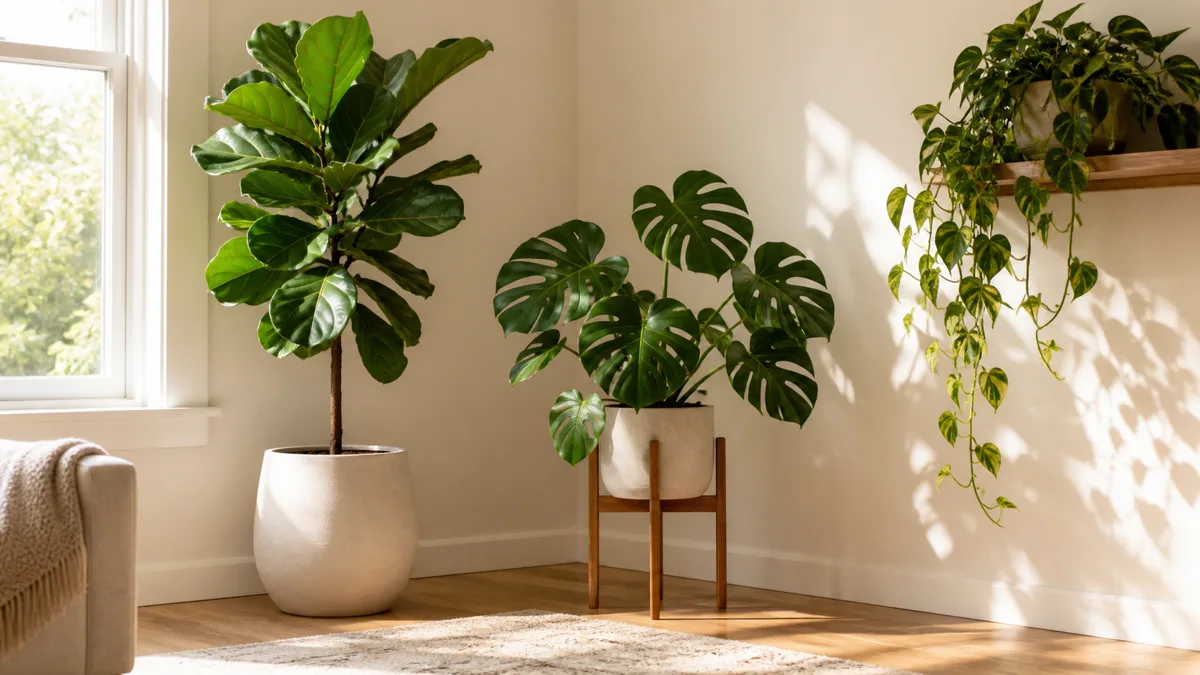
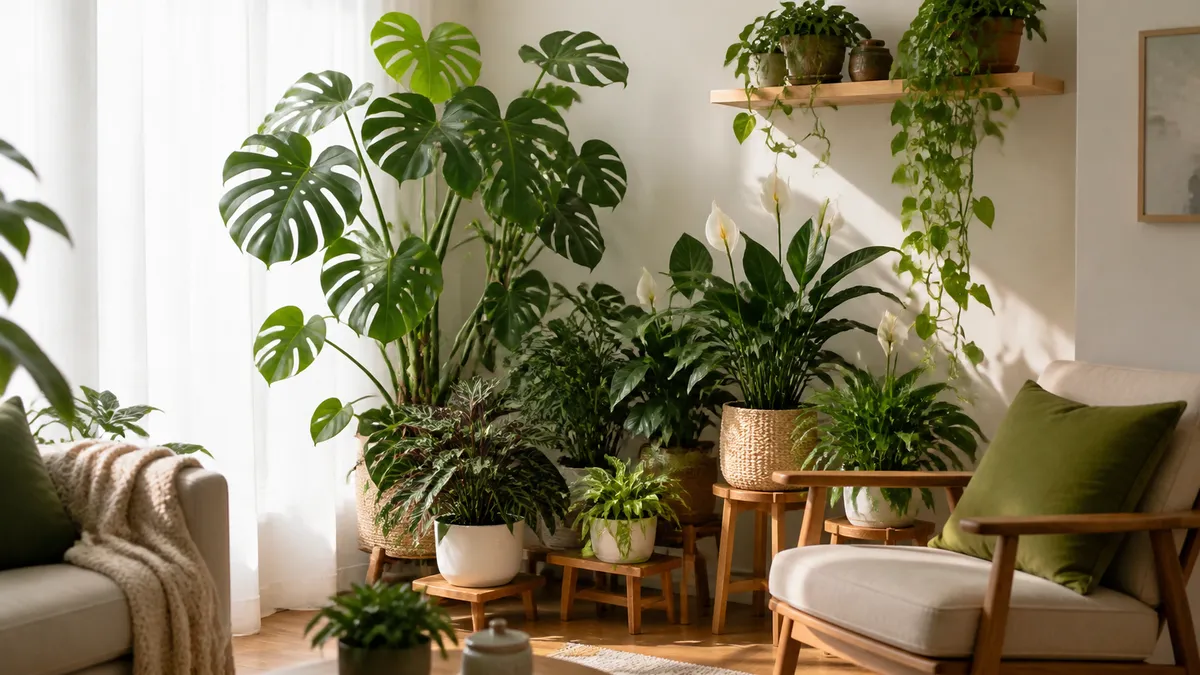
A room with furniture on the floor and nothing on the walls feels half finished. Walls make up more surface area than any other element in a room, and most of that vertical real estate sits empty save for a few picture frames.
Plants change that equation. One living wall setup turns a blank stretch of drywall into a green accent that no wallpaper or gallery print can replicate, because it grows, shifts with the seasons, and filters the air while it decorates.
These sixteen approaches cover every budget, every skill level, and every wall condition from bright south-facing windows to dark hallways that never see direct sun.
- 1Why a Plant Wall
- 2Felt Pocket Planter
- 3Mounted Staghorn
- 4Trellis and Vine Wall
- 5Living Wall Panel
- 6Picture Frame Planter
- 7Moss Wall Art
- 8Test Tube Prop Rack
- 9Hanging Rod Display
- 10Pegboard Plant Wall
- 11Floating Shelf Gallery
- 12Wire Grid Organizer
- 13Choosing Plants
- 14Watering Safely
- 15Layout Rules
- 16Maintenance Calendar
Why a Plant Wall Changes a Room More Than Furniture
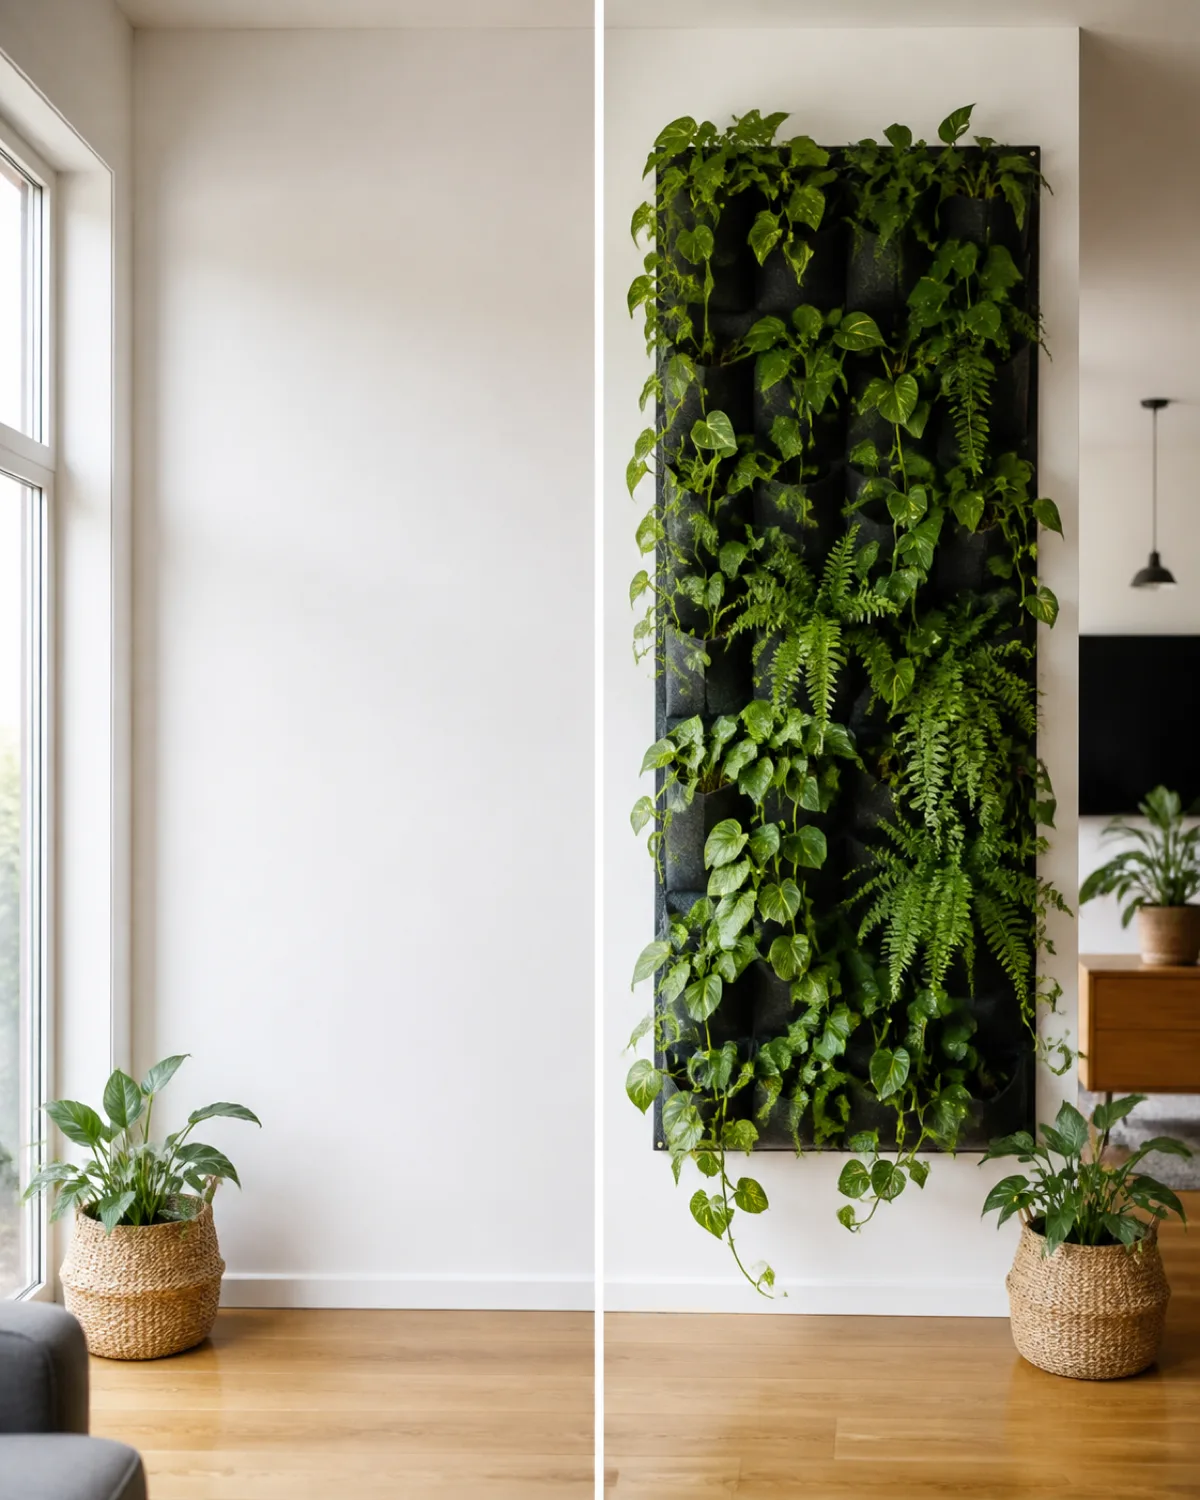
A standard 12-by-14-foot room has roughly 416 square feet of wall surface and only 168 square feet of floor. Most plant collections sit entirely on that smaller surface — windowsills, shelves, tables — while the larger one holds nothing but paint.
Putting plants on the wall flips that ratio. One vertical planter or mounted display claims space that no piece of furniture competes for, because nobody puts a couch against a wall and then hangs a couch above it. The wall is open territory.
- Zero floor footprint: Every plant on the wall is a plant that did not take a shelf slot or a corner stand position, which matters more the smaller the room
- Biophilic impact at scale: A 3-by-4-foot felt pocket planter holds 12 to 18 plants in one tight footprint — equivalent leaf area to scattering five or six floor pots around the room, but concentrated into a single living accent
- Acoustic and air benefits: Dense foliage absorbs mid-range sound reflections and, at scale, contributes measurable humidity in dry centrally-heated rooms
The difference between a plant wall and a framed poster is that the wall keeps changing. New growth fills gaps, trailing vines extend further each week, and seasonal shifts in light alter which sections stay full and which thin out. It rewards attention the way static decor never does.
Felt Pocket Vertical Planter
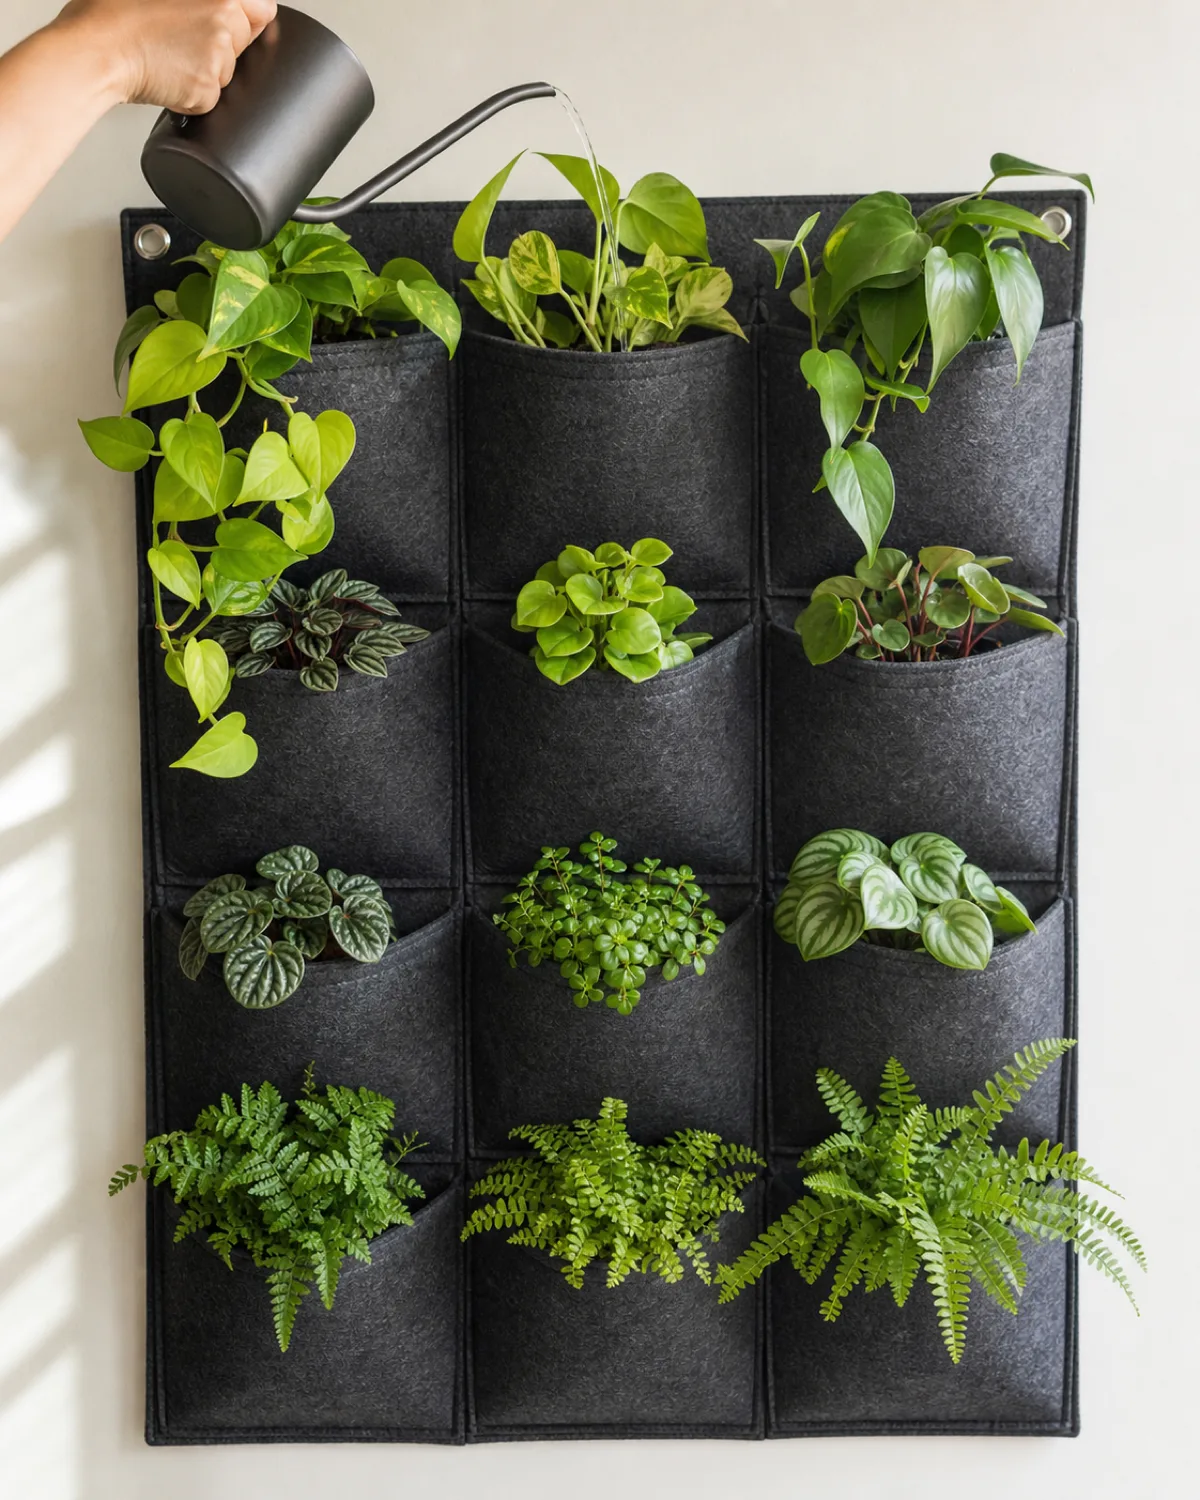
The felt pocket planter is the most accessible entry point for a full plant wall. Industrial felt panels sewn into rows of pockets mount flat against a wall, and each pocket holds a single small plant in its nursery pot or planted directly into the felt with a handful of soil.
The concept descends from Patrick Blanc's vertical garden technology, simplified for home use. Felt absorbs water, retains moisture around roots, and lets air circulate — a combination that keeps root rot in check while preventing the rapid dry-out that terra cotta causes.
- Top-down watering: Pour water into the top row and let gravity carry it down through the felt to lower pockets — this means the bottom row stays wettest and the top dries fastest, so plant accordingly
- Best upper-row picks: Drought-tolerant species like pothos or peperomia that handle brief dry spells between waterings
- Best lower-row picks: Moisture-loving ferns and prayer plants that thrive with consistent dampness
Waterproofing is the non-negotiable step most tutorials skip. Staple a sheet of 6-mil plastic sheeting behind the felt before mounting, and add a narrow drip tray at the base. Without that barrier, water wicks through the felt directly into the drywall and you discover mold six months later behind a wall you thought was fine.
Mounted Staghorn Fern Display
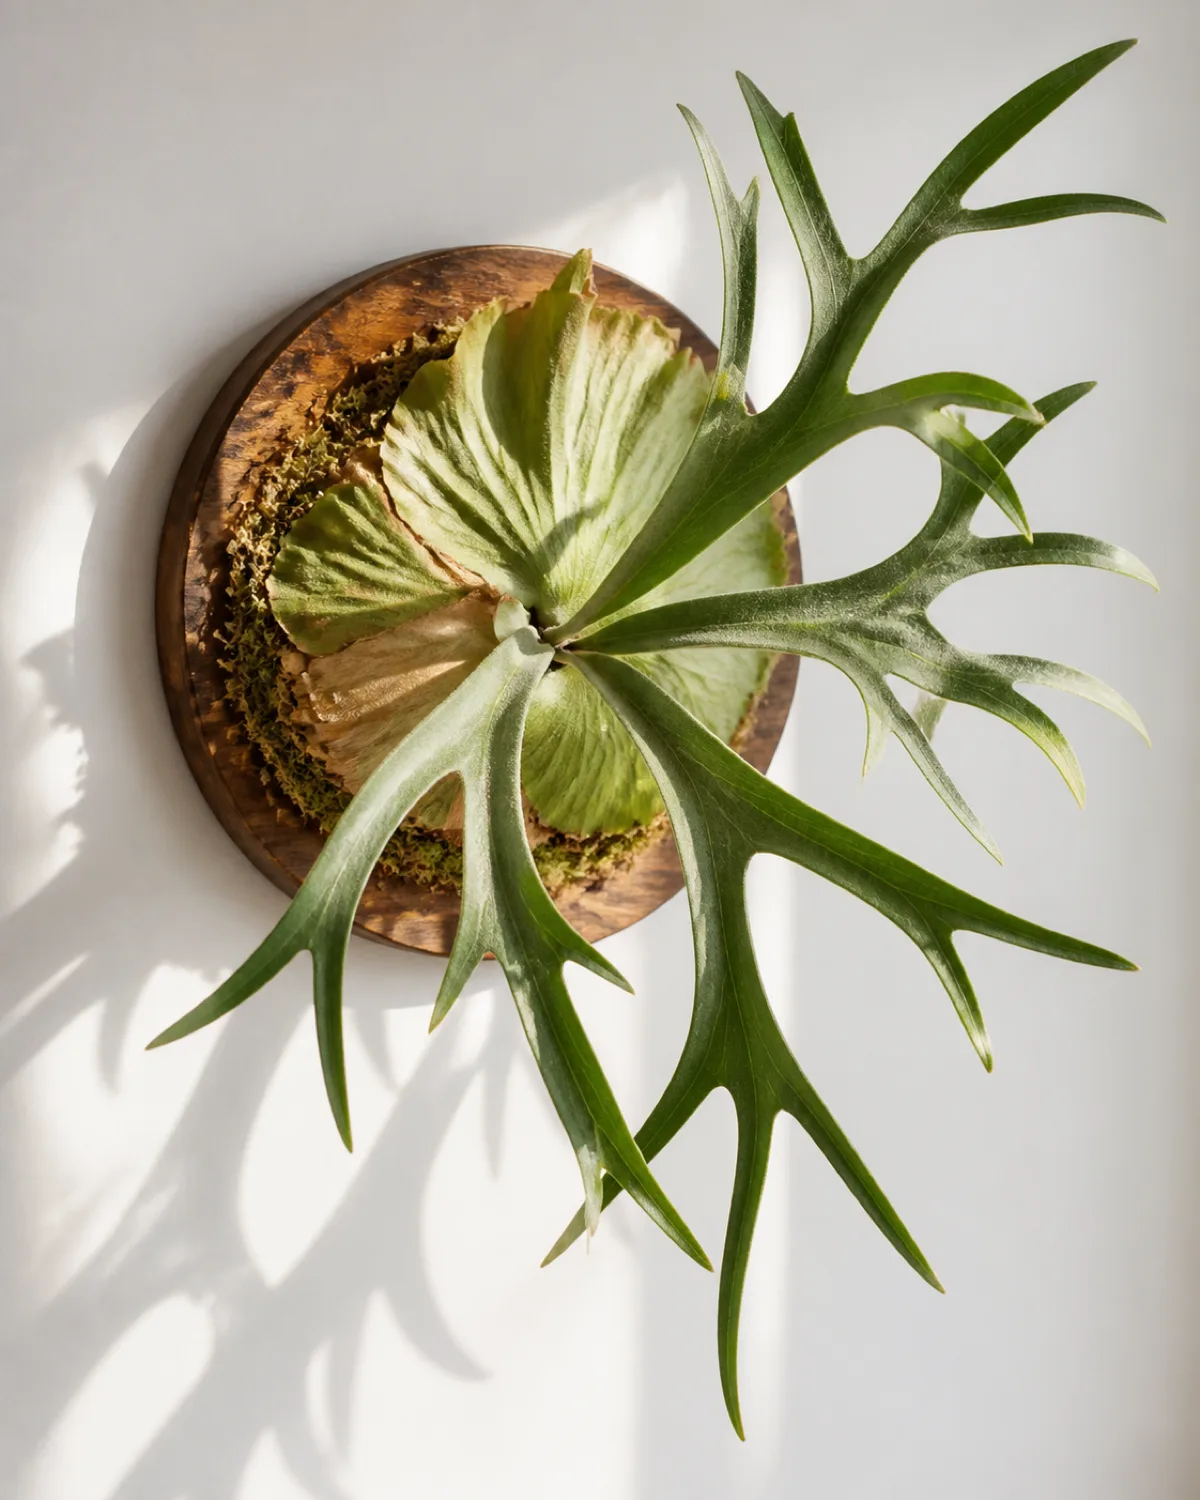
No other wall-mounted plant looks like a staghorn. The antler-shaped fertile fronds reach outward from the board while the flat shield fronds press against the surface, creating a sculptural silhouette that reads more like living art than a houseplant.
Staghorns are epiphytes in the wild, growing attached to tree trunks rather than rooted in soil. Mounting one on a wooden board with a mound of sphagnum moss around the root ball replicates that natural habit exactly.
- Mounting method: Wrap the root ball in damp sphagnum moss, press it against a wooden round or plaque, secure it with monofilament fishing line or plastic-coated wire, and hang the board on a wall screw
- Watering: Take the board down weekly and soak the moss ball in a basin of water for 15 to 20 minutes, then let it drip-dry before rehanging — or mist heavily three times a week if the air is humid enough
- Light: Bright indirect light near a window, but no direct afternoon sun — the fronds scorch permanently and cannot recover
A single mounted staghorn is a statement piece. Three to five boards in different sizes arranged asymmetrically on one wall create a gallery that rivals any art installation, with the added dimension that each one grows into a slightly different shape over time.
Trellis and Climbing Vine Wall
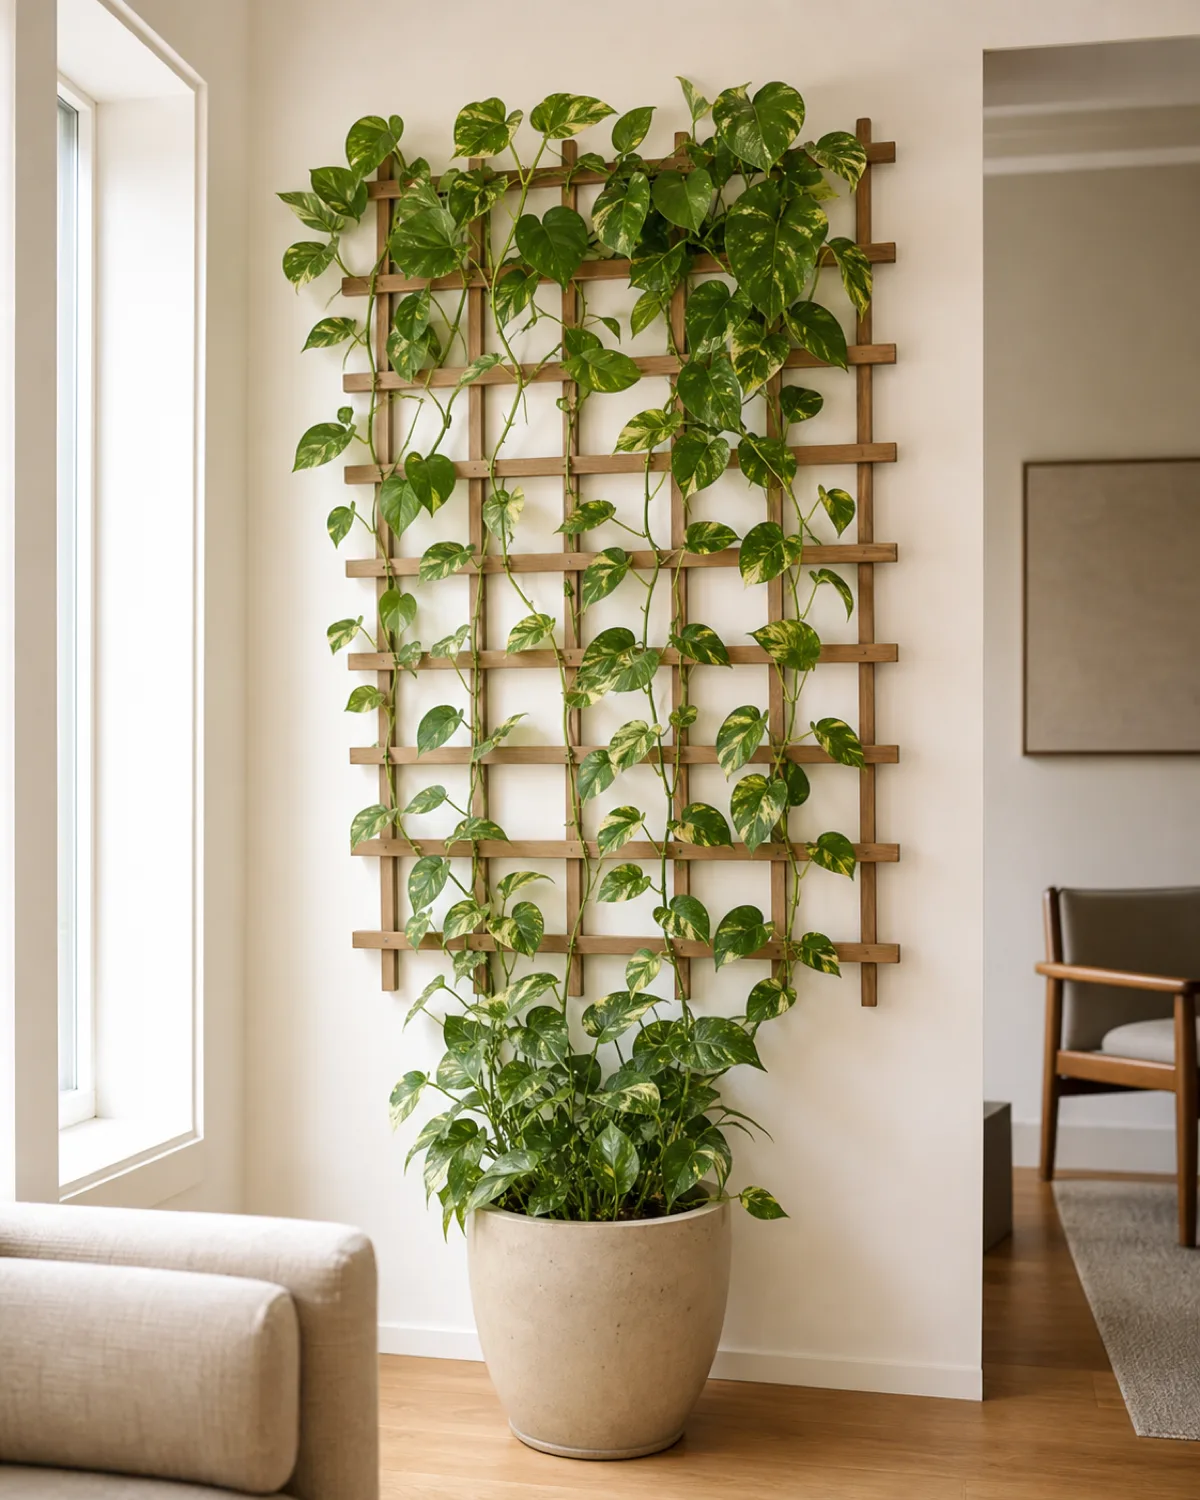
A trellis wall uses a single plant at the base and lets it climb upward to cover the surface over time. The result is one continuous sheet of foliage rooted in a single pot on the floor, rather than dozens of separate plants in individual pockets.
The approach works because many popular houseplants are natural climbers. Pothos and philodendron develop aerial roots that grip textured surfaces. English ivy produces adhesive rootlets strong enough to hold onto brick and stone. Monstera adansonii grows larger leaves with more fenestrations the higher it climbs.
- Wood lattice: Warm tone, paintable, classic garden feel — attach with screws and spacers to keep the grid 1 inch off the wall so vines can weave behind it
- Metal wire grid: Industrial look, thinner profile, and the gaps let more wall color show through
- Command strip plus hook system: No-drill rental-friendly option using adhesive hooks at intervals with twine or wire strung between them
Training takes patience. Use soft plant ties every 6 to 8 inches to guide new growth in the direction you want, and check the ties monthly to make sure they are not cutting into thickening stems. A single pothos can cover a 4-by-6-foot trellis in about 12 to 18 months with bright indirect light and monthly feeding.
Living Wall Panel System
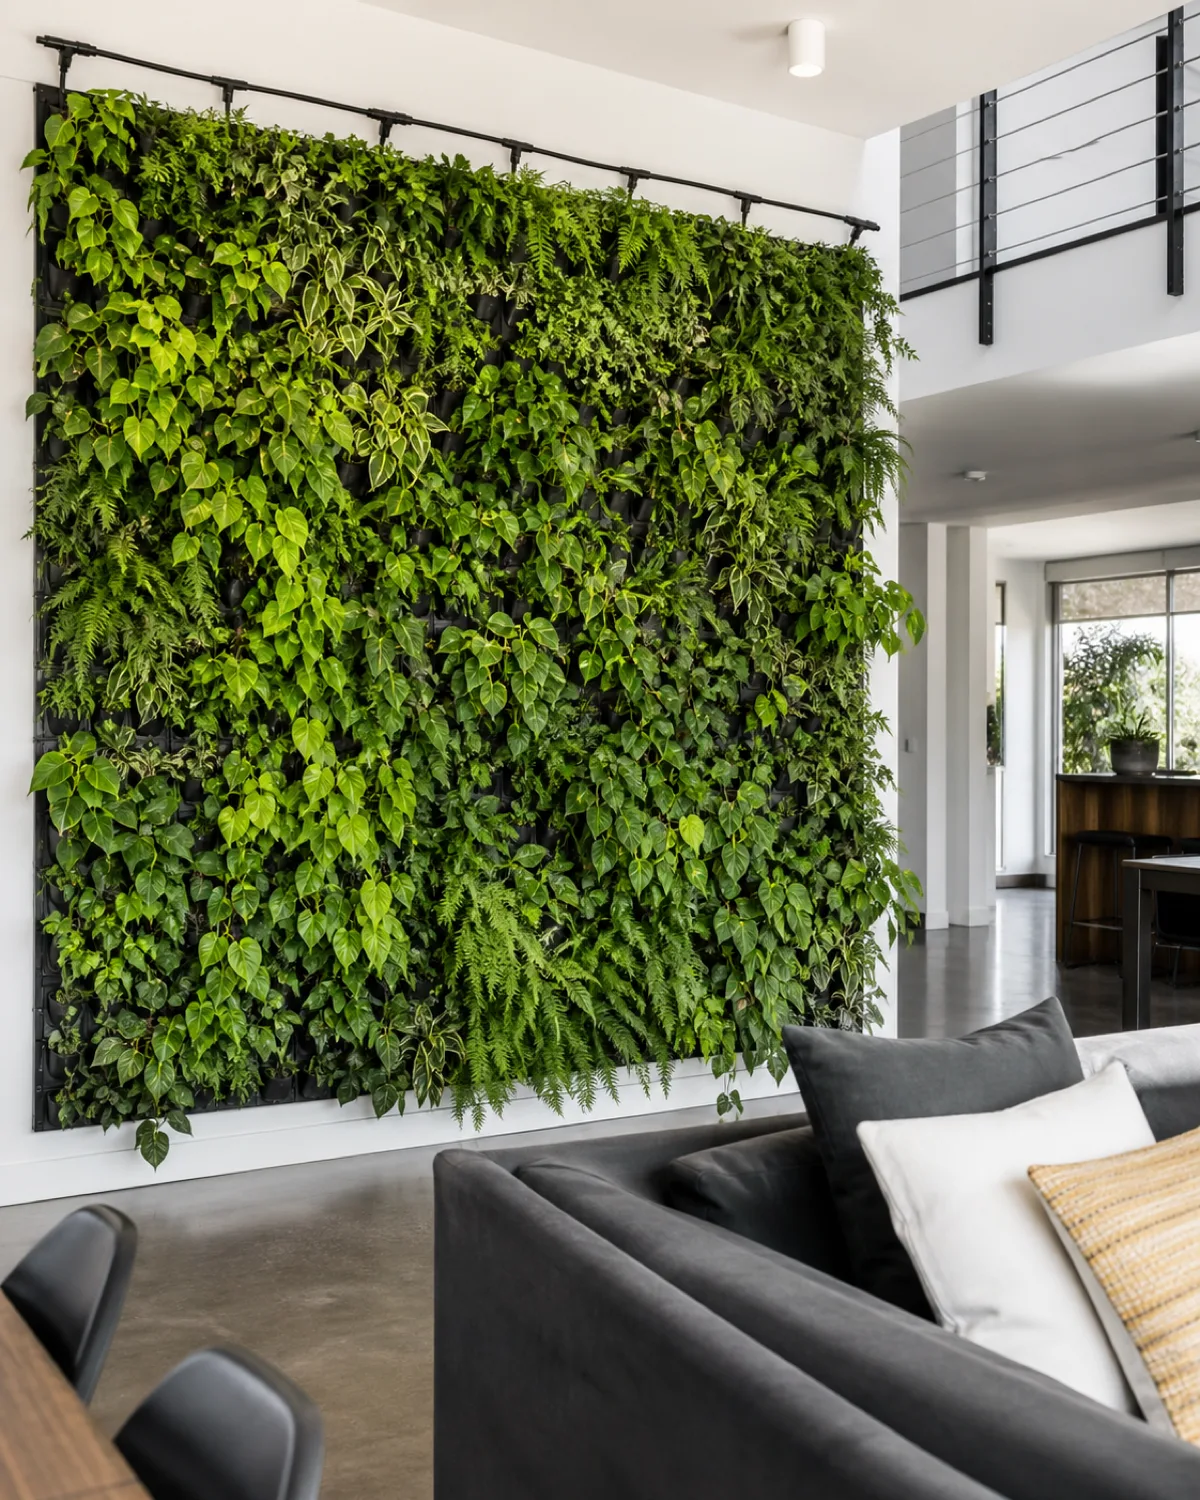
A living wall panel is the professional-grade version of what a felt pocket does at home scale. Pre-engineered modular trays snap together into a continuous grid, each tray containing individual planting cells, a water distribution channel, and a waterproof backing.
The visual result is a dense, unbroken green surface rather than individual plants poking out of pockets. At 4 to 6 plants per square foot, a 4-by-8-foot living wall holds roughly 120 to 190 plants in a space narrower than a bookshelf.
- Irrigation: Most commercial panels include built-in drip lines connected to a water source, so the wall waters itself on a timer — no daily hand-watering of 150 individual pockets
- Weight: Expect 10 to 15 pounds per square foot when fully planted and watered, so the wall behind the panels needs structural support beyond standard drywall
The cost barrier is real. Materials alone run $30 to $80 per square foot before plants, and professional installation adds more. For a living room accent wall, that means $1,500 to $5,000 for a 50-square-foot panel.
A DIY workaround uses felt pockets with a manual watering routine at roughly one-fifth the cost. The result looks similar from three feet away, but you trade automated irrigation for weekly hands-on watering — a fair exchange for most home growers who enjoy the process.
Picture Frame Planter
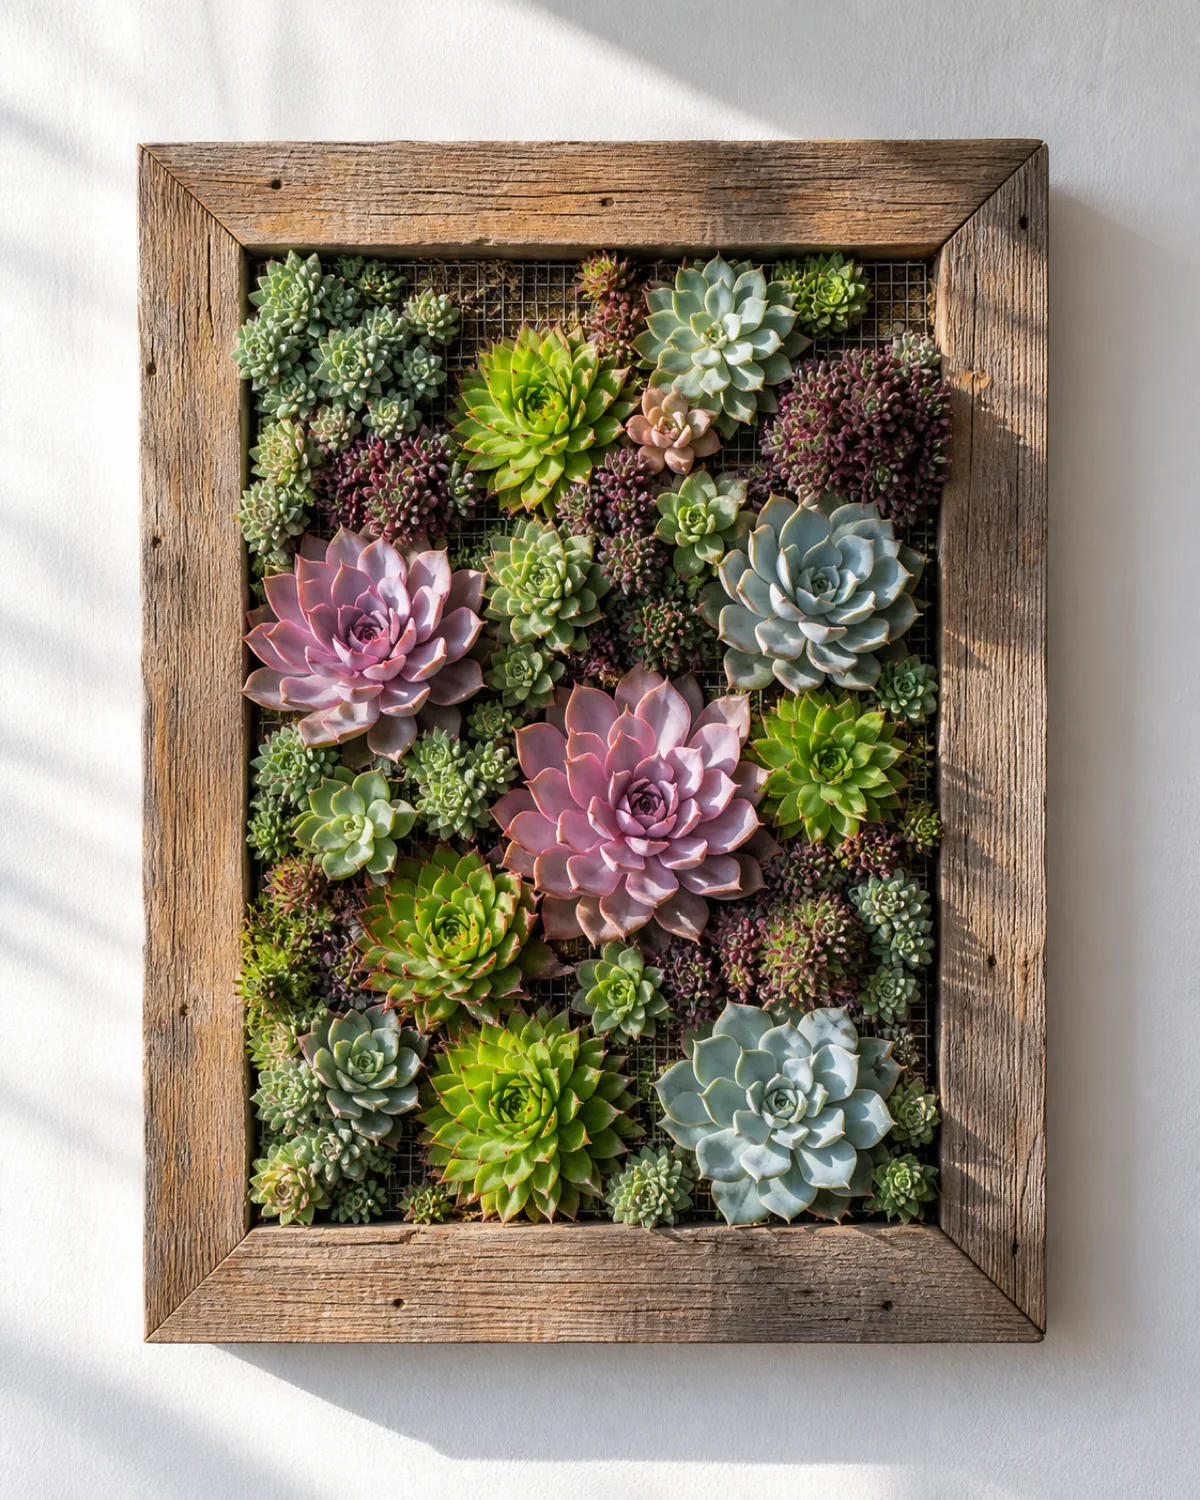
A picture frame planter takes a shallow wooden frame, fills it with soil behind a wire mesh, and lets succulents grow through the openings to create a living mosaic that hangs on the wall like a painting.
The method works specifically because succulents have shallow root systems, tolerate drought, and grow slowly enough to maintain the composition for months without aggressive pruning. Echeveria rosettes, sempervivum, and small sedum varieties pack tightly in the 2 to 3 inches of soil depth a frame provides.
- Build steps: Line a 12-by-16-inch shadowbox frame with plastic, fill with gritty succulent mix, stretch quarter-inch hardware cloth across the face, and tuck succulent cuttings through each opening
- Rooting period: Lay the frame flat for 2 to 3 weeks before hanging so the cuttings develop enough root hold to stay in place when vertical
- Watering: Take the frame down, lay it flat, water through the mesh, let it drain for 30 minutes, and rehang — every 2 to 3 weeks in summer, once a month in winter
The creative range is wide. Multiple small frames in different shapes form a gallery wall of living art. Mixing rosette colors — dusty pink, silver-blue, deep purple, lime green — creates a palette that no printed artwork matches because the colors subtly shift as light and temperature change through the seasons.
The limitation is real: only shallow-rooted, drought-tolerant species survive in a frame. Ferns, pothos, calathea, and anything that needs consistent moisture will dry out and die in 2 to 3 inches of exposed soil.
Moss Wall Art Panel
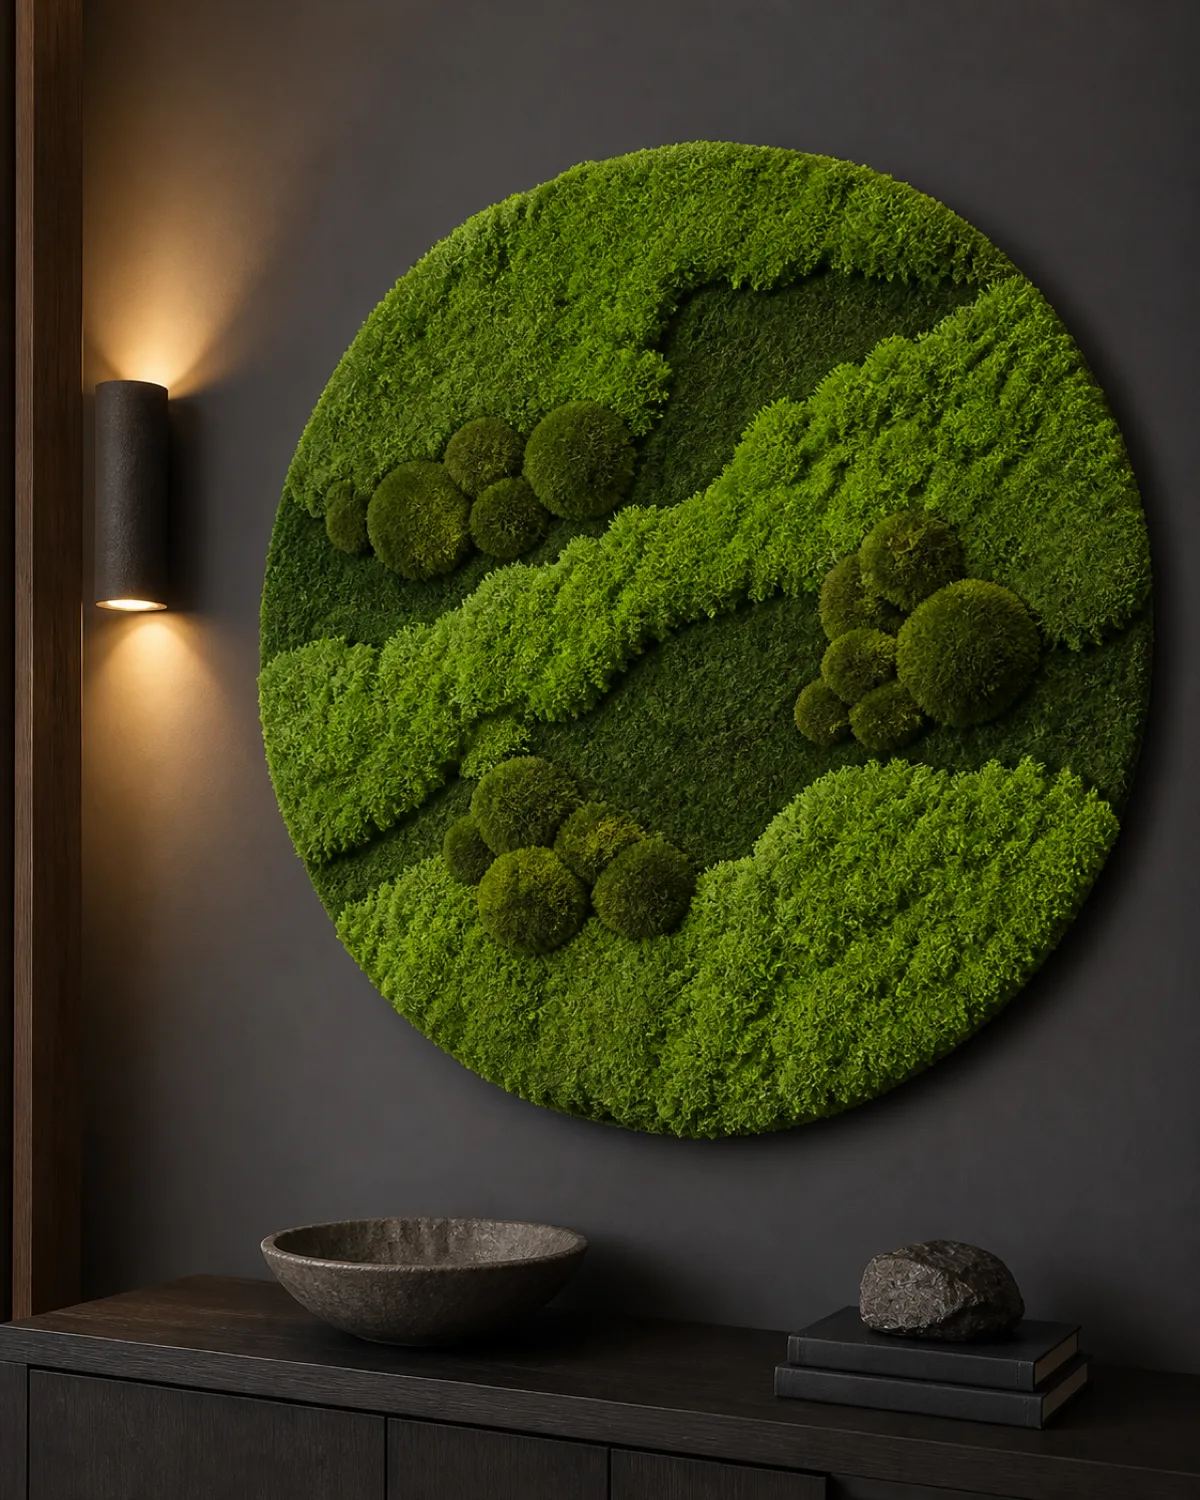
Preserved moss panels deliver the visual effect of a plant wall with zero ongoing care. The moss is real, but it has been treated with glycerin so it stays soft and green indefinitely without light, water, or soil.
Three types create different textures when combined on a single panel. Reindeer moss forms fluffy mounds and comes in natural green or dyed colors. Sheet moss lies flat with a velvety surface. Mood moss creates rounded hillocks that add height variation. Mixing all three on one board produces a miniature landscape with valleys, ridges, and peaks.
- No light required: Preserved moss does not photosynthesize, so it works on windowless interior walls, dark hallways, and north-facing rooms where living plants struggle
- No watering: The glycerin treatment replaces the moisture inside the cells permanently — adding water to preserved moss can actually damage it by washing out the preservative
Humidity above 40 percent keeps the moss soft and pliable. In dry heated rooms below 30 percent, it turns brittle and sheds bits onto the floor. A small humidifier nearby or placement in a naturally humid bathroom solves the problem.
The trade-off is philosophical as much as practical. Preserved moss looks alive but is not — it does not filter air, produce oxygen, or grow. If the appeal of a plant wall is its living, changing nature, a moss panel misses the point. If the appeal is green texture on a wall without the maintenance, nothing else comes close.
Wall-Mounted Test Tube Propagation Rack
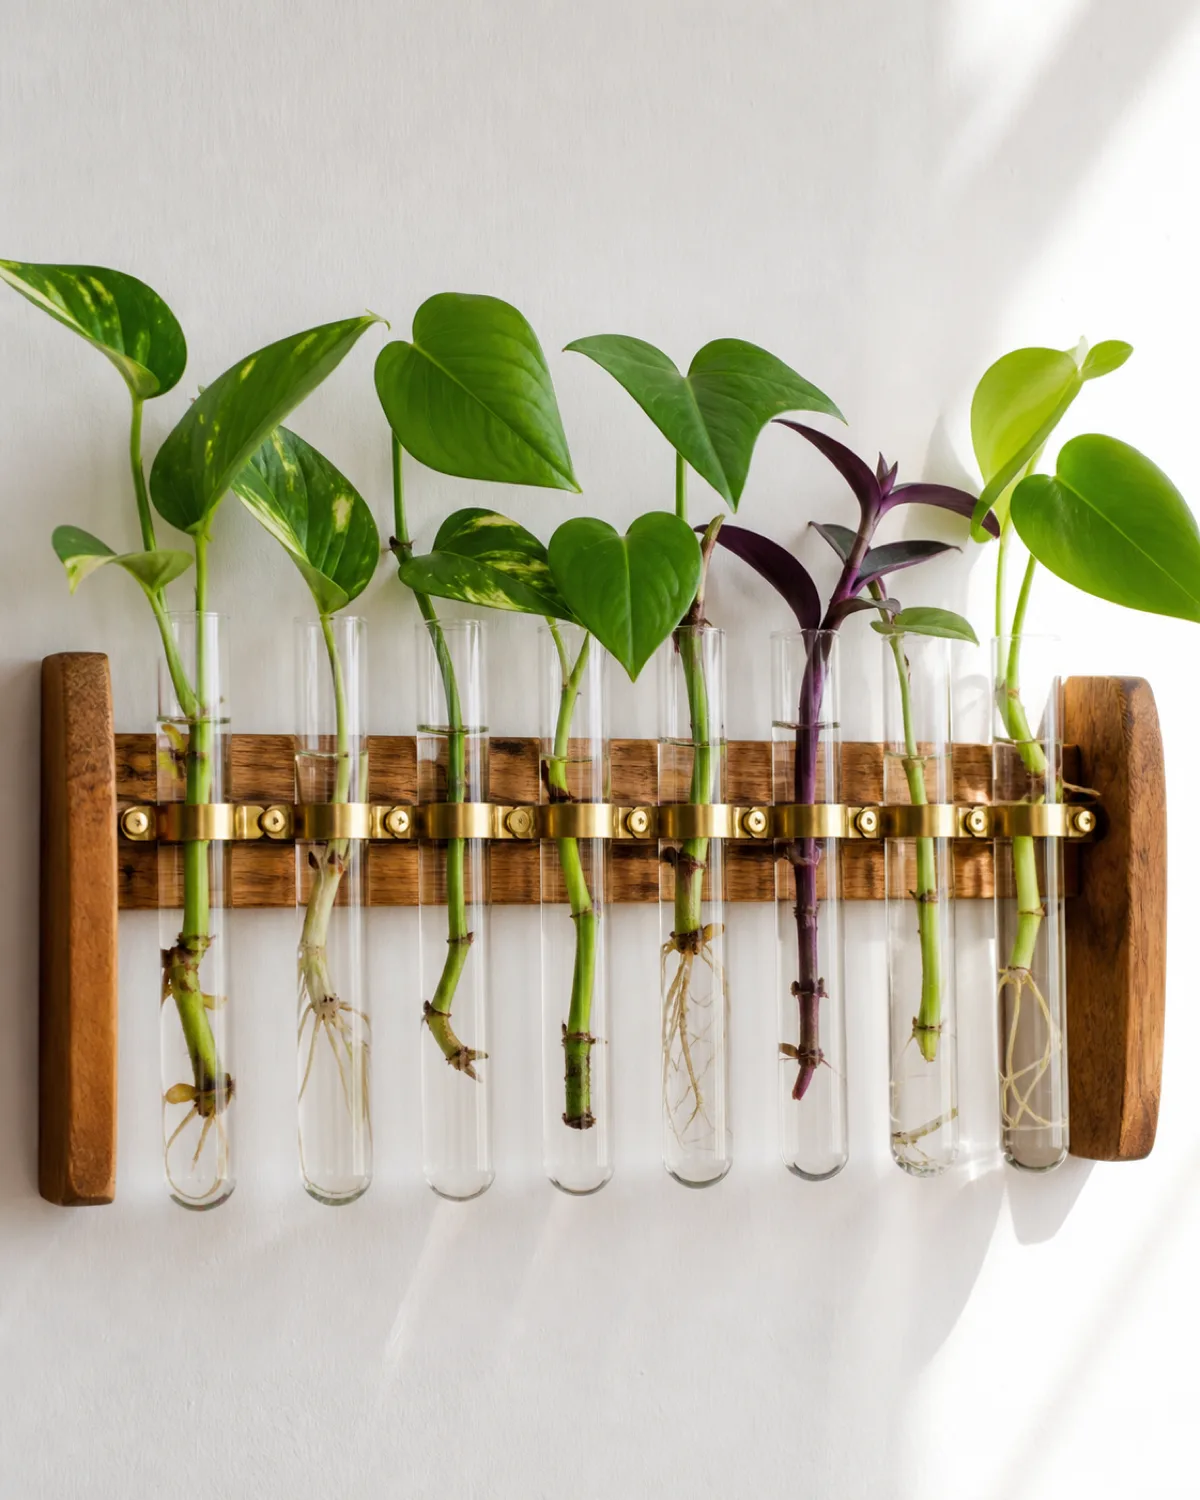
A propagation rack turns the process of rooting plant cuttings into wall-mounted decor. Glass test tubes or small bottles sit in a wooden or metal rack, each holding a single stem cutting submerged in water. White roots grow visibly through the glass, and the whole assembly hangs on the wall at eye level.
It is the only plant wall format that lets you watch roots develop in real time. That visible growth cycle, from bare node to a tangle of white roots over 7 to 14 days, is part of the appeal.
- Fastest rooters for the rack: Pothos nodes root in 7 to 10 days, tradescantia in 3 to 5 days, philodendron heartleaf in 7 to 14 days
- Maintenance: Change the water weekly to prevent algae film on the glass, and trim roots when they reach 2 to 3 inches before they tangle and make transfer difficult
- DIY build: A sanded wooden plank, brass or stainless test tube clamps from a lab supply shop, and a French cleat for hanging — total materials cost of $15 to $25
The display keeps refreshing itself. Once a cutting develops strong roots, transfer it to soil and replace it with a fresh cutting from the mother plant. The rack never looks the same two weeks in a row, which makes it a living installation rather than a static decoration.
Horizontal Hanging Rod for a Curtain of Greenery
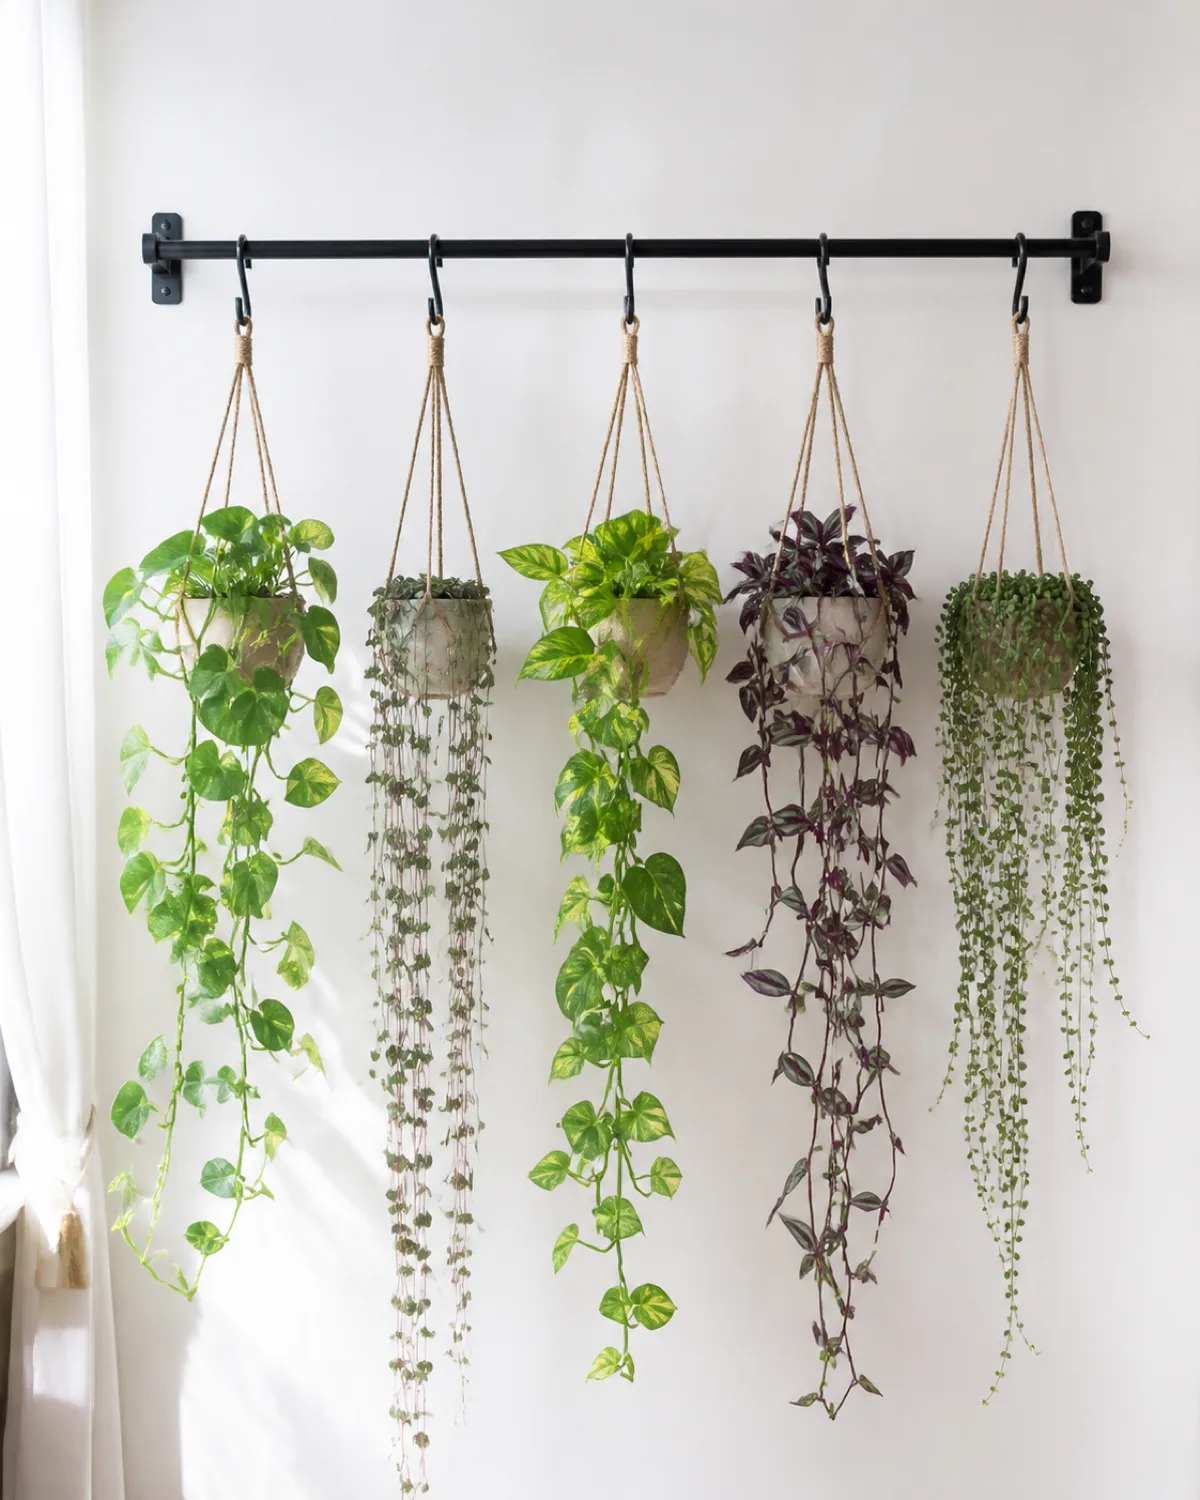
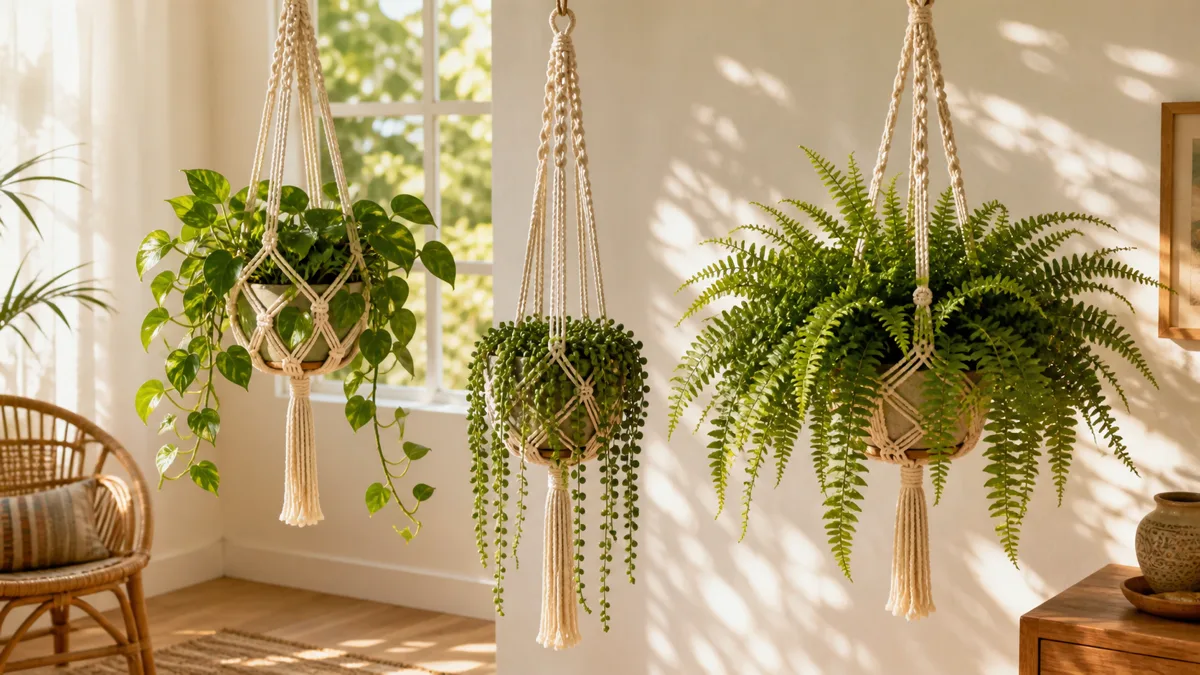
A single horizontal rod mounted near the ceiling creates a linear anchor for multiple hanging plants. Metal or wooden, the rod sits on two wall brackets, and plants hang from it at equal intervals using S-hooks or short macrame cords.
The effect is a curtain of cascading foliage. Trailing species grow downward from each pot, and over a few months the separate columns of greenery merge into a continuous veil of leaves along the wall.
- Rod height: Mount 6 to 12 inches below the ceiling so trailing plants have maximum vertical space to cascade without touching the floor or furniture
- Plant spacing: 8 to 12 inches apart on the rod gives each plant room to spread without tangling with its neighbor
- Best species: Pothos, string of hearts, string of pearls, tradescantia — anything with a strong trailing habit that fills in quickly
S-hooks make the system practical. Each pot lifts off the rod in seconds for sink watering, and goes back on just as fast. No unhooking macrame knots, no detaching wall mounts — just lift, water, drain, and rehang.
The rod itself becomes part of the design. Matte black metal reads industrial and modern. A natural wood dowel reads warm and Scandinavian. Copper pipe develops a green patina over time and pairs with the plant foliage in a way no other finish does.
Pegboard Plant Wall
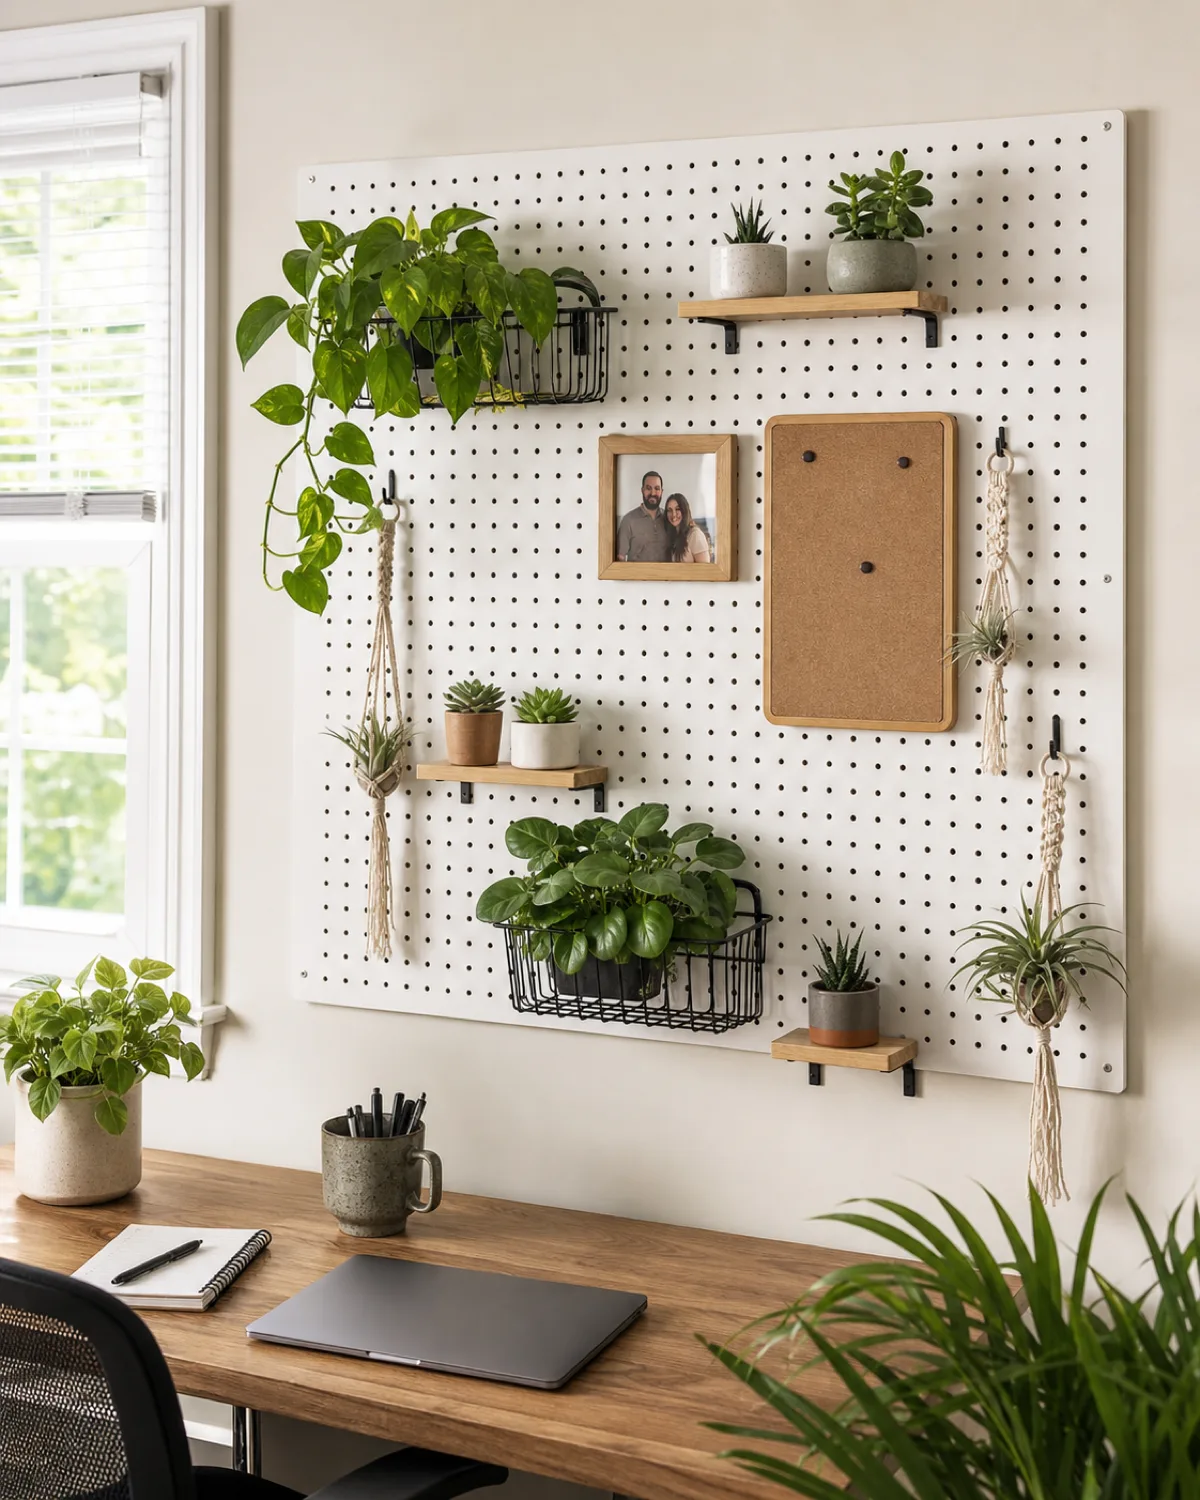
A pegboard turns a wall into a fully reconfigurable display surface. Standard pegboard holes sit on 1-inch centers, and any combination of hooks, baskets, and mini shelves plugs in to hold small plants, tools, photos, and objects in arrangements that change whenever the mood does.
No other wall system offers this level of flexibility. Moving a plant from the upper right to the lower left takes five seconds and leaves no holes, scuffs, or evidence that anything was ever in the old position.
- Best plant accessories: Small wire baskets for 4-inch nursery pots, miniature wooden shelves for succulents and air plants, S-hooks for tiny macrame hangers
- Multi-function advantage: The same board holds plants, framed prints, clipboards, scissors, and tape — it works especially well in a home office, kitchen, or craft room where utility and decoration overlap
- Installation: Attach the pegboard to the wall with 1/2-inch spacer blocks behind it so the hooks can insert fully, then secure with screws into studs or heavy drywall anchors
White pegboard blends into white walls while the plants and accessories provide all the color. Black pegboard creates a dramatic backdrop that makes green foliage pop. Paint the board any color to match the room, and repaint it next year without removing a single plant.
Floating Shelf Gallery Wall with Plants
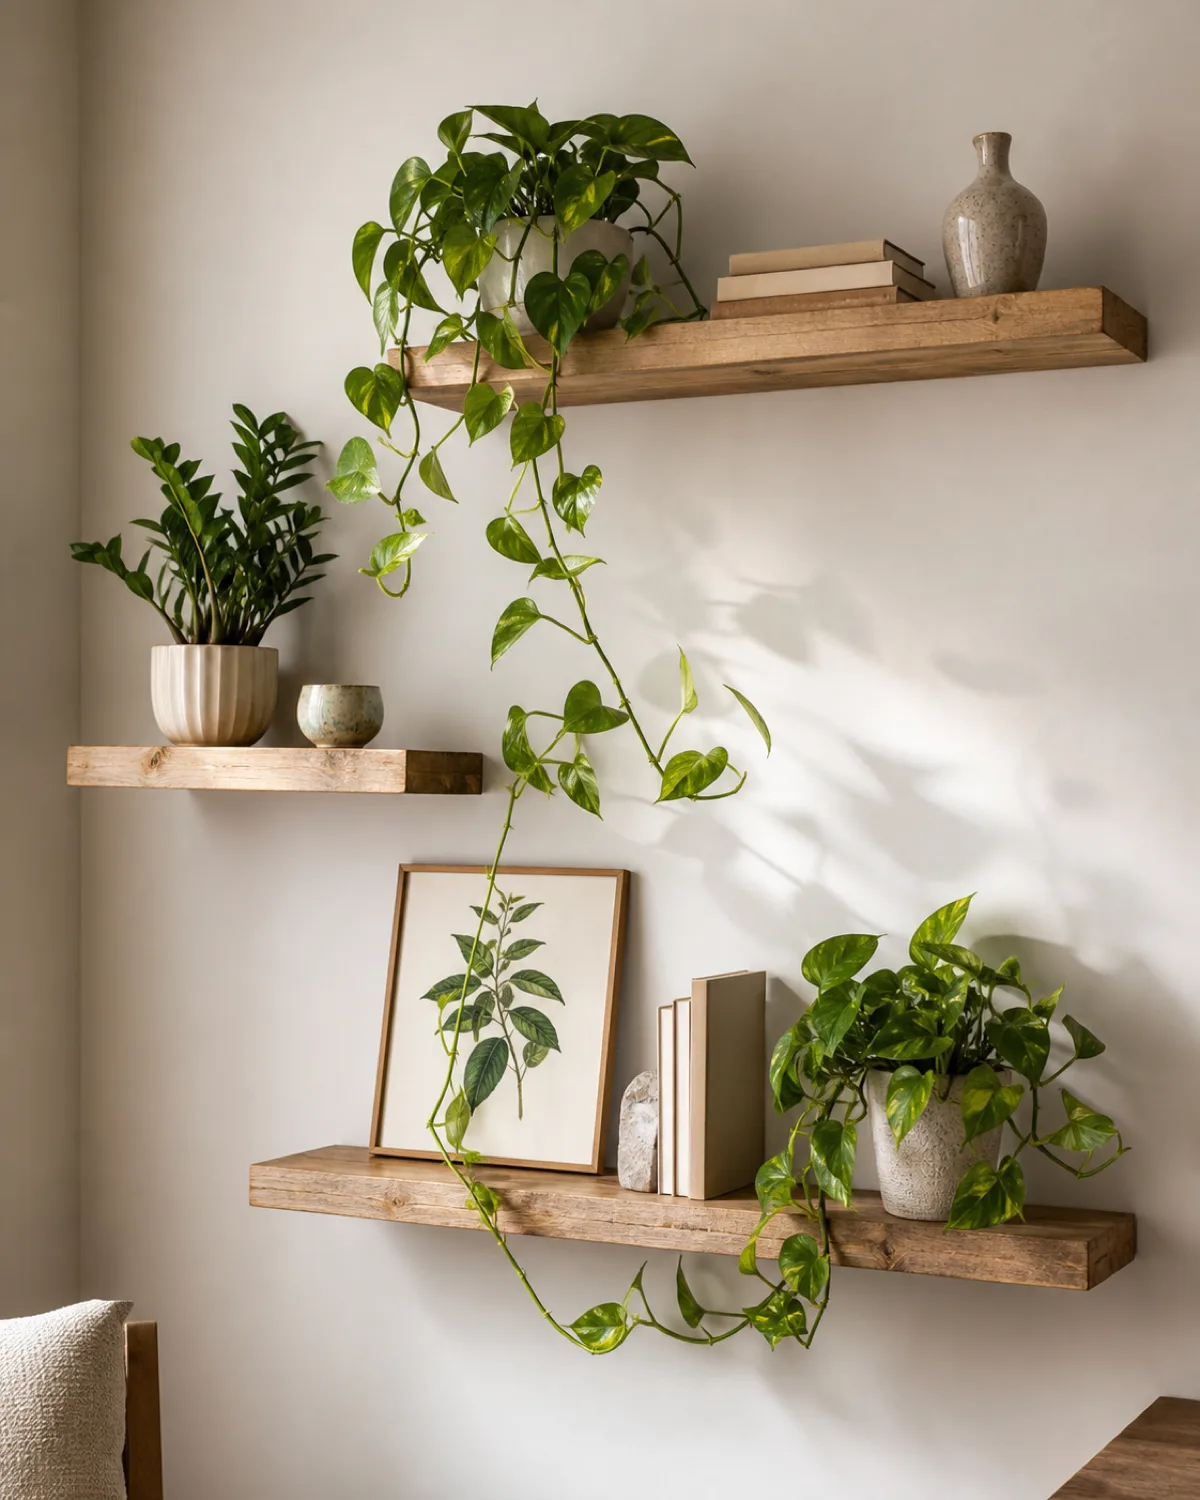
Floating shelves arranged at staggered heights across a wall create a gallery effect that mixes plants with books, art, and objects. Each shelf becomes a curated vignette, and the trailing plants draping over the edges tie the separate levels together into one composition.
The approach differs from a single plant shelf or stand because the goal is full wall coverage through repetition and rhythm, not one piece of furniture holding several plants.
- Shelf count and spacing: Three or five shelves work better than two or four because odd numbers create asymmetry that looks intentional rather than accidental
- Length variation: Mix 24-inch, 36-inch, and 48-inch shelves on the same wall so the layout feels organic rather than grid-like
- 60/40 rule: Fill roughly 60 percent of each shelf with plants and 40 percent with non-plant objects — books, ceramics, small framed art — to keep the display from reading as a nursery stockroom
Place trailing plants at shelf edges so their vines hang down and cover the blank wall between levels. A pothos on the top shelf that sends runners halfway to the shelf below visually connects the two tiers without any hardware or cord.
Compact upright plants like ZZ plant or small snake plant fill the interior of the shelf where trailing growth would just pile on the surface. Tall narrow plants mark the end of a shelf and act as visual bookends.
Wire Grid Wall Organizer for Small Plants
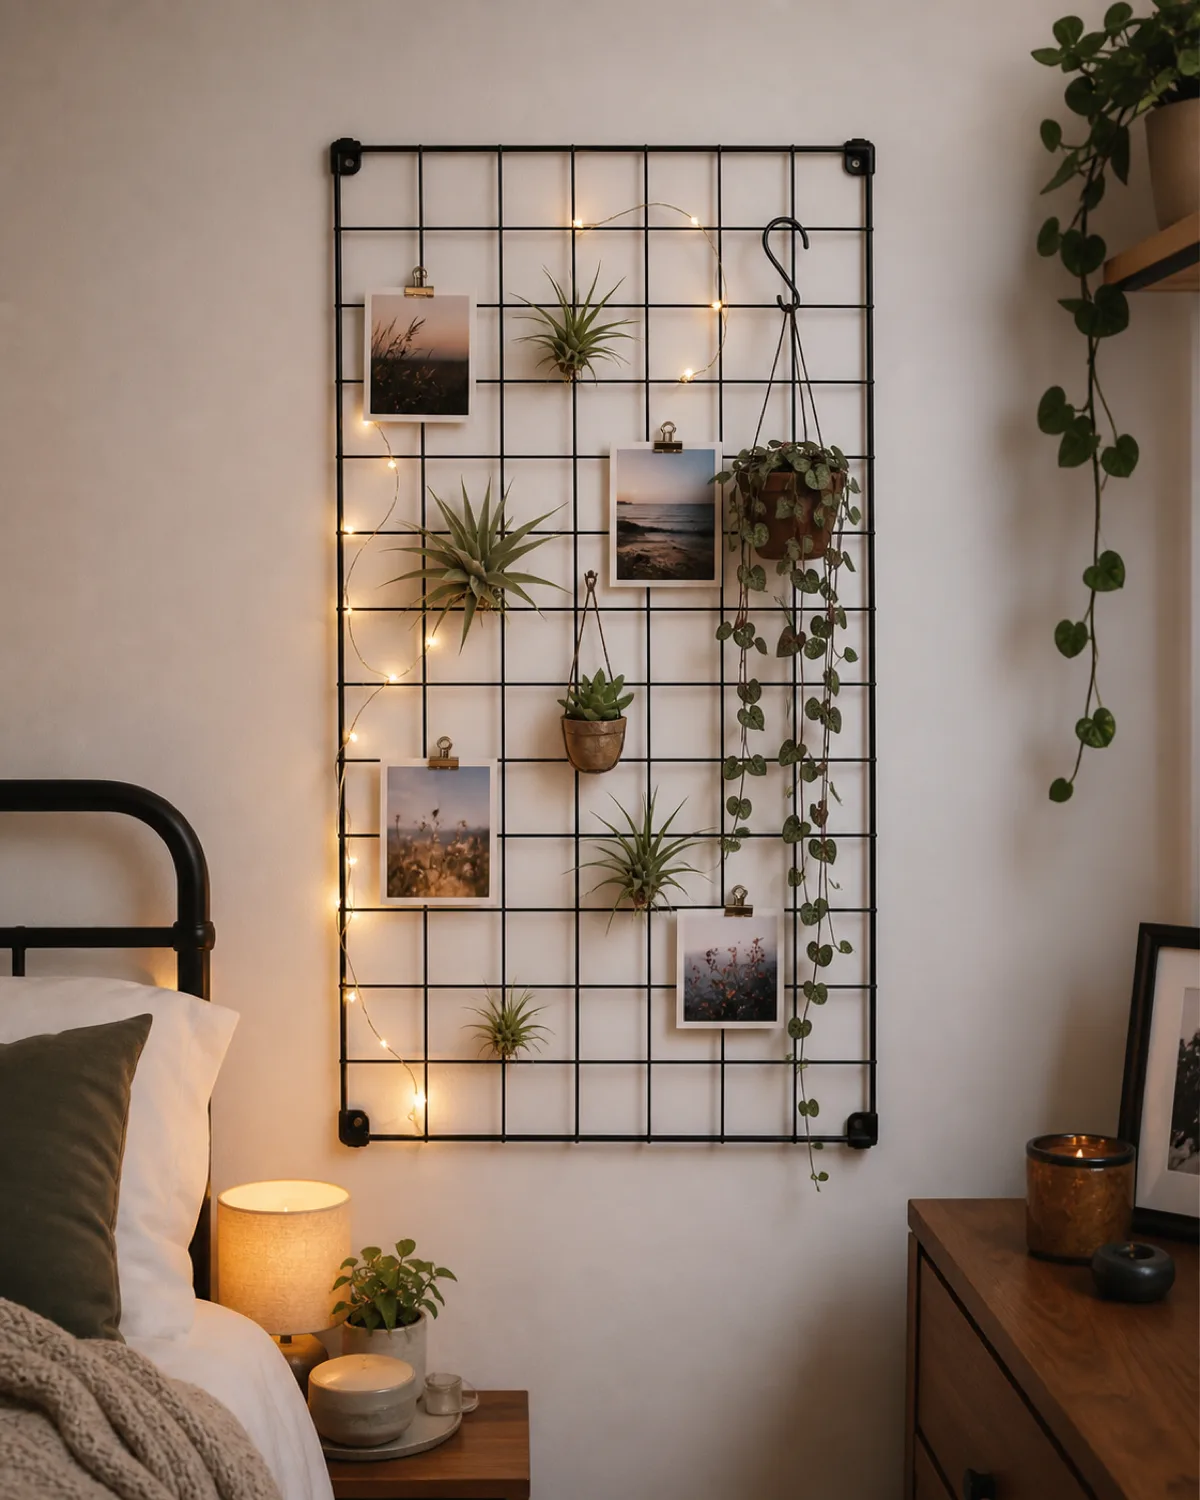
A wire grid panel provides the same reconfigurable flexibility as a pegboard but with a lighter visual footprint. The open metal mesh lets the wall color show through, so the grid itself almost disappears and the plants, photos, and clips seem to float.
The format suits small spaces where a solid panel would feel heavy. Studios, dorm rooms, and compact bedrooms gain a plant display without the visual weight of a full shelf unit or a solid-backed pegboard.
- Air plant advantage: Tillandsia clips directly to the wire mesh with no pot, no soil, and no water dripping onto the wall — mist the whole grid twice a week and the air plants handle the rest
- Multi-use clips: Binder clips hold photos and postcards, S-hooks suspend small pots, and magnetic hooks add another layer if the grid is steel
Two large Command strips hold a light wire grid to the wall without drilling. The entire setup — grid, plants, clips, lights — weighs under five pounds and leaves no marks when removed. For renters, this is one of the lowest-commitment plant wall options that still reads as intentional design.
Choosing the Right Plants for Vertical Growing
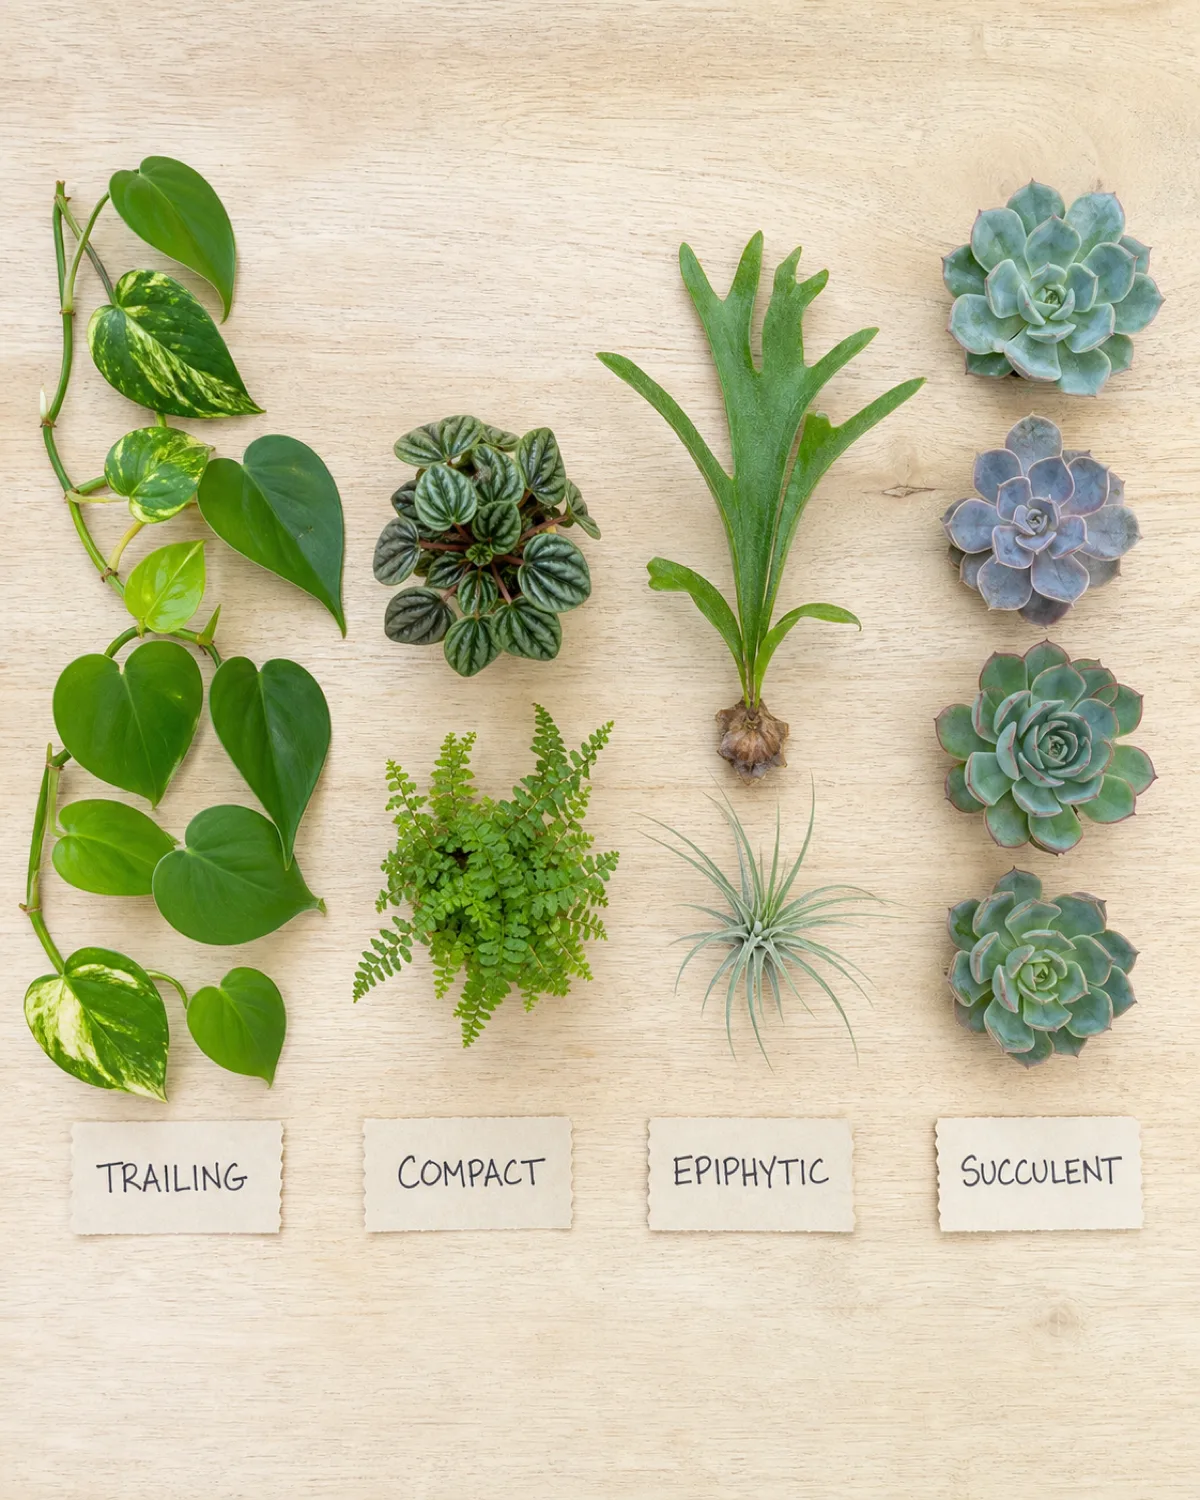
Not every houseplant works on a wall. Vertical growing imposes three constraints that eliminate some of the most popular floor species right away.
Soil volume is the first filter. A felt pocket or frame planter holds 1 to 3 cups of growing medium, compared to 6 to 12 cups in a standard 6-inch pot. Plants with deep taproots or aggressive root systems exhaust that small volume in weeks and starve.
Light direction is the second. Wall-mounted plants receive light from one side only, unlike floor plants that sit in a cone of diffused illumination from a window. Species that require even light exposure from multiple angles develop lopsided, reaching growth on a wall.
- Best trailing picks: Pothos, philodendron heartleaf, string of pearls, tradescantia, English ivy
- Best compact picks: Peperomia, small ferns, prayer plant, pilea
- Best epiphytic picks: Staghorn fern, air plants, mounted orchids — they naturally grow on vertical surfaces without soil
- Avoid on walls: Monstera deliciosa, fiddle leaf fig, bird of paradise, and any large floor plant — too heavy, too deep-rooted, and too large for wall-mounted containers
Watering gravity is the third constraint. Water runs downward through any vertical system, which means the top row dries first and the bottom stays wettest longest. Plant drought-tolerant species at the top and moisture-lovers at the bottom, and the single pour from above waters everyone according to their actual needs.
Watering a Plant Wall Without Ruining Your Real Wall
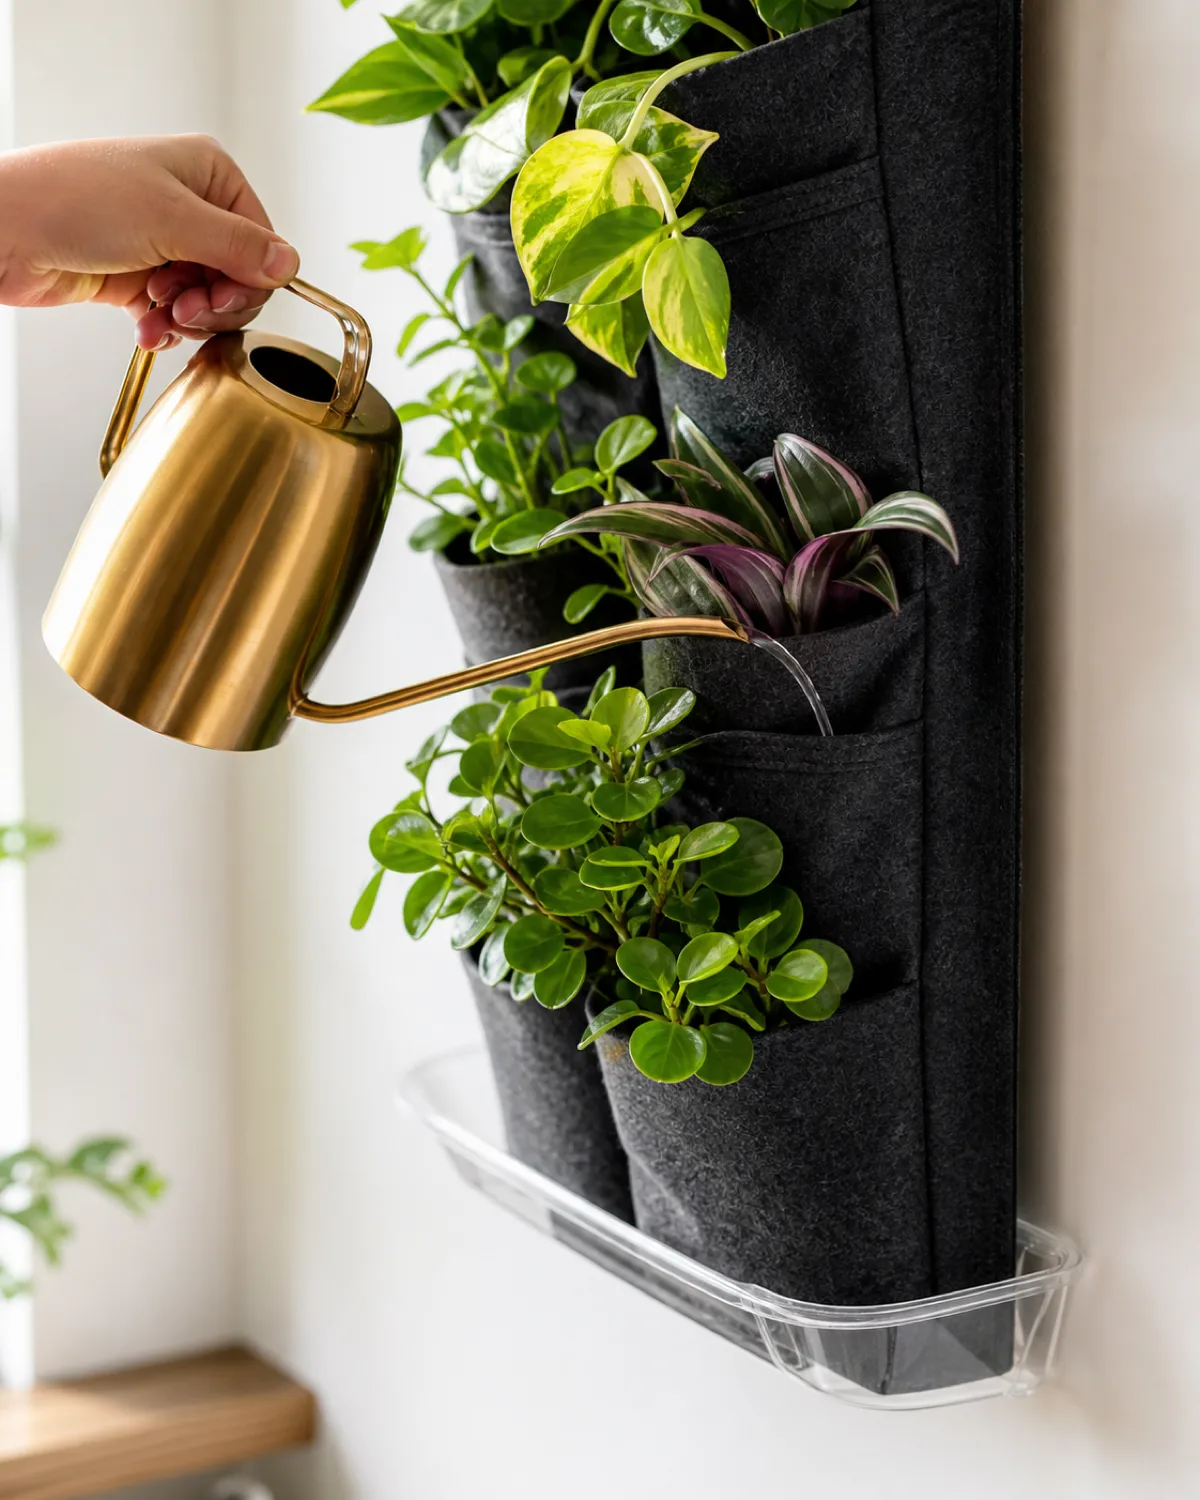
Water and walls are adversaries. Every plant wall idea in this guide puts water within inches of drywall, paint, or plaster, and the difference between a thriving vertical garden and a mold colony behind it comes down to four layers of defense.
The system layer is the most important. Choose a setup with built-in waterproofing — a felt pocket with a plastic backer, a living wall panel with sealed trays, or a mounted staghorn that goes to the sink for soaking. Systems that lack any water barrier against the wall require that you add one before planting.
- Precision watering tool: A long-spout watering can directs the stream exactly where it needs to go, eliminating the splash zone that a wide-mouth can or a cup creates
- Ice cube method for small pots: Place two or three ice cubes in a felt pocket or pegboard pot and let them melt slowly — the slow release prevents overflow and gives the soil time to absorb
- Remove and soak for mounted plants: Staghorn fern boards, test tube racks, and S-hook pots lift off the wall for sink watering and go back dry, so no water ever touches the wall behind them
Check the wall behind the installation during the first two weeks. Run your hand along the surface every day after watering and feel for dampness or swelling. If moisture is reaching the drywall, the waterproof barrier has a gap and needs fixing before planting continues. After the first two weeks with no moisture detected, switch to monthly checks.
Layout Rules for Arranging a Plant Wall
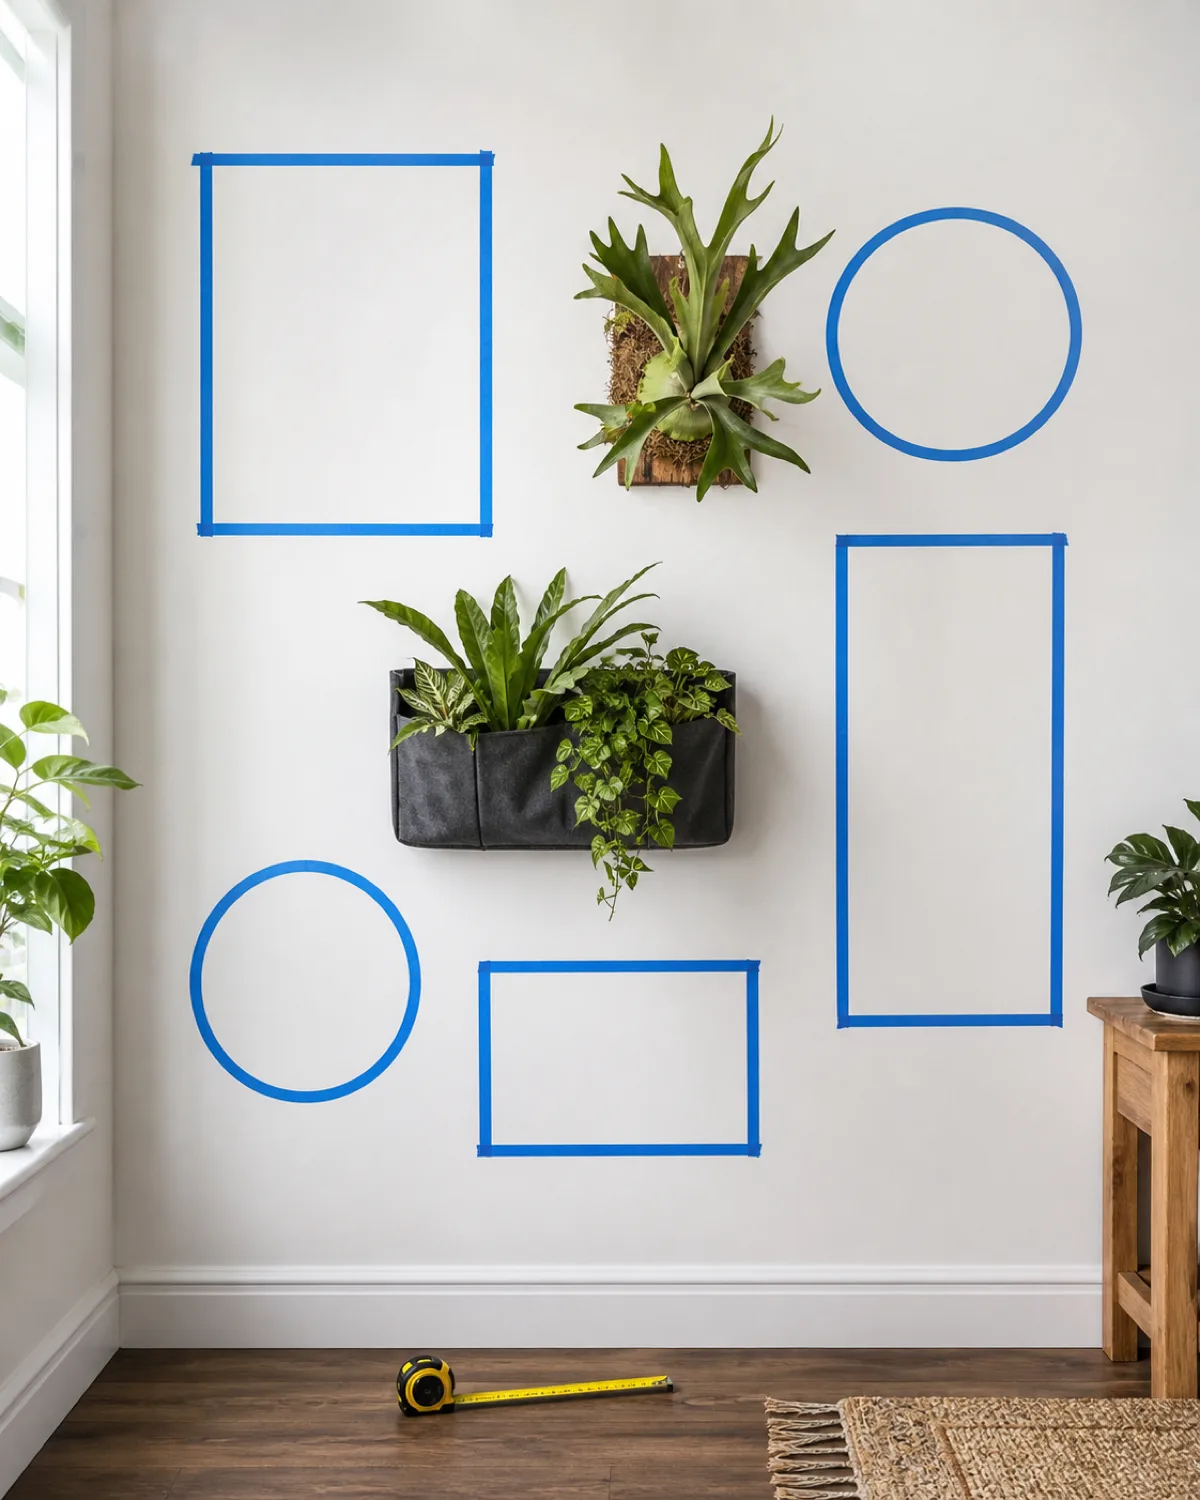
The difference between a plant wall that looks curated and one that looks cluttered is layout discipline. Throwing plants at a wall in whatever spots the screws happen to land produces the same mess as hanging photos without a plan.
Start on the floor. Arrange the physical elements — pots, frames, boards, panels — on the ground in the pattern you intend for the wall. Step back four feet and photograph it. Rearrange and photograph again. The one that looks balanced on the floor will look balanced on the wall.
- Painter's tape mock-up: Once you settle on a layout, mark each position on the wall with blue painter's tape cut to the shape and size of each element — rectangles for shelves, circles for staghorn boards, squares for felt panels
- Visual weight distribution: Heavy or dark elements anchor the bottom of the composition, lighter and smaller elements float above — this follows the same gravity logic our eyes expect from the physical world
- Gap consistency: Pick one gap distance, either 4 or 6 inches, and use it between every element — inconsistent spacing is the fastest way to make a considered layout look accidental
The temptation after installation is to keep adding. Resist it. A plant wall with negative space between elements reads as intentional design. A wall packed edge to edge with no breathing room reads as a garden center display shelf, which is exactly the vibe a living room should avoid.
Maintenance Calendar for a Healthy Plant Wall
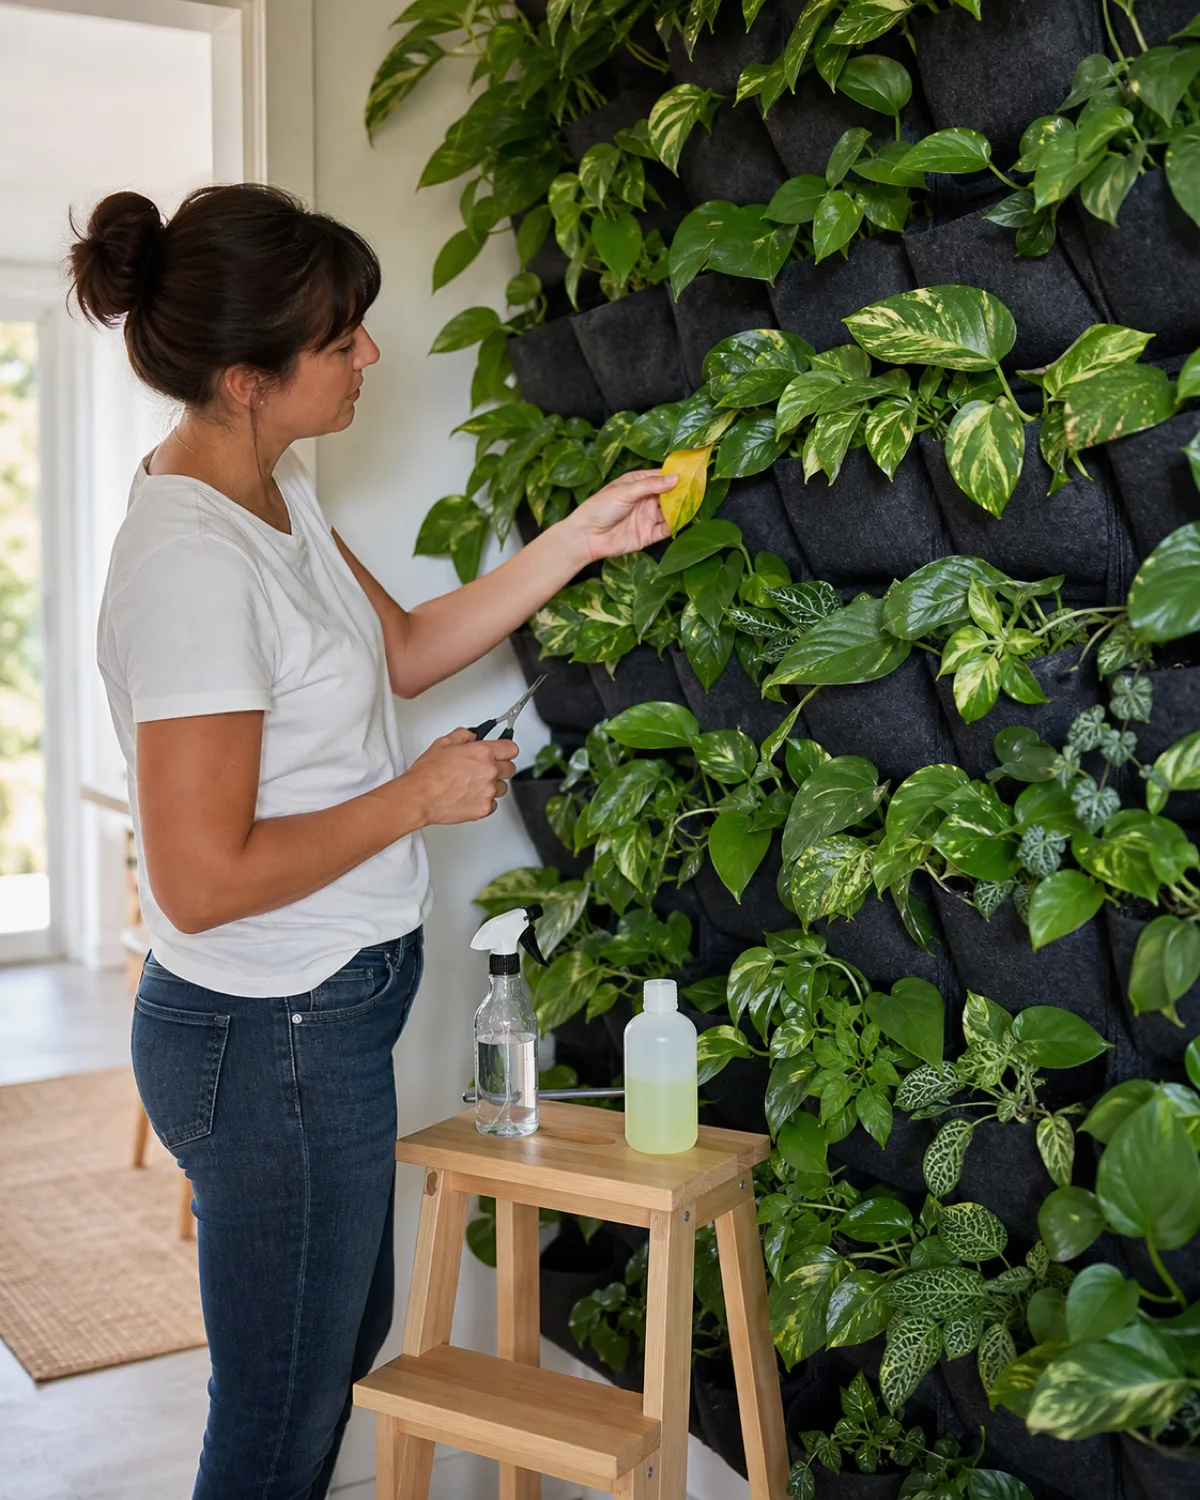
A plant wall needs more regular attention than the same plants would need on a shelf, because the vertical format concentrates 12 to 20 plants into one tight zone where problems spread fast and access is harder.
The fix is scheduling. Turn maintenance into a calendar routine with three frequency tiers, and the wall stays healthy without the cognitive load of remembering what you checked last.
Weekly tasks keep the wall clean. Walk the entire installation and remove any yellow or brown leaves by hand. Check the watering tray for overflow. Look at each pocket or pot for signs of pests — spider mites love wall-mounted plants because the dry air near wall surfaces suits them.
- Monthly tasks: Trim trailing plants that are shading lower sections — one long pothos vine can block light from reaching two or three plants below it — and feed with half-strength liquid fertilizer during the growing season from April through September
- Monthly hardware check: Press each mounting screw, hook, and bracket and feel for looseness — plants gain weight as they grow, and a bracket that held firm with three small plants may not hold when those plants have doubled in size
- Quarterly deep clean: Wipe dust from leaves with a damp cloth — dust reduces photosynthesis efficiency and makes pest infestations harder to spot — replace any plants that have declined beyond recovery, and inspect the wall surface behind the installation for moisture or mold
The quarterly replacement step matters more for plant walls than for floor displays. A dead plant on a table is an eyesore. A dead plant in a vertical pocket planter can spread root pathogens through the shared moisture system to its neighbors above and below. Remove and replace fast.
Plant wall quick reference
- 1Felt pocket for a budget full wallIndustrial felt panel with 6 to 36 pockets, gravity-fed watering from the top row, 6-mil plastic backer required to protect the wall.
- 2Staghorn for a sculptural statementMounted on a wooden board with sphagnum moss. Soak weekly, bright indirect light, no direct sun. Multiple boards make a gallery wall.
- 3Trellis for one-plant coverageA single pothos or philodendron in a floor pot climbs a wall-mounted lattice and covers 4 by 6 feet in 12 to 18 months.
- 4Picture frame for succulent artShallow frame, hardware cloth mesh, succulent mix. Lay flat for 3 weeks to root, then hang. Water flat every 2 to 3 weeks.
- 5Moss panel for zero maintenancePreserved moss needs no light, water, or soil. Keep humidity above 40 percent to prevent brittleness. Does not filter air or grow.
- 6Waterproof the wall firstPlastic sheeting behind felt, sealed trays for panels, drip trays at the base. Check for moisture daily during the first two weeks.
- 7Trailing plants at top, moisture-lovers at bottomGravity moves water downward. Pothos and peperomia handle dry upper rows. Ferns and prayer plants thrive in the wetter lower rows.
- 8Odd-number layout with breathing roomGroup in 3s, 5s, or 7s. Leave 4 to 6 inches between elements. Use painter's tape on the wall to test the layout before drilling.
- 9Weekly leaf check, monthly trim and feedRemove yellowing leaves weekly. Trim trailing growth that shades lower plants monthly. Feed half-strength fertilizer April through September.
- 10Quarterly hardware and wall inspectionPlants gain weight as they grow. Check every mount and bracket for looseness. Inspect the wall behind the installation for moisture or mold.

Mara writes plant care guides grounded in published botany and first-hand growing experience, not recycled social-media advice. Every recommendation on Kultivy is tested against real-world conditions before it reaches your screen. More about our editorial standards.