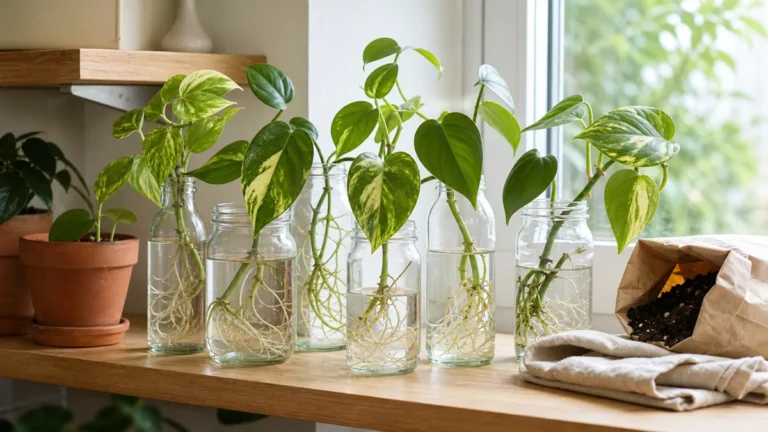
A cutting sitting in a glass of water on the kitchen counter is already a propagation station. It is also the least interesting version of one.
The roots growing beneath that waterline are striking, and most people bury them in soil the moment they appear. A dedicated station keeps those roots on permanent display.
These sixteen setups cover every surface, every budget, and every room. Pick one, fill it with cuttings you already own, and let biology redecorate your shelf.
- 1Why Roots Deserve Display
- 2Single Test Tube Stand
- 3Wall-Mounted Tube Rack
- 4Tiered Wood Shelf
- 5Mason Jar Cluster
- 6Hanging Glass Globes
- 7Multi-Hole Wood Board
- 8Window Shelf Bar
- 9Vintage Bottle Collection
- 10Station With Grow Light
- 11Minimalist Bud Vase Row
- 12Rotating Seasonal Station
- 13Kitchen Herb Bar
- 14Test Tube Chandelier
- 15Bookshelf Integration
- 16Keeping Every Station Healthy
Why Roots Behind Glass Deserve a Permanent Spot
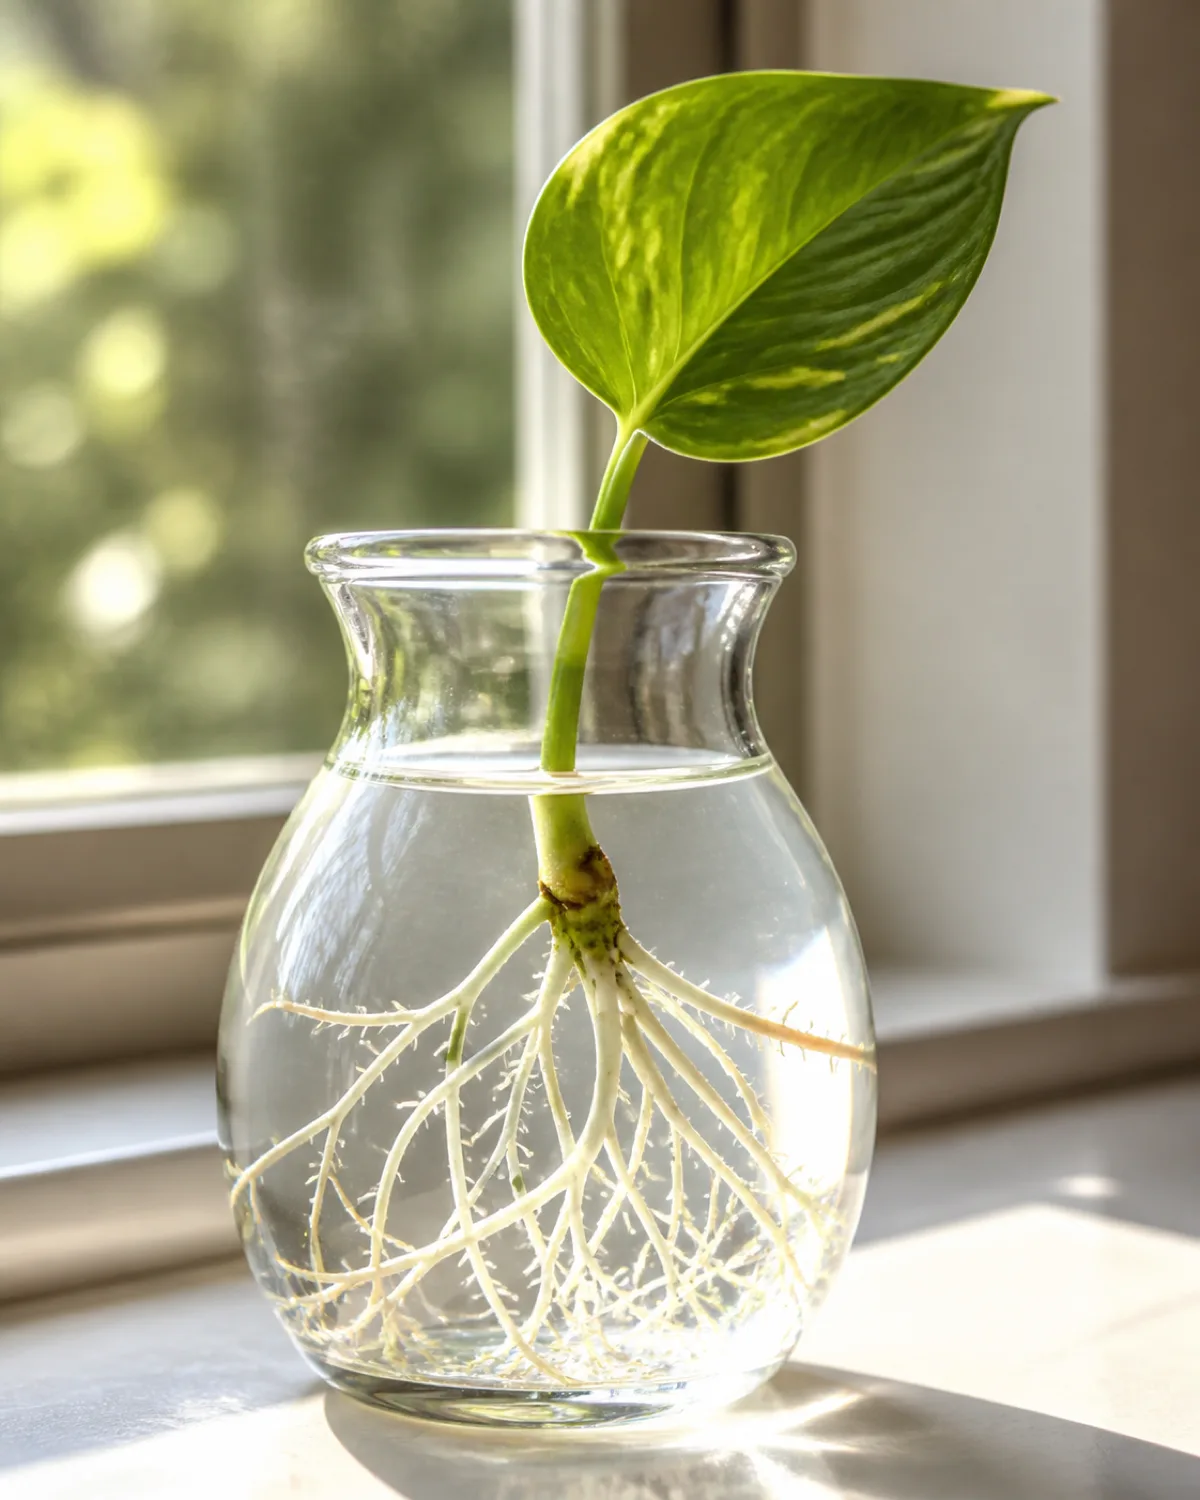
Most people treat water propagation as a temporary step between cutting and potting. The glass sits on the counter for a few weeks, roots appear, and the whole thing gets buried in soil before anyone really looks at what happened in the water.
That root system is one of the most beautiful structures a plant builds. White root tips branch into fractals, fine root hairs catch light like spider silk, and the whole network grows visibly day by day. No potted plant shows you that.
A propagation station turns that temporary holding pattern into a permanent display. The vessel stays on the shelf. The cuttings rotate in and out as roots reach transplant length. The station itself becomes furniture.
- Visual: Root fractals in clear water are a form of living geometry that no artificial decoration replicates
- Educational: Guests and children watch roots emerge, branch, and thicken in real time — biology without a textbook
- Productive: Every rooted cutting becomes a free plant for another room or a gift for a friend
The methods for taking cuttings and encouraging root growth are covered in the plant propagation guide. This article is about the display — sixteen ways to make the rooting process itself the point.
Single Test Tube on a Wood Stand
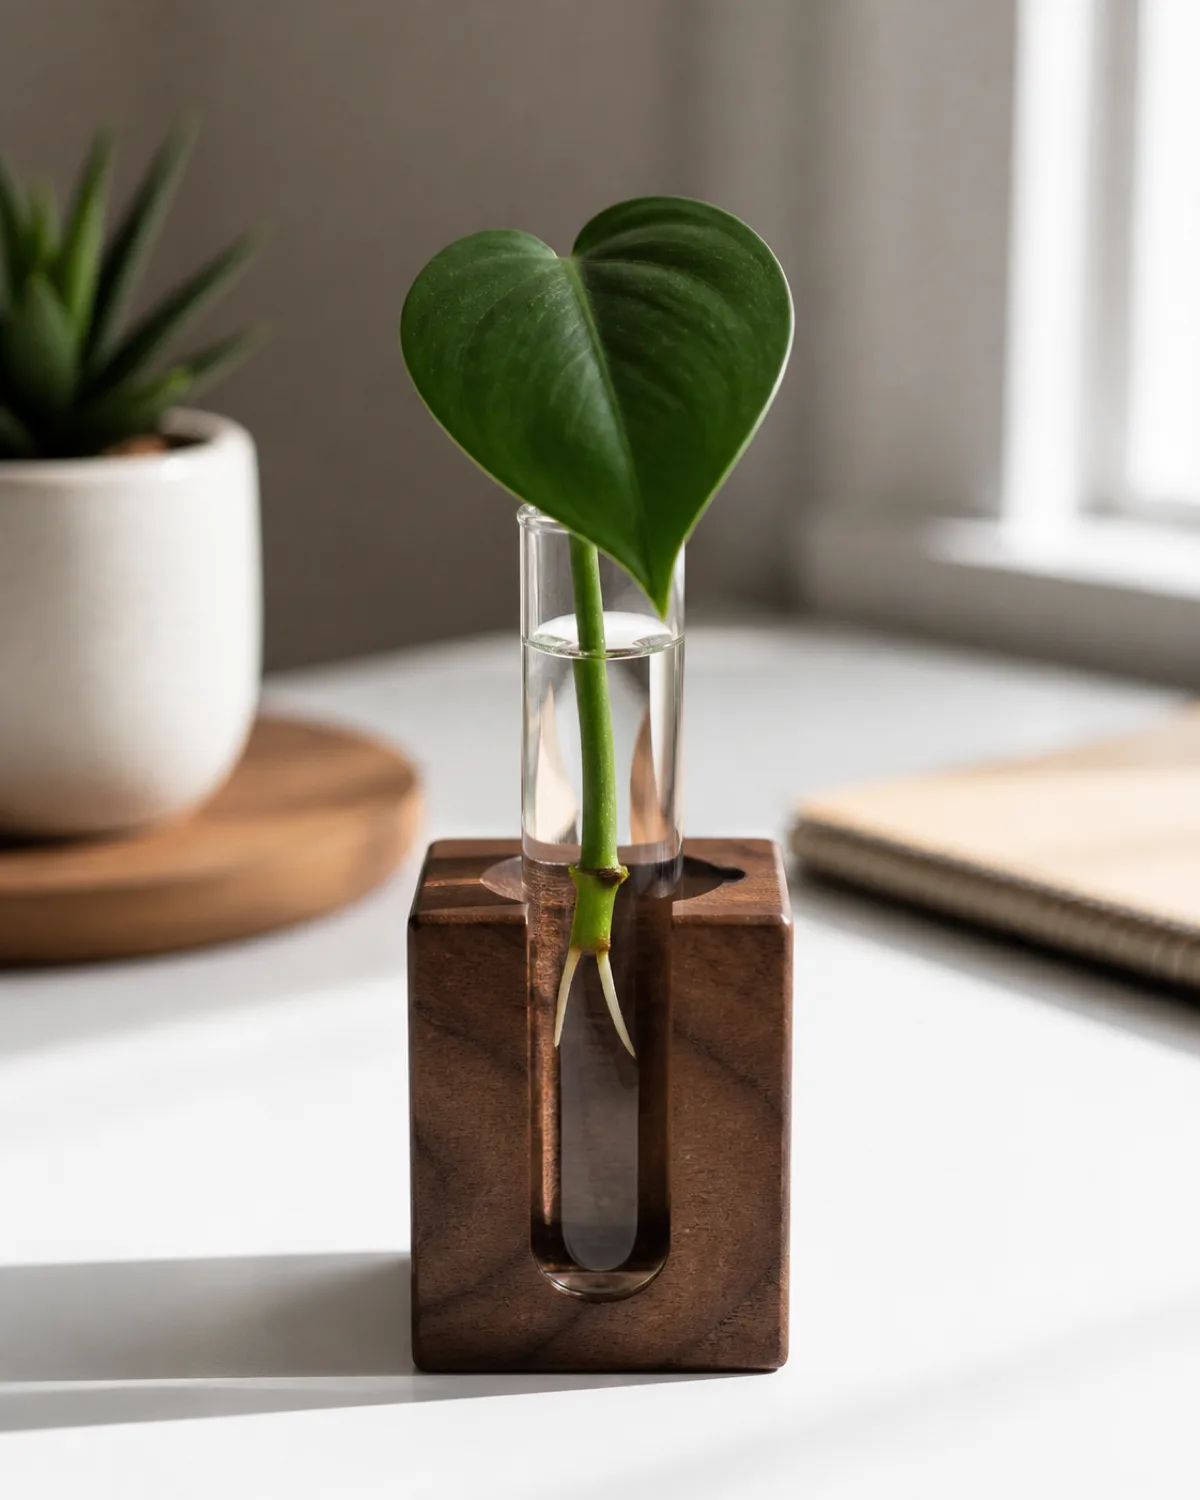
One tube. One cutting. One block of wood. This is the propagation station stripped to its absolute minimum, and it works better as a desk accessory than most things marketed as desk accessories.
The wood block gets drilled with a single hole sized to fit a standard 25mm × 150mm glass test tube. The tube holds enough water for one cutting with one or two nodes submerged.
- Walnut gives a dark, warm tone that reads as modern or mid-century
- Oak lands in Scandinavian territory — light, clean, understated
- Pine goes boho or natural — especially with the bark edge left on
The narrow tube opening is actually an advantage. It forces the cutting to stand upright, which keeps the maximum amount of root structure visible through the glass. A wide-mouth jar lets the cutting lean sideways and hides half the roots against the glass wall.
The best single-tube plants are small-node species that look complete as a single stem: pothos, philodendron heartleaf, or tradescantia. One leaf, one node, one root system — a miniature botanical specimen on display.
Put it on a nightstand, a bathroom shelf, or next to your monitor. It takes up less space than a coffee mug.
Wall-Mounted Test Tube Rack
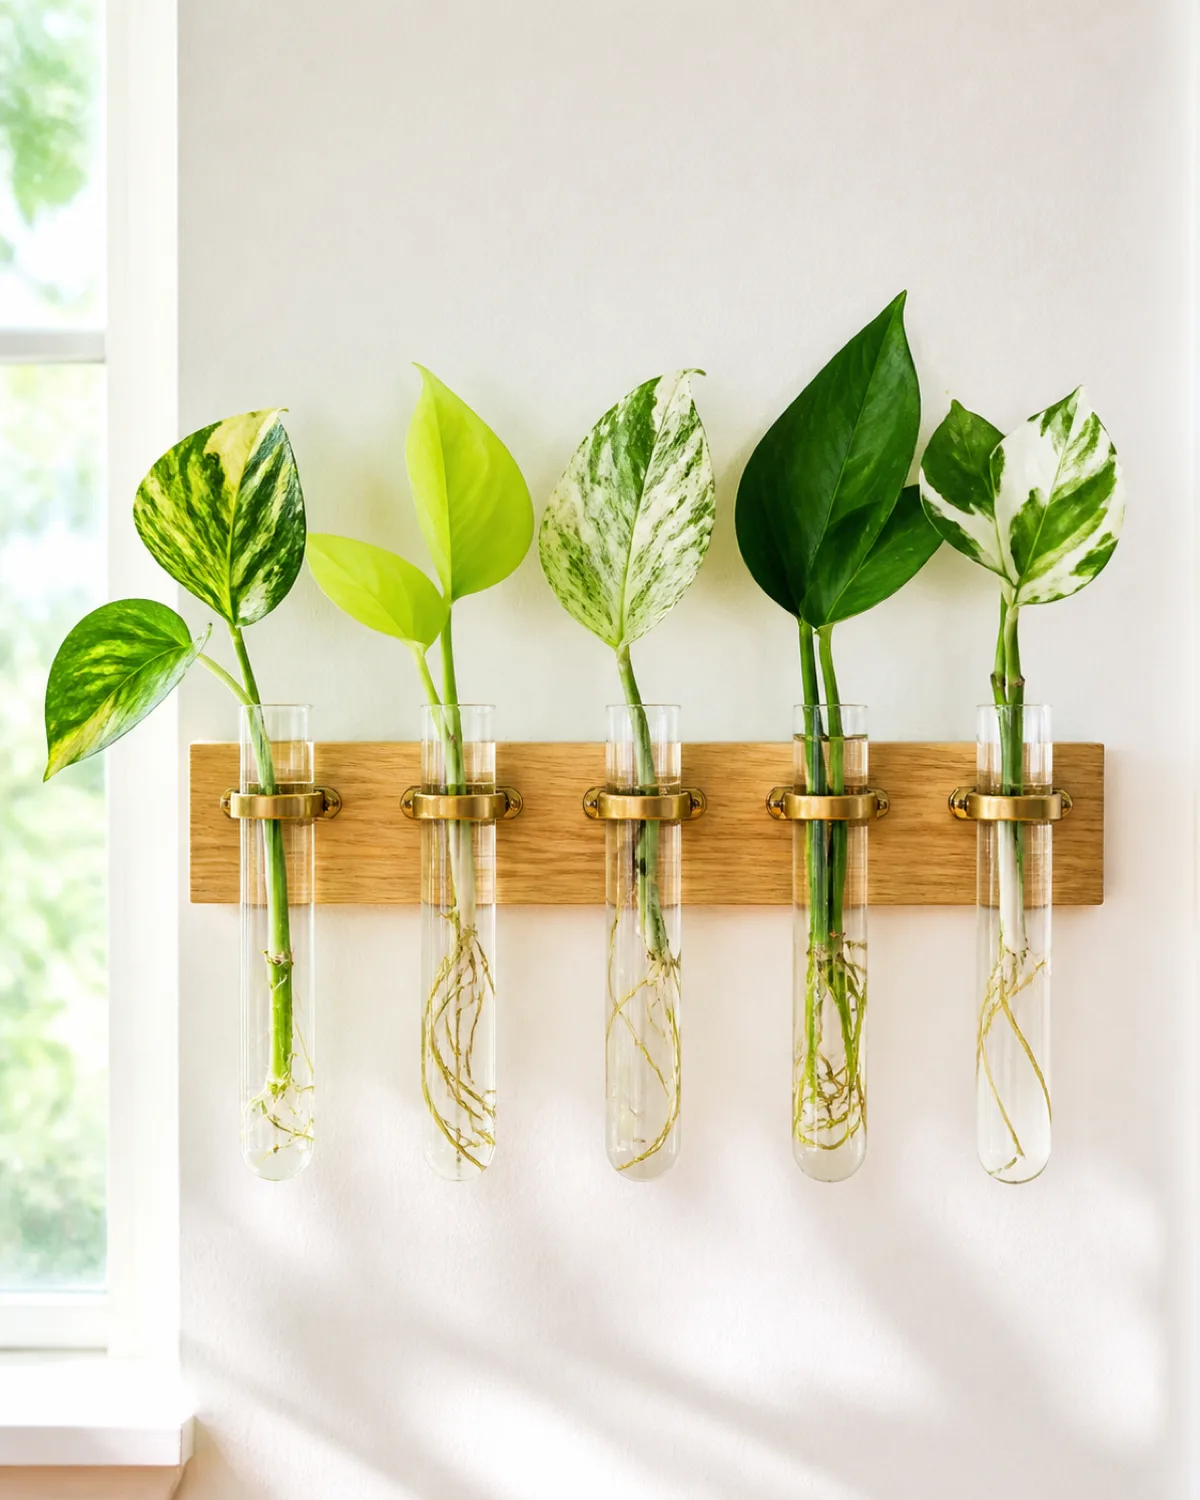
The single tube on a desk is nice. Three to seven tubes mounted in a row on the wall is a statement.
A wall-mounted test tube rack uses a horizontal wood strip or metal bar with small clamps or drilled holes spaced two to three inches apart. Each tube sits at the same height, creating a rhythm of green and white that reads from across the room.
The power move is a color gradient. Fill each tube with a different variety of the same species:
- Pothos gradient: golden → neon → marble queen → Njoy → jade — warm yellow-green shifting to crisp white-green to solid dark green
- Philodendron gradient: Brasil → heartleaf → micans — tricolor to solid green to velvety bronze
- Tradescantia gradient: zebrina → nanouk → pallida — silver-purple to pink-green to solid deep purple
Mount the rack at eye level next to a window. The natural light behind the tubes creates a backlit effect that makes the roots glow. Learn more about variety options in the pothos varieties guide.
- Command strips hold the weight of a light wood rack with five filled tubes (under 2 lbs total) — no drilling needed for renters
- Swap water every five to seven days by lifting each tube out of its clamp, dumping, and refilling at the sink
Tiered Wood Shelf Station
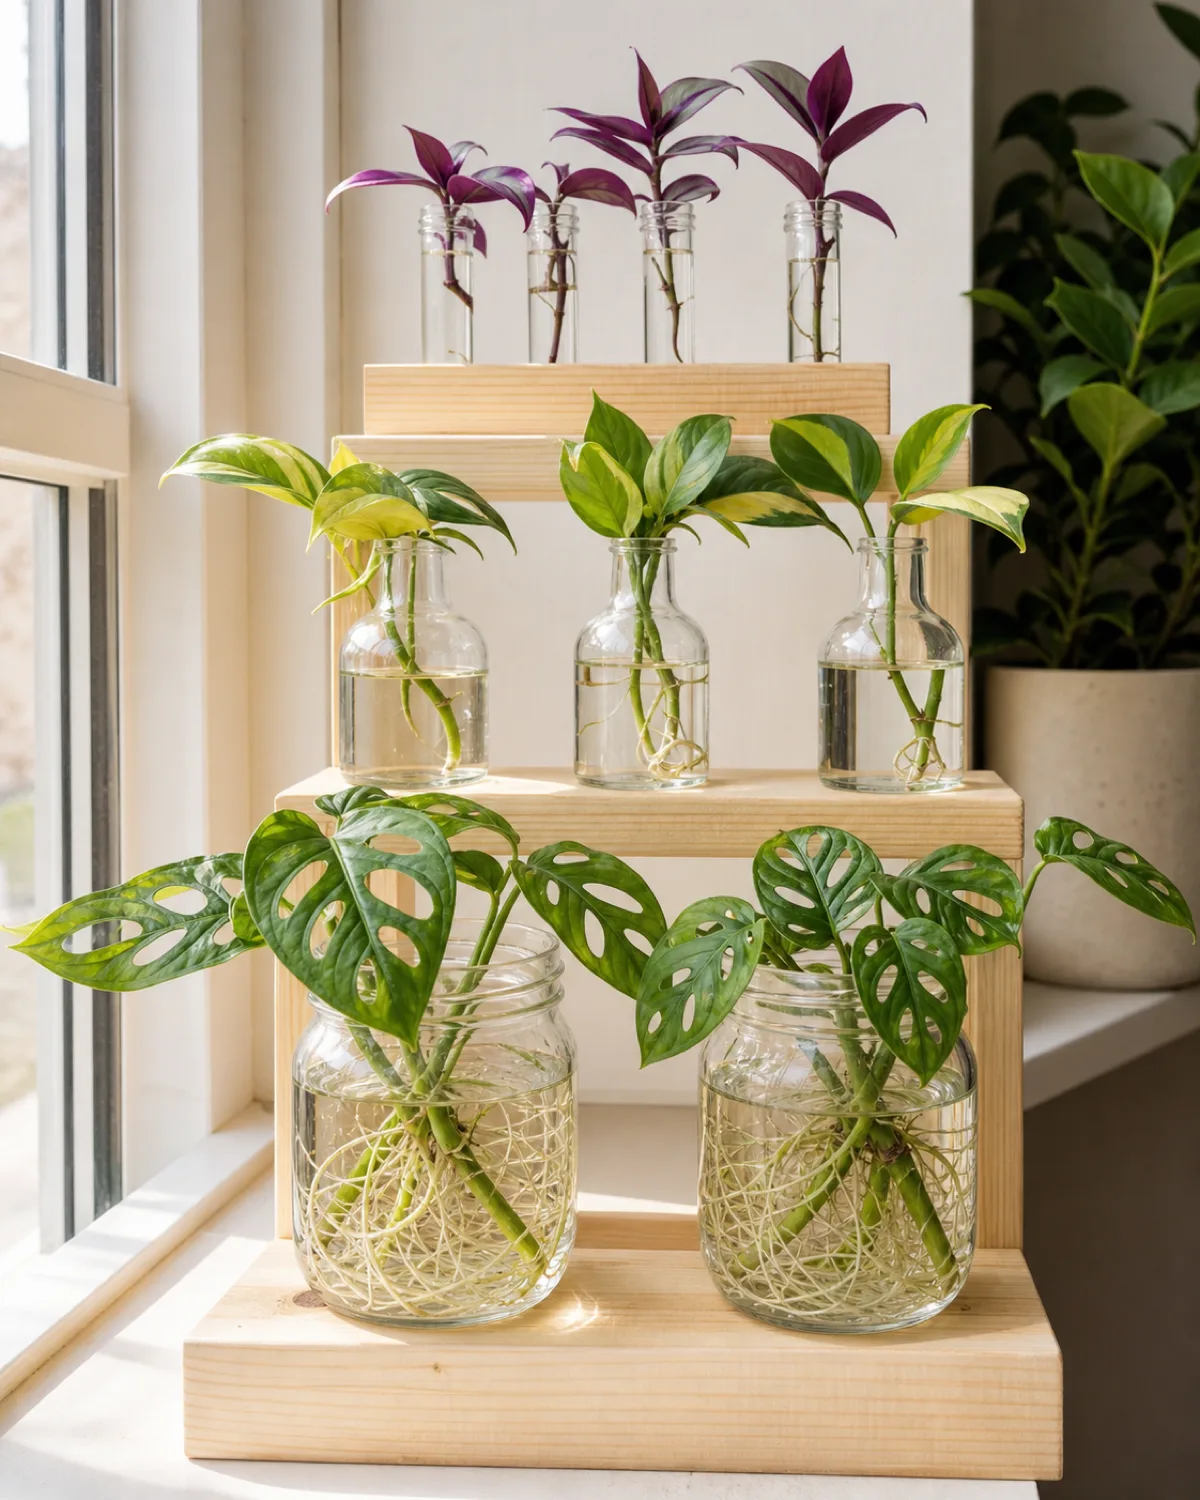
A single shelf puts everything at the same height. A tiered shelf creates a botanical ladder where the eye climbs from large vessels at the bottom to tiny tubes at the top.
The principle is simple: big plants in big containers on the bottom step, medium plants in medium bottles on the middle step, small cuttings in test tubes on the top step. The height difference is what makes it a display instead of a cluttered windowsill.
Three tiers is the sweet spot. Two feels incomplete. Four gets too tall for most windowsills and starts blocking the light it needs.
- Bottom tier: Large mason jars or apothecary jars with monstera cuttings — the big leaves and thick aerial roots need the visual weight of a wide vessel
- Middle tier: Medium glass bottles with philodendron or pothos cuttings — the moderate leaf size matches the intermediate container
- Top tier: Small test tubes in a wood block with tradescantia or pilea pups — delicate cuttings in the smallest vessels
Material options for the shelf itself:
| Material | Style | Light impact |
|---|---|---|
| Light pine | Scandinavian / natural | Minimal shadow — good for low-light windows |
| Walnut | Mid-century / warm modern | Some shadow — pair with bright south or west windows |
| Acrylic | Invisible / modern minimal | Zero shadow — best for north-facing windows where every lumen counts |
Mason Jar Cluster
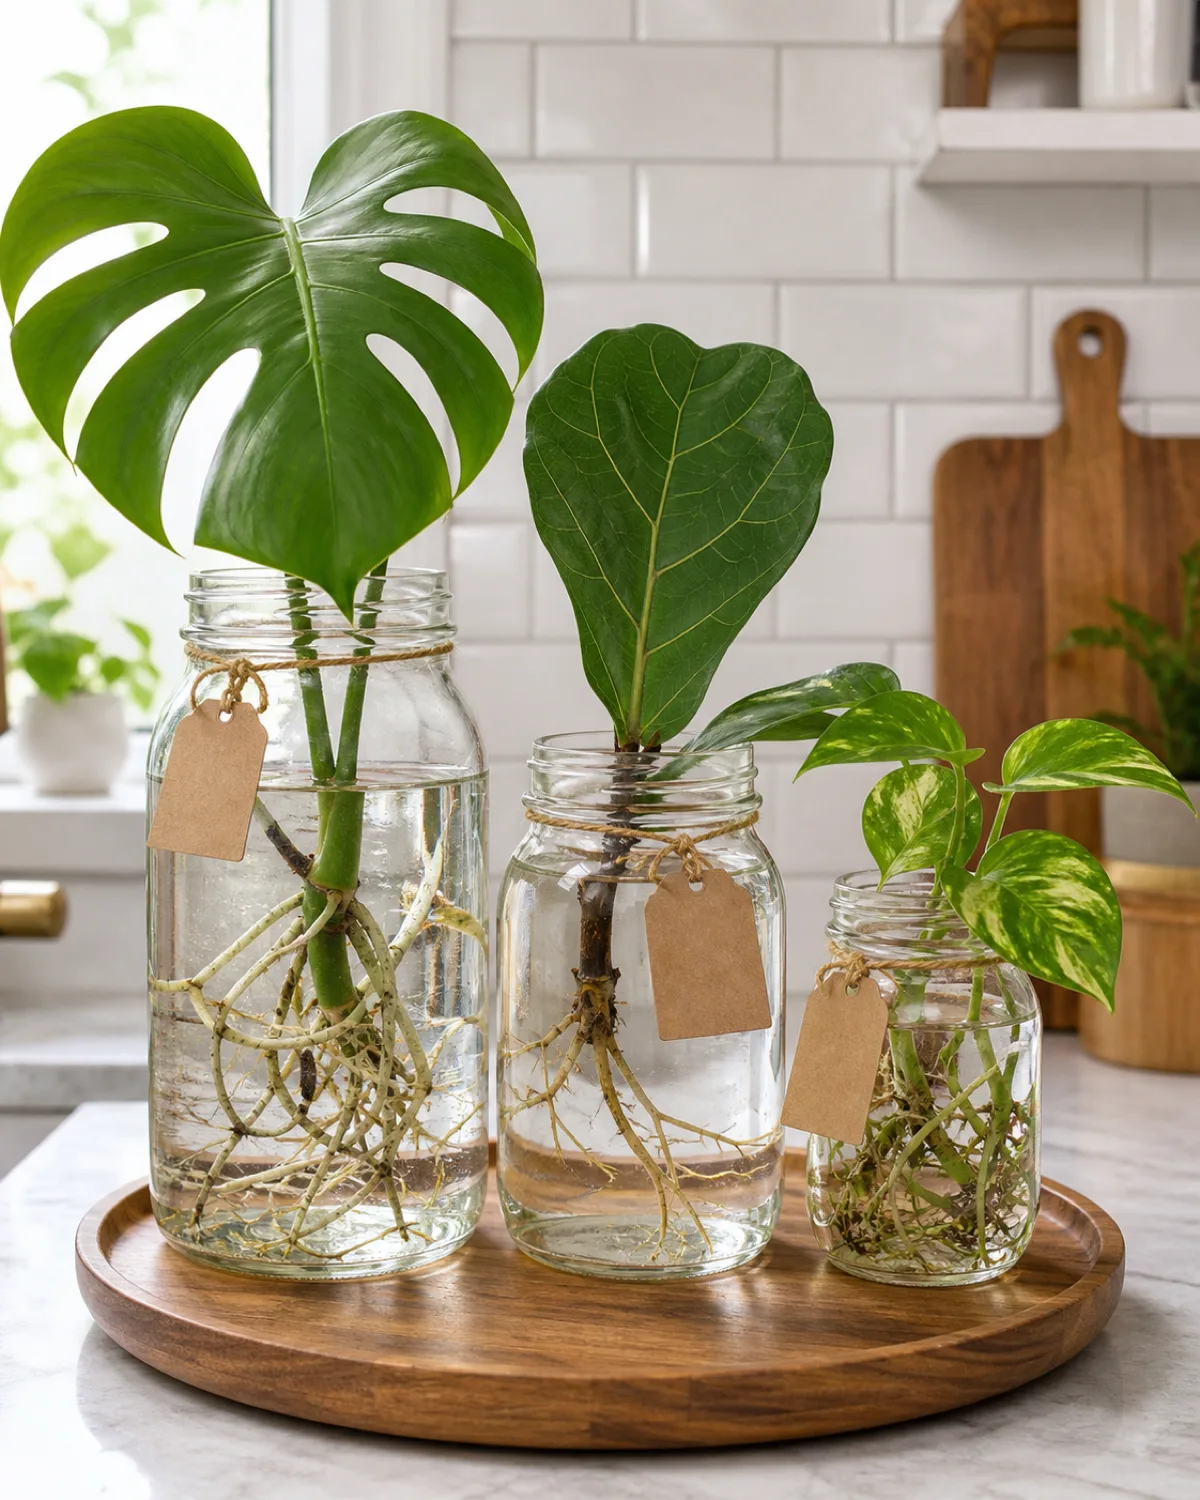
Mason jars are the most accessible propagation vessel on earth. They cost one to three dollars at any grocery store, thrift shop, or garage sale. They come in multiple sizes. They have wide mouths that fit thick-stemmed cuttings without forcing.
The display rule is odd numbers. Three jars on a tray looks intentional. Four looks like you ran out of shelf space. Five works for larger surfaces but gets crowded on a standard kitchen counter.
Size mixing creates visual interest:
- Quart jar (32 oz): Monstera deliciosa — the thick stem and aerial roots fill the wide mouth, and the large leaf provides canopy above
- Pint jar (16 oz): Philodendron, rubber plant, or fiddle leaf fig — moderate stems that stand upright without support
- Half-pint jar (8 oz): Pothos, tradescantia, or spider plant babies — small cuttings that would get lost in a larger vessel
Tie a small kraft paper tag to each jar with twine. Write the plant name and the date you started the cutting. This turns a cluster of jars into a documented experiment and gives visitors something to read.
The container should fit the cutting, not the other way around. Start with what you are propagating and pick the vessel that shows it off best.
Place the tray near a water source — the kitchen counter next to the sink is ideal. Water changes happen weekly, and proximity to the faucet makes the task effortless instead of a chore.
Hanging Glass Globe Station
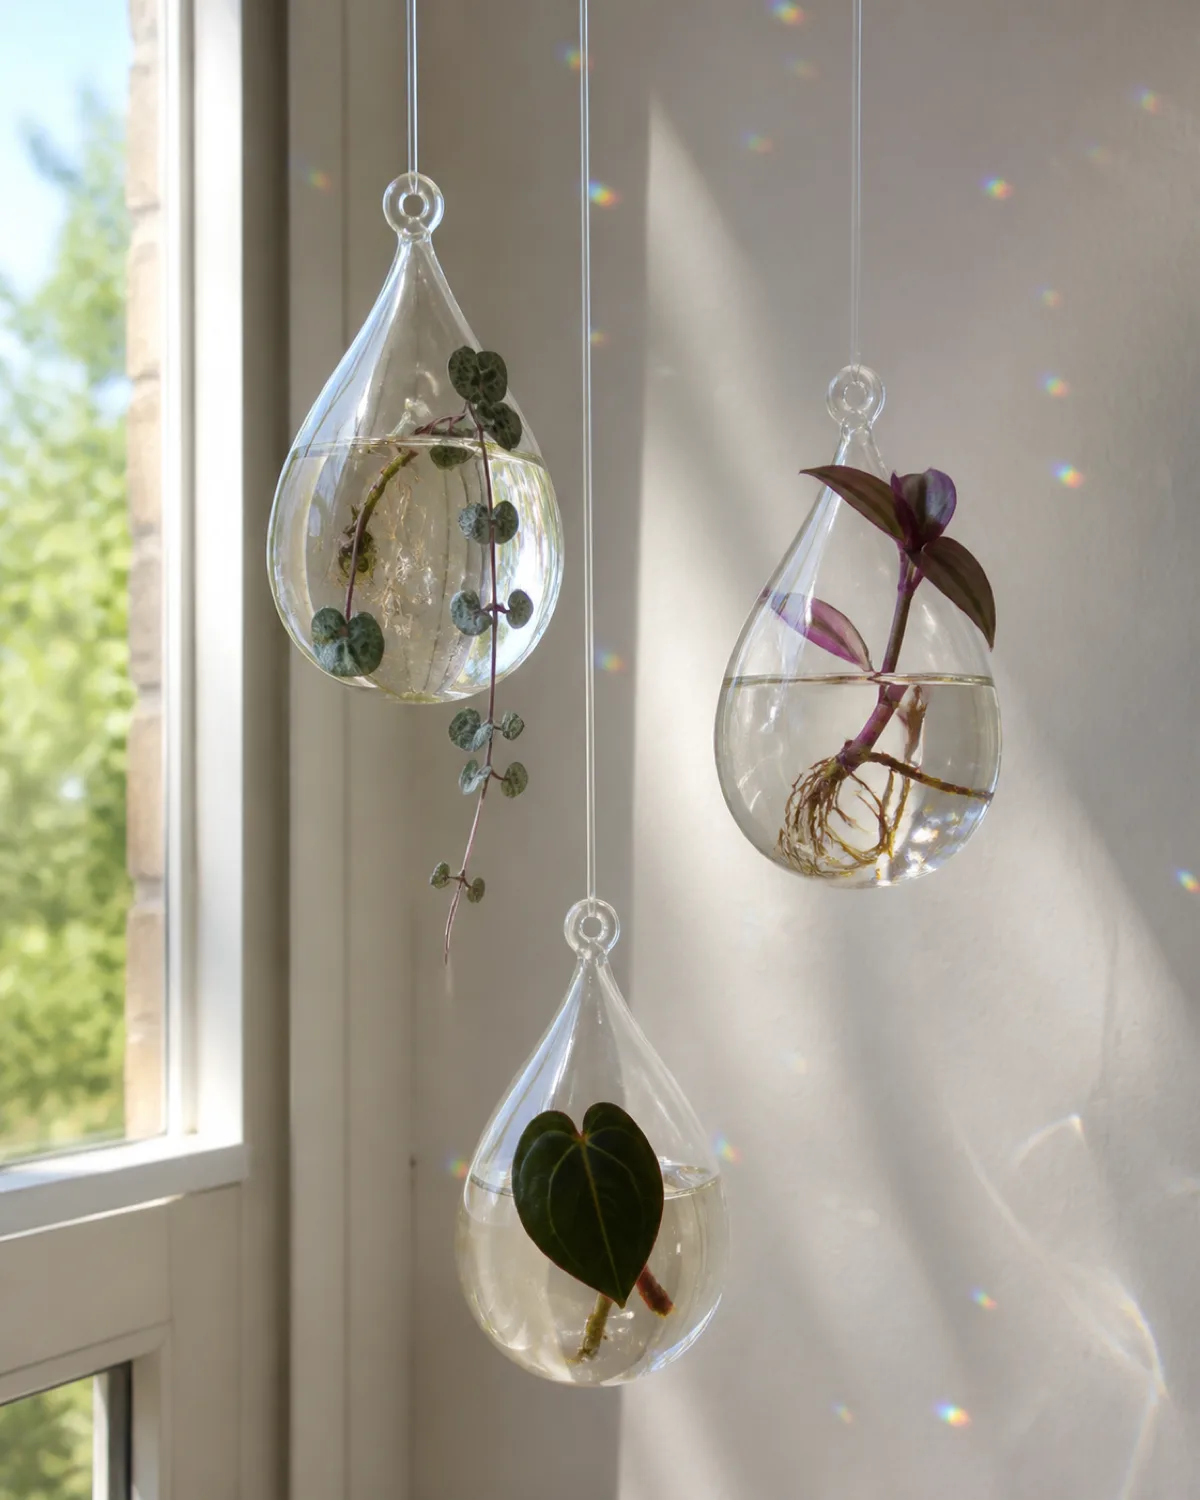
Glass globes turn propagation into something closer to a mobile than a shelf display. The orbs hang from the ceiling or a window frame, spinning slowly in air currents, catching light from every angle.
The transparent globe makes the root system visible from 360 degrees. No shelf, tray, or rack gives you that — they all have a back that faces the wall. A hanging globe has no back.
Suspension options ranked by visibility:
- Transparent fishing line: Nearly invisible — the globe appears to float
- Thin leather cord: Modern, warm, adds a vertical design line
- Macrame hanger cord: Boho, textured, but the cord competes visually with the plant inside
Hang three globes at staggered heights (12, 18, and 24 inches from the ceiling) for vertical rhythm. The hanging plants guide covers the ceiling-mounting hardware you need.
Keep the cuttings lightweight. String of hearts, tradescantia, and small philodendron micans work. Monstera does not — the weight pulls the globe at an angle and the thick stem blocks the opening.
One practical warning: globe openings are small. Refilling water means either a long-spout watering can, a squeeze bottle, or removing the entire globe from its cord. Plan for this before you hang them.
Desktop Multi-Hole Wood Board
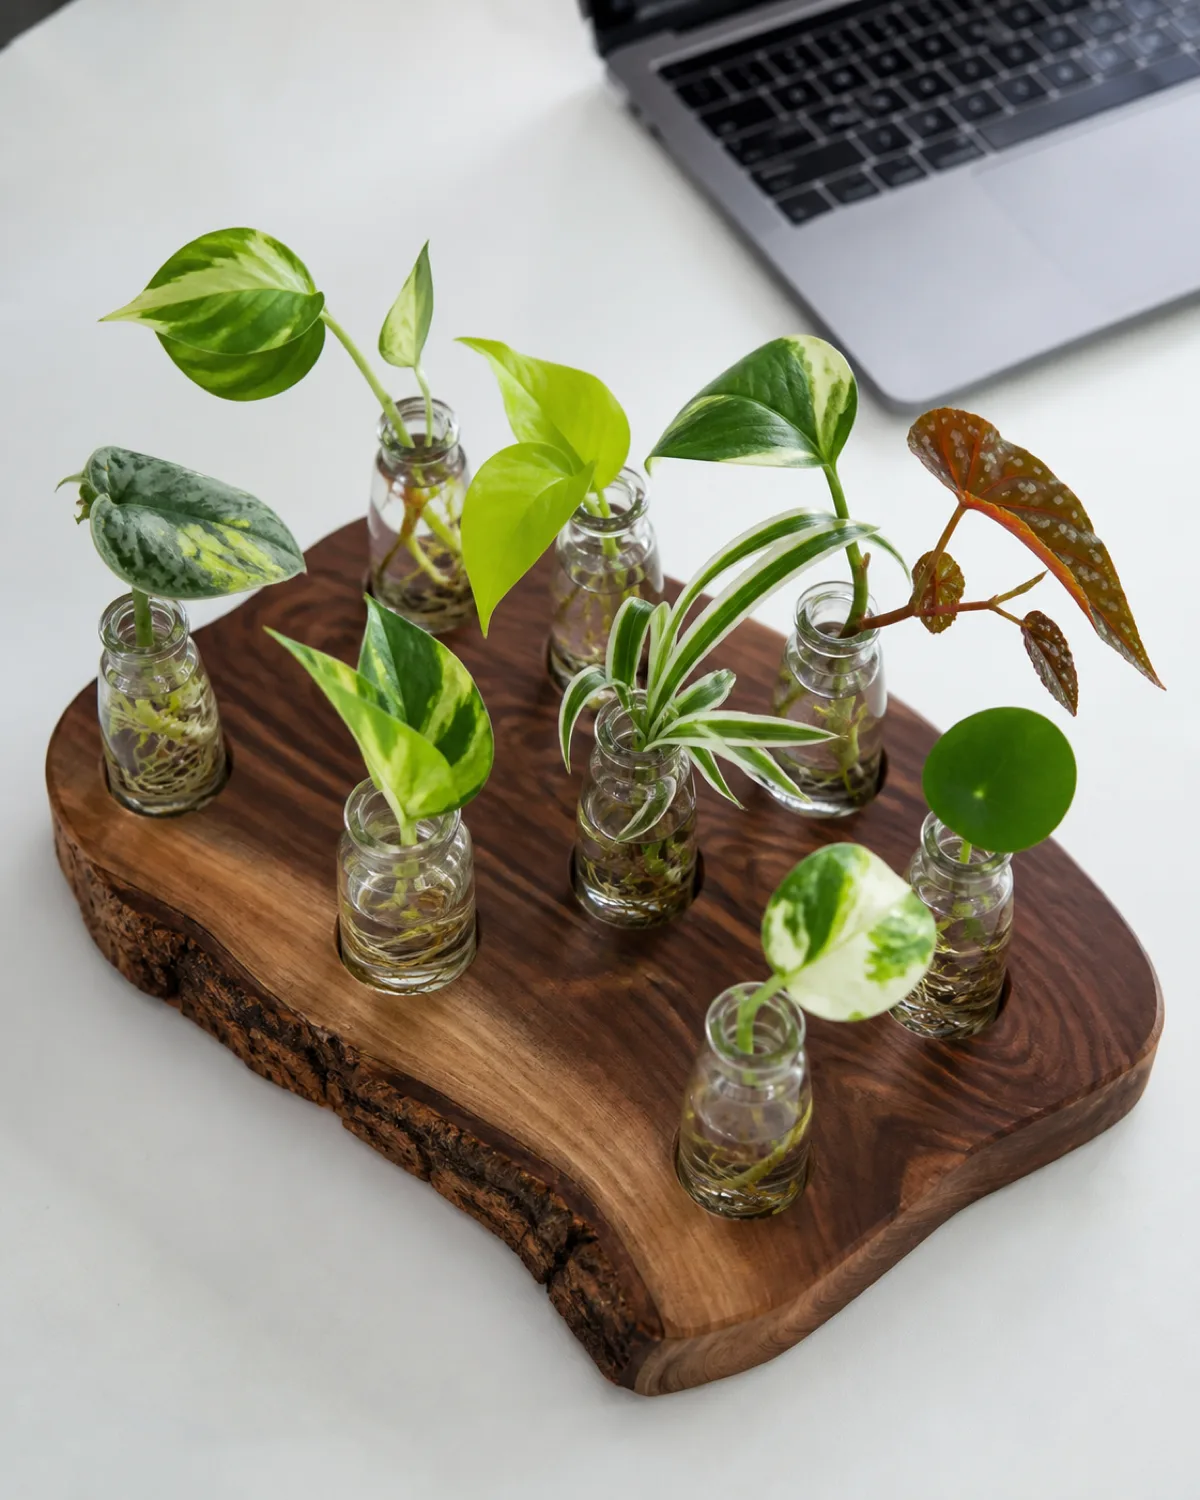
This is the batch-processing version of a propagation station. One board, eight to twelve holes, eight to twelve cuttings rooting simultaneously. It is also the easiest setup to build yourself.
The materials list is short:
- One thick wood slab (1 to 1.5 inches thick, any species)
- A Forstner drill bit sized to your bottles (25mm for test tubes, 35mm for small pharmacy bottles)
- Sandpaper (120 grit, then 220 grit)
- Optional: mineral oil or beeswax finish
Drill the holes. Sand the edges. Drop in the bottles. The entire build takes thirty minutes with basic tools.
Layout variations change the character:
- Straight line on a long narrow board — minimal, orderly, laboratory aesthetic
- Circle on a round slab — organic, conversational, mandala-like
- Irregular scatter on a live-edge slab — natural, each bottle at its own angle
This setup works best on a desk or studio table where you want propagation to be an ongoing activity rather than a passive display. Label each bottle with a fine-tip pen on a small kraft tag if you are tracking rooting times across different species.
Window Shelf Propagation Bar
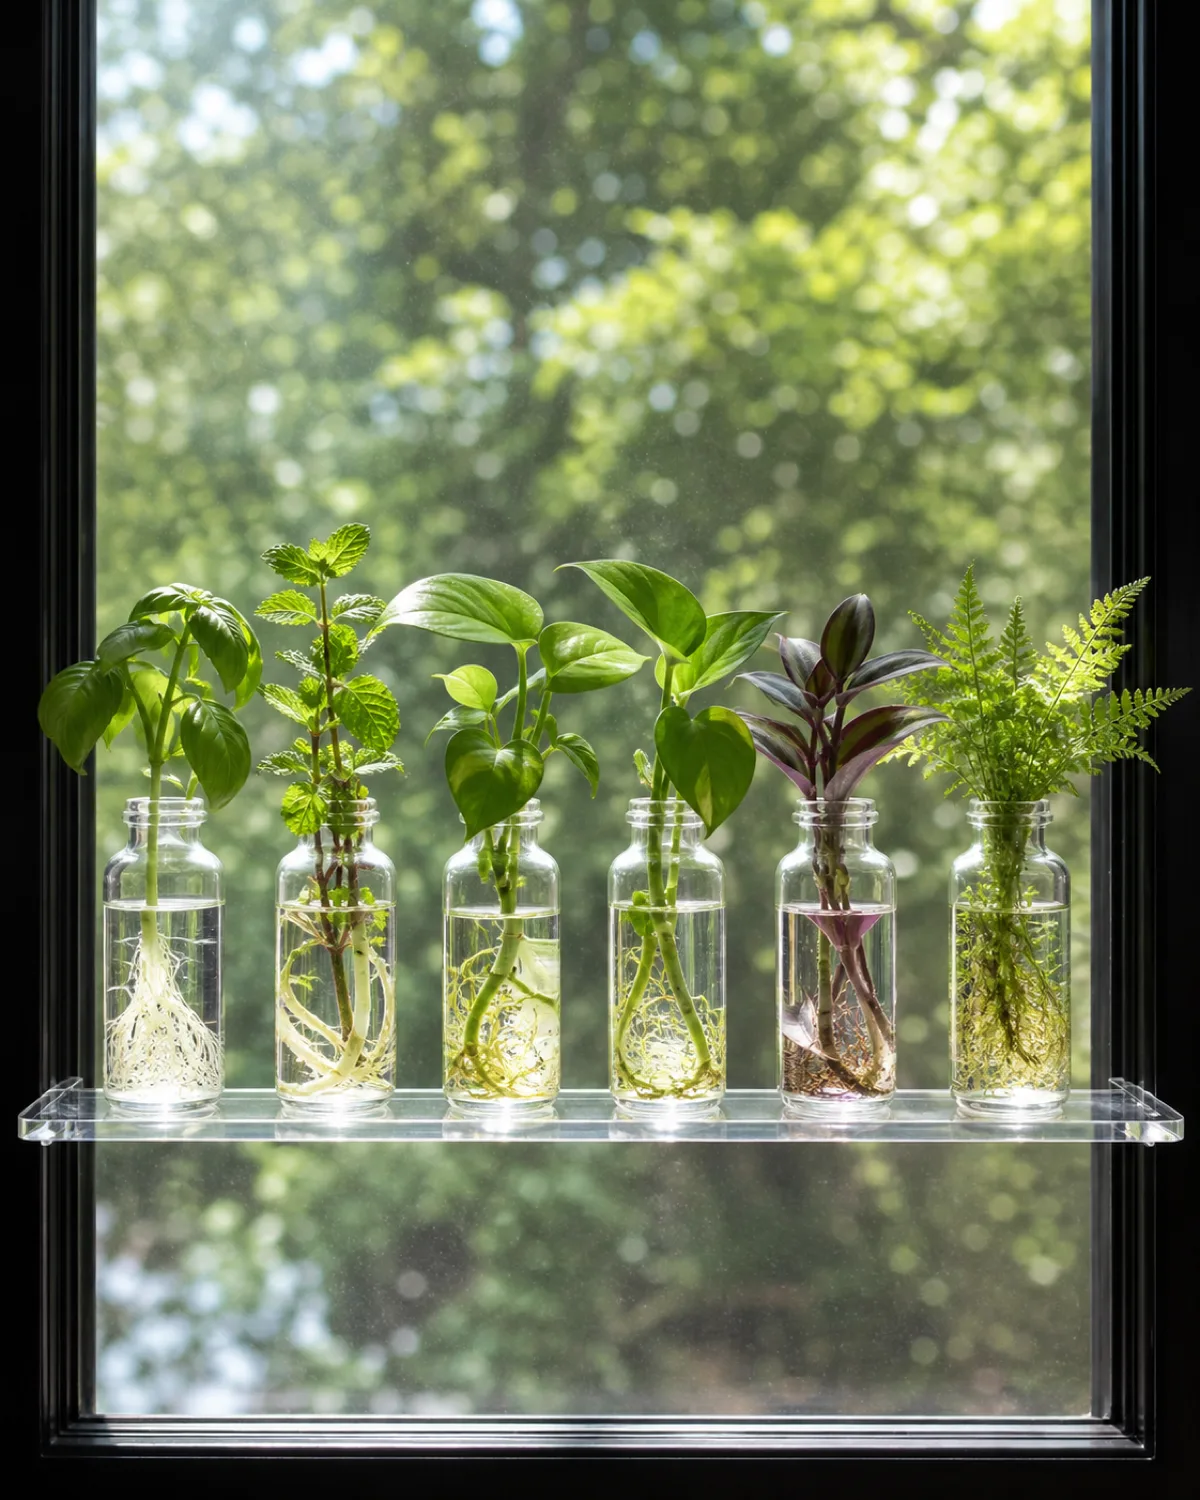
The window is the single best location for any propagation station. Bright indirect light drives root growth, warmth accelerates cell division, and the backlit effect through glass and water is more visually dramatic than any artificial lighting arrangement.
A propagation bar is a shelf that spans the window frame at mid-height, holding a row of identical vessels. The repetition and uniformity create a visual rhythm that a mixed cluster cannot match.
Shelf material matters for light:
- Clear acrylic: Transmits light downward to the windowsill below — the best choice when other plants sit beneath the bar
- Wood: Warm aesthetics but blocks downward light — reserve for windows with no plants below
- Tension rod with S-hooks: No shelf at all — individual vessels hang from hooks, with light passing freely between them
The ideal window faces east or north. South and west windows risk overheating the water — temperatures above 80°F encourage algae and bacterial growth that clouds the water and slows rooting. The houseplant light requirements guide covers window orientation in detail.
- Fill all vessels to the same level for visual consistency
- Use identical containers — the uniformity is the design, and one mismatched bottle breaks it
- Place the shelf at mid-window height, not at the top — this puts the roots at eye level when you stand in front of the window
Vintage Bottle Collection
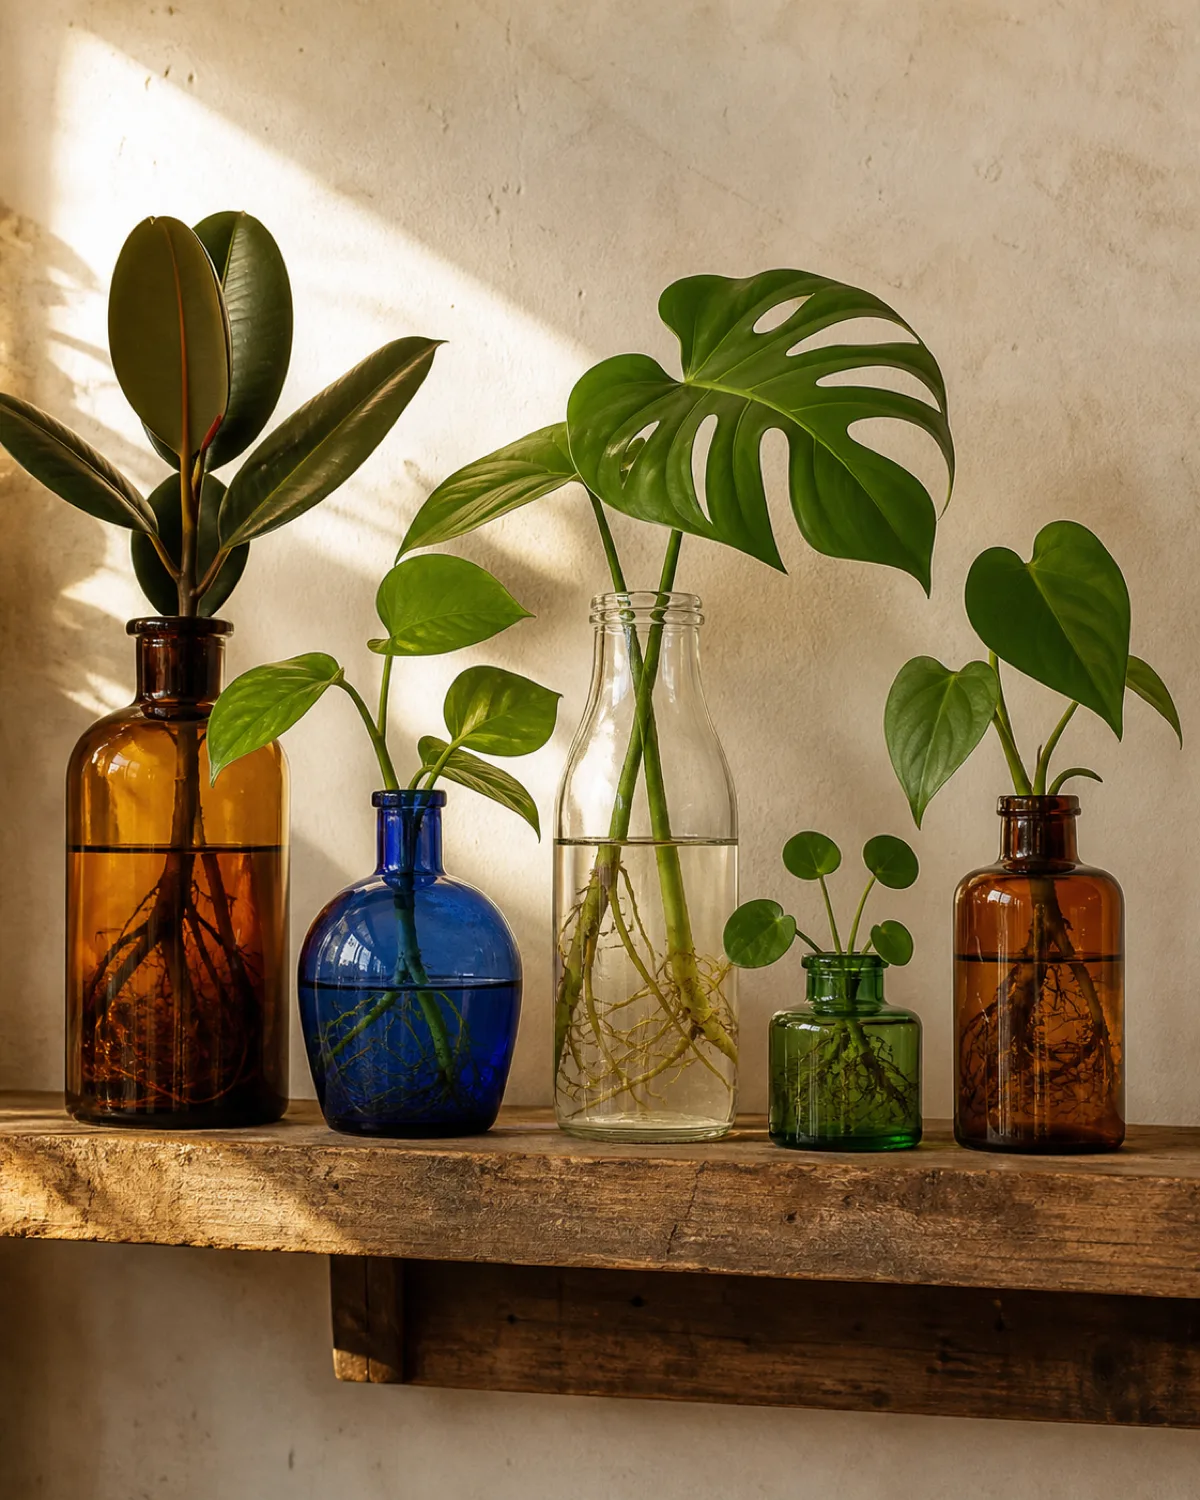
Every other station on this list aims for uniformity. This one does the opposite. The beauty of a vintage bottle collection is that nothing matches — and that is what makes it look intentional.
Pharmacy bottles, inkwells, old milk bottles, perfume flasks, soy sauce bottles, jam jars. Each one with a different shape, a different color, a different era of glass-making. The collection grows over time from thrift stores, estate sales, and the back of your kitchen cabinet.
Colored glass adds a functional benefit beyond aesthetics. Amber and cobalt blue glass filter light and reduce algae growth inside the water. The tradeoff is reduced root visibility — you cannot see the root system as clearly through tinted glass, which is the opposite of what most propagation stations are trying to show.
Arrangement on the shelf follows one guideline: tallest in the back, shortest in the front, with the widest spacing between the two tallest bottles. This creates a natural landscape silhouette.
- Source bottles with openings wide enough to fit a cutting but narrow enough to hold the stem upright — most vintage bottles hit this range naturally
- Place a thin felt pad under each bottle to protect the shelf surface from moisture rings
- This station pairs best with rooms that already have a vintage, eclectic, or collected aesthetic — it looks odd on a stark minimalist shelf
Propagation Station With Built-In Grow Light
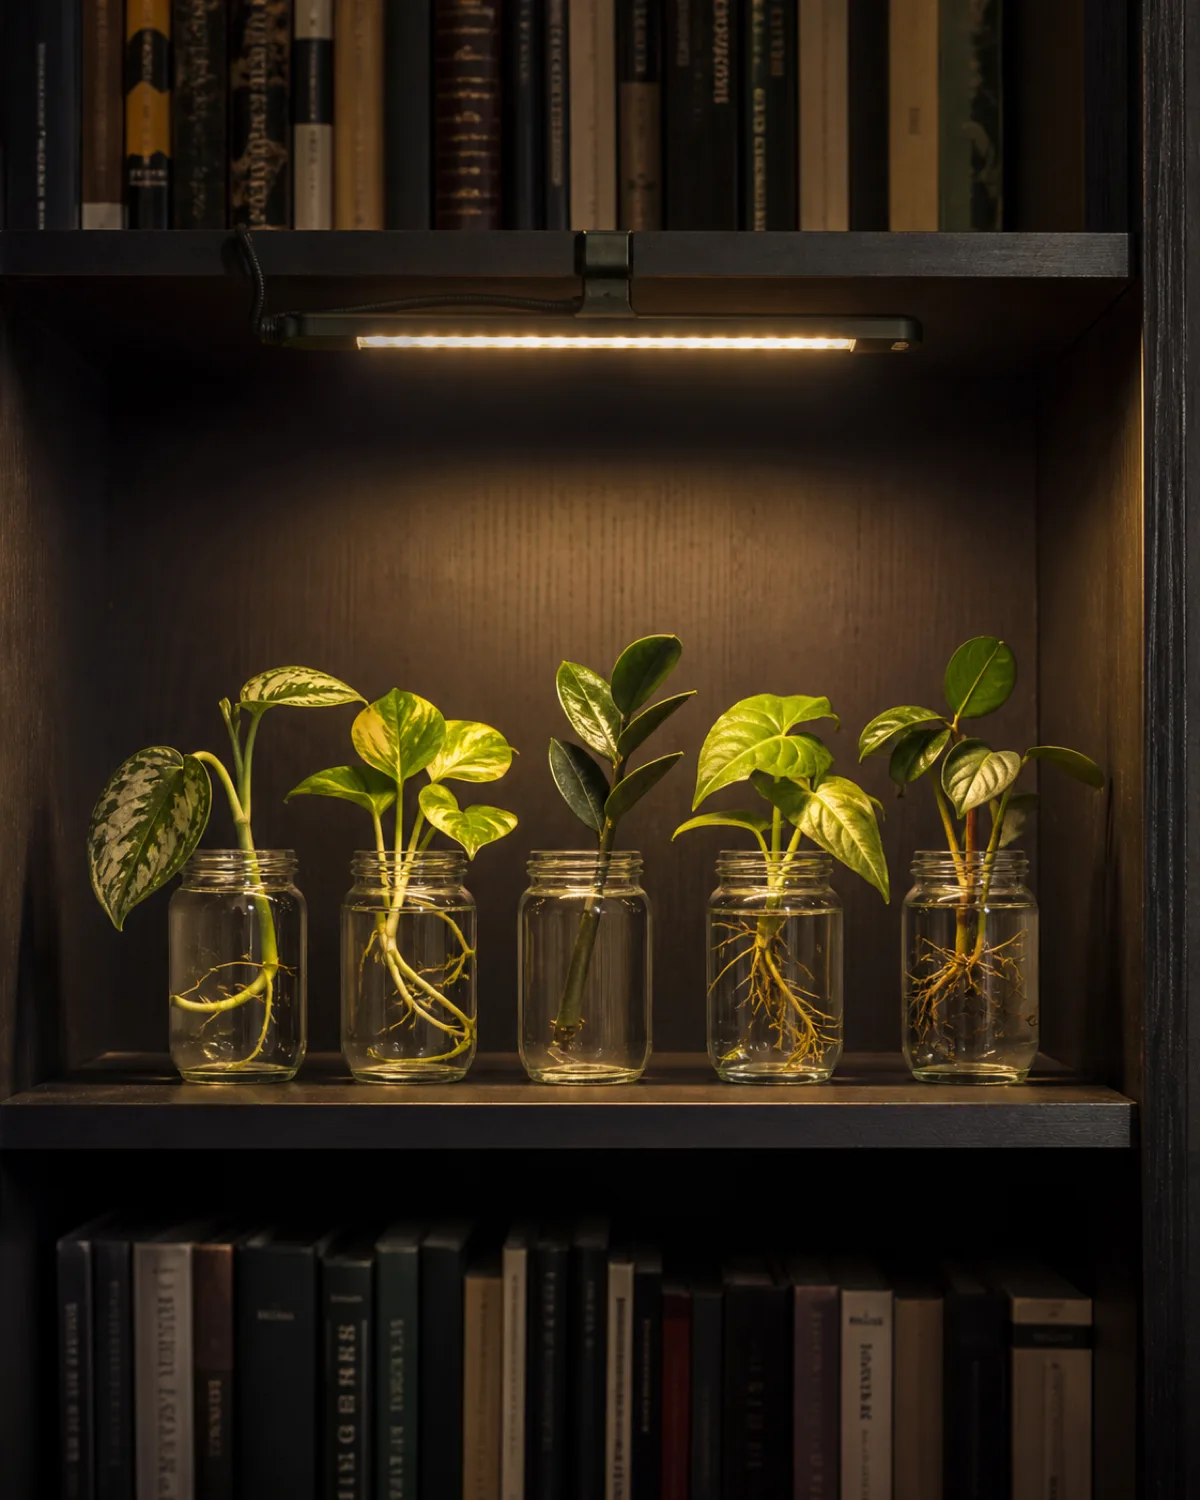
Lack of light is the reason most indoor cuttings sit in water for six weeks and still show nothing. The node is alive. The cutting is not rotting. But without enough photons hitting that leaf, the plant has no energy to invest in root construction.
A grow light solves this completely and frees your propagation station from window dependence. Any shelf, any bookcase, any dark corner becomes a viable rooting location.
What to look for in a propagation grow light:
- Spectrum: Full-spectrum white LED, 3500 to 5000 Kelvin — the same light that works for mature plants works for cuttings
- Distance: Six to twelve inches from the leaf surface — closer than you would place it for a mature plant because cuttings have fewer leaves to absorb light
- Duration: Twelve to fourteen hours per day on a timer — longer than the eight to ten hours most houseplants need because root initiation requires sustained energy input
The grow lights guide covers spectrum science, fixture types, and distance calculations in full.
- A clip-on gooseneck LED is the cheapest option (under fifteen dollars) and clamps to any shelf edge
- An LED strip adhered to the underside of the shelf above creates even, diffused light across all vessels below
- Warm white light (3500K) doubles as ambient room lighting and eliminates the purple glow that blurple grow lights create
Minimalist Bud Vase Row
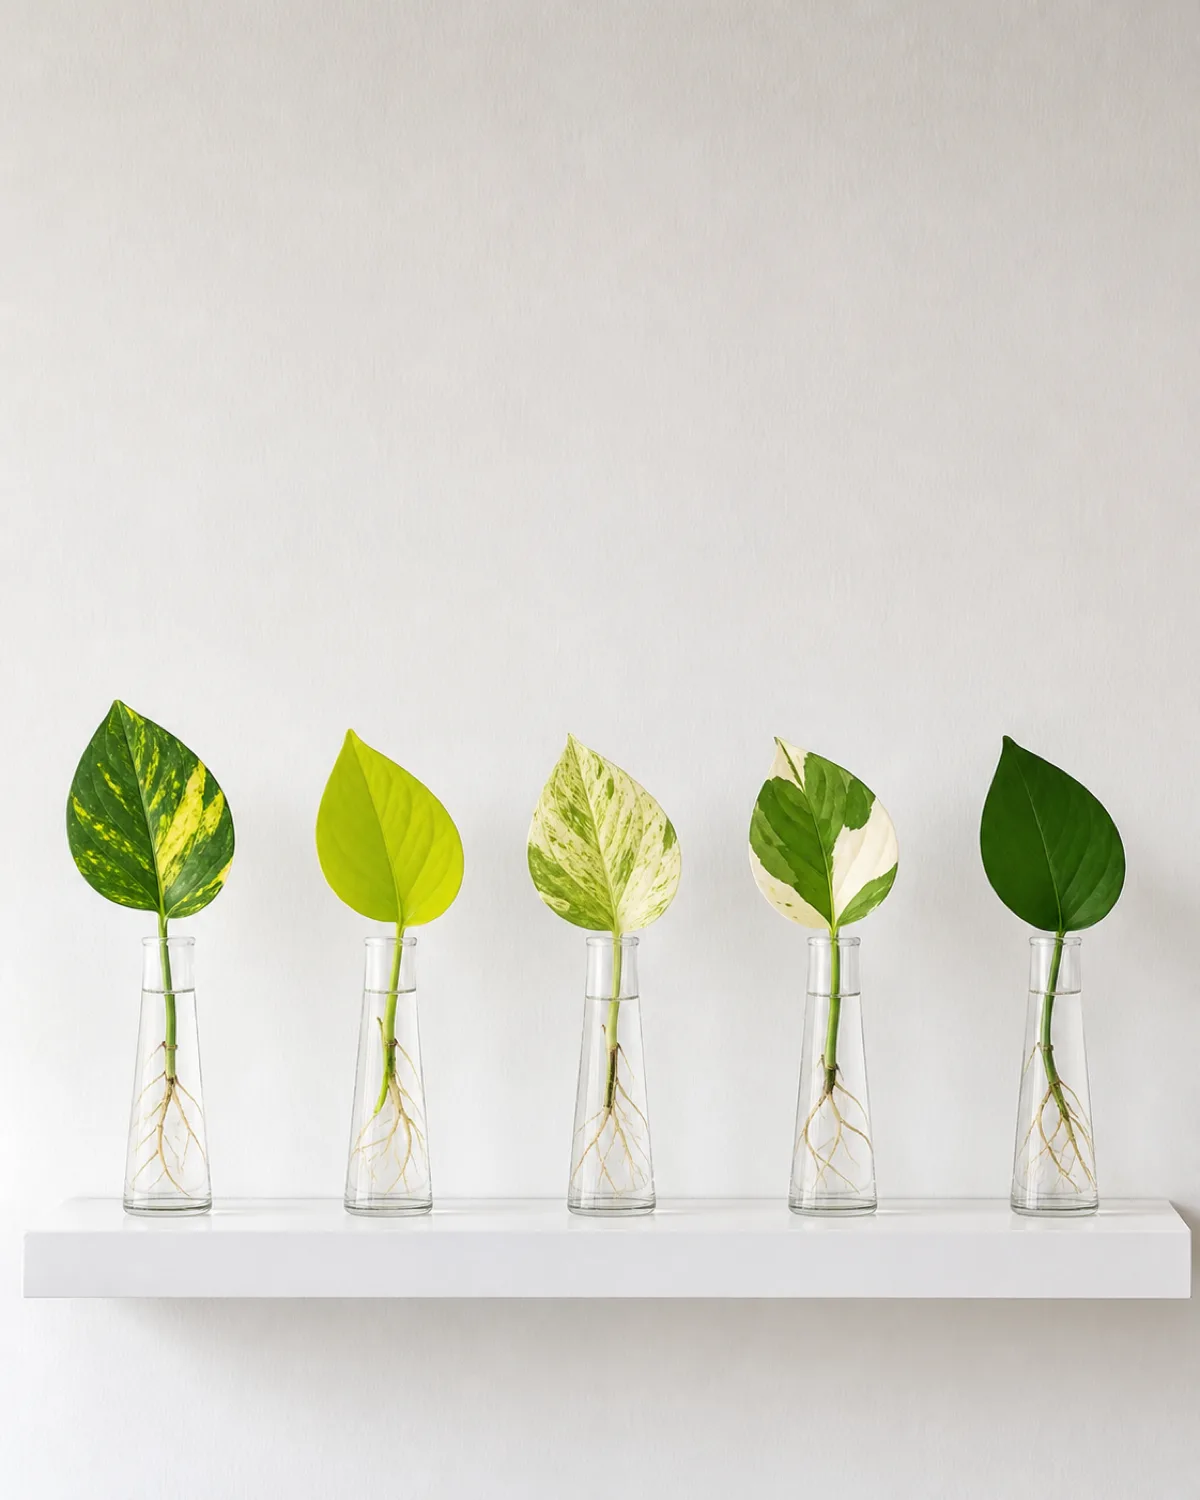
Where the desktop wood board is a batch processor, the bud vase row is a curated exhibition. Each vase holds exactly one cutting. The spacing between vases is deliberate. The overall effect is closer to a gallery wall than a gardening project.
Bud vases are designed for single flower stems, which makes them naturally sized for single plant cuttings. The narrow neck holds the stem upright without any support, and the flared base provides stability.
The strongest version of this setup uses five vases with five varieties of one species. The visual gradient tells a story:
- Pothos varieties gradient: golden (yellow splashes) → neon (bright chartreuse) → marble queen (white dominant) → Njoy (crisp blocks) → jade (solid dark green) — five shades of the same plant side by side
- Philodendron gradient: Brasil (tricolor) → heartleaf (solid green) → micans (bronze velvet) → lemon lime (bright yellow-green)
Place the row on a floating shelf, console table, mantle, or the back edge of a long desk. The linear arrangement demands a long narrow surface — a round table breaks the rhythm.
- Space each vase three to four inches apart, measured center to center
- All vases should be identical in shape and size — the variety is in the plants, not the containers
- Replace any cutting that reaches three-inch roots with a fresh cutting to keep the station permanently active
Rotating Seasonal Station
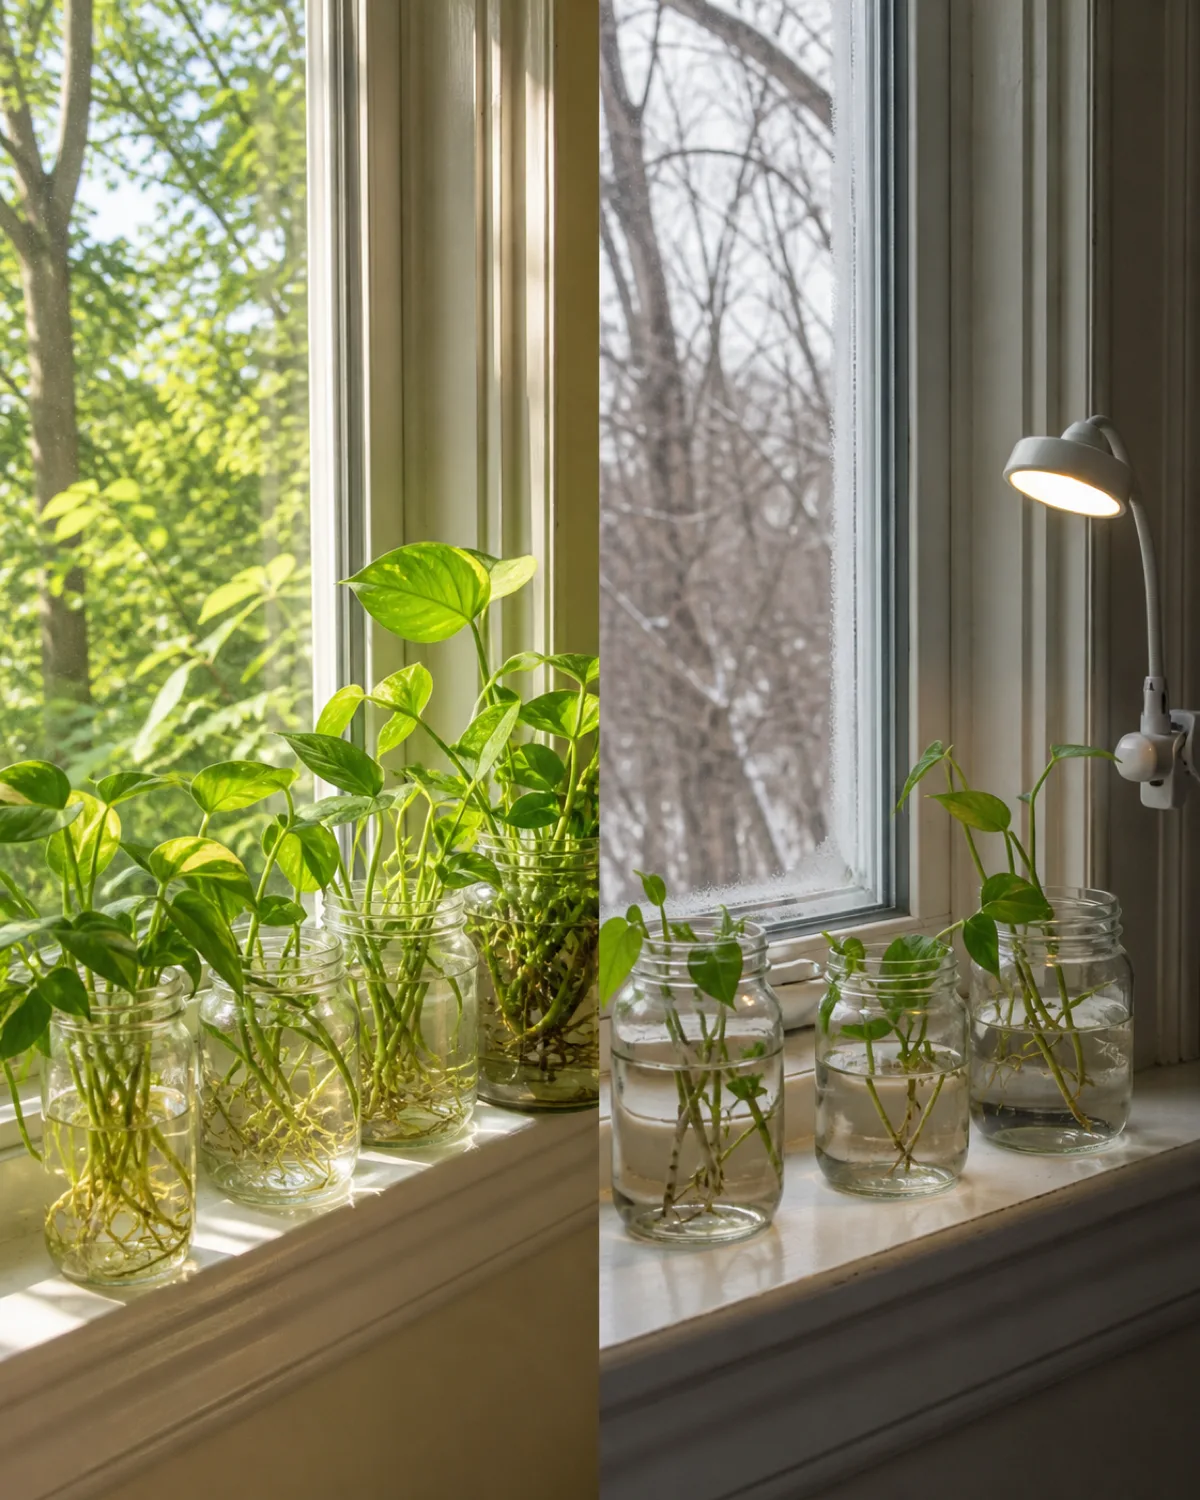
A propagation station is not a static installation. It follows the same seasonal rhythm that every houseplant follows, and ignoring that rhythm is how people end up with brown mushy cuttings in January.
Spring and summer are the expansion months. Plants are in active growth mode, hormones are flowing toward root production, and a cutting placed in water will show visible roots within one to three weeks for most species.
- March through September: Fill every slot, take cuttings aggressively during regular pruning, expect fast rooting
- October through February: Scale back to half capacity, choose only fast-rooters like pothos and tradescantia, expect rooting times to double or triple
Winter adjustments that keep the station productive:
- Move the station closer to the window or add a grow light — shortened daylight hours reduce the energy available for root building
- Avoid cold windowsills — water temperature below 60°F can stall root initiation entirely
- Switch to smaller vessels that require less water volume — large jars take longer to warm to room temperature after a water change
The rotation cycle works like this: cutting goes in → roots reach two to three inches → cutting transfers to soil → empty slot gets a fresh cutting → repeat. A well-managed station is a perpetual motion machine of free plants.
The plant propagation guide covers the seasonal timing for each propagation method.
Kitchen Windowsill Herb Propagation Bar
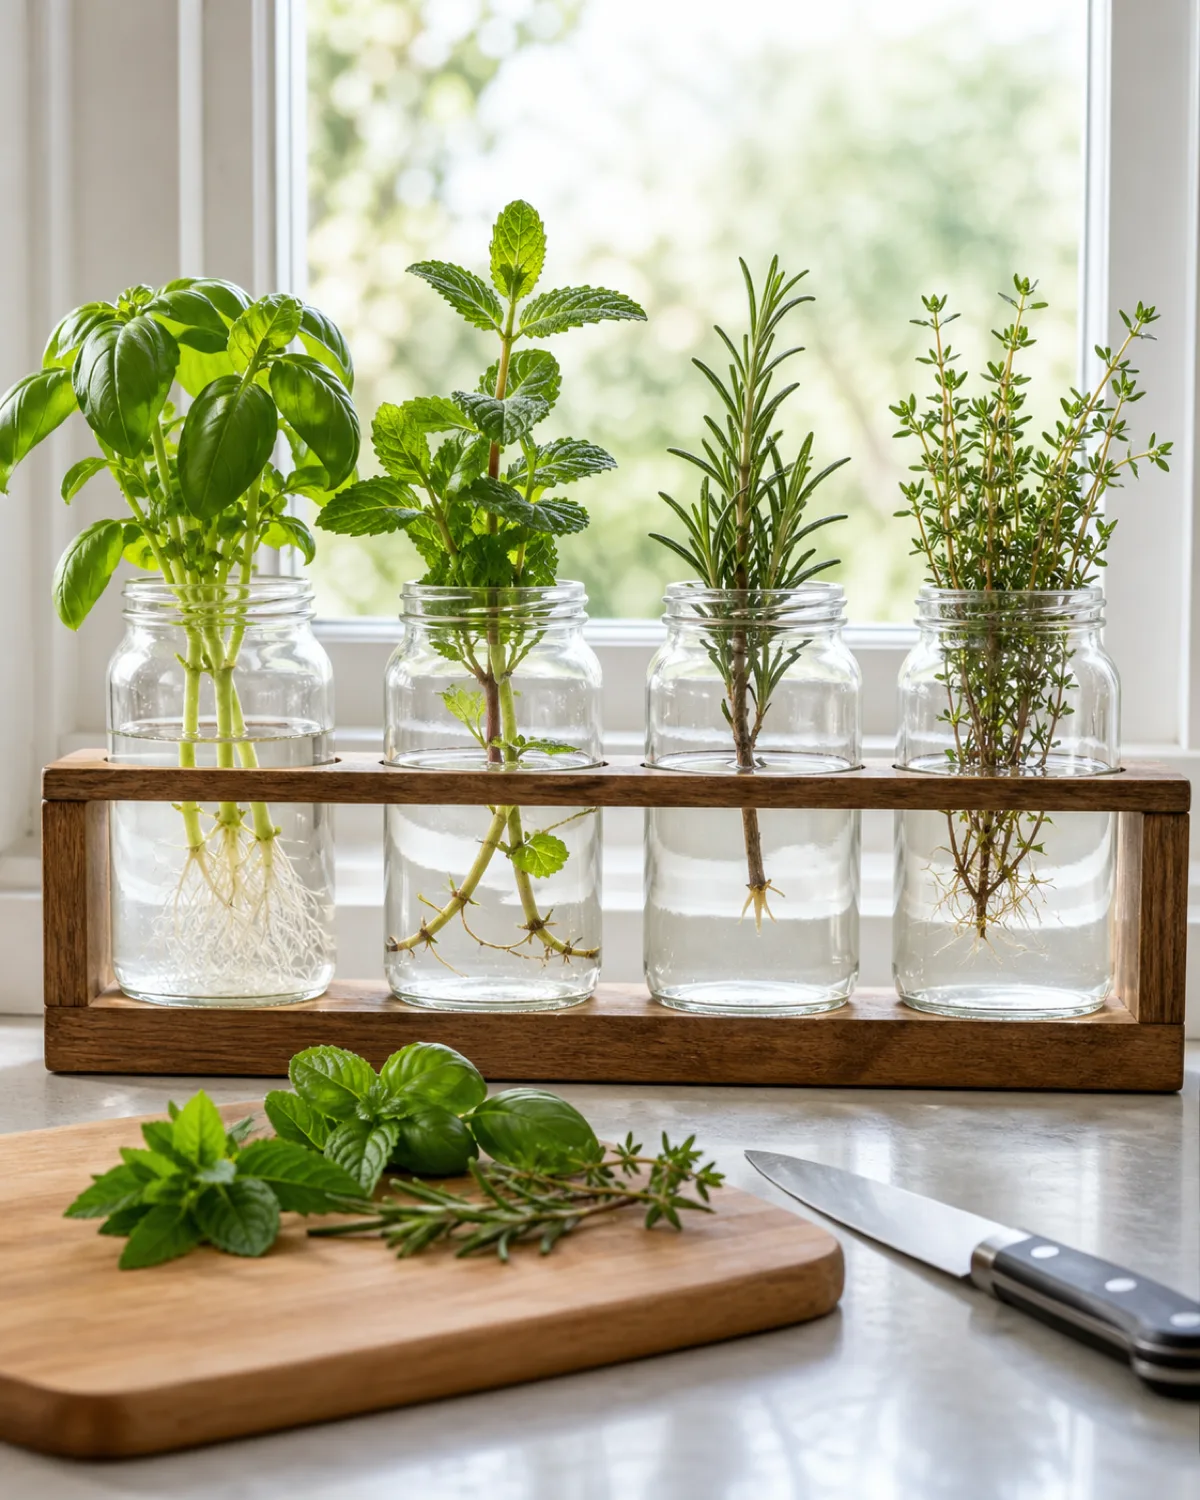
Every other station on this list produces ornamental plants. This one produces dinner.
A herb propagation bar on the kitchen windowsill turns grocery-store herb bundles into a self-renewing supply. Buy one bunch of basil, take five cuttings, root them in water on the windowsill, and never buy basil again.
Herb rooting speeds vary dramatically:
| Herb | Root appearance | Ready to harvest |
|---|---|---|
| Basil | 3 to 5 days | 2 to 3 weeks |
| Mint | 5 to 7 days | 3 to 4 weeks |
| Oregano | 7 to 10 days | 4 to 5 weeks |
| Thyme | 14 to 21 days | 6 to 8 weeks |
| Rosemary | 21 to 42 days | 8 to 12 weeks |
Basil and mint can live permanently in water. They grow fast enough to harvest repeatedly without transferring to soil. Rosemary and thyme root so slowly in water that soil propagation is often more practical — but the visual of woody herb stems slowly developing fine white roots has its own appeal.
The kitchen plants guide covers which edible and ornamental plants thrive in the humidity, warmth, and variable light of a kitchen environment.
- Strip all leaves below the waterline — submerged herb leaves rot faster than ornamental plant leaves because they are thinner and softer
- Change water every three to four days for herbs, not the five to seven that ornamental cuttings tolerate — the organic compounds from herbs cloud water faster
- Position the bar on a windowsill that gets at least four hours of direct morning light — herbs are sun plants, not shade plants
Test Tube Chandelier
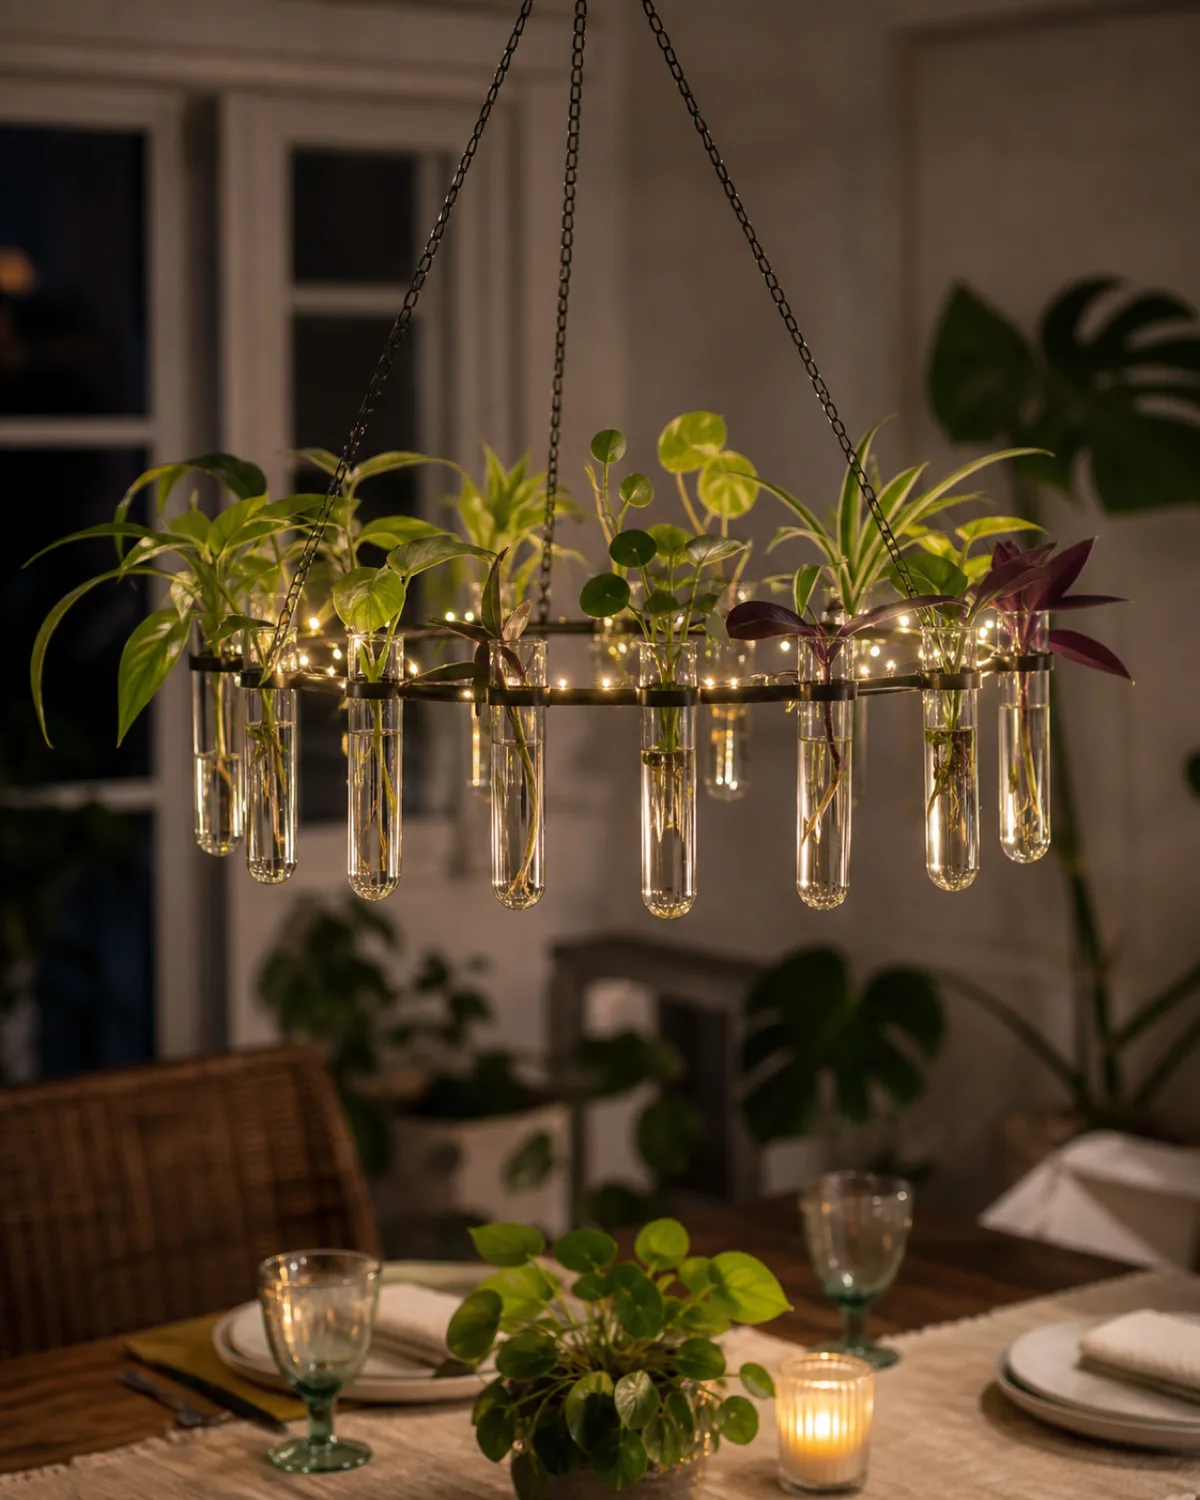
This is the statement piece that makes people stop mid-sentence when they walk into the room.
A test tube chandelier suspends twelve to twenty tubes from a metal or wood frame hanging from the ceiling. Each tube holds water and a cutting. The ring shape puts the tubes in a circle, creating a crown of growing roots visible from every seat at the table below.
Frame options:
- Metal hoop: Clean, industrial, available as embroidery hoops or welding rings — spray paint matte black or brass
- Wood ring: Warm, natural, slightly more difficult to source — look for quilting hoops or bent plywood rings
- Geometric wire frame: Hexagon or triangle — architectural, bold, harder to make tubes sit evenly
Wrap a string of warm-white LED fairy lights around the frame. At night, the lights illuminate the water and roots from behind, and the effect is genuinely spectacular — each tube glows like a tiny lantern filled with living green and white.
- Total weight of twenty filled test tubes plus frame is roughly two to three pounds — a standard ceiling hook rated for five pounds handles it easily
- Hang over a dining table, kitchen island, or reading chair — the tubes need to be at a height where people look up and see the roots, not at head-bonking level
- This setup requires a step stool for weekly water changes — plan the hanging height with maintenance access in mind
Bookshelf Integration Station
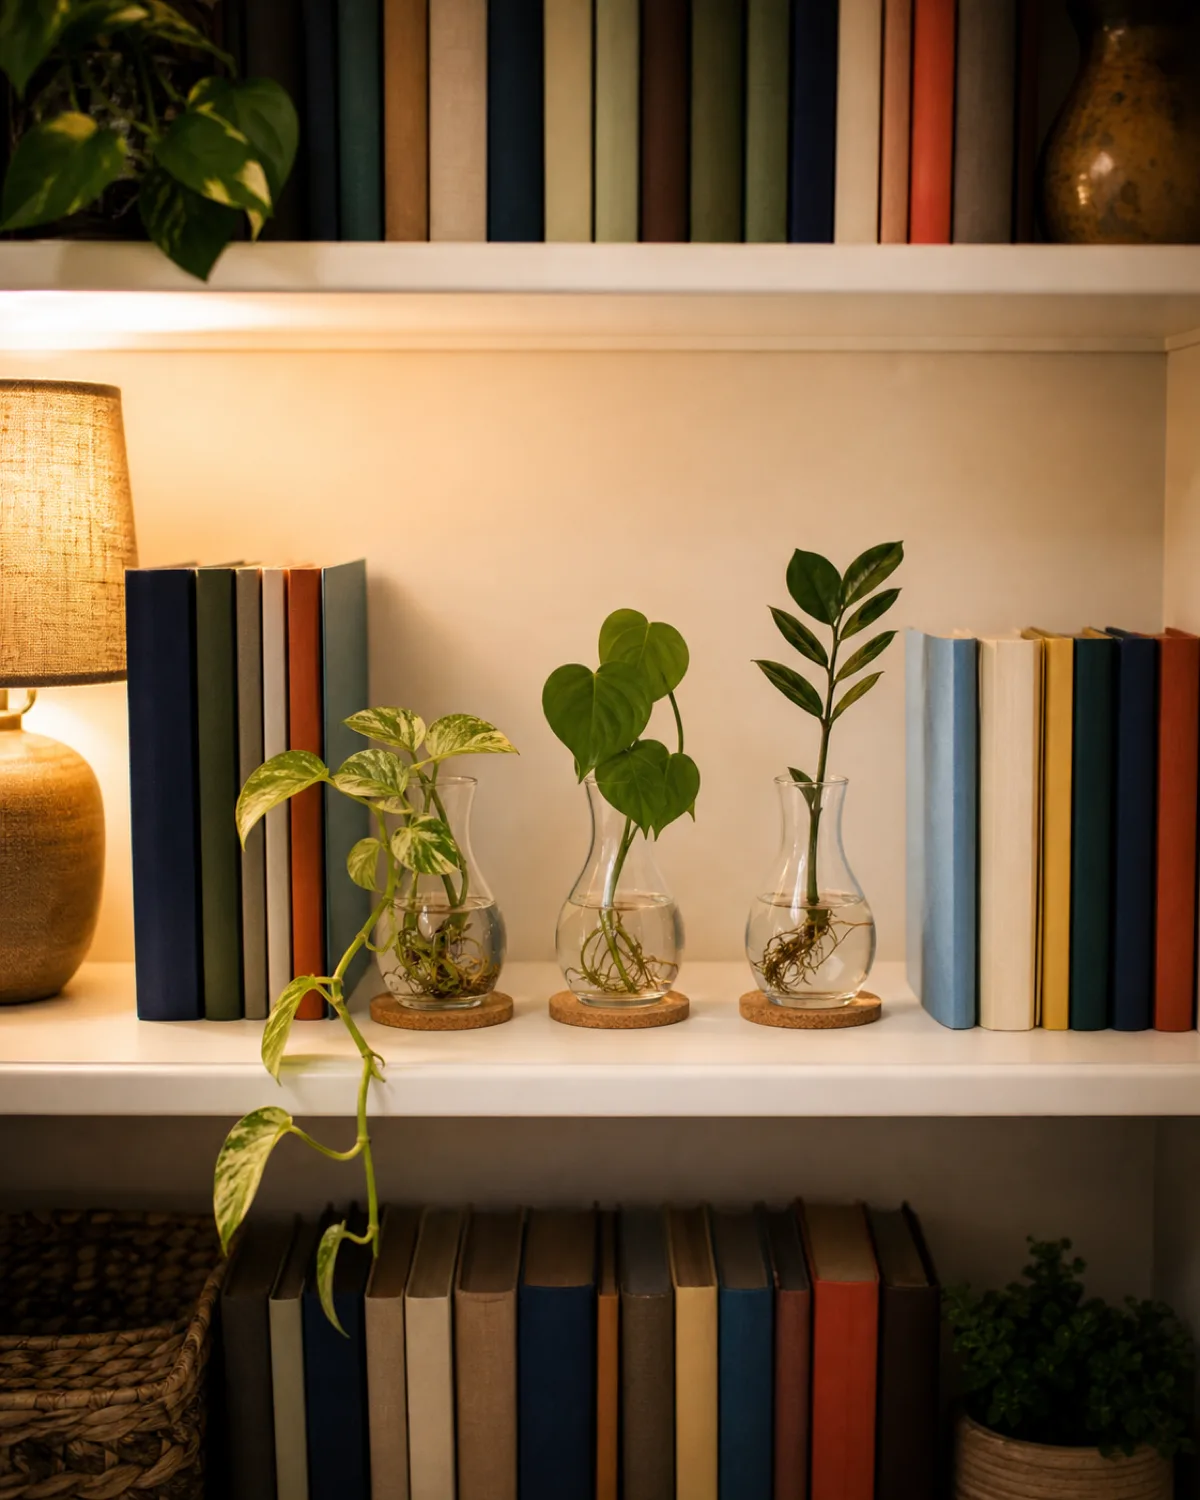
Not every propagation station needs its own furniture. The best one might be the twelve inches of bookshelf you clear between two stacks of novels.
Integration means the station shares space with non-plant objects. The glass vessels sit between books, next to a framed photo, under a small sculpture. The plants become one element in a styled vignette rather than the entire display.
The key is restraint. Three matched vessels on one shelf. Not seven random jars on three shelves.
- Choose a shelf at eye level — propagation vessels below waist height are invisible, and above head height requires a step stool for water changes
- Place a cork coaster or small waterproof mat under each vessel to protect the shelf from moisture rings
- Select cuttings that tolerate the lower light levels of a bookshelf interior — pothos and philodendron root in remarkably dim conditions, while most other species struggle without supplemental light
The trailing effect of a pothos cutting growing over the edge of a bookshelf and draping down across book spines is one of the most photographed propagation displays on Pinterest. Let the vine grow instead of transferring to soil, and the cutting becomes a permanent shelf resident.
The low-light plants guide has more species that root and grow in the dim interior of furniture.
How to Keep Every Station Healthy
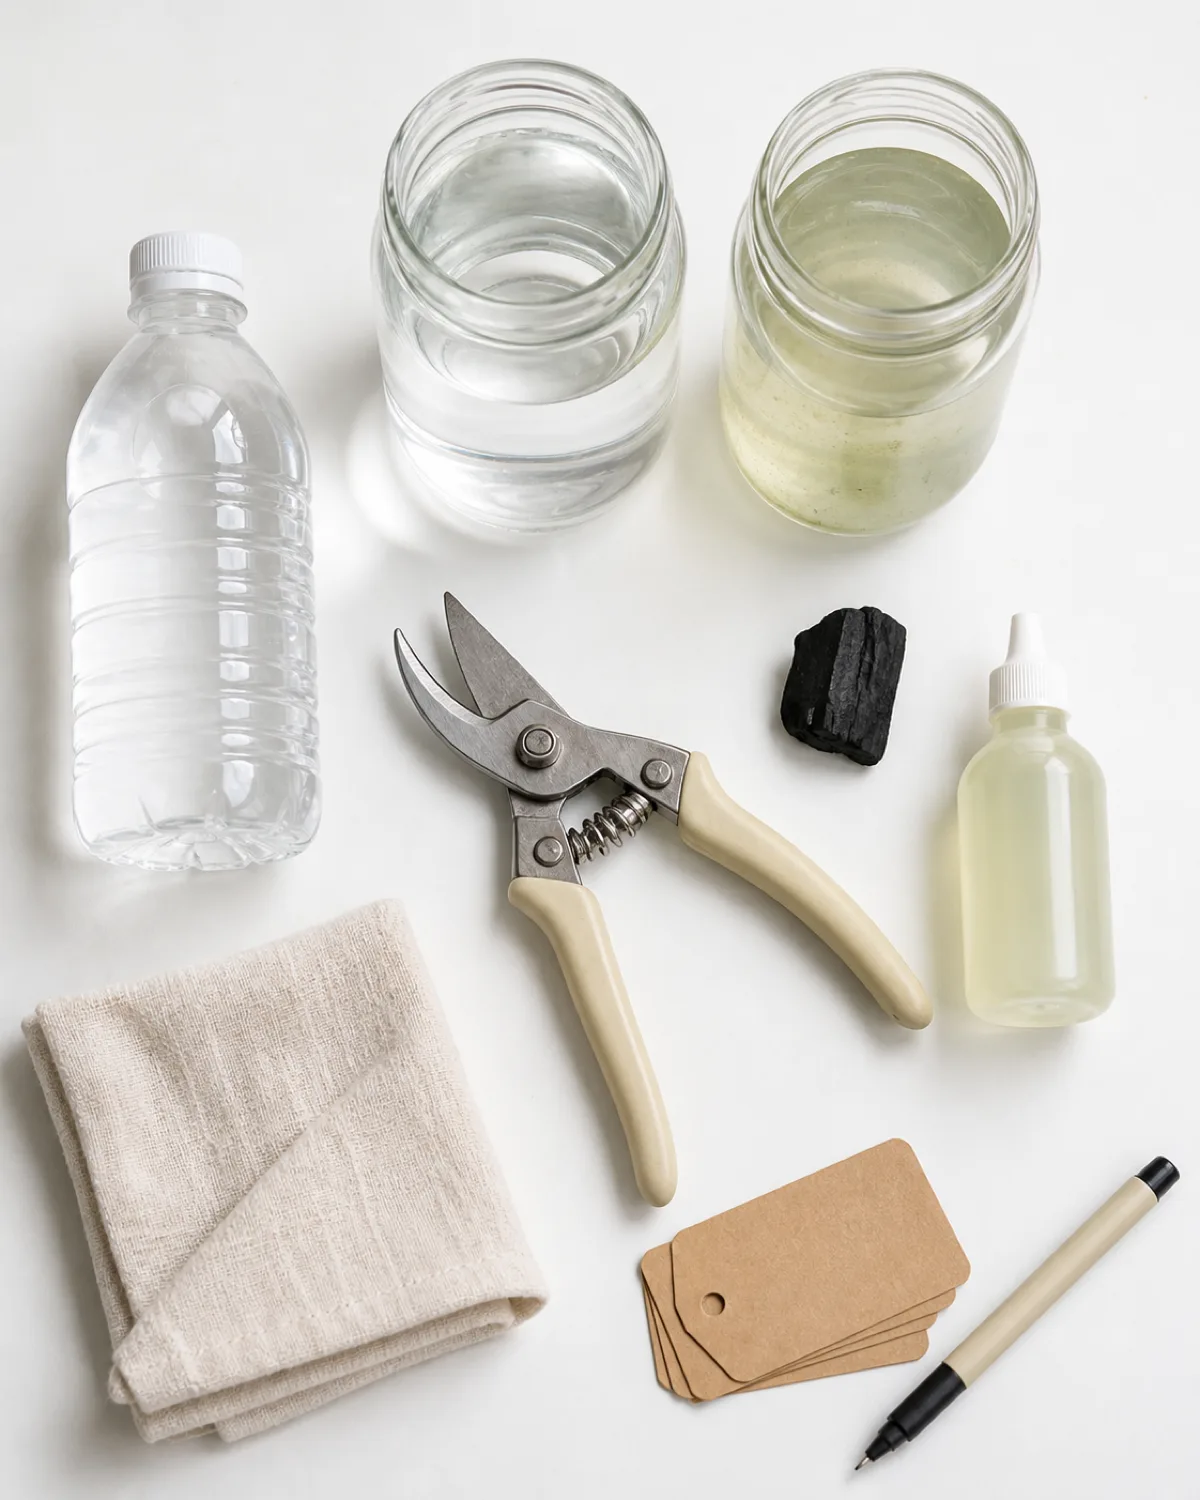
Every setup on this list shares the same maintenance needs. The vessel shape changes, but the biology inside does not.
Water quality is the single biggest factor in rooting success. Tap water works for most species if you let it sit in an open container for 24 hours to off-gas chlorine. Sensitive species like calathea and prayer plant cuttings prefer filtered or distilled water.
Water changes happen on a strict schedule — dump and replace every five to seven days. Topping off looks easier but concentrates bacteria and dissolved waste. The visual test: if the water is not crystal clear, it is overdue for a change.
- Water temperature should match room temperature (65 to 75°F) — cold water from the tap shocks root cells and stalls growth for days
- Water level must cover the node by at least one inch but keep all leaves above the waterline — a single submerged leaf decomposes and poisons the water for every other cutting in the same vessel
- Algae prevention: Keep vessels out of direct sunlight, use opaque or colored glass in sunny spots, and add one small piece of activated charcoal per vessel
Transfer timing is the decision most people get wrong. Roots need to reach two to three inches before transfer to soil. Shorter roots have low survival rates. But roots longer than four to five inches have adapted to water and struggle to transition — the longer a cutting stays in water past the transfer window, the harder the adjustment.
Signs a cutting is failing and needs intervention:
- Stem turning black from the cut end up: Stem rot — the cutting was too deep in water, or water was not changed frequently enough — remove, trim above the rot to healthy tissue, let the cut dry for an hour, restart in fresh water
- Leaves yellowing but roots look healthy: The cutting has exhausted its stored nutrients — add a tiny amount of liquid fertilizer (one-quarter strength) to the water
- No root growth after three weeks: Insufficient light — move the station closer to a window or add a grow light
16 propagation station setups at a glance
- 1Roots behind glass deserve permanent displayThe fractal geometry of growing roots is living art that potted plants hide. Make the rooting process the point, not a temporary step.
- 2Single test tube on a wood standOne cutting, one tube, one block of wood. The minimum viable propagation station that works as a desk accessory. Walnut, oak, or pine.
- 3Wall-mounted test tube rackThree to seven tubes in a row at eye level. Fill with a pothos variety gradient for a color shift that reads from across the room.
- 4Tiered wood shelf stationThree levels create a botanical ladder. Big monstera jars at the bottom, medium philodendron bottles in the middle, tiny tradescantia tubes on top.
- 5Mason jar cluster on a trayThree to five wide-mouth jars grouped on a round tray. Cheapest setup on the list. Kraft paper tags with dates turn it into a documented experiment.
- 6Hanging glass globesTeardrop orbs on fishing line. The only setup with 360-degree root visibility. Keep cuttings lightweight — string of hearts, tradescantia, small philodendron.
- 7Desktop multi-hole wood boardOne thick slab, eight to twelve drilled holes, eight to twelve simultaneous cuttings. Thirty-minute DIY with a Forstner bit. Batch propagation headquarters.
- 8Window shelf propagation barAcrylic shelf spanning the window frame at mid-height. Identical vessels in a row. Backlit roots at eye level. East or north windows are best.
- 9Vintage bottle collectionNothing matches and that is the point. Amber and cobalt glass reduce algae. Thrift store finds arranged tallest-back, shortest-front on a floating shelf.
- 10Station with built-in grow lightA clip-on LED frees the station from window dependence. Full-spectrum white, six to twelve inches away, twelve to fourteen hours on a timer.
- 11Minimalist bud vase rowFive identical narrow vases, five varieties of one species, one color gradient. Gallery-level curation on a floating shelf or console table.
- 12Rotating seasonal stationScale up in spring and summer, scale back in winter. Fast-rooters only from October through February. Add a grow light when daylight drops.
- 13Kitchen windowsill herb barThe station that feeds you. Basil roots in three to five days and lives permanently in water. Rosemary takes six weeks. Change herb water every three to four days.
- 14Test tube chandelierTwelve to twenty tubes on a hoop frame hung from the ceiling. Wrap in fairy lights for a nighttime glow effect. Statement piece for above a dining table.
- 15Bookshelf integration stationThree matched vessels between books on one shelf. Cork coasters protect the wood. Pothos trailing over the edge is the Pinterest money shot.
- 16Full water change every five to seven daysDump and replace, never top off. Transfer to soil at two to three inches of root length. Charcoal absorbs toxins. Quarter-strength fertilizer for yellow leaves.
kultivy.com
Every propagation station is a system with a built-in refresh cycle. Cuttings go in, roots grow, plants come out, new cuttings replace them. The station itself stays on the shelf permanently. The plants inside it are always changing, always growing, always giving you something new to look at on the way to the kitchen.

Mara writes plant care guides grounded in published botany and first-hand growing experience, not recycled social-media advice. Every recommendation on Kultivy is tested against real-world conditions before it reaches your screen. More about our editorial standards.