Every houseplant you already own is a free plant factory, and most beginners still buy a second one instead of cutting a piece off the first. The reason cuttings fail is almost never bad luck — it’s one missing detail: no node in the water, a leaf in soggy soil, a cutting potted up too soon.
Propagation means growing a new plant from a piece of one you already have: a stem cutting, a division of the root ball, or a baby plantlet the parent already grew for you. Each method below rests on one piece of plant anatomy, not a green thumb.
Know your plant already? Jump to pothos, monstera, or the plants that clone themselves. Otherwise start with the node below — it decides everything else.
Free plants start with the right method for the plant you already own. The twelve sections below cover water and soil cuttings, division, self-cloning plantlets, the node rule that decides success, and the fixes for cuttings that keep rotting.
Water propagation: the easiest place for a beginner to start
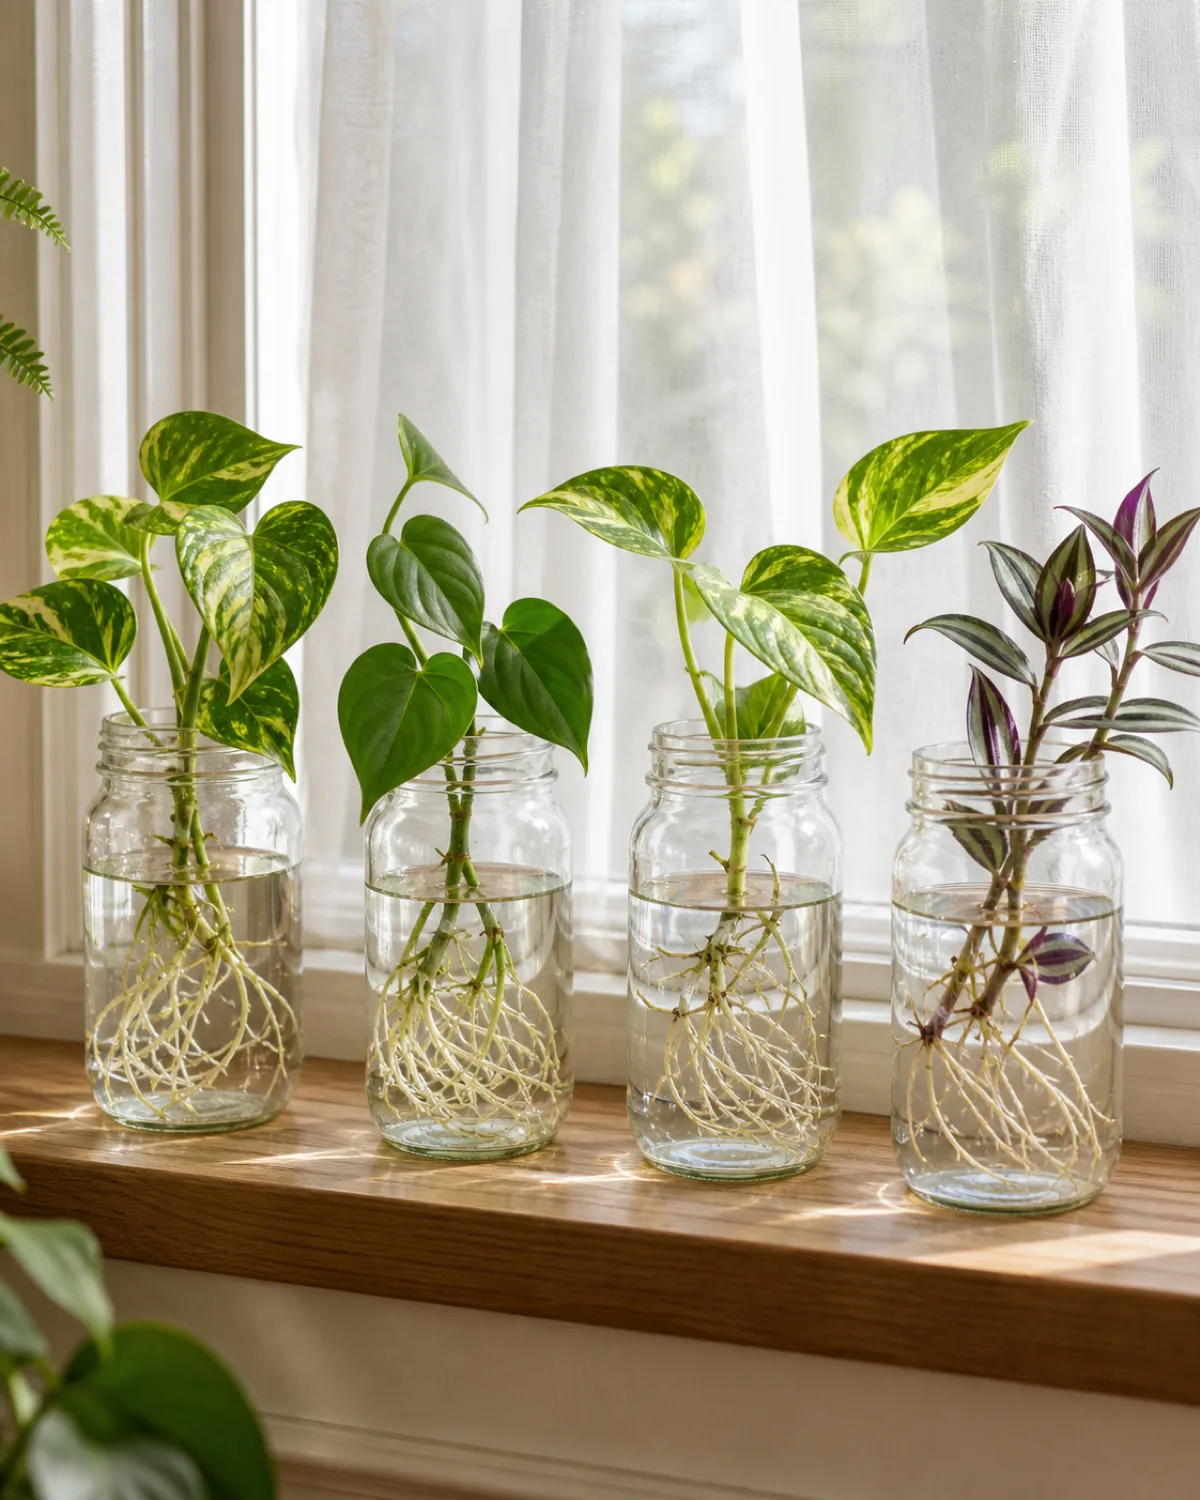
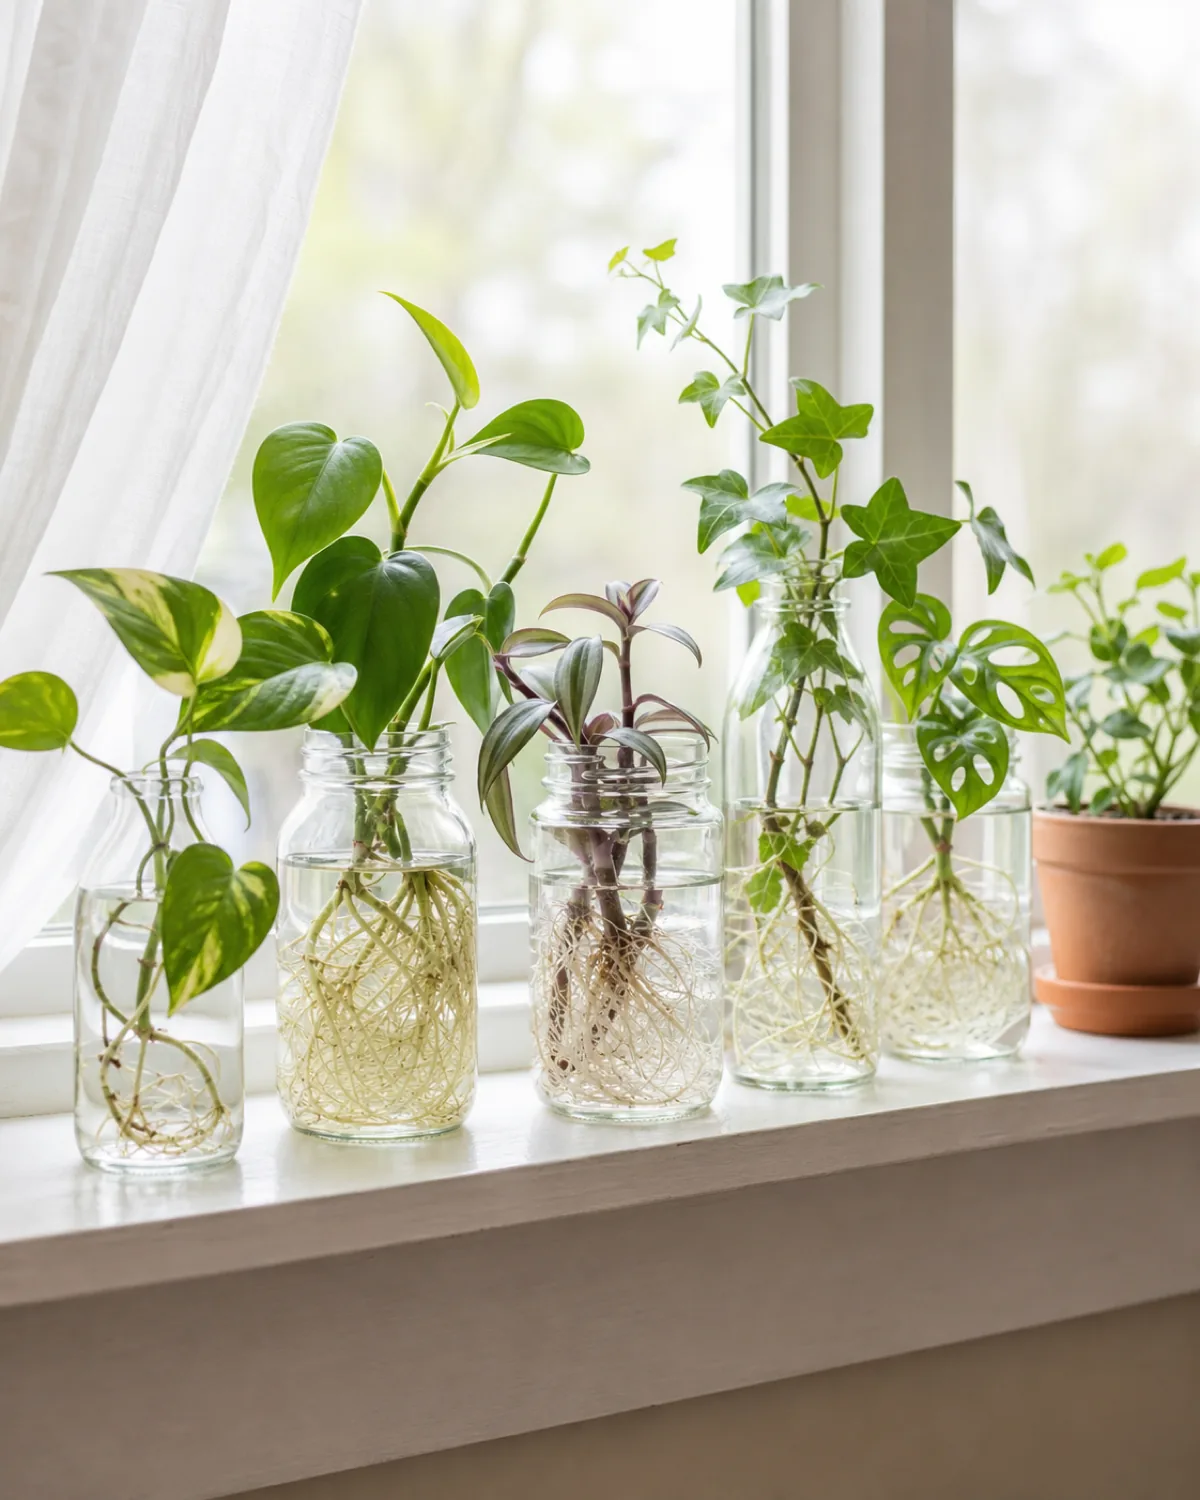
Submerging a cut stem in a glass of water lets you watch the roots form, and that visibility is what makes water propagation the right place to start. It removes the guesswork that makes beginners give up on a method they can’t see progress on. It works because many tropical vines are built to push roots out from any node that sits in moisture, no soil required.
Pothos, philodendron, monstera, tradescantia, and coleus all take to a glass of water readily. The trade-off is that water roots are thinner and more brittle than the roots a plant grows in soil, so the longer a cutting lives in water, the harder its eventual move to soil becomes.
- Use a clear glass or jar so you can actually see the roots develop and catch problems early.
- Submerge at least one node, never just a bare stem with no node touching the water.
- Don’t leave it in water for months just because it looks happy — pot it up once roots form.
Find the node: the one rule that decides whether a cutting roots
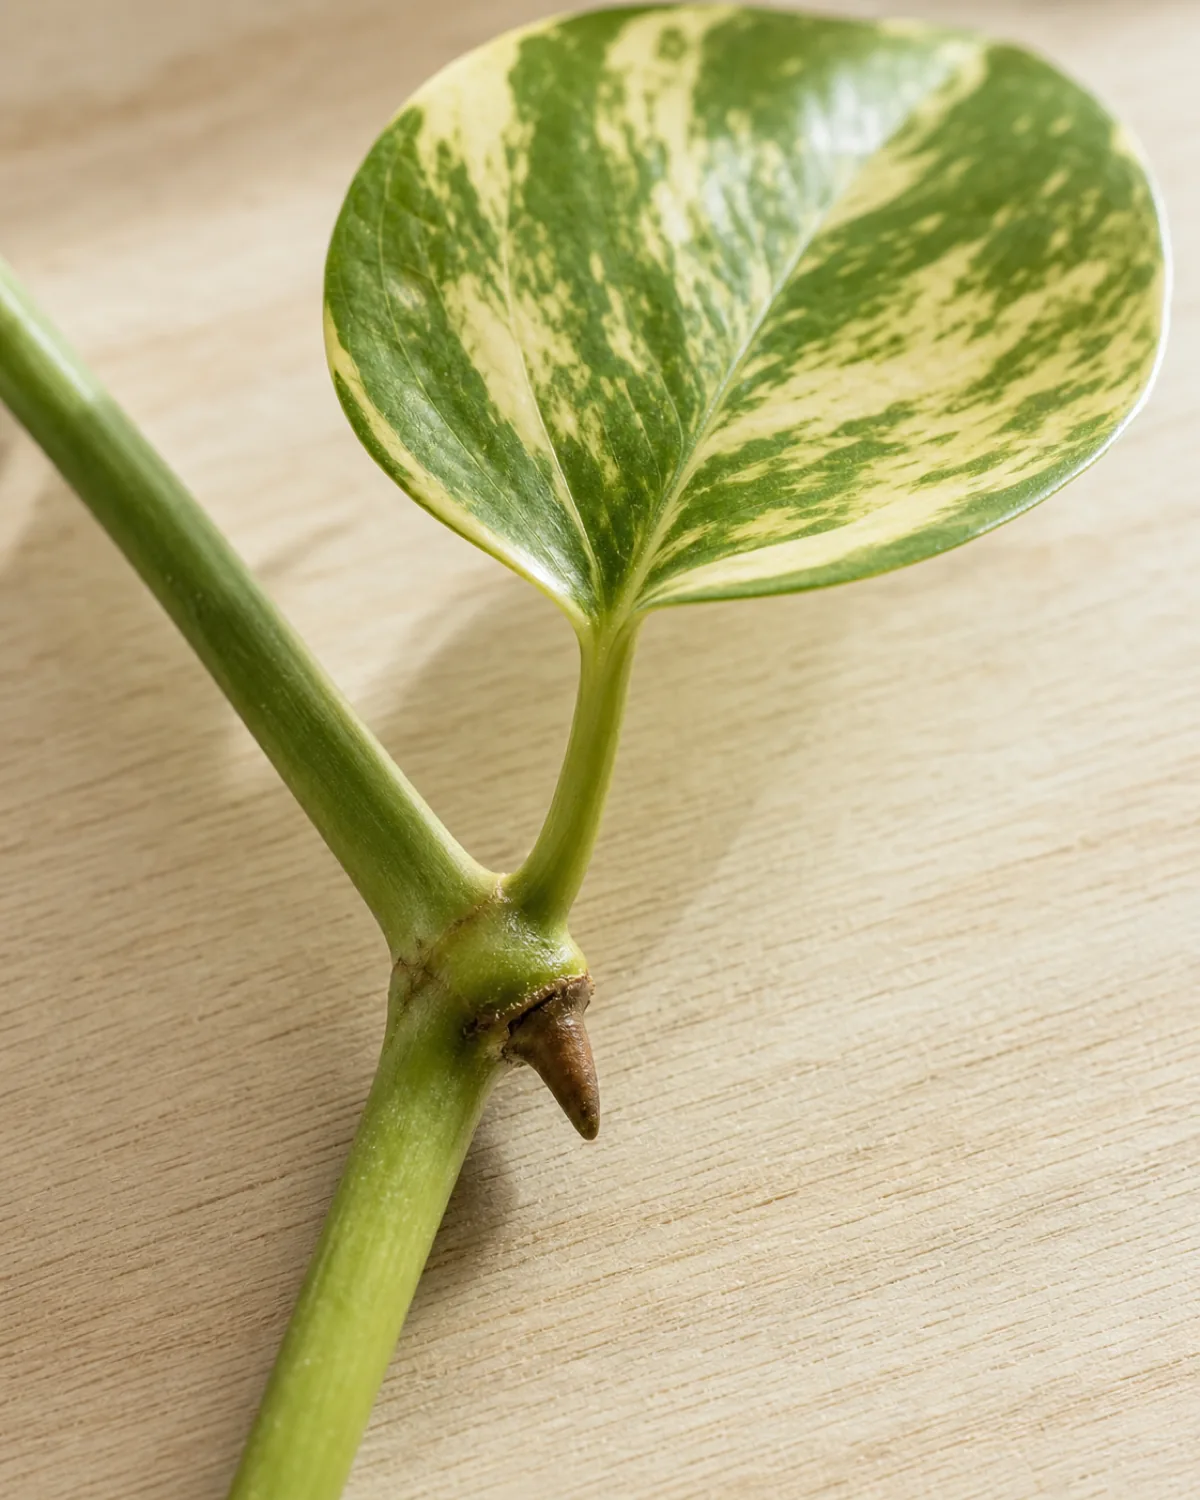
A node is the slightly swollen bump on a stem where a leaf, bud, or aerial root emerges, and it is the only spot on the whole cutting that contains the cells capable of becoming roots. A leaf with no node attached can sit in water for weeks looking fine and then rot, because there was never a route to grow roots in the first place.
This single piece of anatomy explains most failed beginner cuttings. People cut a leaf they like the look of, skip past the stem, and wonder why nothing happens.
- Look for the bump on the stem where a leaf or bud attaches — that’s the node.
- Check for a leaf scar or a small brown nub, which is often an aerial root already forming.
- Cut just below a node, never between two nodes, so the node itself sits in water or soil.
Pothos and heart-leaf philodendron: the foolproof first cuttings
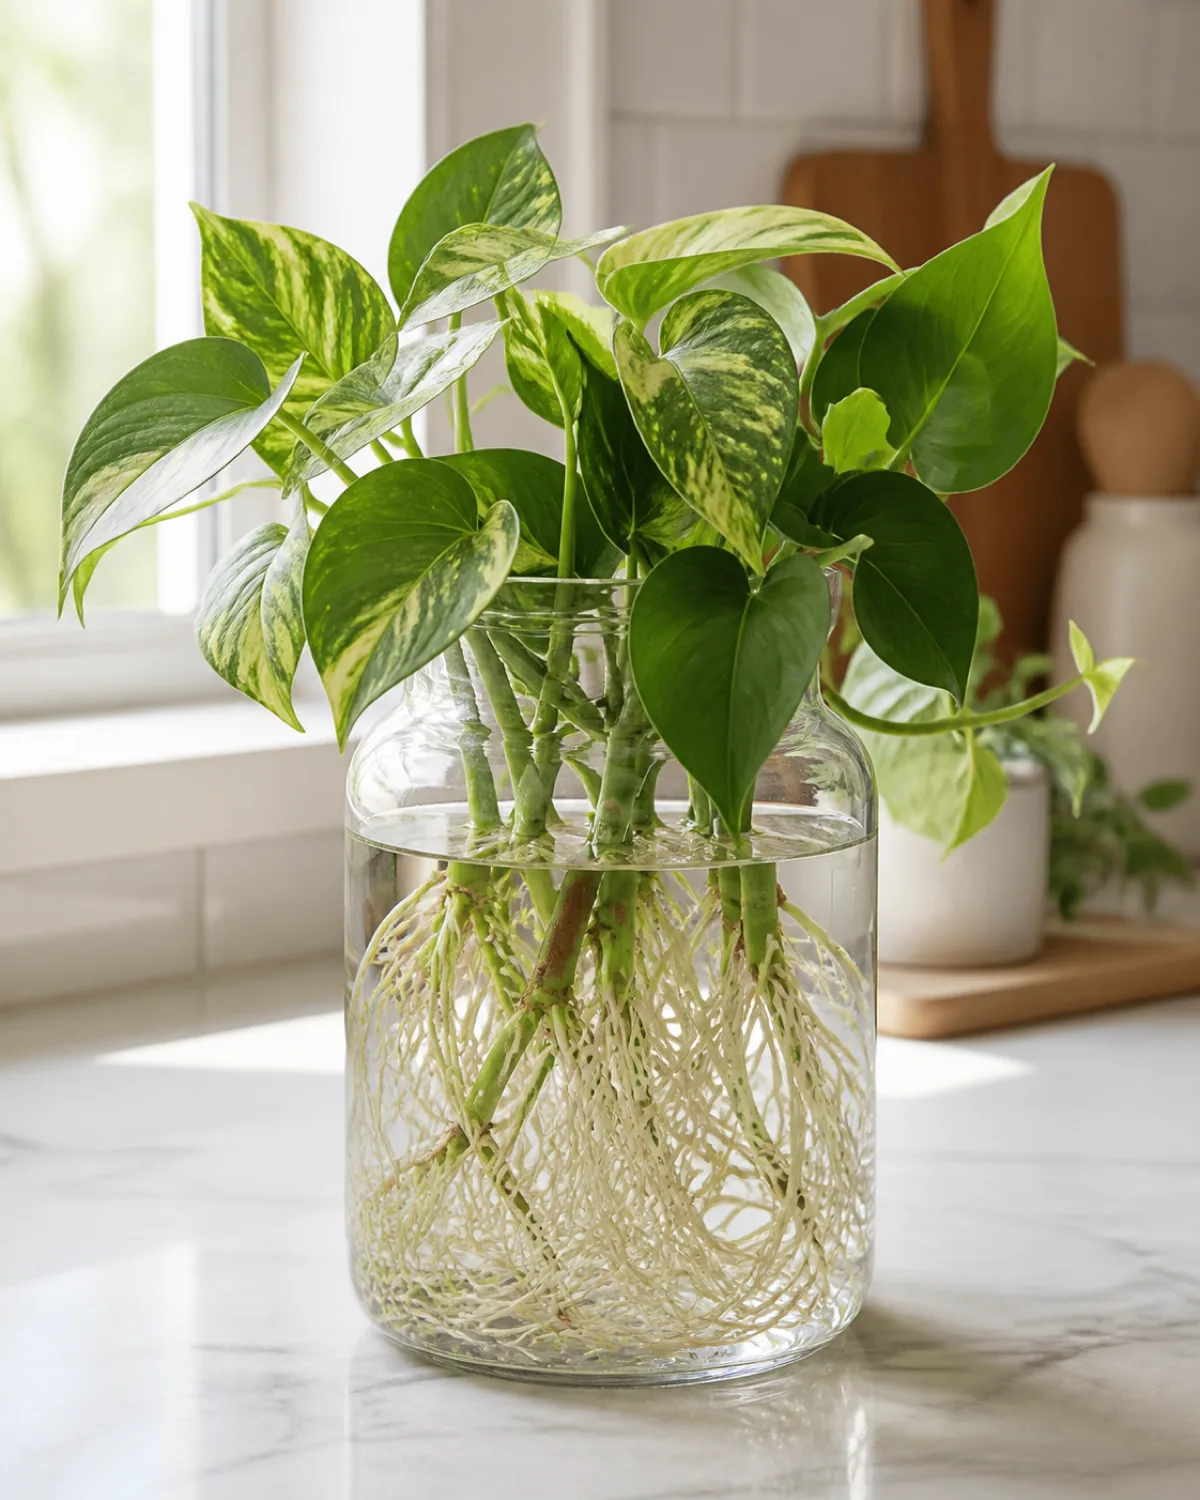
These two vines root so reliably in plain water that they’re the cuttings to learn on before risking anything fussier. Both grow with obvious nodes every few inches, so a four-to-six-inch cutting with two or three nodes will root in one to two weeks on an ordinary windowsill, no special setup needed.
If you want the full picture of keeping the parent plant thriving once your cuttings are potted up, the full pothos care guide covers light, watering, and the common leaf problems.
- Cut a 4-6 inch length with two or three nodes below the growing tip.
- Strip any leaf that would sit underwater, keeping only the top leaves above the surface.
- Cut just below a node, not between nodes, or none of it will end up submerged.
Most failed cuttings trace back to one of four blind spots. Start with whichever situation describes yours, then circle back to the rest later.
Monstera: propagating from a node with an aerial root
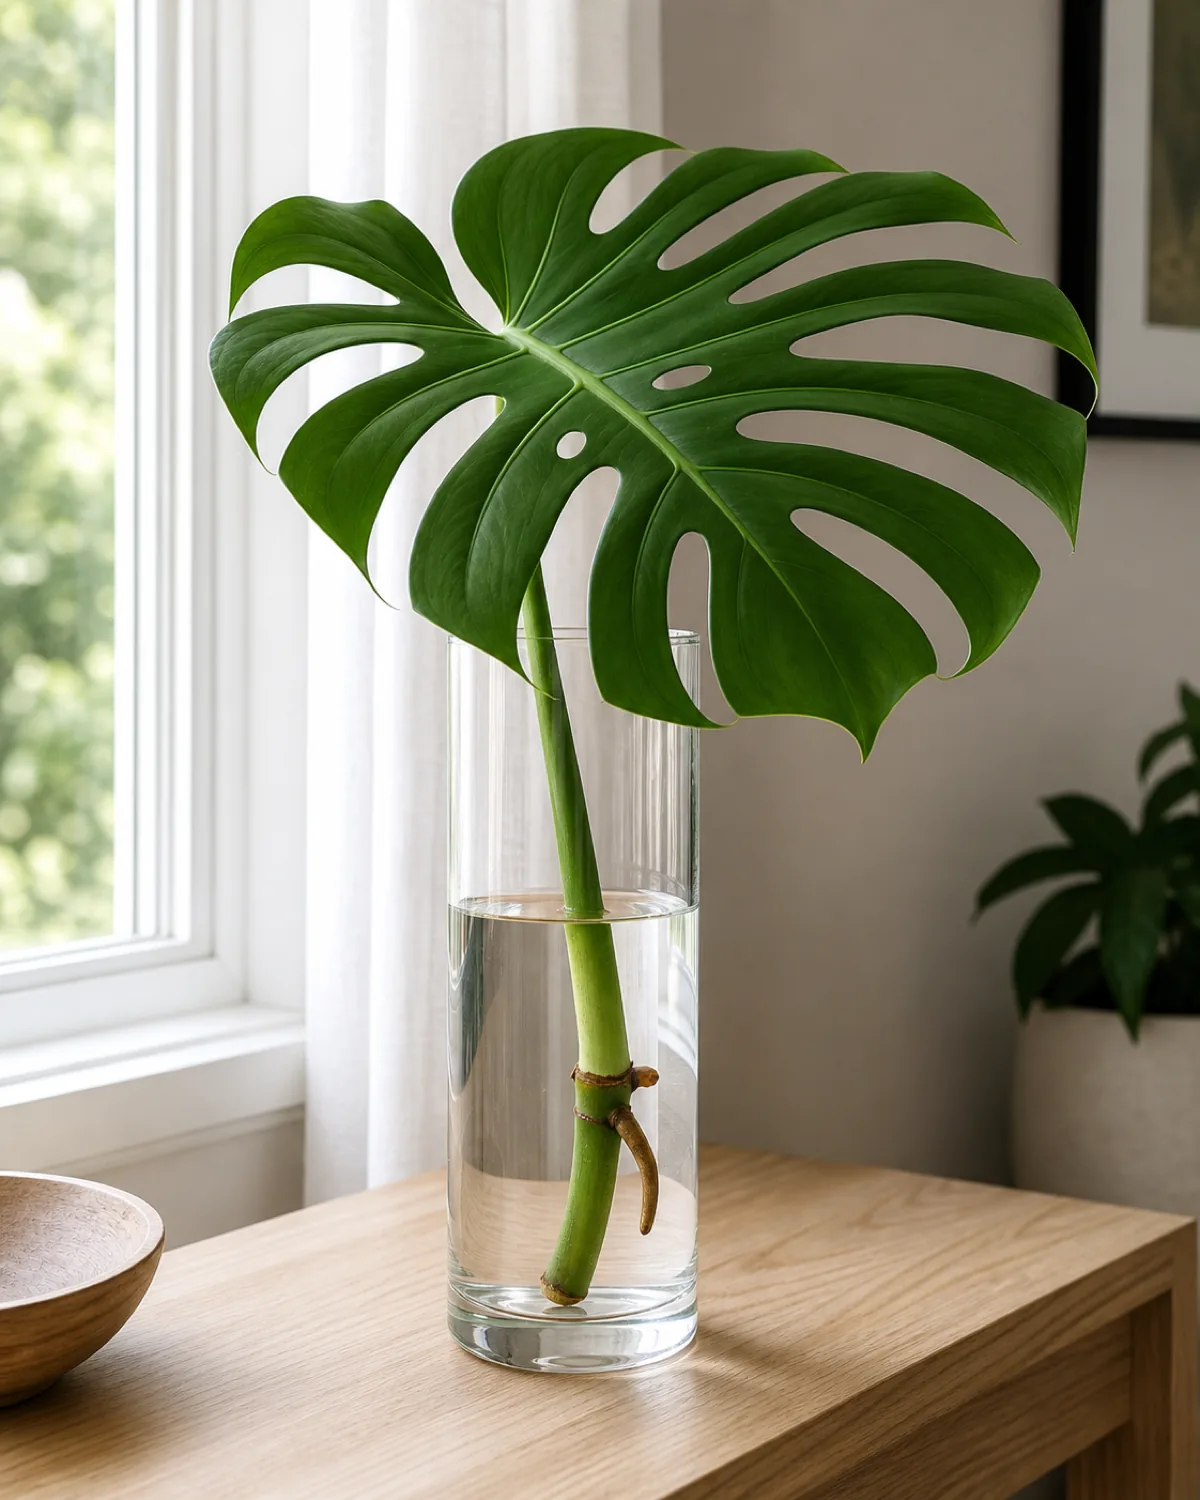
Monstera cuttings root fastest when the cutting includes a node plus the stubby brown aerial root that often grows right beside it, because that aerial root converts to a functioning water root quickly once it’s submerged. A leaf on its own, even a big beautiful fenestrated one, will never grow a new plant no matter how long you wait.
For everything else about keeping a monstera happy long after the cutting takes root, the complete monstera care here guide covers light, climbing supports, and fenestration.
- Cut just below a node that already has an aerial root attached beside it.
- Leave one leaf on the cutting so it can keep photosynthesizing while roots form.
- Submerge only the node and aerial root, not the leaf itself.
Snake plant and ZZ: why division beats cuttings
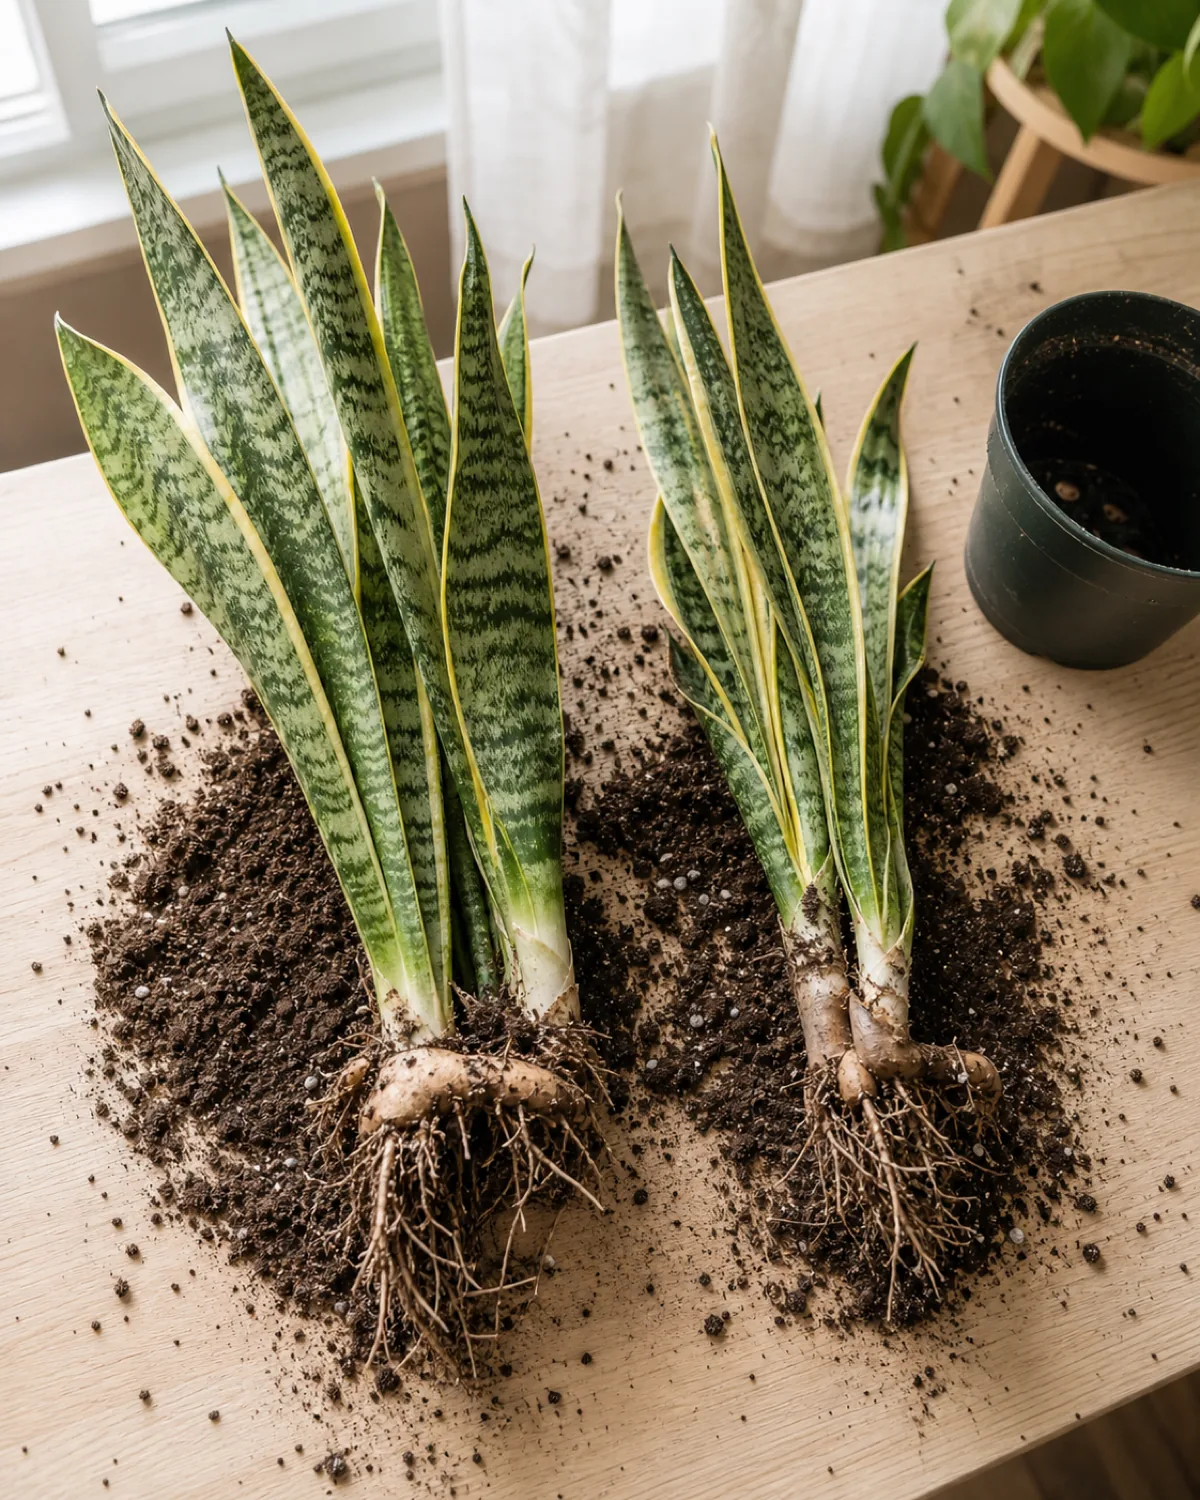
Clumping plants that grow from an underground rhizome multiply fastest by being unpotted and split apart, because each section already carries its own roots and its own growth point. There’s no waiting around for new roots to form at all.
A snake plant leaf will technically root in a glass of water, but it loses its variegation in the process and takes months to turn into a real plant, while division hands you a finished plant the same day.
- Slice the rhizome between fans with a clean knife or your hands.
- Give each section at least one leaf and a chunk of root before separating it.
- Pot each division into its own pot right away, no rooting period needed.
Spider plant and pilea: the plants that propagate themselves
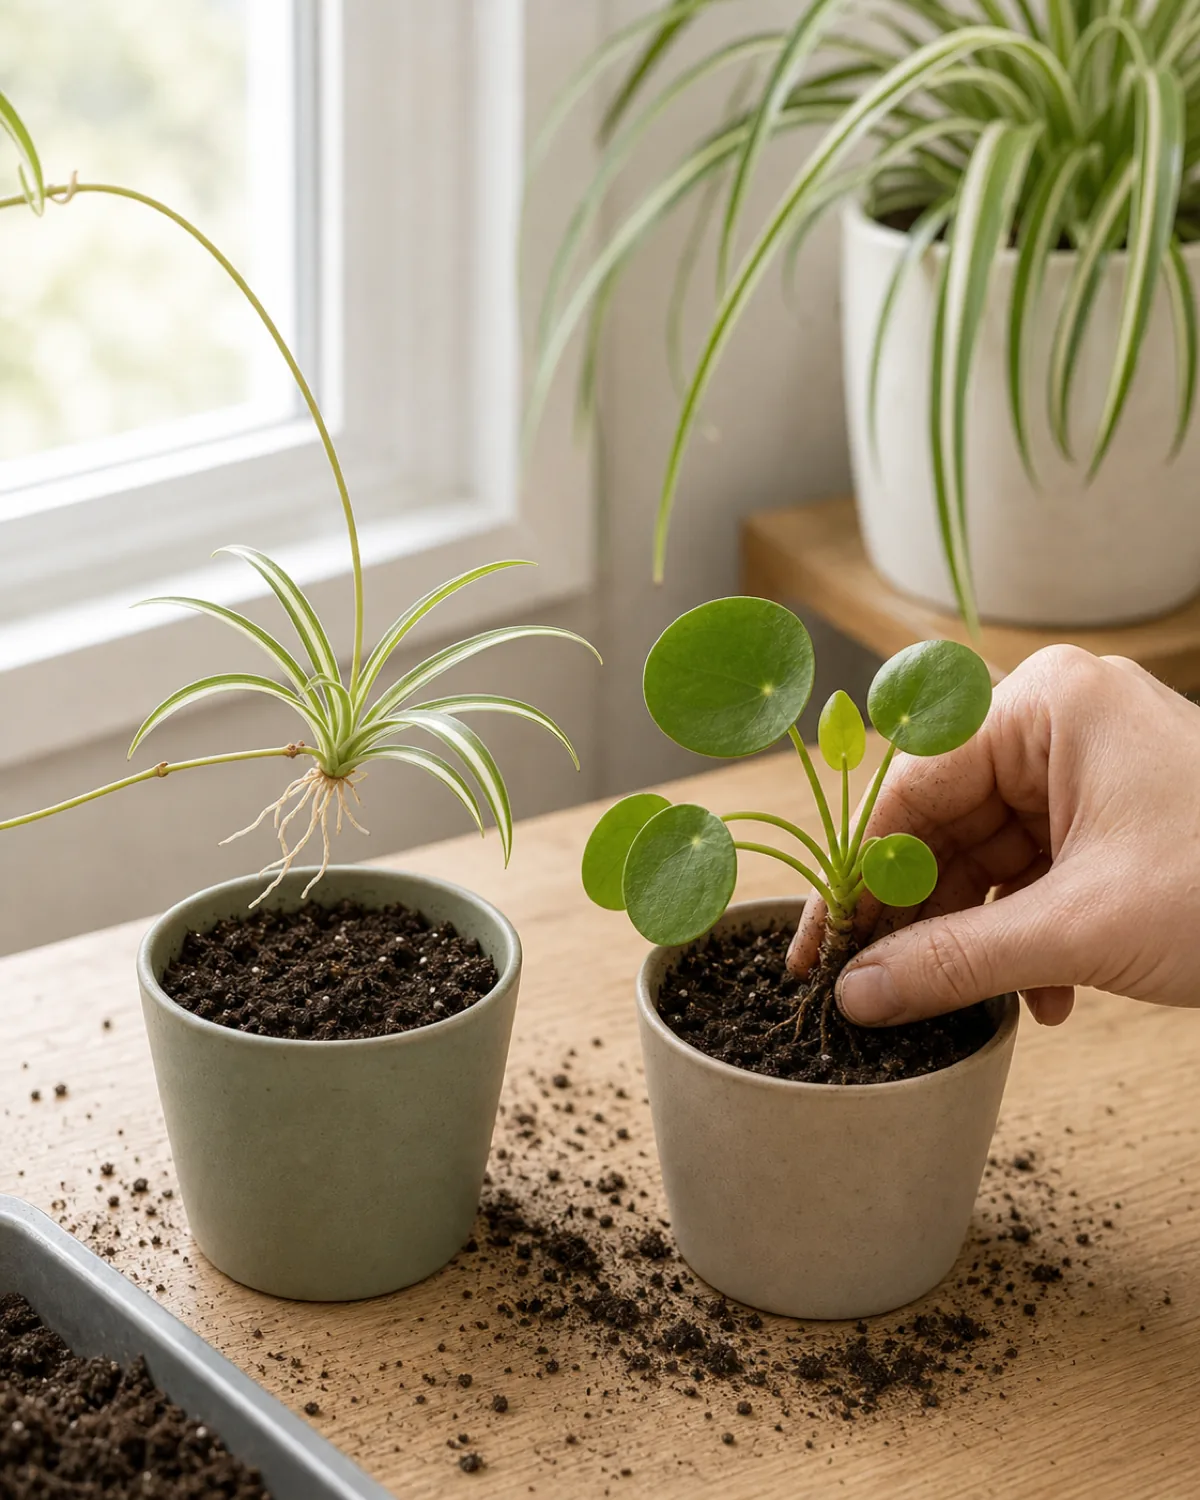
Some plants do the propagation work for you by growing ready-made baby clones, so all you have to do is detach and pot them. A spider plant sends out plantlets on long arching stolons, and pilea peperomioides pushes up pups from its own underground rhizome — both already carry tiny roots before you ever separate them.
For the parent plant’s full care picture once you’ve potted up its offspring, see a full spider plant care walkthrough or how to care for the parent pilea.
- Wait until the plantlet or pup already shows tiny roots before detaching it.
- Snip the stolon or gently separate the pup from the parent’s base.
- Pot it straight into soil, since it’s already carrying working roots.
Most failed cuttings trace back to one of four moves people skip. Hold these four and almost any houseplant will multiply for free.
Succulents and jade: leaf and stem propagation that needs no water
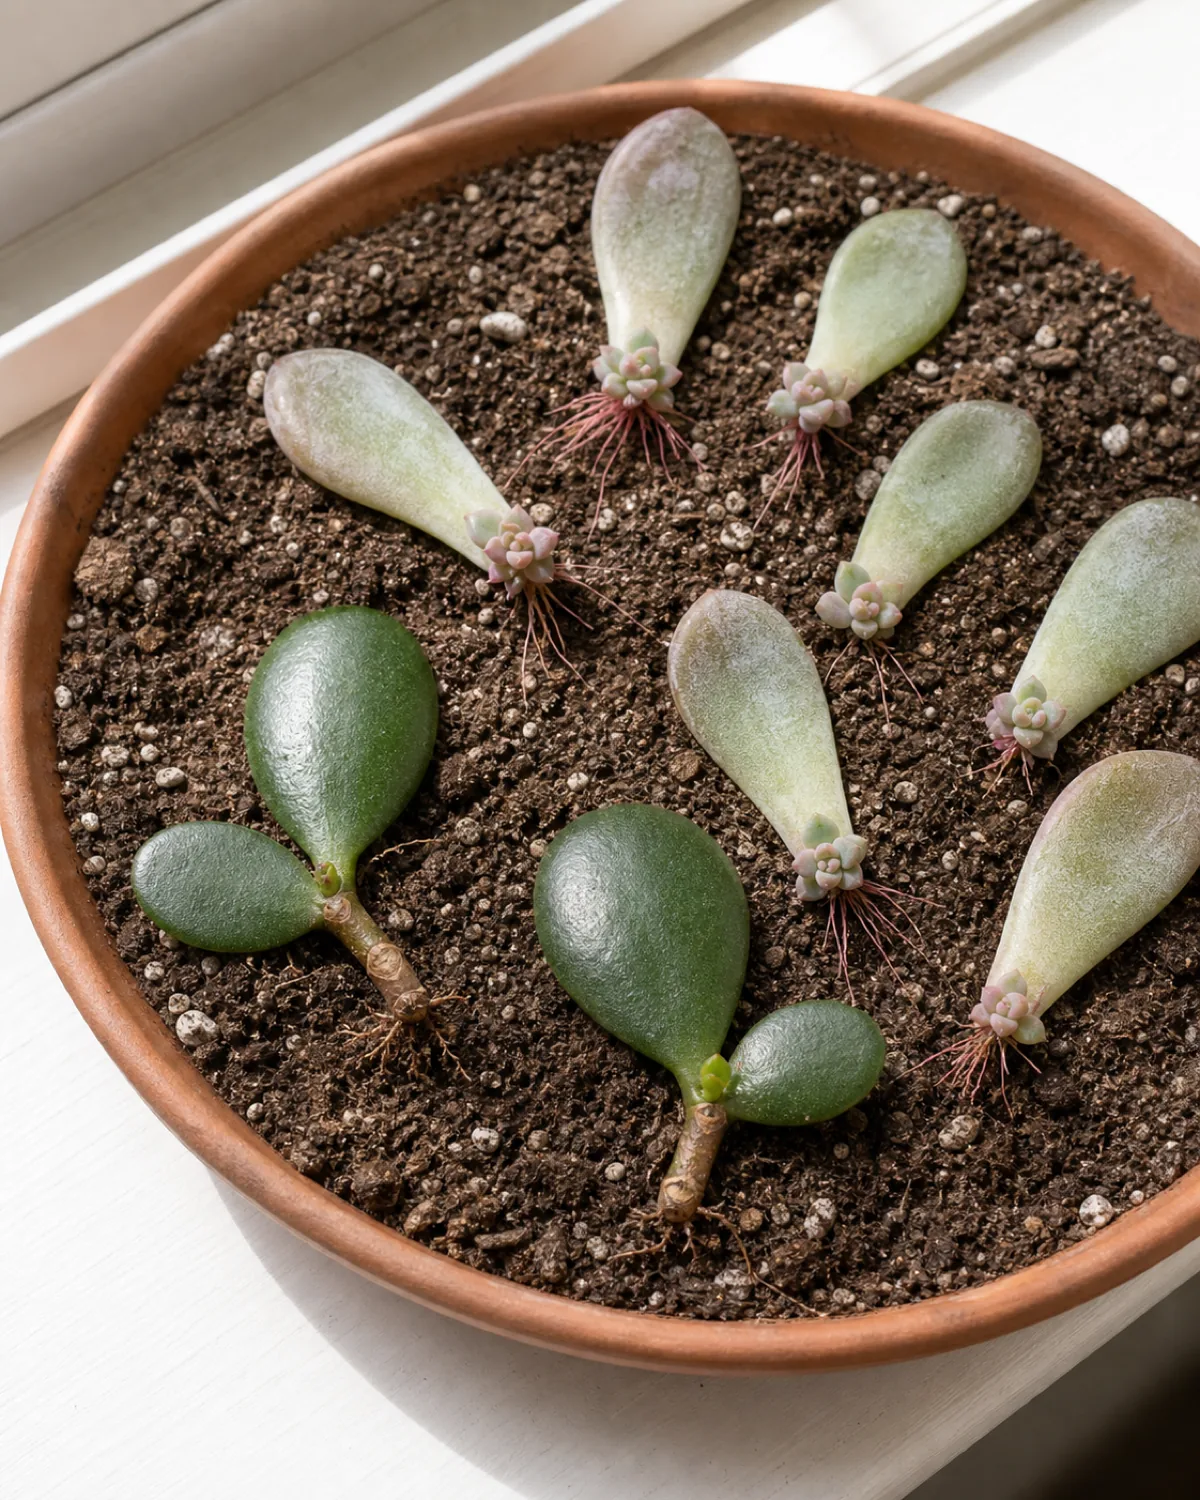
Succulent leaves and jade stem cuttings propagate dry, laid right on top of soil, because their fleshy tissue holds enough stored moisture to grow both roots and a new rosette straight from the leaf base. Sitting a succulent leaf in water does the opposite of helping — it just rots, which is the reverse of every vine covered so far.
- Twist a whole healthy leaf off cleanly, don’t cut it partway.
- Let the cut or twisted end callus over for a day or two before placing it on soil.
- Rest it on dry soil and mist lightly until roots and a tiny new rosette appear.
Soil propagation: when to skip the water step entirely
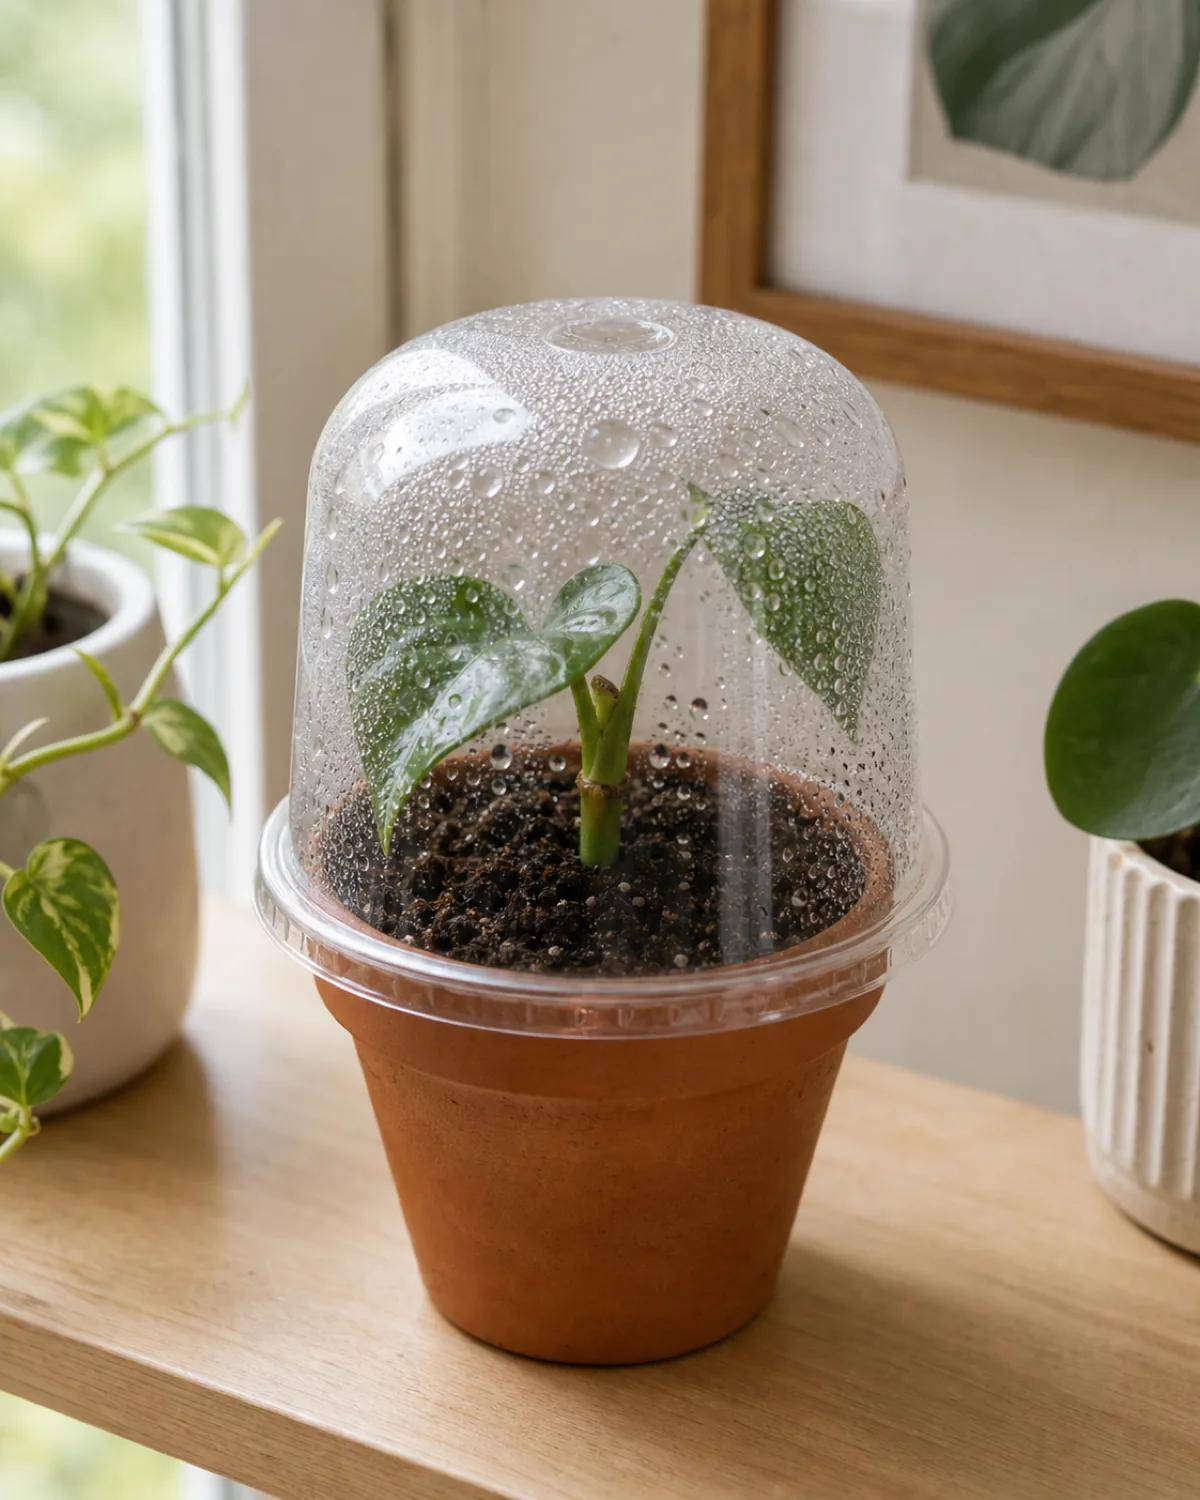
Pushing a cutting straight into moist soil under a clear cover skips the brittle-water-root problem entirely and produces stronger first roots, at the cost of not being able to watch the progress. This suits plants that are prone to rotting in water, and anyone who has already lost a cutting during the awkward water-to-soil move.
- Use a small pot of moist, not wet, potting mix.
- Cover with a clear bag or dome to hold humidity around the cutting.
- Resist tugging on it to check for roots for two to three weeks.
Do you actually need rooting hormone?
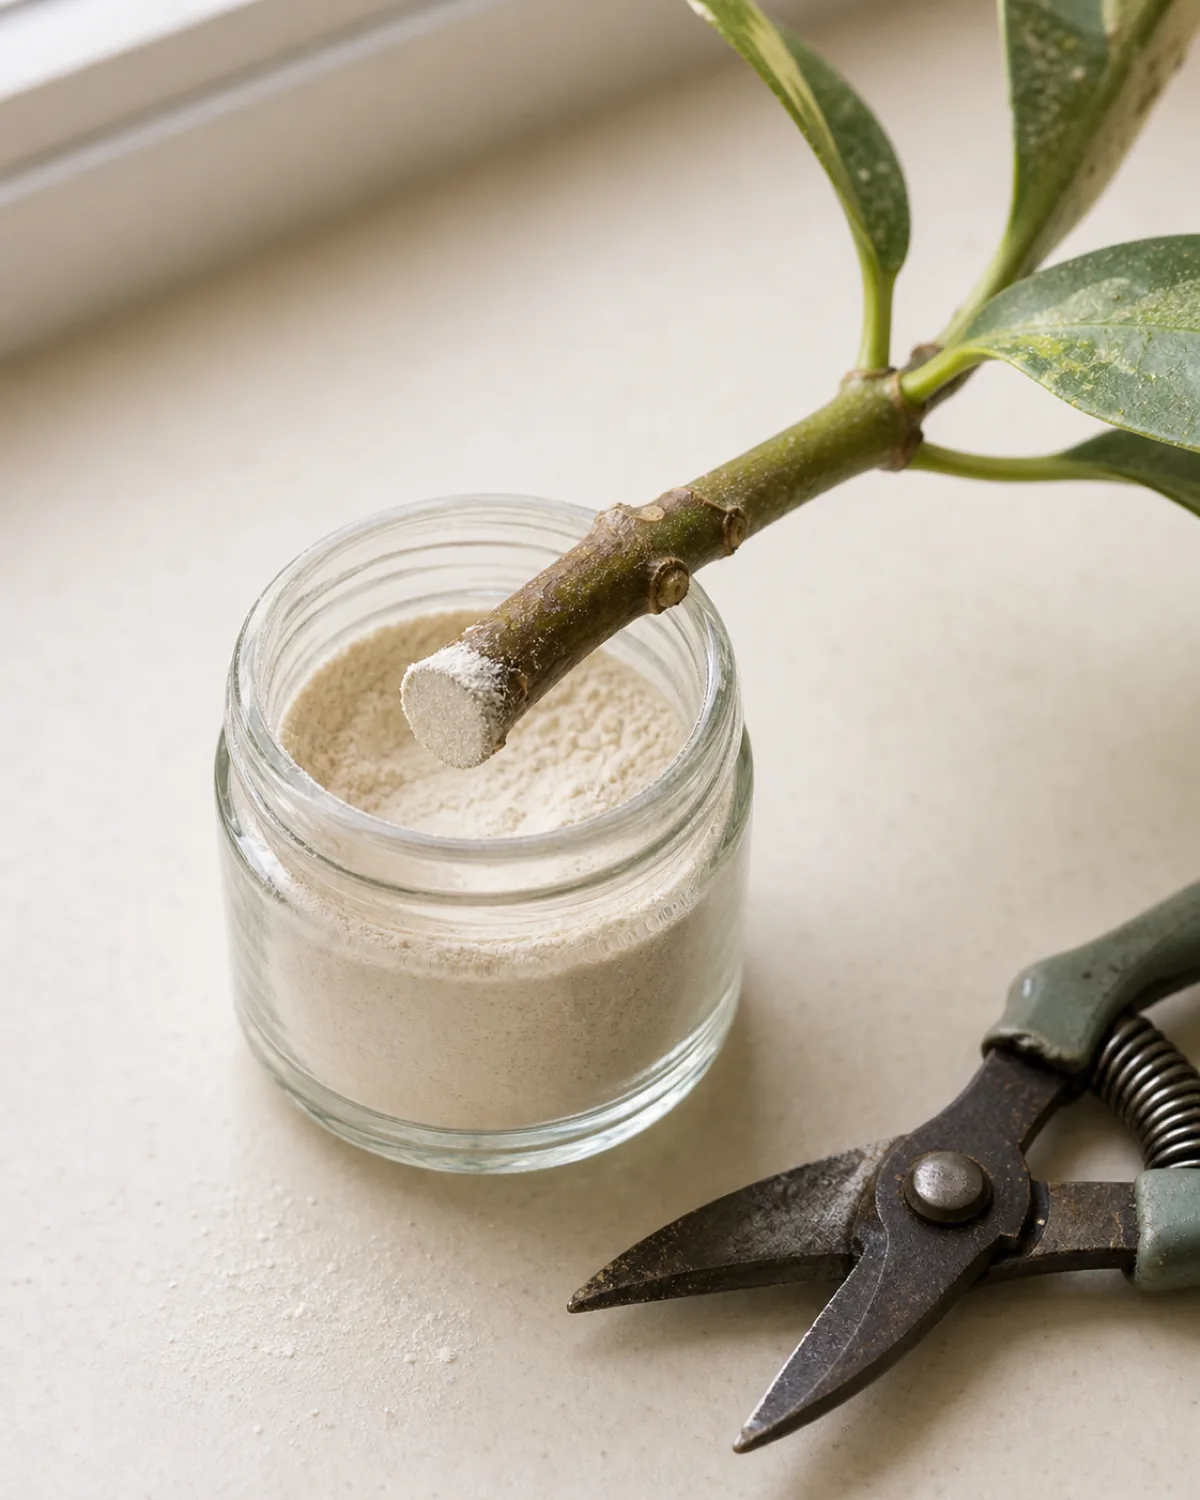
Rooting hormone is a powder or gel form of synthetic auxin that speeds up and strengthens root initiation, and it genuinely earns its place on woody or slow-rooting cuttings like fiddle leaf fig, rubber plant, and hoya. For fast vines like pothos that root in a matter of days without any help, it’s optional rather than necessary.
- Skip it for beginner water cuttings like pothos and philodendron.
- Dip woody or slow cuttings in a light dusting before potting or submerging.
- Keep a small jar on hand for the stubborn ones rather than buying it for everything.
Plant Propagation: The Quick Reference
- 1Water propagation is the easiest place to startSubmerge a cut stem in a clear glass so you can watch the roots form. Best for pothos, philodendron, monstera, tradescantia, and coleus.
- 2Always include a nodeThe node is the only spot that can grow roots. A lone leaf with no node will rot in water without ever rooting.
- 3Pothos and philodendron root in one to two weeksA 4-6 inch cutting with two or three nodes roots reliably in plain water on a windowsill.
- 4Monstera needs a node plus its aerial rootA leaf alone never grows a new plant. Submerge the node and aerial root, leave one leaf above water.
- 5Snake plant and ZZ multiply by divisionSplit the rhizome into sections that each already carry roots and a growth point for an instant finished plant.
- 6Spider plant and pilea clone themselvesWait for visible roots on the plantlet or pup, then detach and pot it straight into soil.
- 7Succulents and jade propagate dryTwist off a whole leaf, let it callus a day or two, then rest it on dry soil until roots and a new rosette form.
- 8Soil propagation skips the brittle-root problemPush a cutting into moist soil under a clear dome for humidity, and resist checking for two to three weeks.
- 9Rooting hormone is optional for fast vinesSkip it for pothos and philodendron. Keep a jar for slow, woody cuttings like fiddle leaf and hoya.
- 10Rot means dirty water or a buried leafStrip underwater leaves and change the water every three to four days to stop mush, slime, and smell.
- 11Pot up at one to two inches of rootWaiting longer grows brittle water roots that adapt poorly to soil. Move it early, not at six inches.
- 12Spring and summer root fastestWinter cuttings stall and rot more easily. Add a grow light in winter and expect it to take twice as long.
kultivy.com
Why your cutting rotted, and how to stop it
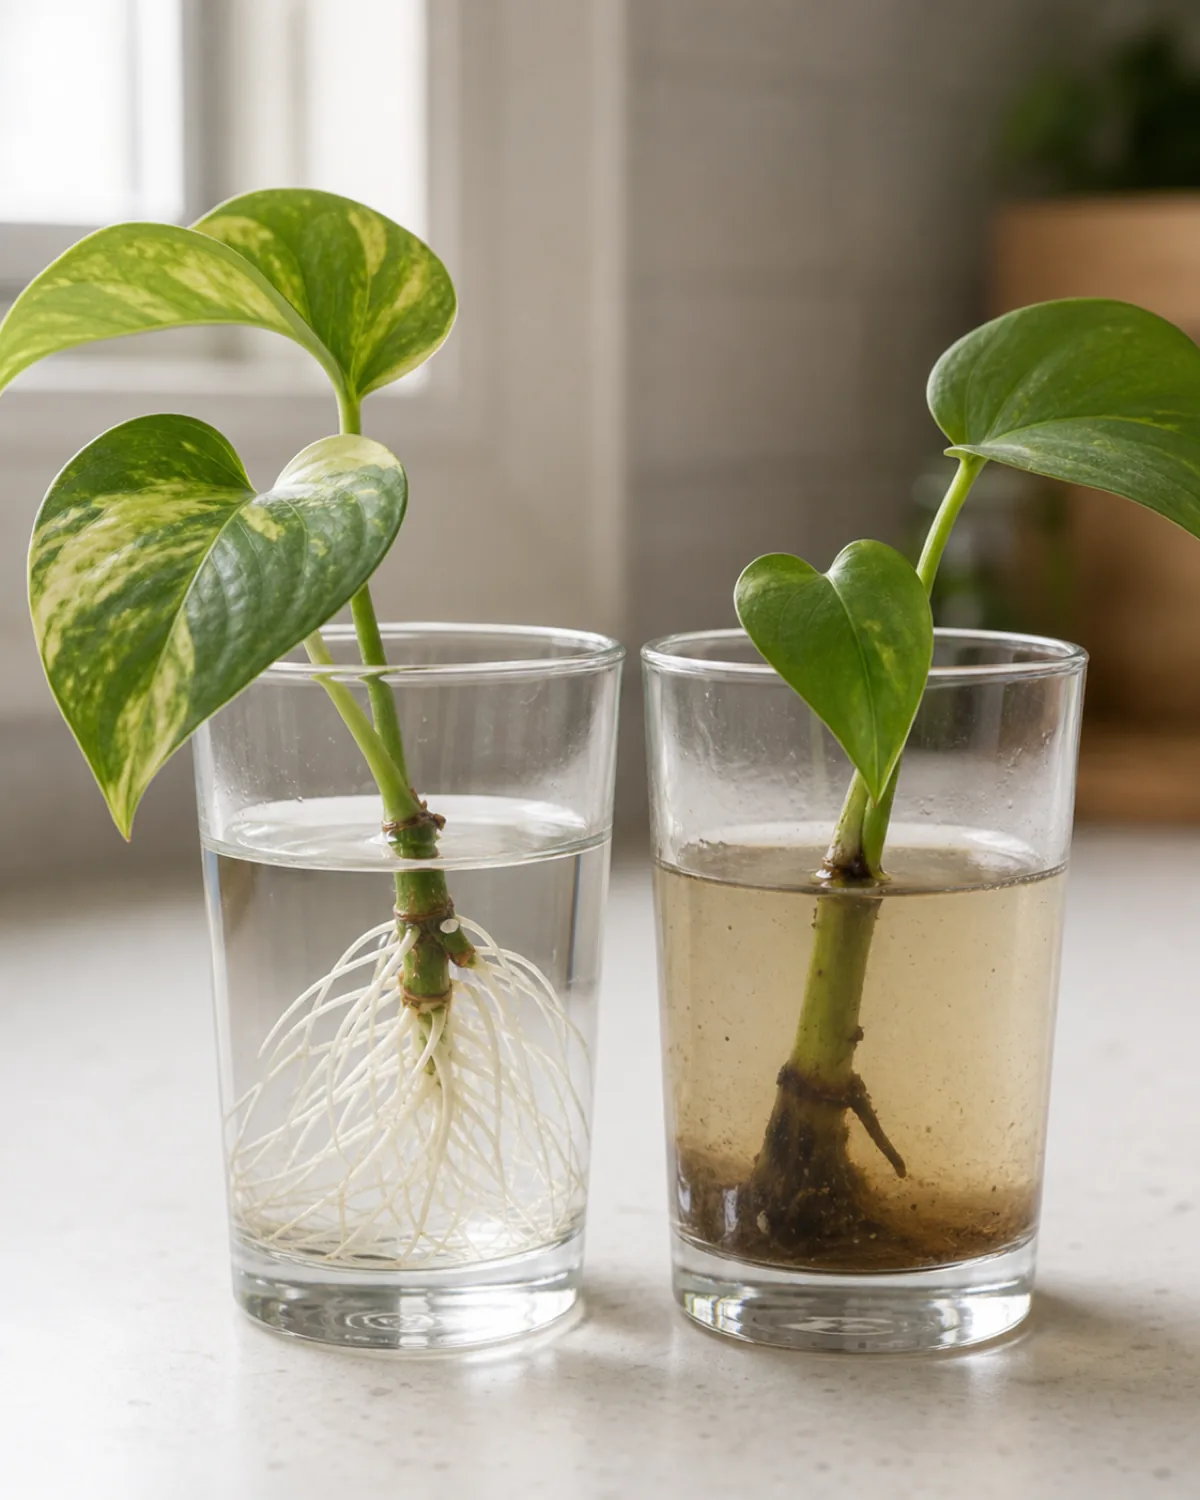
A cutting rots when bacteria multiply faster than roots can form, and that happens with dirty water, a node that never got submerged, a leaf buried and decaying underwater, or water gone stagnant and low on oxygen. Rot looks like mush, slime, and a sour smell right at the cut end, and it’s the single most common reason a beginner’s first cutting fails.
- Strip any leaf that would sit underwater, since a submerged leaf decays and fouls the water.
- Change the water every three to four days, not once a week or longer.
- Use a clean glass each time you refresh the water, not a reused cloudy one.
When to pot up a water-rooted cutting into soil
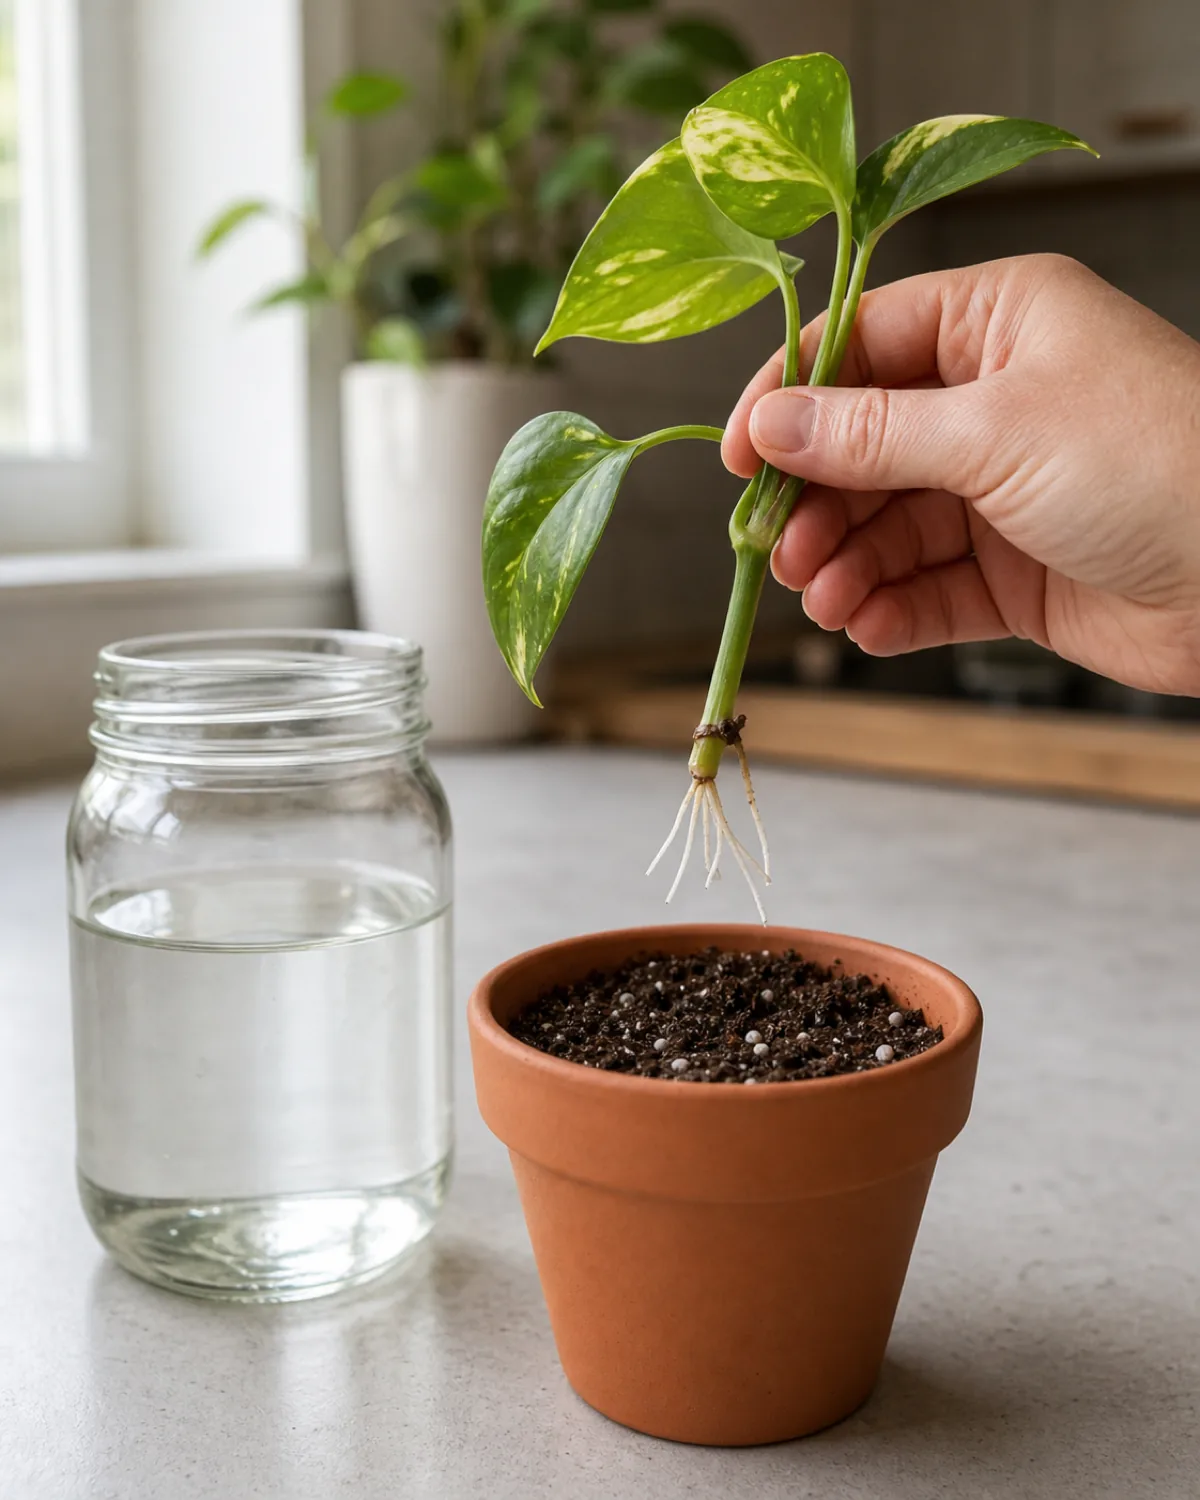
The move from water to soil kills more beginner cuttings than the cutting itself ever does, because waiting too long grows long, brittle water roots that can’t adapt to soil once they’re finally moved. Pot up once roots reach one to two inches, not six.
- Pot up at one to two inches of root, before the roots get long and brittle.
- Move into a small pot of light, moist potting mix, not a large one.
- Keep it more humid and watered than usual for the first two weeks while soil roots take over.
The best time of year to propagate, and when to wait
Propagation works best in spring and summer, when longer days and active growth push a cutting to root in weeks instead of months. A cutting taken in the short dark days of winter often stalls and rots before it ever roots, because both the parent plant and the cutting are barely growing at that point.
- Take cuttings in spring or summer whenever possible, during active growth.
- Add a grow light if you must propagate in winter, and expect it to take twice as long.
- Be patient with winter cuttings rather than assuming a slow one has failed.

Mara Quinn edits Kultivy, where she shares houseplant care, propagation, beginner-friendly plant picks, and plant-styling ideas for anyone who wants their indoor plants to actually thrive. Every guide is image-led and reviewed for clarity, usefulness, image accuracy, and Pinterest-to-page alignment before it goes live. Visit the About page.