The first spider plant I ever owned came from a neighbor who clipped a single pup off her own and dropped it in a glass of water. A week later it had roots, two weeks later it lived in soil, and a year later it was throwing babies of its own across the kitchen window.
That is the strange charm of a spider plant. It is one of the very easiest houseplants to keep alive, genuinely safe around cats and toddlers, and one of the only common houseplants that hands you free babies on arching stalks.
Most owner problems come down to two small things — tap water chemistry burning the leaf tips, and a too-big pot choking off the babies. Sort those out and it will pup for years.
A spider plant is one of the few common houseplants that is both genuinely pet-safe and willing to give you free babies on arching stalks. Most owner mistakes come down to two things — tap water chemistry and a pot that is too big. Jump to whichever question matters most today.
- 1How much light it actually needs
- 2How often to water
- 3Why the leaf tips turn brown
- 4The right soil mix and a cramped-on-purpose pot
- 5The best spot for the arching habit
- 6Why it is not making babies yet
- 7How to root the baby plantlets
- 8Safe for cats, dogs, and kids?
- 9When and how to repot
- 10Pests and a shower-and-soap fix
- 11Crown rot rescue
- 12The varieties worth knowing
- 13Long-term thriving tips
How much light a spider plant actually needs (and the variegation-and-pup trigger)
Bright indirect light is the only level that grows a spider plant fast, keeps the cream-and-green variegation crisp, and reliably triggers the arching stolons that carry babies in mid-air. Medium light gives slower growth, faded stripes, and almost no pup show. Harsh direct sun bleaches the thin grass-like leaves bone white and scorches the tips brown within an afternoon.
Spider plant is one of the brighter-loving easy houseplants. Without real brightness, the stolons never appear, no matter how healthy the rosette looks.
- An east window with morning sun hits the sweet spot for crisp stripes and a steady flow of babies.
- A sheer-curtained south window works once the curtain softens the midday glare to a bright glow.
- Three to four feet back from a west window is the deepest position that still triggers stolons; further back, you get a green plant with no pups.
How often to water (and why the tuberous roots forgive missed weeks)
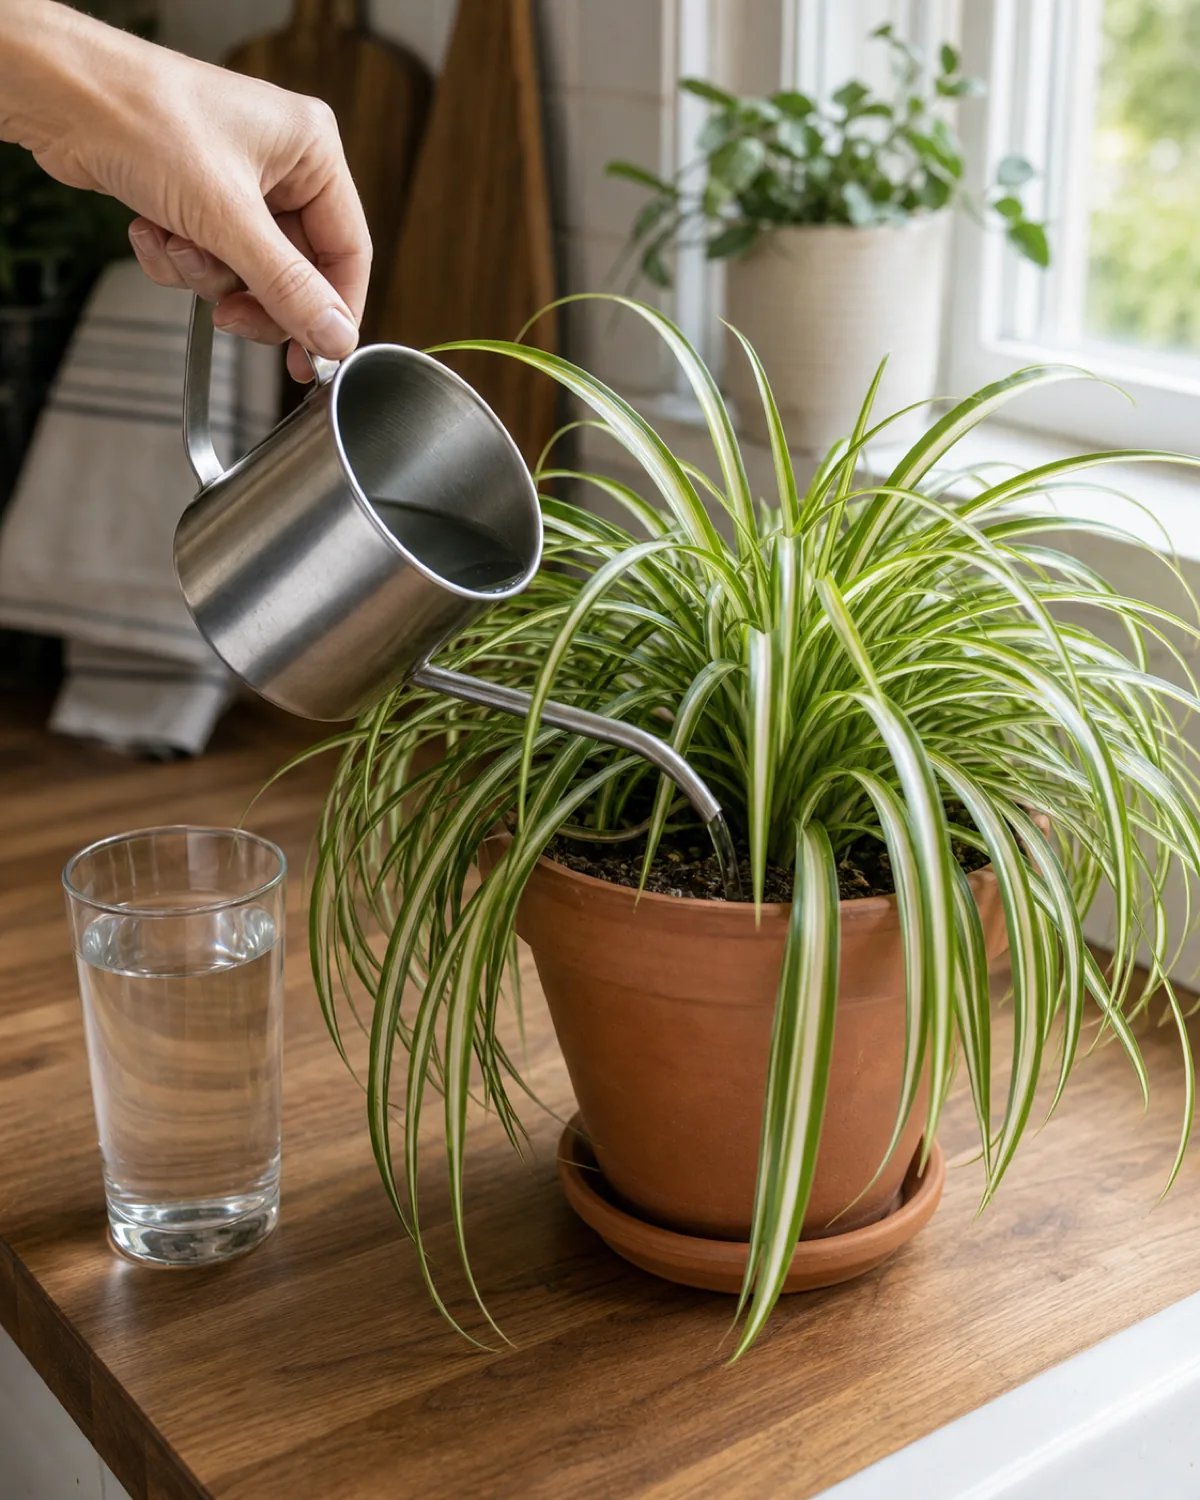
Water deeply when the top inch of soil feels dry, typically once a week in summer and every 10 to 14 days in winter. The thick white tuberous roots store water like miniature potatoes, so a forgotten weekend rarely kills it. Consistently soggy soil, on the other hand, rots the crown faster than almost any other care mistake.
Compared to a ZZ plant, spider plant wants more frequent water — a ZZ rhizome holds weeks of moisture, spider tubers hold days.
- Tepid water at the soil line. Cold tap water shocks the roots; pouring straight on the crown invites rot.
- Empty the saucer after every watering. The tubers dislike sitting in standing water as much as the crown does.
- Cut watering by a third in winter. Indoor air is drier but the plant is barely growing, and a winter overwatering is the most common crown-rot trigger.
Why the leaf tips are turning brown (and the fluoride and chloride truth)
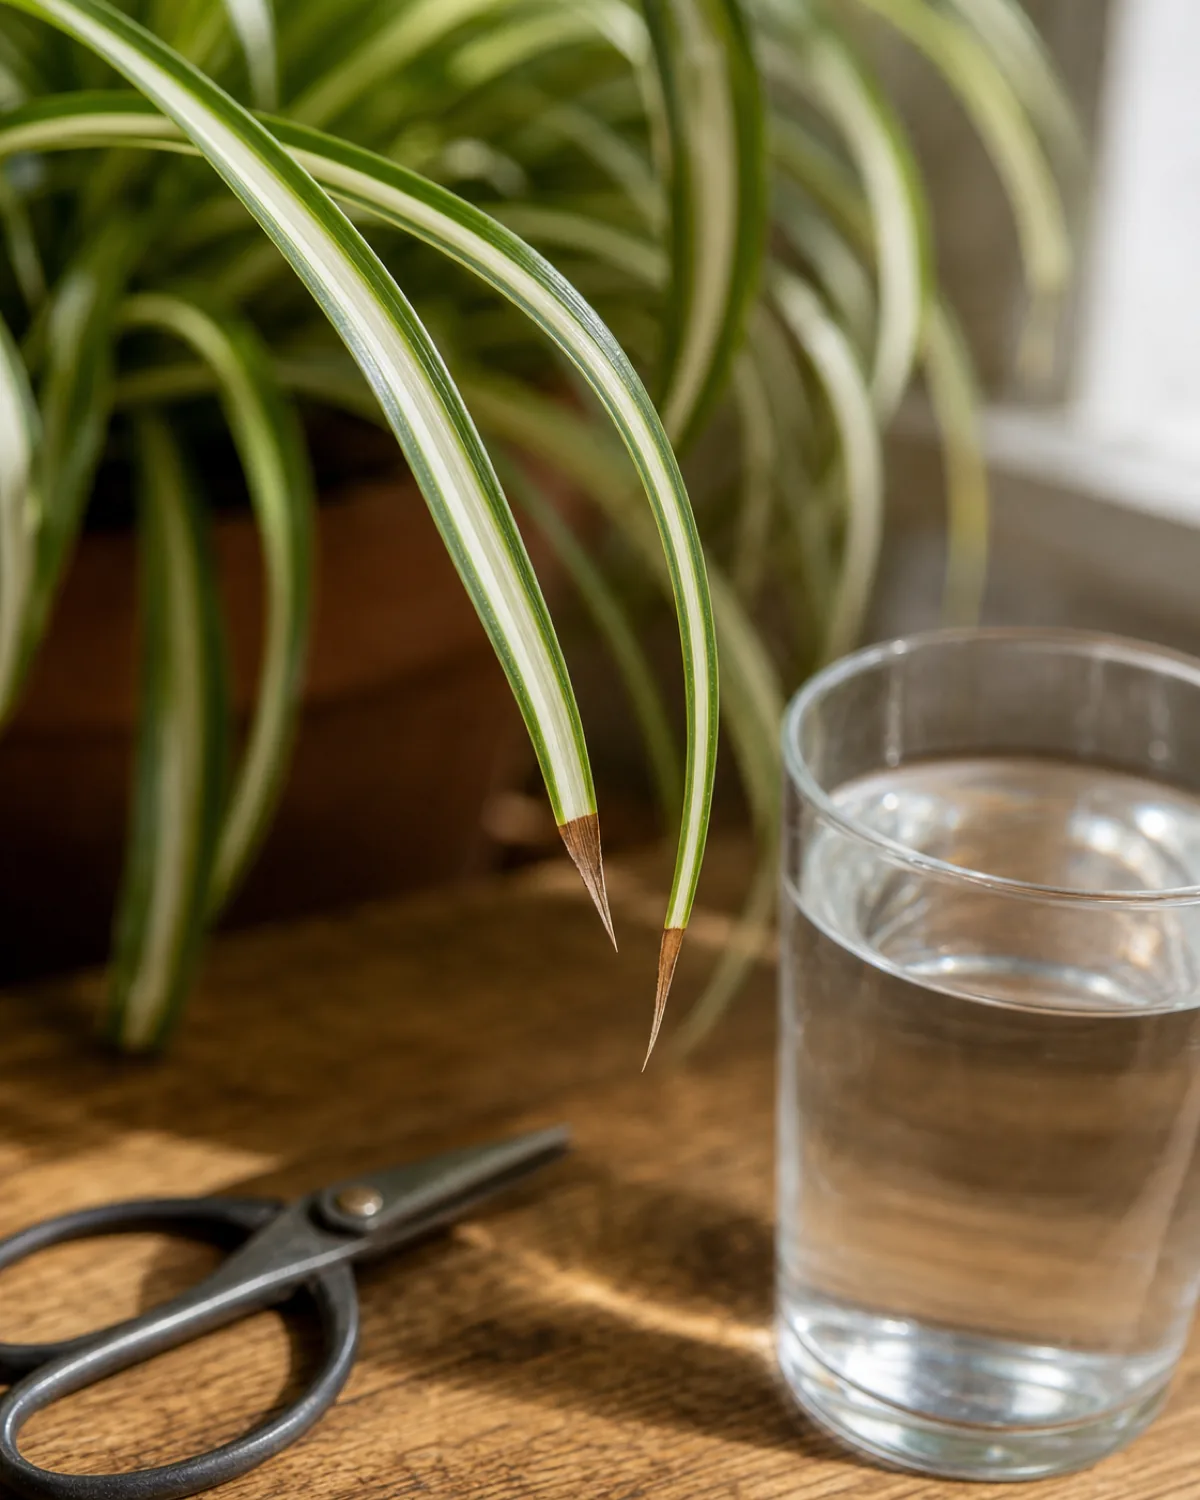
The number one cause of brown tips on a spider plant is fluoride and chloride in tap water building up at the leaf tips, not under or over watering. Let tap water sit out overnight to off-gas chlorine, switch to filtered or rainwater for tip-prone plants, and snip off existing brown tips at a sharp angle for a cleaner look.
Salt buildup from too much fertilizer causes the same brown-tip pattern. Flush the soil every few months with plain water poured through and drained out to clear the buildup before it shows on the leaves.
- Fill the watering can the night before. A few hours of open-air resting drops most of the chlorine on its own.
- Use filtered or rainwater for chronic tip browning; well water and softened water make it worse.
- Snip browned tips at a sharp angle with clean scissors so the cut looks like a natural leaf taper, not a flat hack.
A new spider plant rarely has one big problem — it has one specific question. Find the one that matches your plant today and start there.
The right soil mix and a cramped-on-purpose pot
A standard well-draining houseplant mix amended with extra perlite for chunky structure is plenty. Spider plant is not picky about soil, but it is picky about pot size. The white tuberous roots want a deliberately snug fit, so go up only one pot size at most, and choose terracotta with drainage so the porous clay walls wick moisture away from the crown.
A too-large pot stalls the pup-throwing habit for years while the plant fills empty volume with roots before sending any aerial stolon out.
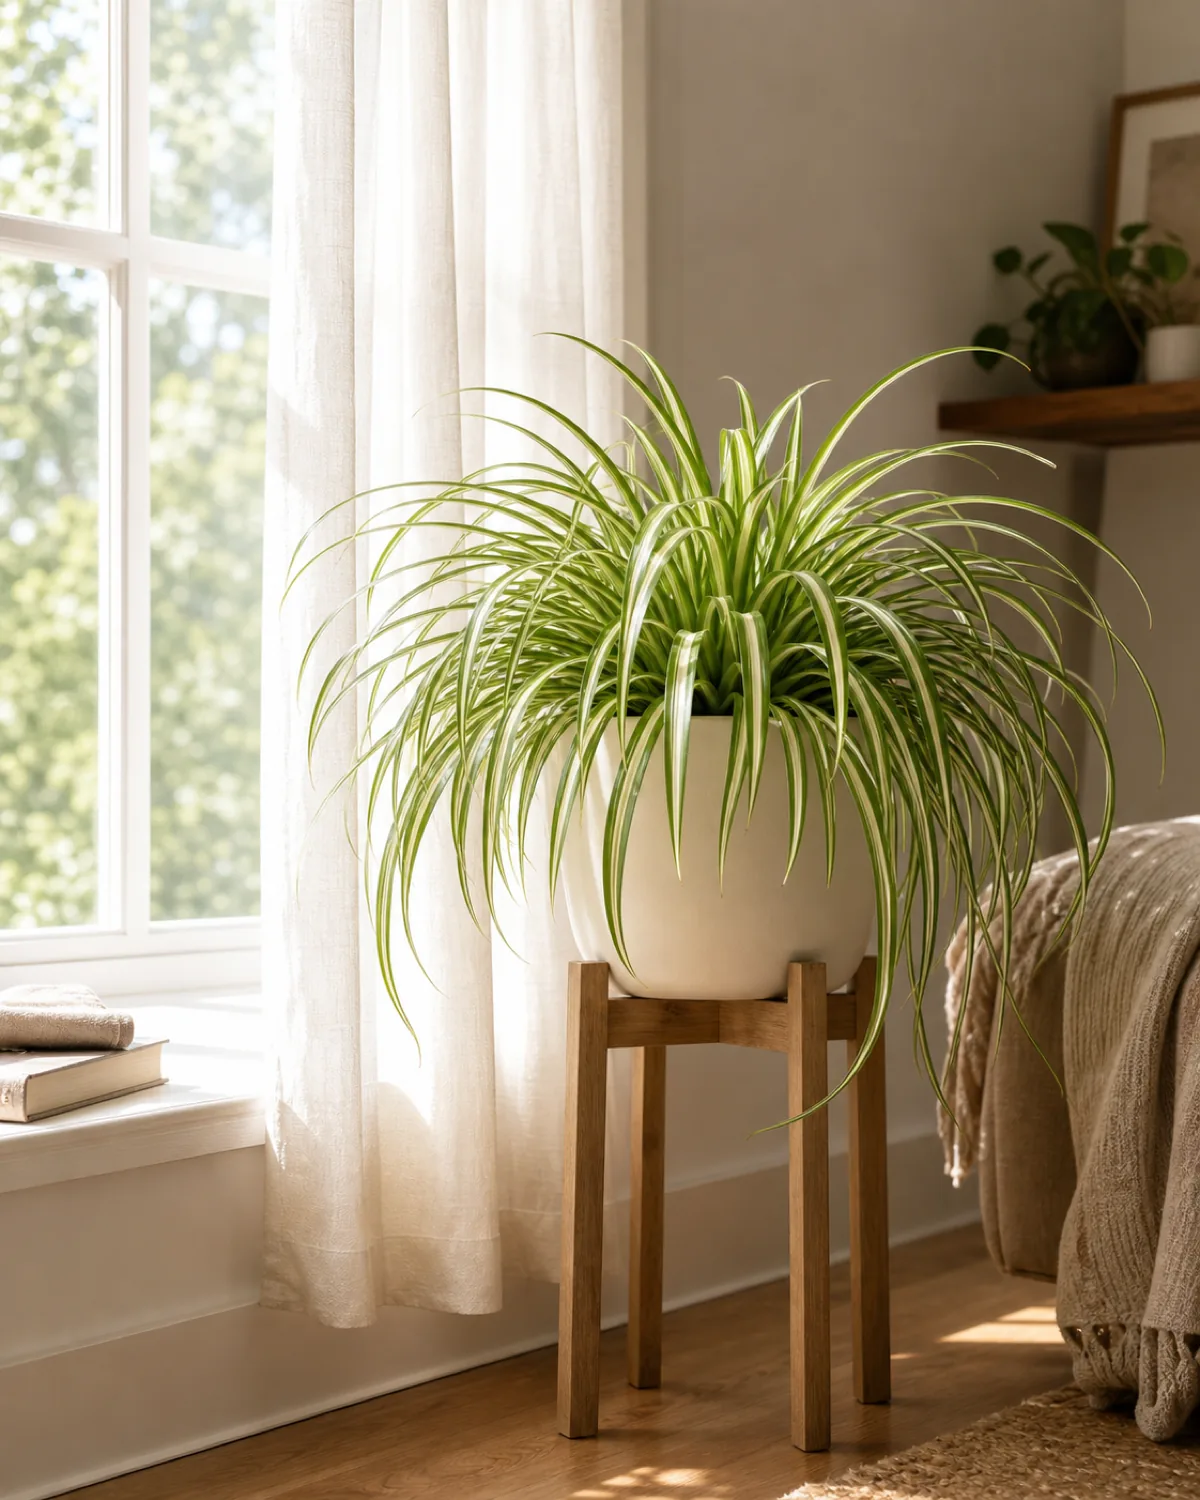
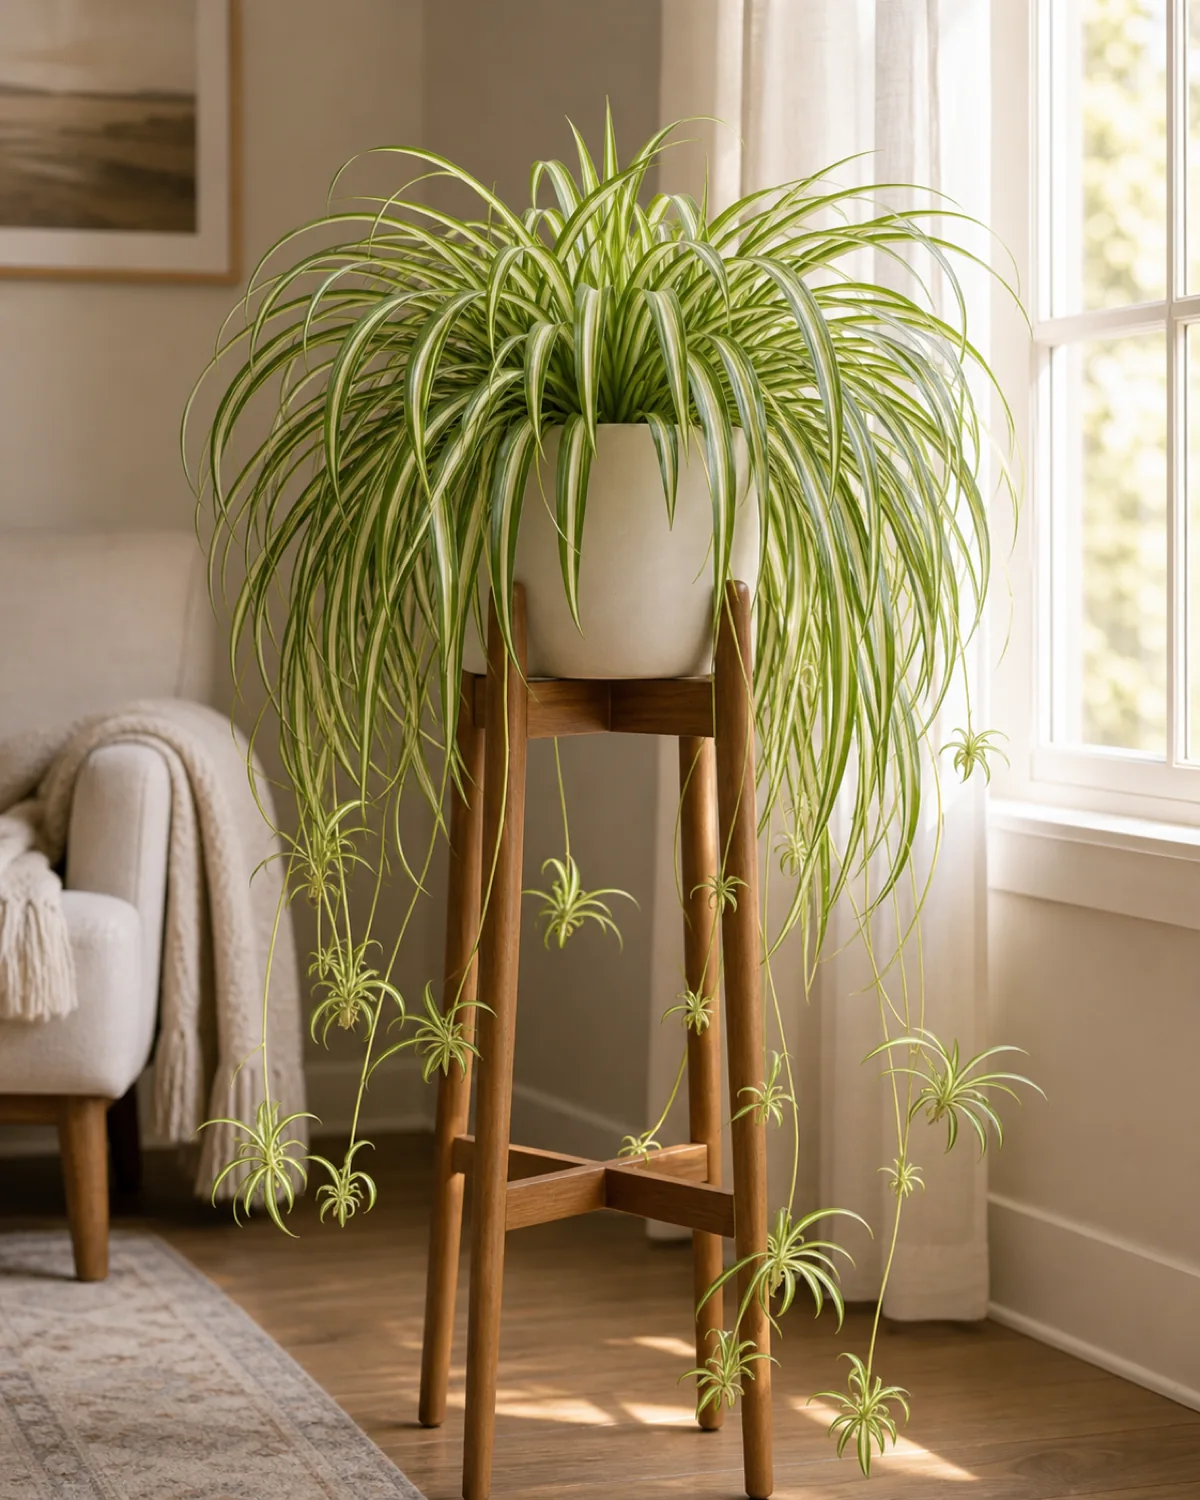
The best spot for it (and how to show off the arching habit)
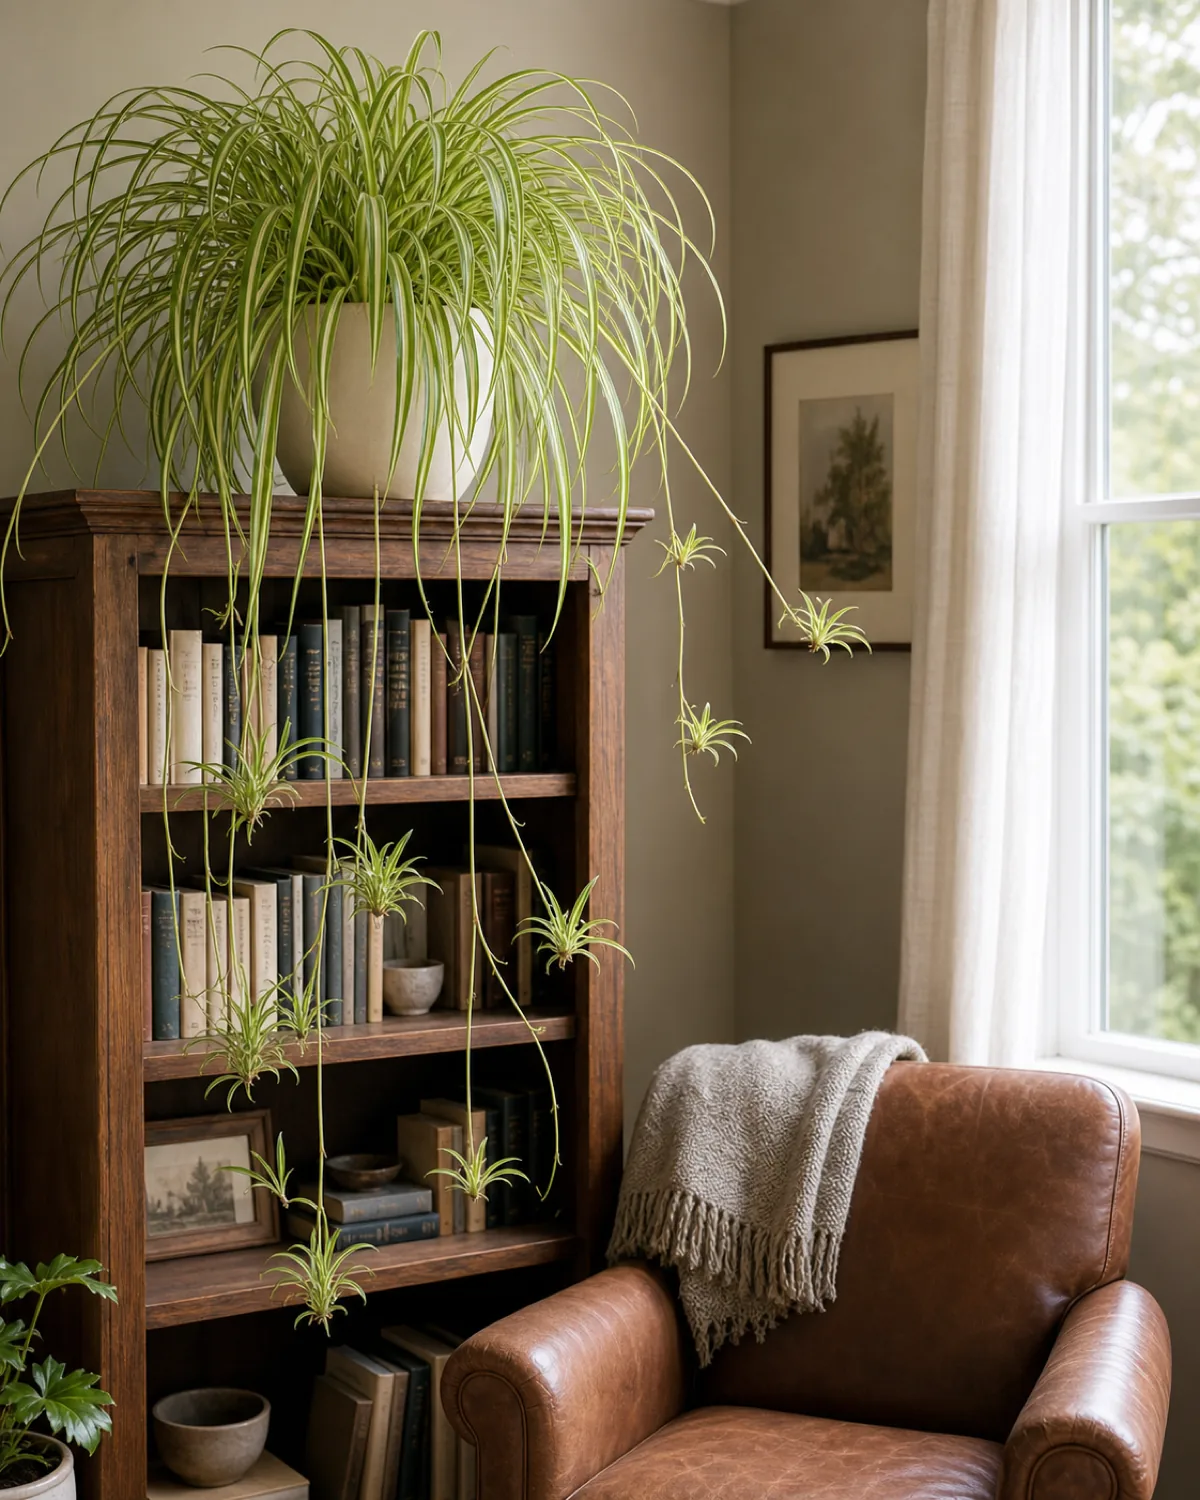
The arching habit needs vertical room to show. An east window, a shelf three to four feet back from a south or west window, or the top of a tall bookcase where the leaves and baby plantlets can cascade down all work beautifully. A bright bedroom corner with morning light is another excellent spot.
For a richer set of cascading and corner ideas, our plant shelf and corner ideas guide covers the kinds of perches that make trailing pups the visual focus.
- The top of a tall bookcase lets the long arching leaves and dangling pups frame the room without a footprint.
- A wall-mounted hanging pot beside a bright window gives the same drama in a tighter spot.
- A tall slim plant stand beside an armchair works when the wall is not available.
Why your spider plant is not making babies yet (the root-bound trigger)
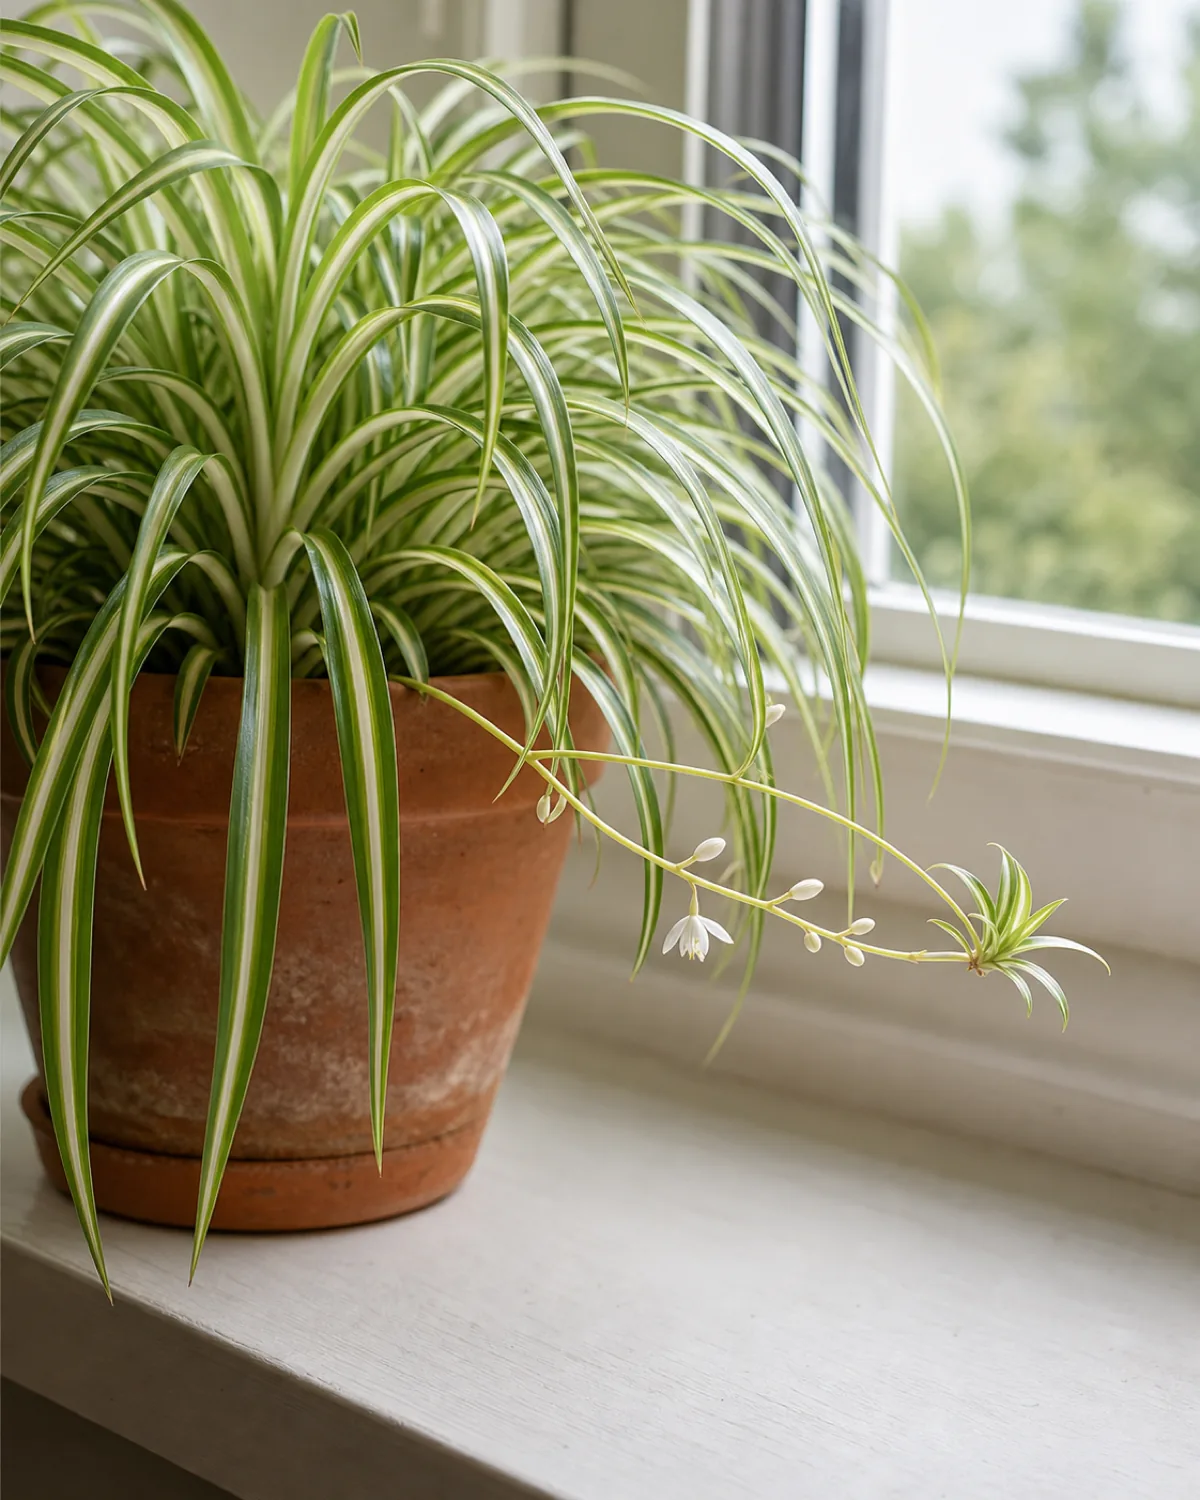
Spider plant only sends out aerial flower stalks and baby plantlets once it is mildly root-bound and getting enough bright indirect light. A young plant that was over-potted into a huge container will spend years filling roots before any pup. Twelve to fourteen hours of daylight, or a few months in a brighter spot, also helps trigger the long arching stolons that carry the babies.
The first sign is a single thin wiry stalk arching out from the center of the rosette with tiny white star-shaped buds along it. A baby plantlet forms at the tip a few weeks later.
- Check the pot size first. If the plant rattles around in soil, downsize the pot before changing anything else.
- Move it closer to the light. A foot or two closer to an east window often does what nothing else does.
- Wait through a full growing season. Once a young plant settles into a snug pot, pups usually arrive within a few months.
Spider plant is almost impossible to kill outright, but most home plants stop pupping and start browning for the same handful of reasons. Four small habits keep crisp stripes, regular babies, and zero crown rot on the table.
How to root the baby plantlets (the easiest propagation in houseplants)
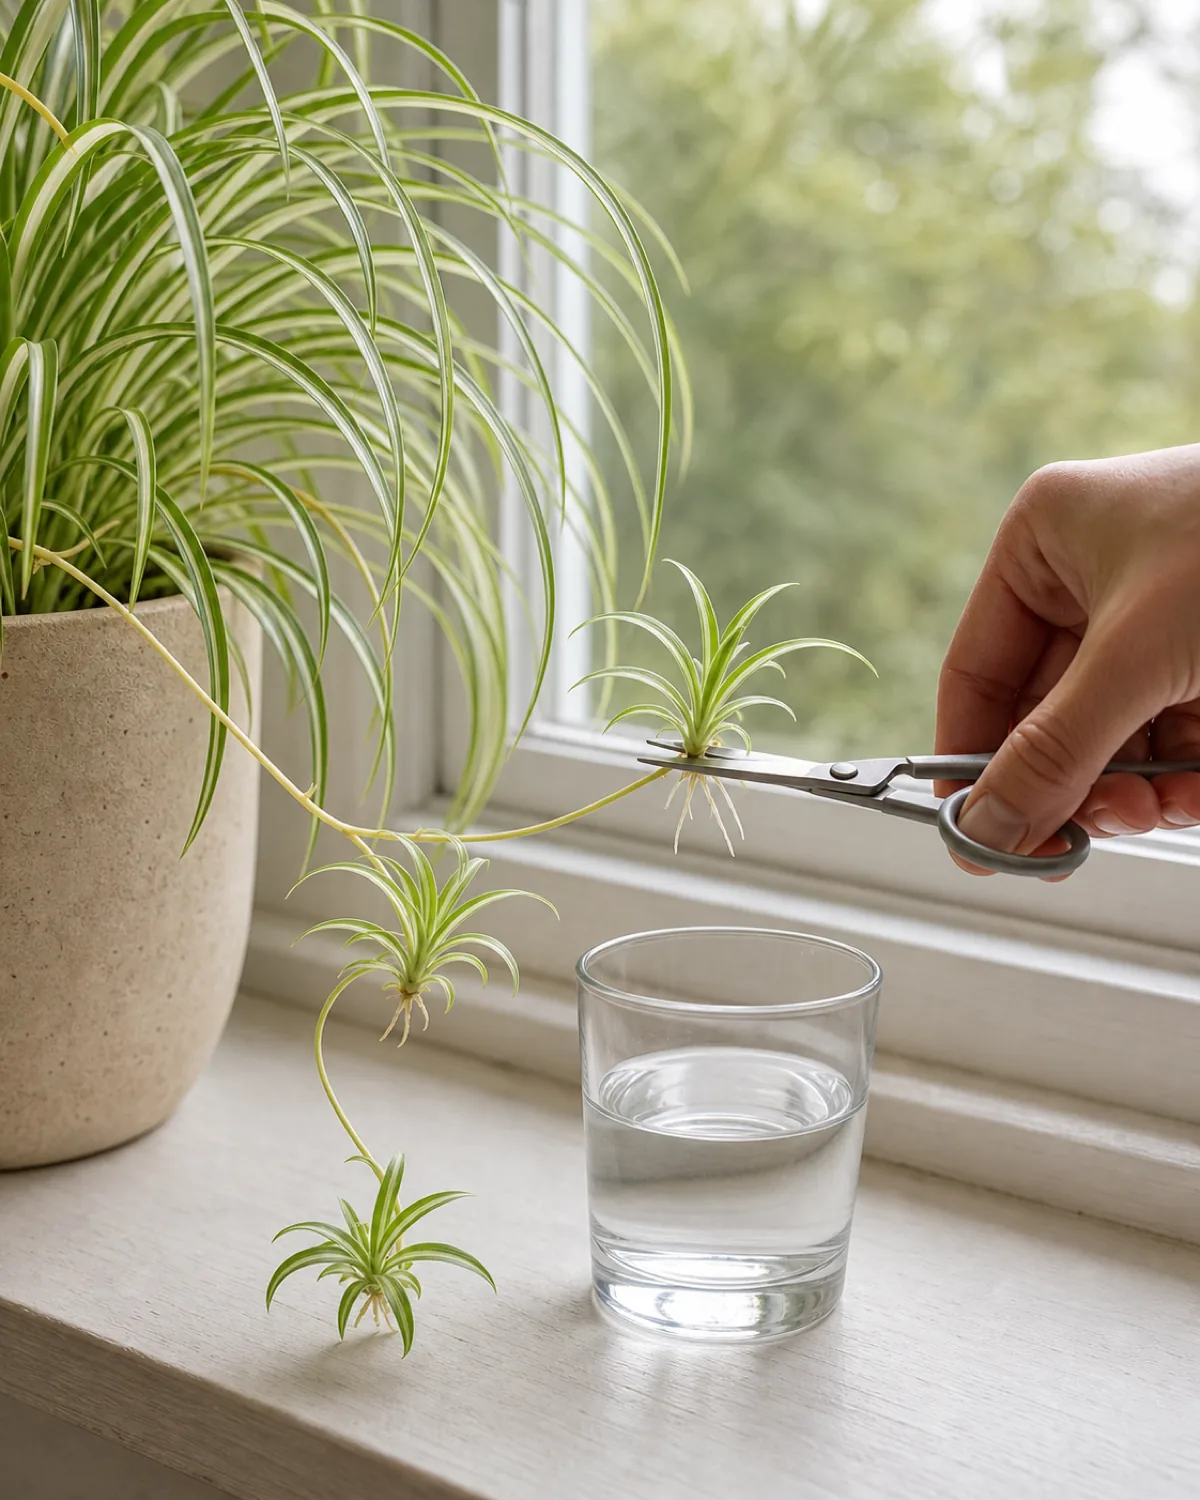
Pick a pup with small visible root nubs at its base, snip it from the parent stolon with clean scissors, and either root it in a glass of water (roots grow visibly within a week) or pot it directly into moist soil and keep it humid for two weeks. Both methods are nearly fail-proof.
Compared to a ZZ plant leaflet, which takes four to six months to form a tiny rhizome, or a monstera stem cutting that needs two to three weeks in water, a spider plant pup roots in days. The fastest propagation in houseplants.
- Choose a pup with visible root nubs. A pup with no root start can still root, but the one with white nubs is twice as fast.
- Change the water every few days if you go the water-root route, to keep it clear and oxygen-fresh.
- Bag a soil-potted pup loosely for the first two weeks to hold humidity while the new roots take.
Are spider plants safe for cats, dogs, and kids? (the genuinely non-toxic answer)
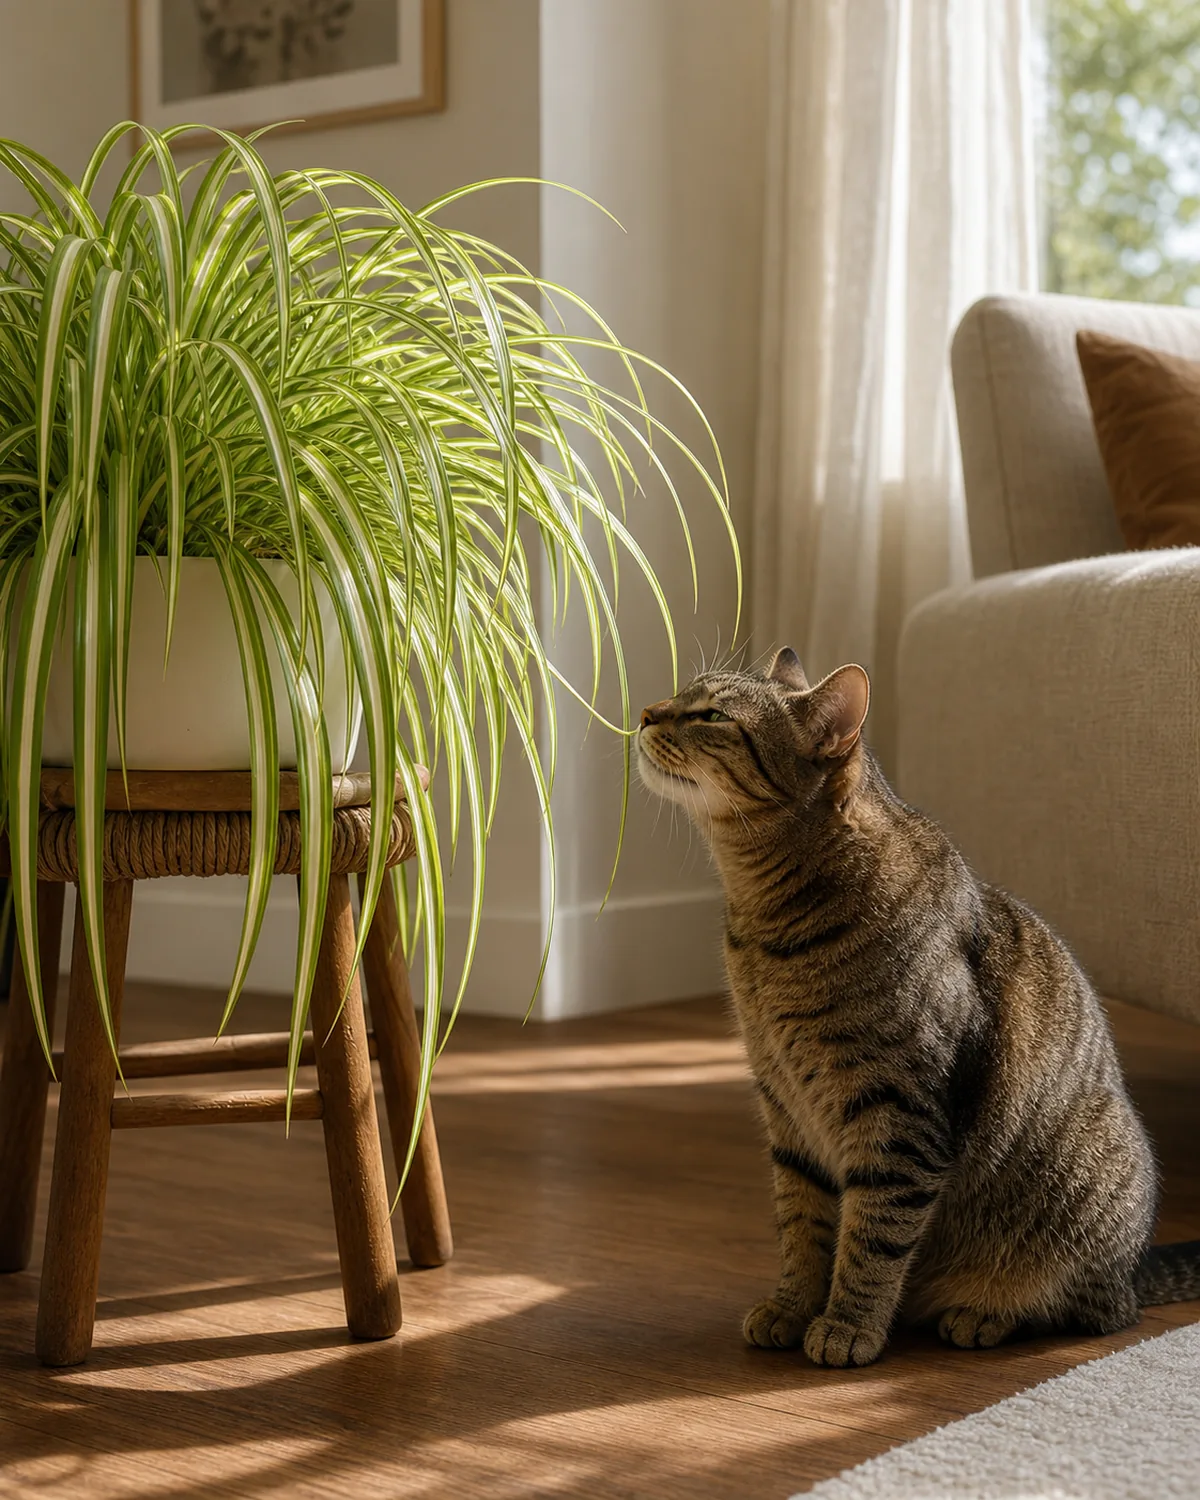
Yes — spider plant is one of the very few common houseplants on the ASPCA non-toxic list for cats and dogs. Cats love to chew the arching leaves, which is harmless, though over-chewing can cause a small amount of vomit. It is a great pick for households with curious pets or toddlers.
Unlike a ZZ plant, a peace lily, a monstera, or a pothos — all of which contain calcium oxalate crystals that irritate mouths — spider plant is genuinely safe. That is rare enough among popular houseplants to be worth pointing out by name.
- Plant a few extra pups if your cat treats it as a snack. The plant grows them faster than the cat can eat them.
- Place it where the cat can reach it on purpose. A low shelf beats a hanging pot if the goal is a safe nibble target.
- Skip the lily next to it. Many “lilies” sold beside spider plants are highly toxic to cats; double-check any plant pairing.
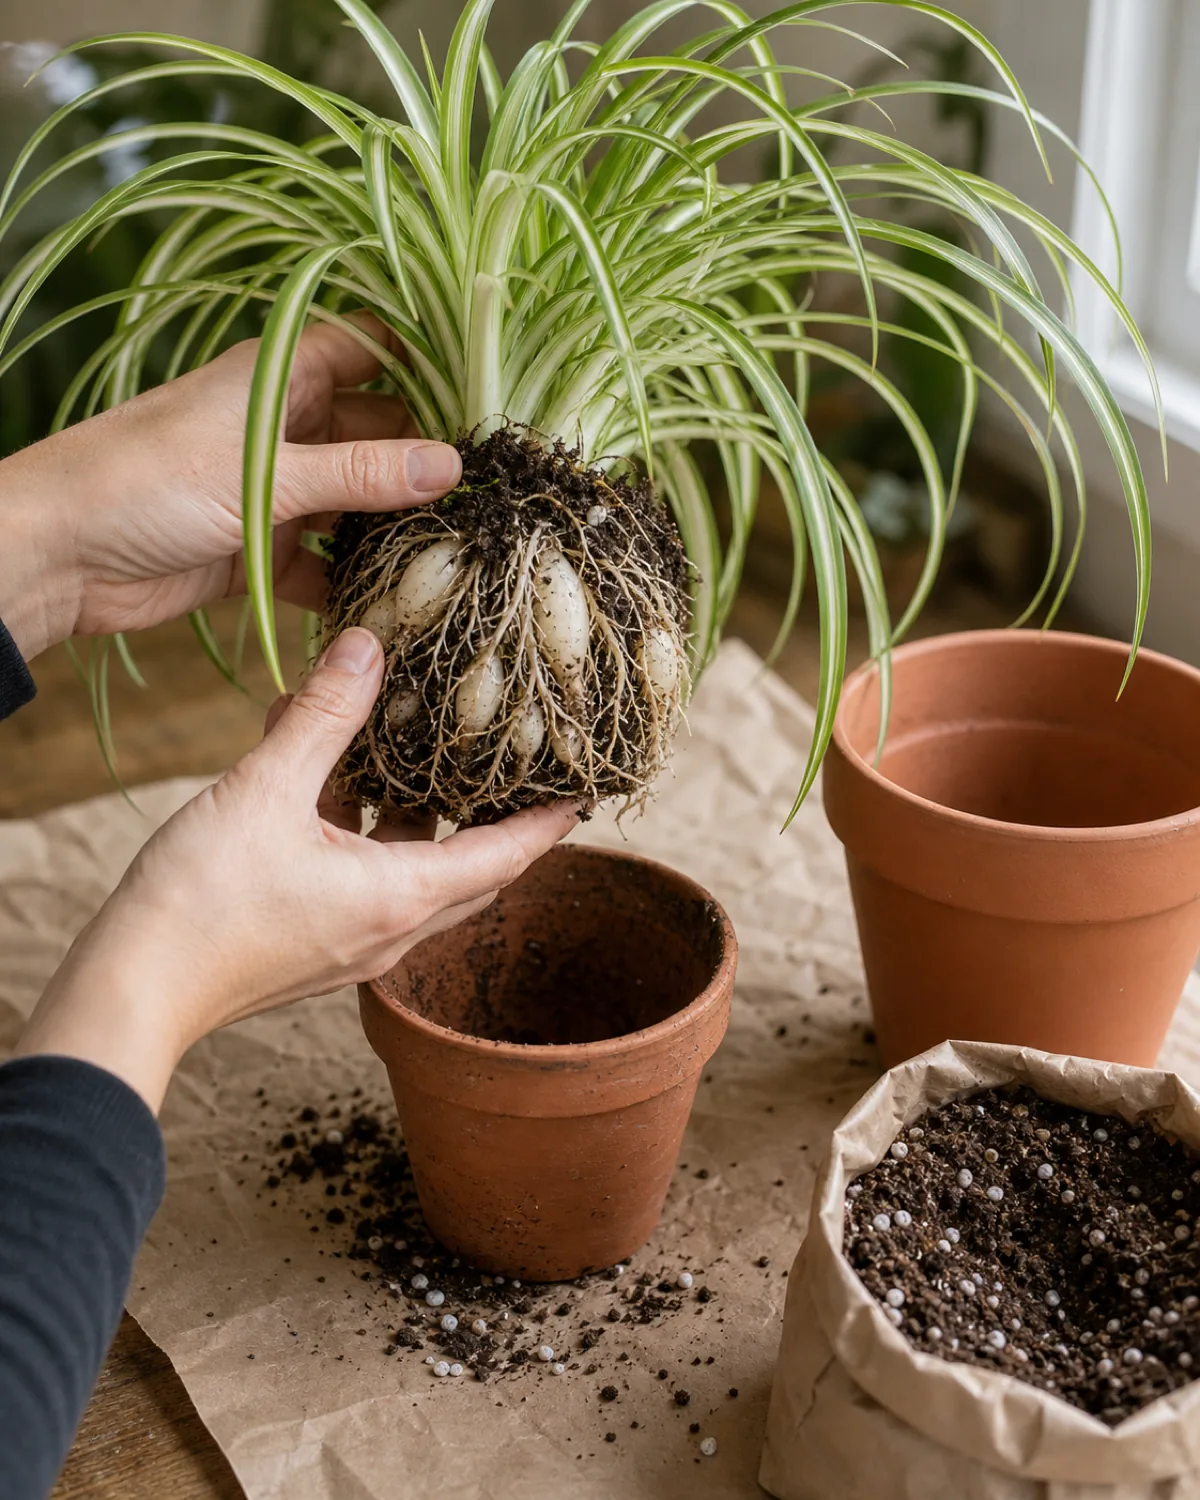
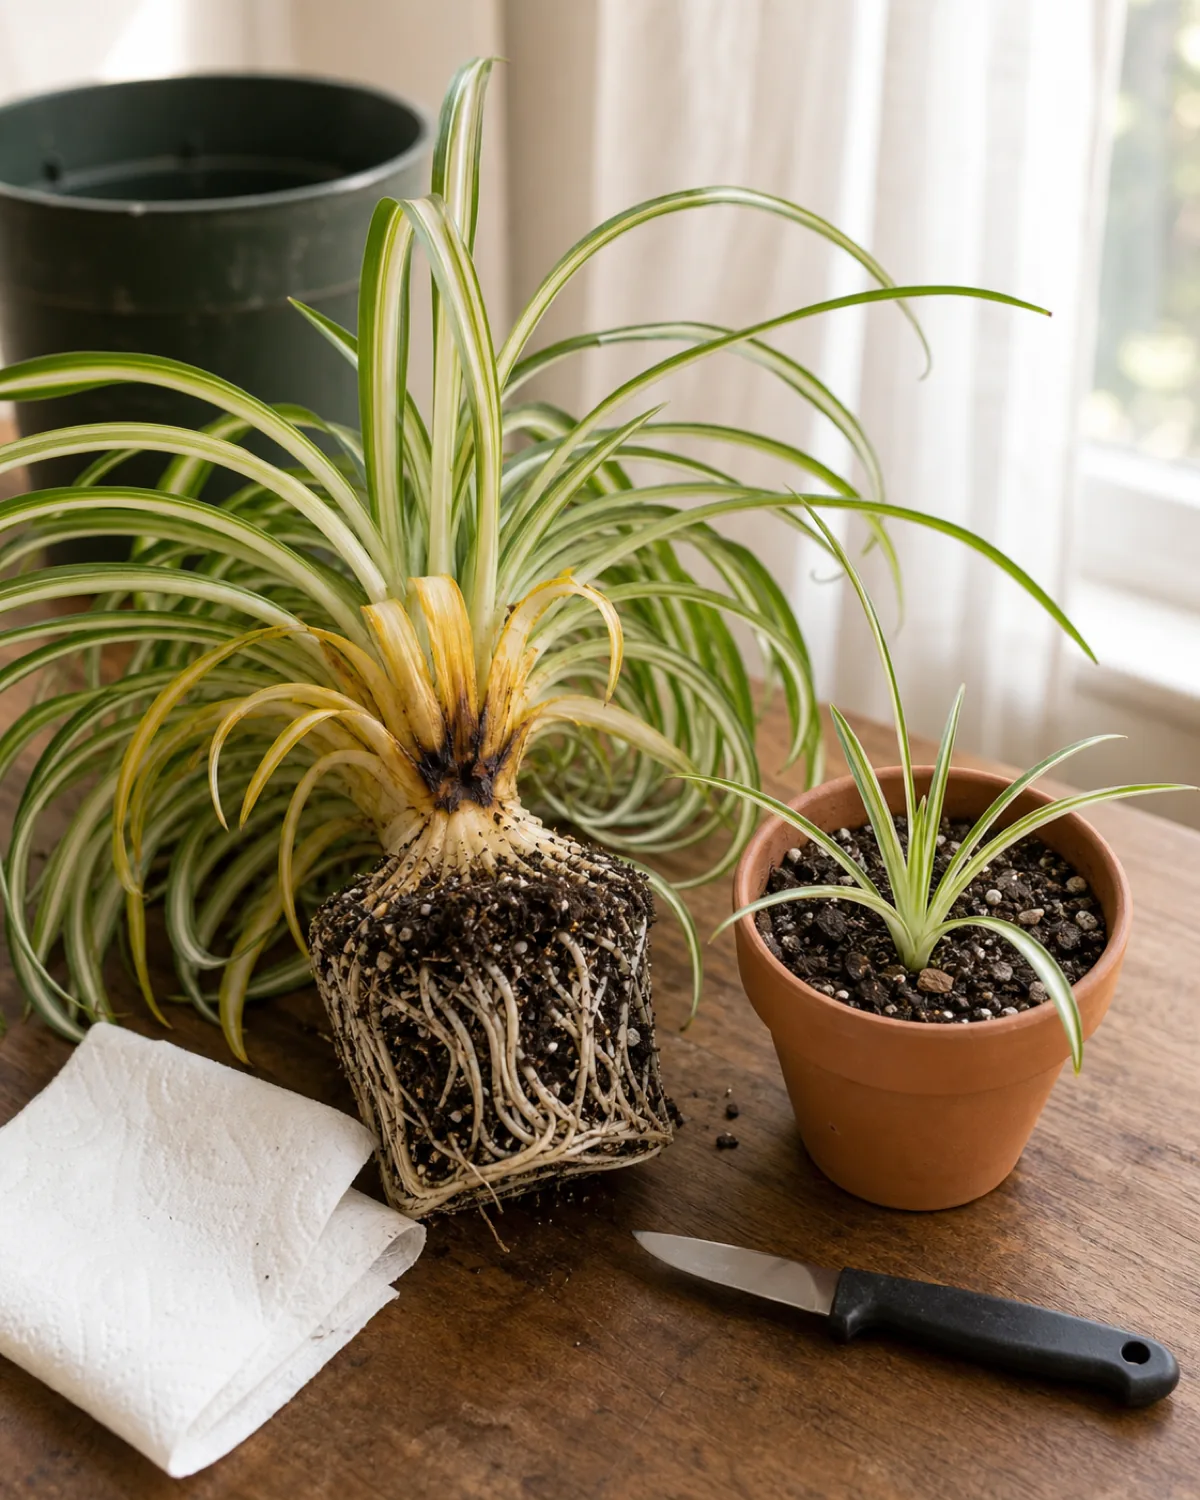
When and how to repot (and why slightly cramped is best)
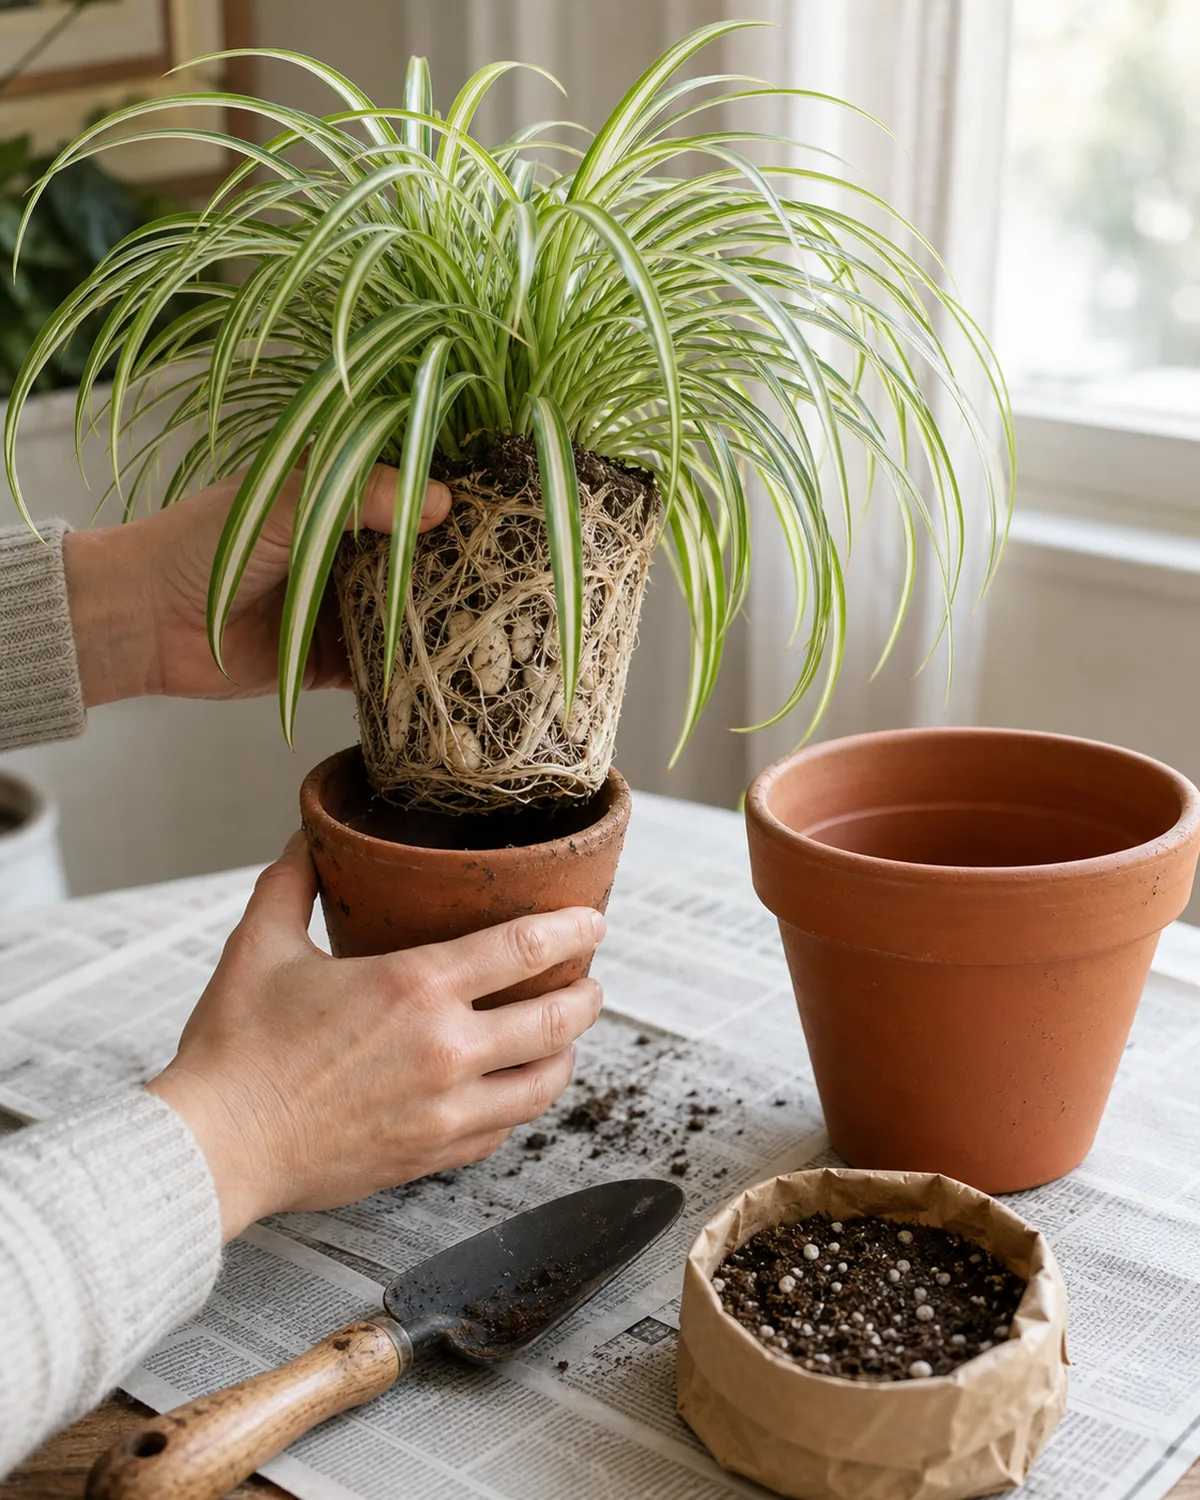
Repot every one to two years, or when the thick tuberous roots literally lift the plant out of the pot or crack a plastic container. Go up only one pot size in spring, refresh the soil, and trim any mushy black tuber sections with a clean blade.
Spider plant blooms and pups more reliably when slightly root-bound, so resist the urge to oversize the new pot. A jump from a 6-inch pot to a 10-inch is the surest way to lose a season of babies.
- Repot in spring so the plant has the full growing season to settle into the new soil.
- One pot size up at most. A 6-inch goes to a 7 or 8, not a 10.
- Trim any mushy black tubers before repotting; they are dead and will only spread rot.
Spider Plant Care: The Quick Checklist
- 1Bright indirect light is the babies triggerEast window, sheer-curtained south, or three to four feet back from a west window; harsh direct sun bleaches the leaves.
- 2Water when the top inch driesOnce a week in summer, every 10 to 14 days in winter; the tuberous roots store days, not weeks, of moisture.
- 3Brown tips equal tap water chemistryFluoride and chloride buildup, not under or overwatering. Use filtered or sat-out water and snip the tips at a sharp angle.
- 4Snug pot equals more babiesGo up one pot size at most. Terracotta with drainage beats wet plastic for the white tuberous roots.
- 5Cascade it off something tallA high shelf, a tall bookcase, or a plant stand so the long arching leaves and dangling pups have room to hang.
- 6No stolons yet equals not root-bound yetA young plant in a too-large pot will not throw pups for years. Bright indirect plus a snug pot triggers the arching baby stalks.
- 7Pups root in a glass of water in a weekSnip a pup with visible root nubs, drop it in water or moist soil. The fastest propagation in houseplants.
- 8Genuinely safe around cats, dogs, and toddlersOn the ASPCA non-toxic list. A rare cat-safe, kid-safe pick when so many common houseplants are mildly toxic.
- 9Repot every 1 to 2 yearsOnly one pot size up, in spring, when roots crack the pot or lift the plant out of it.
- 10Pests are mostly mites and aphidsShower the plant for mites, wipe aphids off the new stalks, insecticidal soap for heavier infestations.
- 11Crown rot is the fatal signalYellowing crown center and mushy base equals chronic overwatering. Cut, dry, repot any healthy pups, save what you can.
- 12Pick a variety by leaf patternVittatum cream center, Variegatum cream edges, curly Bonnie, broader Hawaiian, or the rare all-green species. Care is identical.
- 13Snip a pup every couple of monthsSharing pups keeps the parent tidy and signals it to throw more stolons faster.
kultivy.com
The pests that find a spider plant (and a shower-and-soap fix)
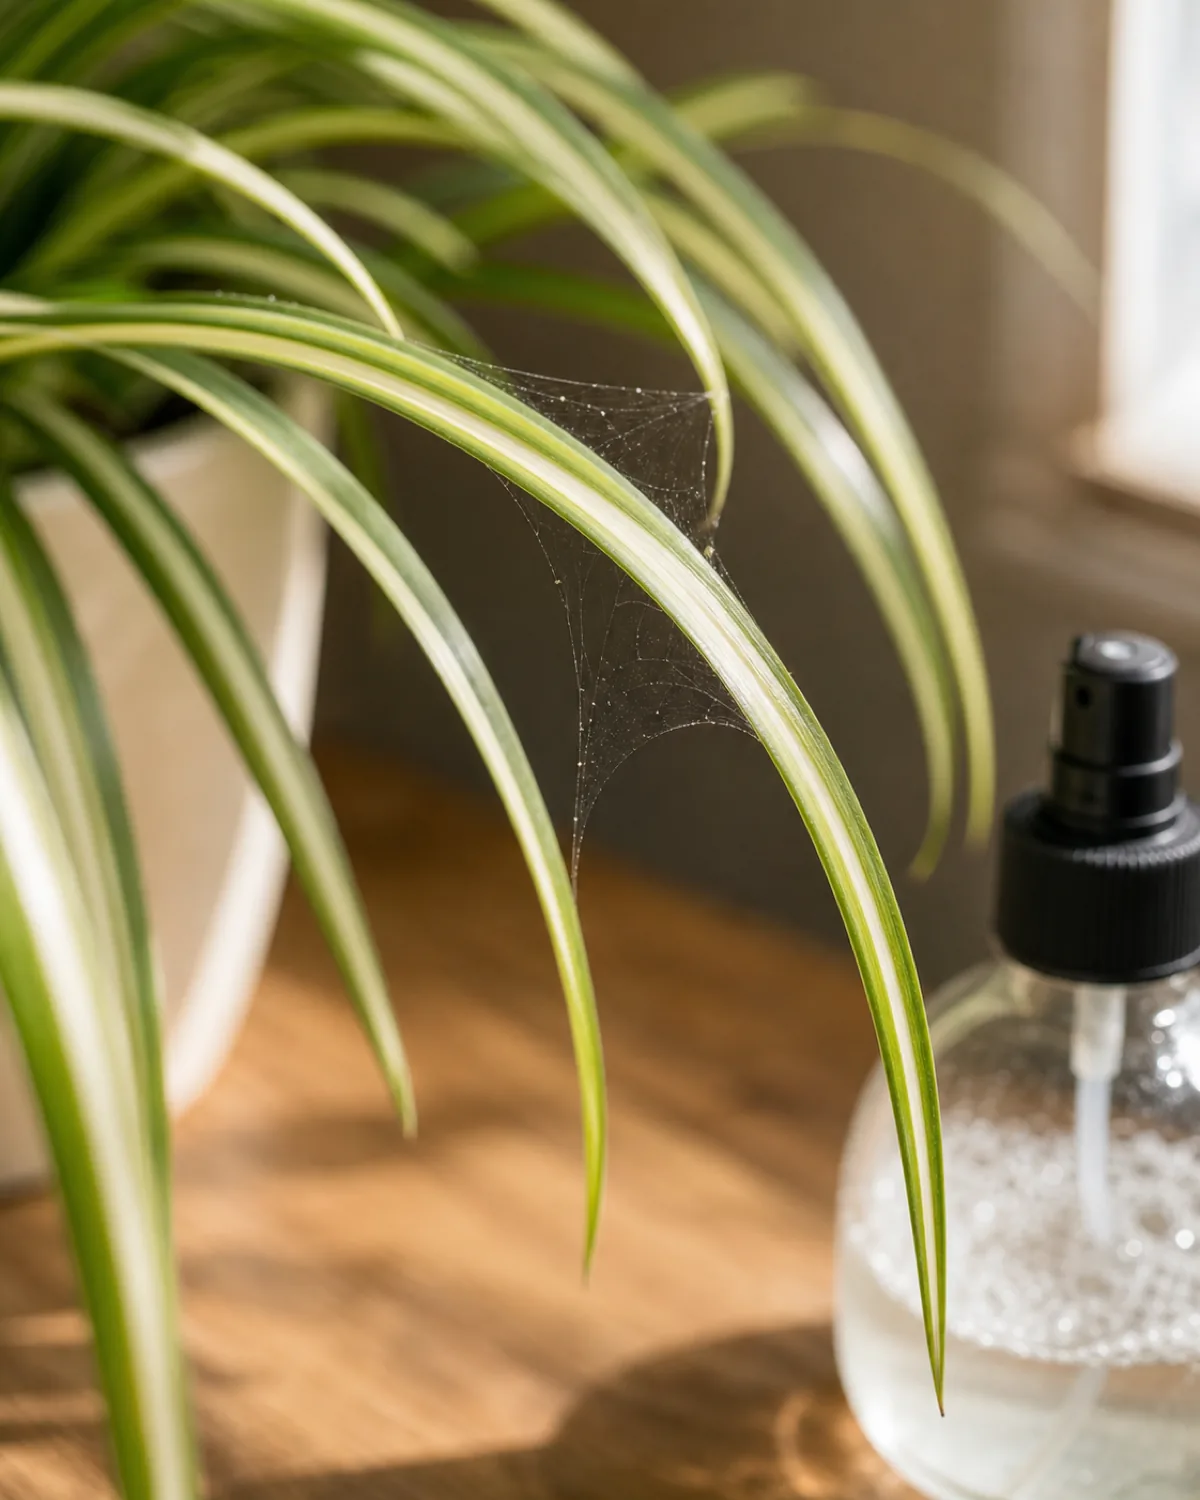
Spider plant is mostly pest-resistant, but three pests show up reliably enough to learn the signs: spider mites in dry indoor air leaving fine webbing between the arching leaves, aphids clustering on the soft new flower stalks before pups even form, and brown scale bumps on older crown bases.
The fix order is fast — rinse the whole plant in the shower for mites, dab visible aphids off with a wet cloth before they reach the stolons, and treat any heavier infestation with insecticidal soap sprayed onto both the leaf top and the underside where mites really live.
- Check the leaf crosses for fine webbing every couple of weeks in heating season; mites move fast in dry air.
- Inspect new stolons for aphids before they reach the baby plantlets, where they are hardest to remove.
- Quarantine a buggy plant in a separate room for two weeks so the pests do not find the rest of the collection.
Why a whole clump is yellowing or rotting from the center (and crown rot rescue)
Central crown yellowing or a mushy base means crown rot, almost always from chronic overwatering or a plastic pot with no drainage. Lift the plant, cut away mushy tuber and crown tissue with a clean blade, let cut surfaces dry overnight, and then repot any healthy roots and pups in fresh dry mix.
Crown rot is the fatal spider plant signal. Brown leaf tips are a chemistry annoyance; a yellowing center is a fight for the plant’s life.
- Act on the first soft spot at the base. Waiting a week often means losing the parent rosette entirely.
- Save the babies first. Any detached pup with root nubs will root in water and carry the plant forward even if the parent fails.
- Switch to terracotta with drainage for the rescue repot; plastic without drainage is what got you here.
The varieties worth knowing (‘Vittatum’, ‘Variegatum’, ‘Bonnie’, ‘Hawaiian’, and the all-green species)
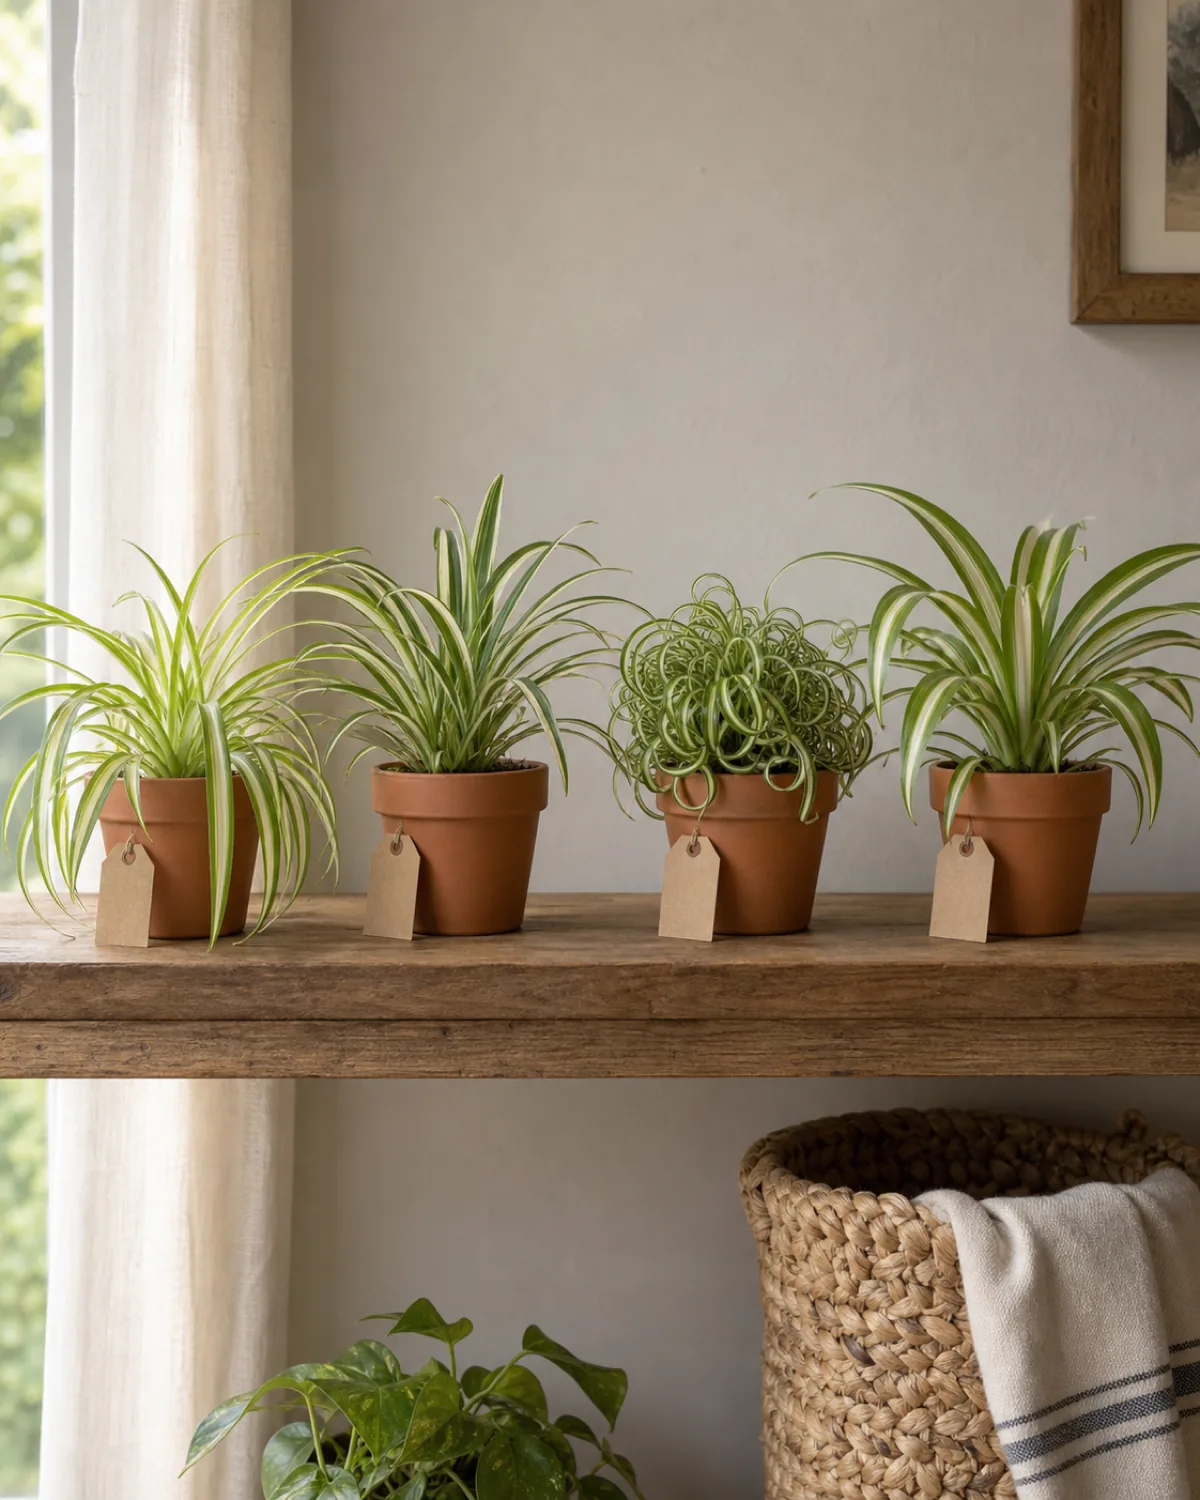
Five varieties cover almost every spider plant for sale. The classic Vittatum has a cream center stripe with green margins — the textbook spider plant. Variegatum flips the pattern with cream edges and a green center, a cleaner mirror of Vittatum.
Bonnie has tightly curling leaves and a compact habit, fun for a small shelf. Hawaiian shows broader stripes and a slightly more tropical feel. The rarer all-green species form has no stripes at all, grows more vigorously, and blooms more easily than any variegated cultivar.
Pick by leaf pattern — care is identical across all five.
Vittatumfor the classic look. Cream center, green margins, the textbook spider plant.Bonniefor a small shelf. Curly leaves stay tight and compact even when the plant matures.- The all-green species form for the most pups; less photogenic, but the easiest bloomer.
A few quick tips for keeping a spider plant thriving long term
A spider plant that is still pupping at year five is doing four small things right. Water with filtered or sat-out tap water to avoid brown tips. Give it bright indirect light to keep the variegation crisp. Let it get mildly root-bound for the best baby plantlet show. And propagate the pups regularly to share with friends or to keep a backup on a different shelf.
The plant rewards every one of those habits with more babies, faster. Once you have a thriving parent and a steady supply of pups, our plant shelf and corner ideas guide is a good next read for finding all those cascading new plants the right perch.