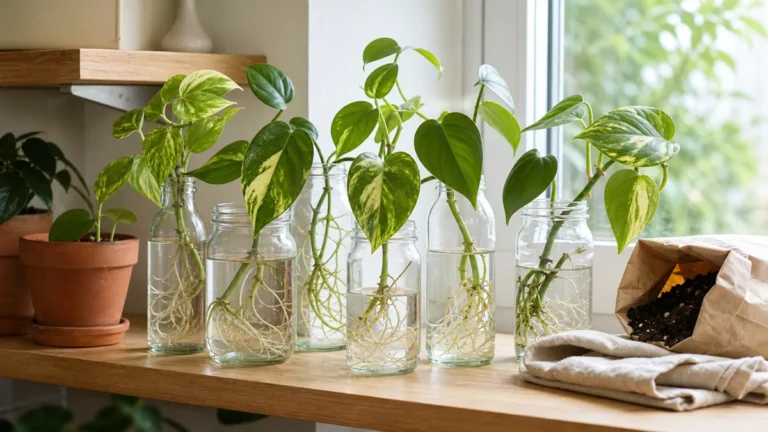
Every monstera node is a self-contained growth factory. One stem section with a node, an aerial root, and a leaf can become a full plant within a year.
Monstera deliciosa is one of the most forgiving houseplants to propagate — aerial roots are pre-adapted for rooting and cuttings tolerate a wide range of conditions.
This guide covers five methods, node anatomy, timing, potting, troubleshooting, and how different monstera varieties respond.
From node anatomy and timing to five propagation methods, potting, troubleshooting, and fenestration timelines.
- 1 Why monstera is easy to propagate
- 2 Node anatomy and why it matters
- 3 Best time of year to propagate
- 4 Tools and supplies you need
- 5 Taking a stem cutting
- 6 Rooting cuttings in water
- 7 Rooting in moss or perlite
- 8 Air layering without cutting
- 9 Dividing a multi-stem plant
- 10 Single-node propagation
- 11 Mother plant care after cutting
- 12 Potting up rooted cuttings
- 13 Troubleshooting common problems
- 14 When fenestrations appear
- 15 Propagating different varieties
Why Monstera Is One of the Easiest Houseplants to Propagate
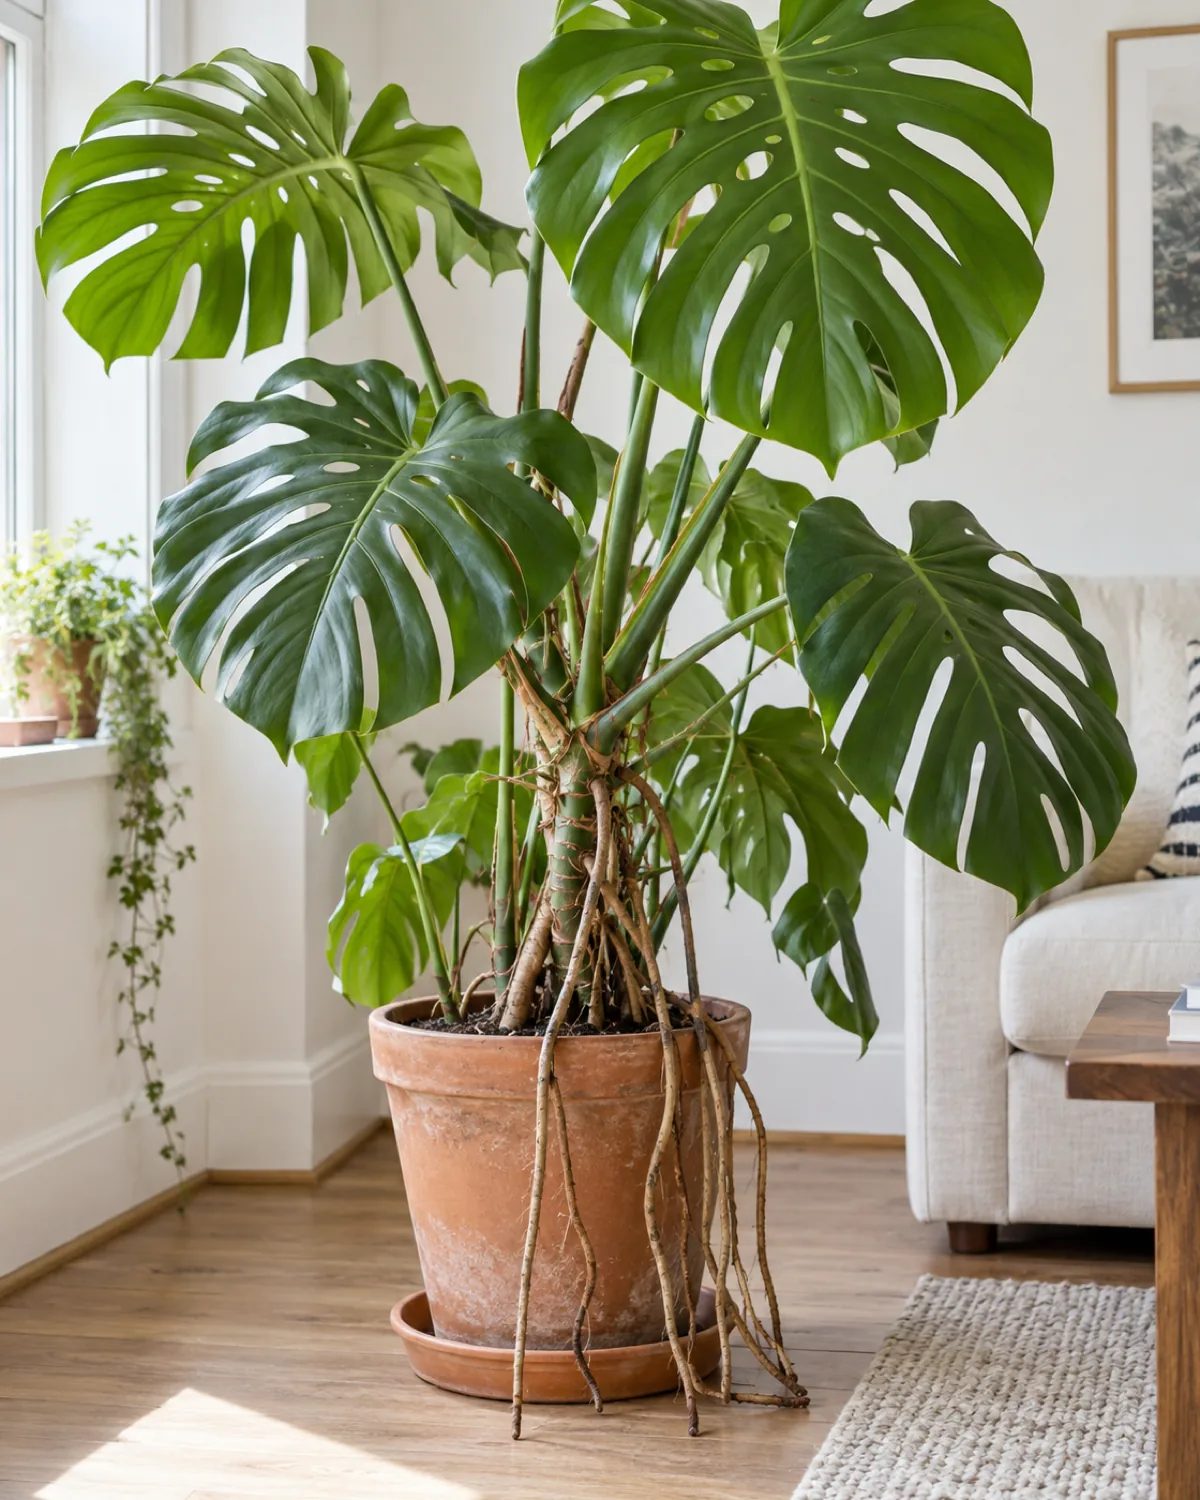
Monstera deliciosa grows aerial roots at nearly every node along its stem. In the wild, these roots anchor the vine to tree trunks and absorb moisture from humid air. In your living room, they are pre-built rooting structures waiting for a reason to grow.
That head start is what makes propagating monstera so forgiving. Most houseplants need to generate roots from scratch at a cut wound. Monstera cuttings already have aerial roots that redirect into true roots the moment they hit water or moist medium.
- Each node is a complete growth point — it contains an axillary bud (dormant eye) that can produce a new stem, plus the aerial root infrastructure to support it
- The timeline is fast — visible root growth in two to four weeks, transplant-ready roots in six to eight weeks, a self-sustaining plant within three months
- Cuttings tolerate mistakes — a slightly long callus period, imperfect water changes, or a dim windowsill will slow things down but rarely kill a monstera cutting outright
Compare that to finicky species like fiddle leaf figs or string of pearls where one wrong variable can collapse the whole cutting. Monstera gives you a wide margin for error.
Monstera Node Anatomy and Why It Matters
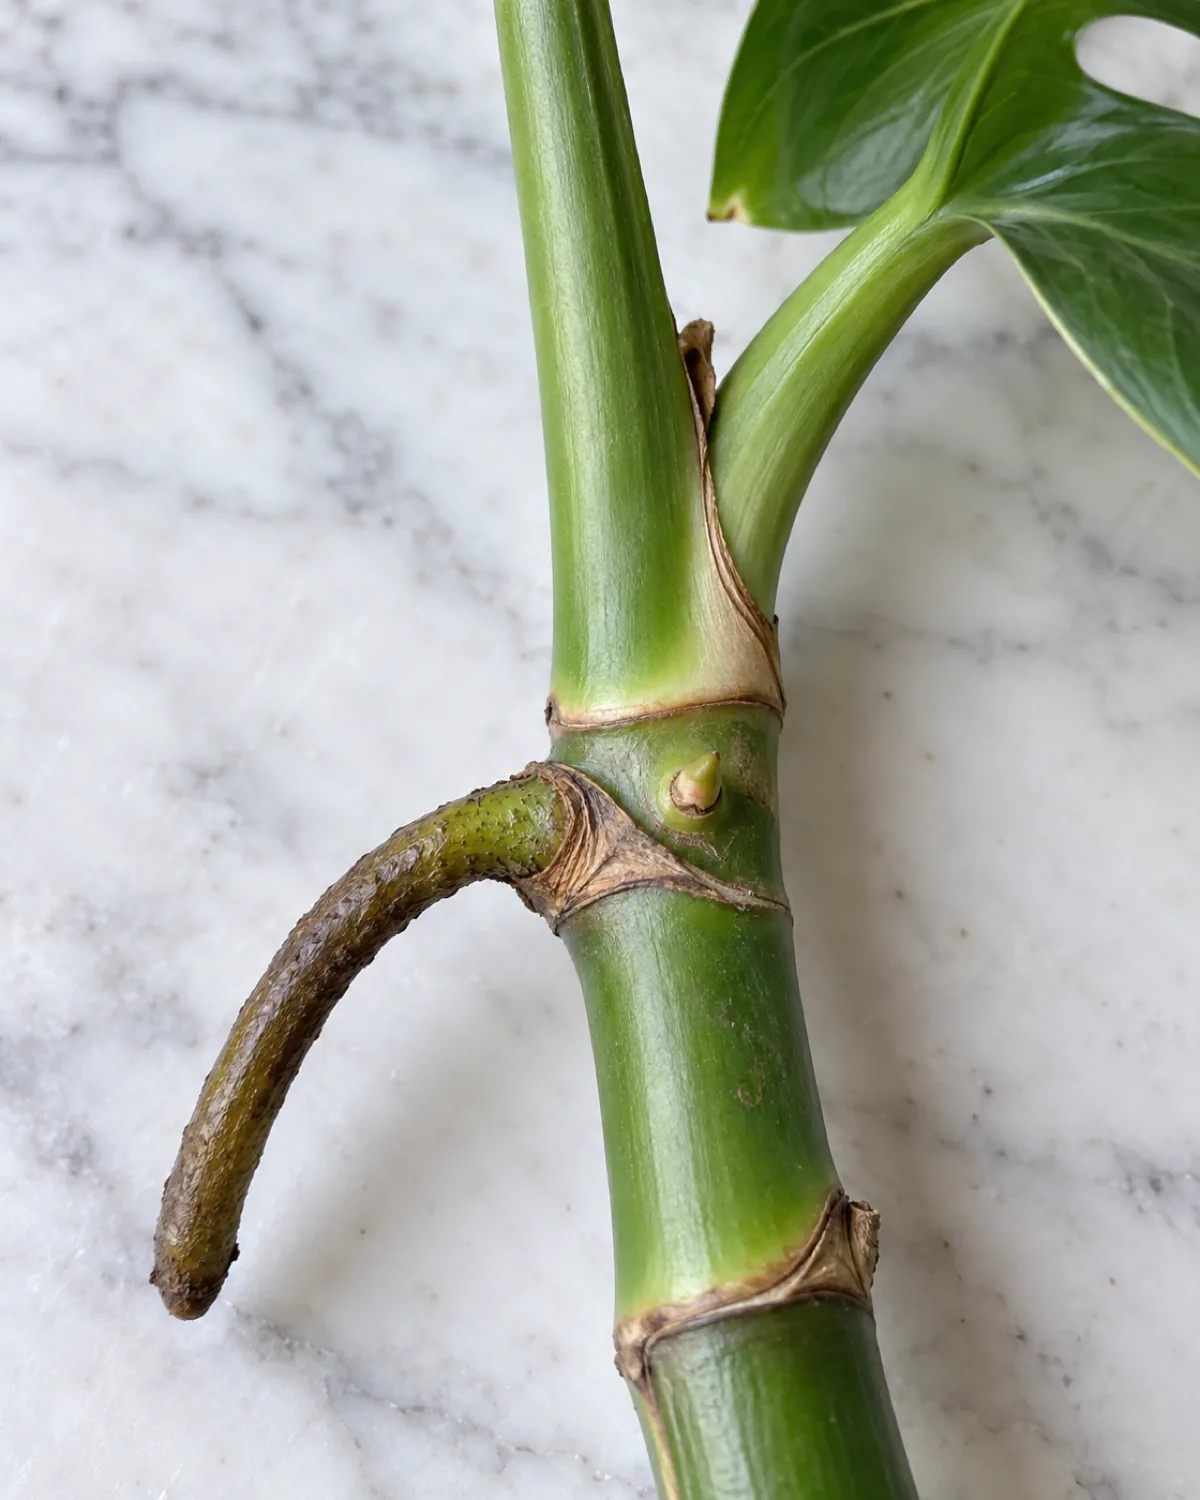
The node is the only part of a monstera stem that can produce a new plant. Understanding what a node is — and what it is not — prevents the most common propagation failure.
A monstera stem has two alternating zones:
- Node — the slightly thickened ring or bump where a leaf petiole attaches. It contains the axillary bud (a tiny dormant eye that becomes new growth) and usually has an aerial root emerging from it.
- Internode — the smooth stretch of stem between two nodes. It has no buds and no capacity to generate new growth.
A monstera cutting without a node will grow roots from an aerial root stub but never produce a new leaf. The node holds the only bud capable of new growth. No node, no plant.
When you look at a monstera stem, follow the leaf petiole back to where it meets the main stem. That junction is the node. The aerial root — if present — will be emerging from the same spot or just below it. A healthy cutting needs the node, ideally the aerial root, and at least one leaf for photosynthesis.
The Best Time of Year to Propagate Monstera
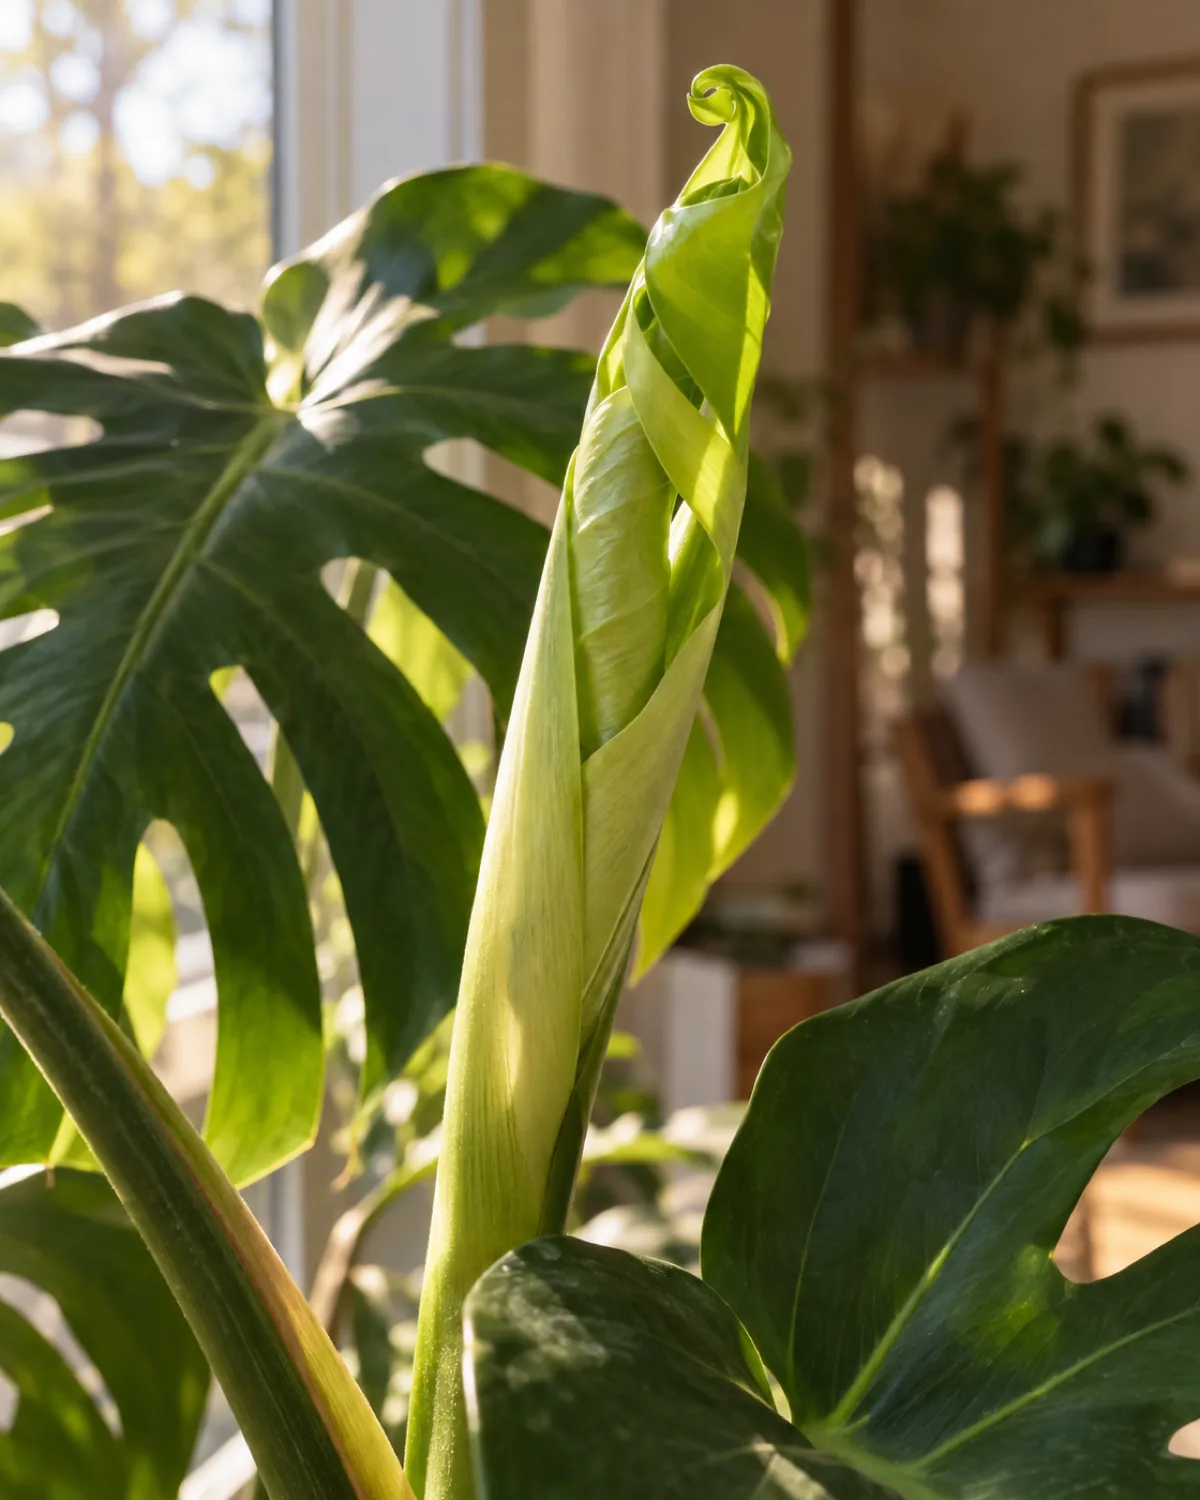
Spring through midsummer is the ideal propagation window. The plant is actively growing, hormones are flowing, and the long days give cuttings the light they need to photosynthesize while rooting.
The clearest signal that your monstera is ready: it is pushing new leaves. An unfurling leaf means growth hormones are active throughout the stem, and cuttings taken during this phase root faster.
- March through July — prime season; fastest rooting, strongest root development
- August through September — still viable; slightly slower as daylight shortens
- October through February — possible but slow; cuttings may sit dormant for weeks before rooting, and the risk of rot increases in cool low-light conditions
Winter propagation is not impossible, but it is noticeably slower and less reliable. If you must propagate in winter, use grow lights to compensate for the short days and keep the cutting in the warmest room of your home.
Tools and Supplies You Need Before You Cut
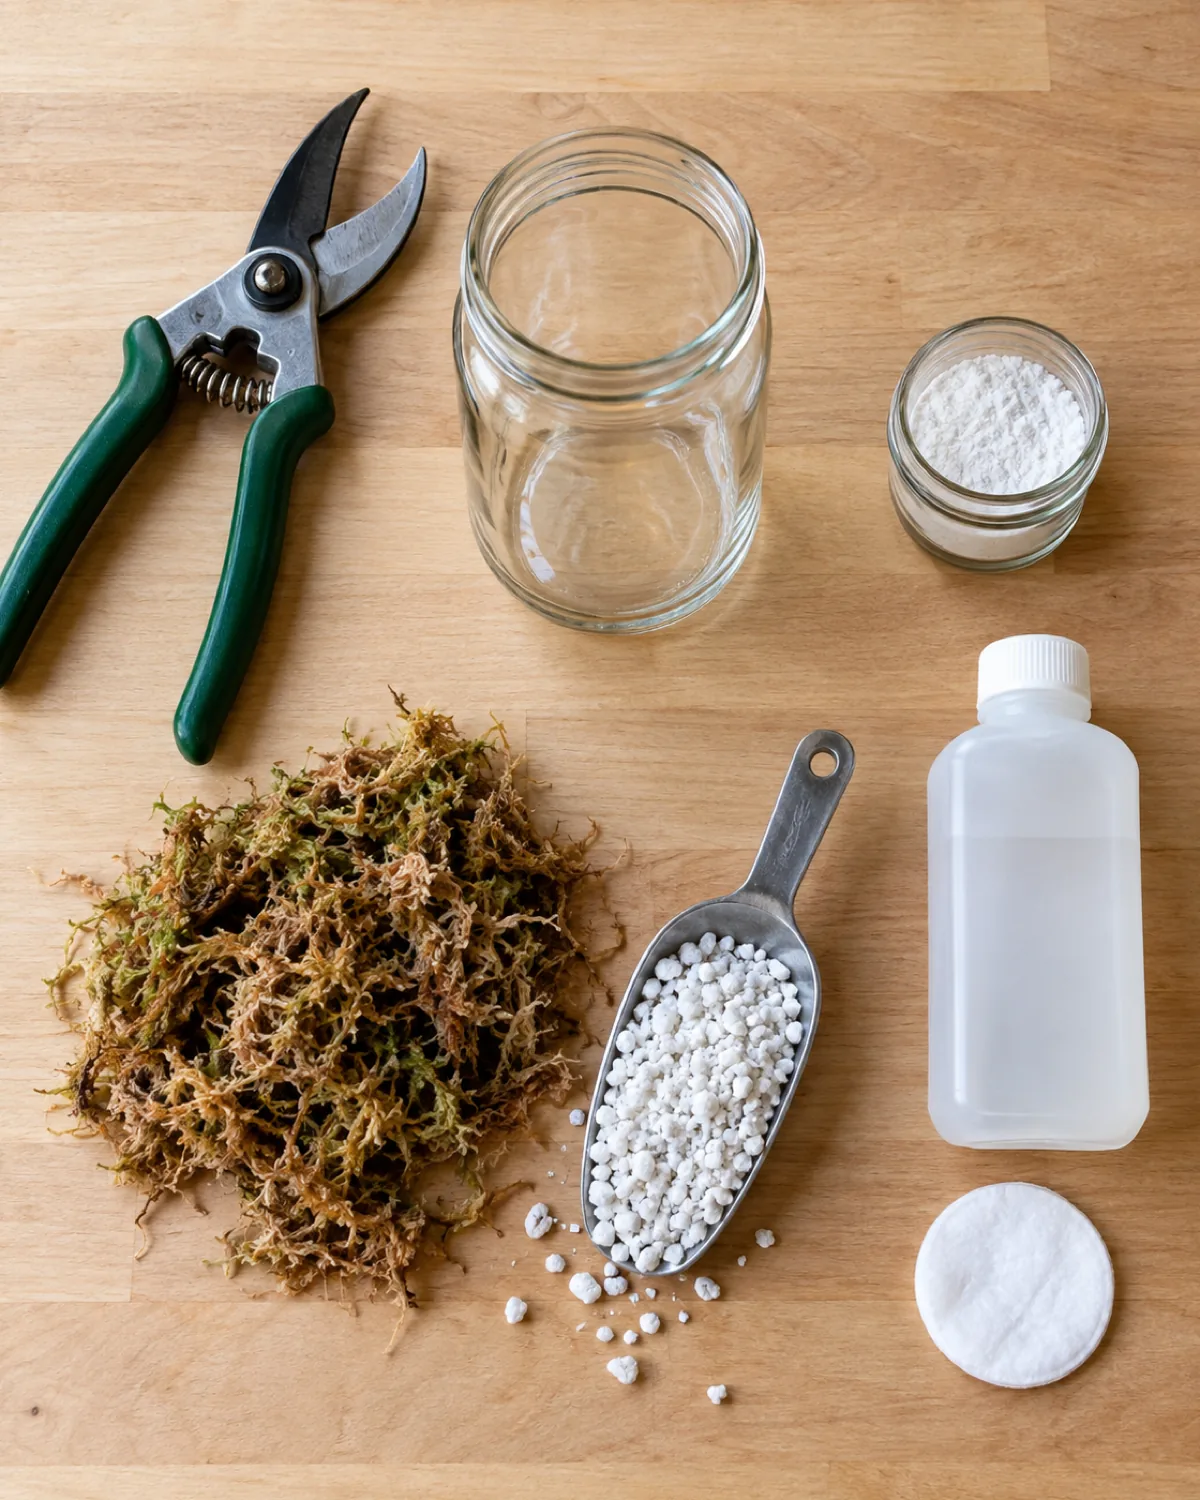
Gather everything before you make the first cut. A clean workspace and sterile tools reduce the risk of bacterial infection at the cut site.
Essential tools:
- Sharp bypass pruning shears — or a clean knife; the blade must be sharp enough to cut cleanly without crushing the stem tissue
- Rubbing alcohol (70% isopropyl) — wipe the blade before and after cutting to prevent transferring pathogens
- Clear glass jar or propagation station — clear walls let you monitor root growth without disturbing the cutting
- Rooting hormone powder (optional) — speeds callus formation and encourages root initials; not required but helps with thicker stems
For moss or perlite rooting:
- Sphagnum moss — long-fiber, rehydrated and wrung out until damp but not dripping
- Perlite — coarse grade; holds moisture with excellent airflow around the node
- A clear plastic cup or container — lets you see root development through the wall
One thing you do not need: a complicated setup. A clean glass jar, a sharp blade, and a bright windowsill are enough for most monstera cuttings.
How to Take a Stem Cutting the Right Way
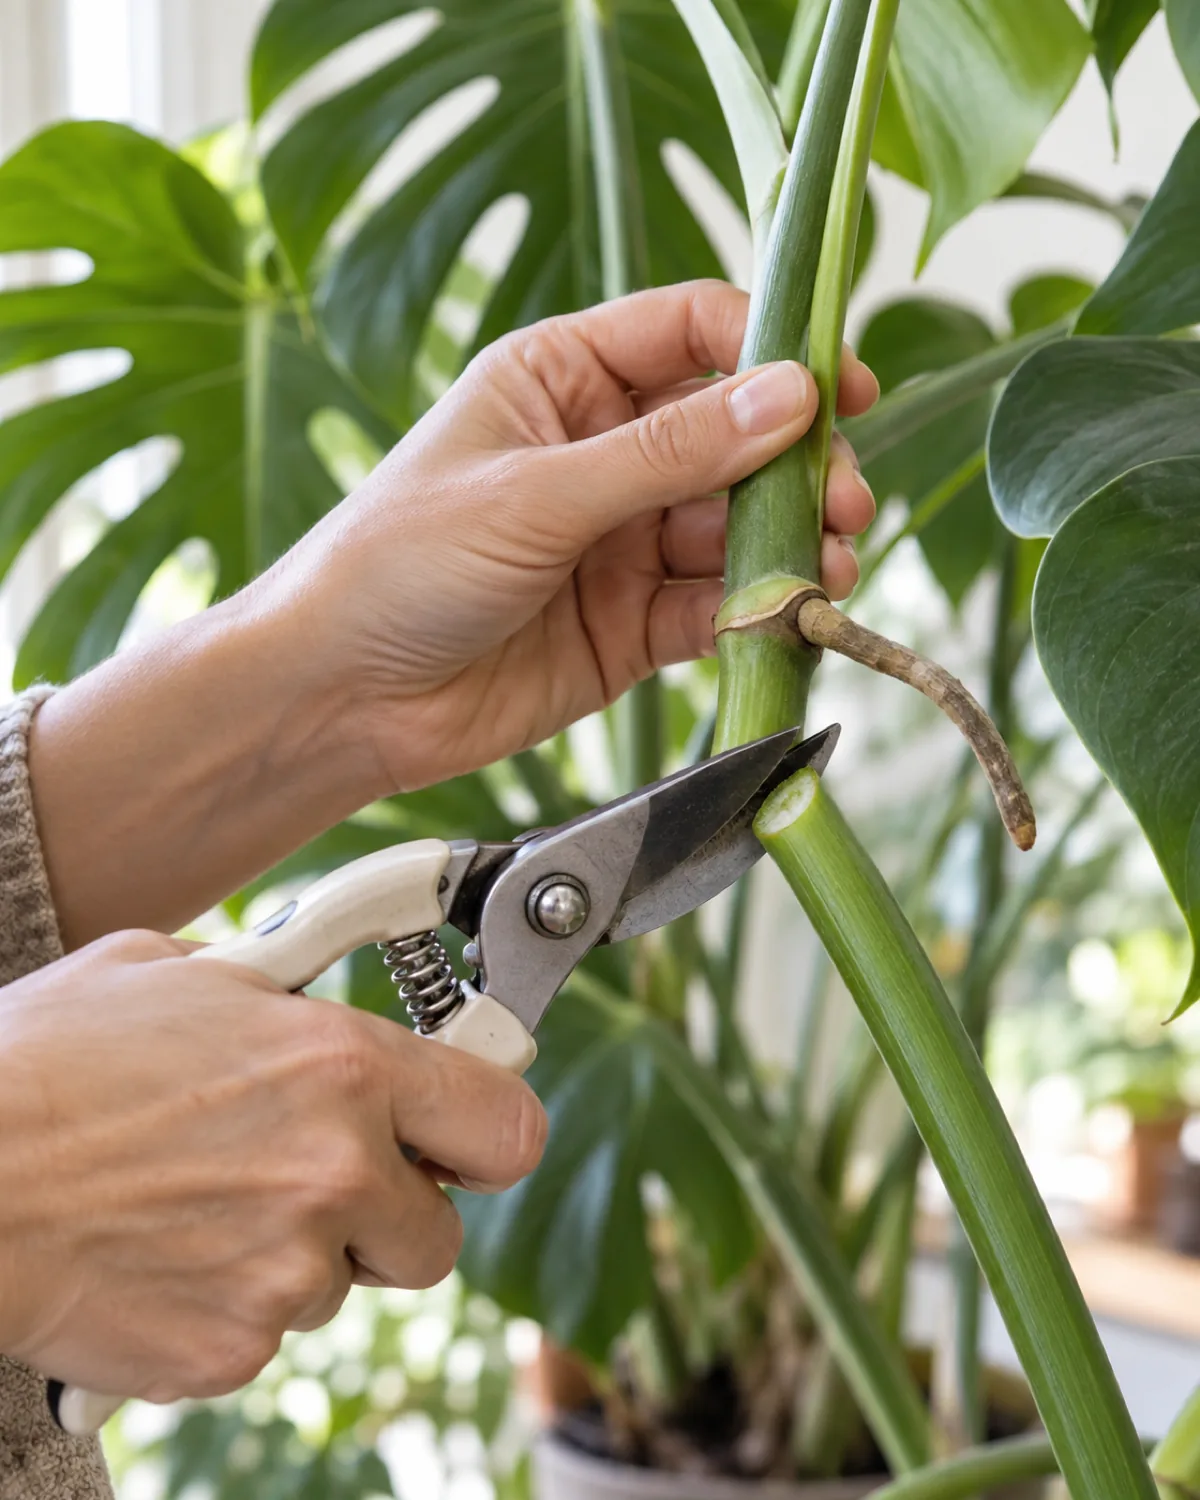
The quality of your cut determines how well the cutting roots. A clean angled cut exposes more cambium tissue and reduces the flat surface where water can pool and invite rot.
Follow these steps for the highest rooting success rate. Each one matters.
One common mistake: cutting between two nodes, through the internode. That gives you a cutting with no node at all — it will never produce new growth no matter how long you wait.
Another mistake: using dull scissors that crush the stem instead of cutting cleanly. Crushed tissue turns brown and becomes a rot entry point. If your shears leave a ragged edge, sharpen them or switch to a razor blade.
Rooting Monstera Cuttings in Water
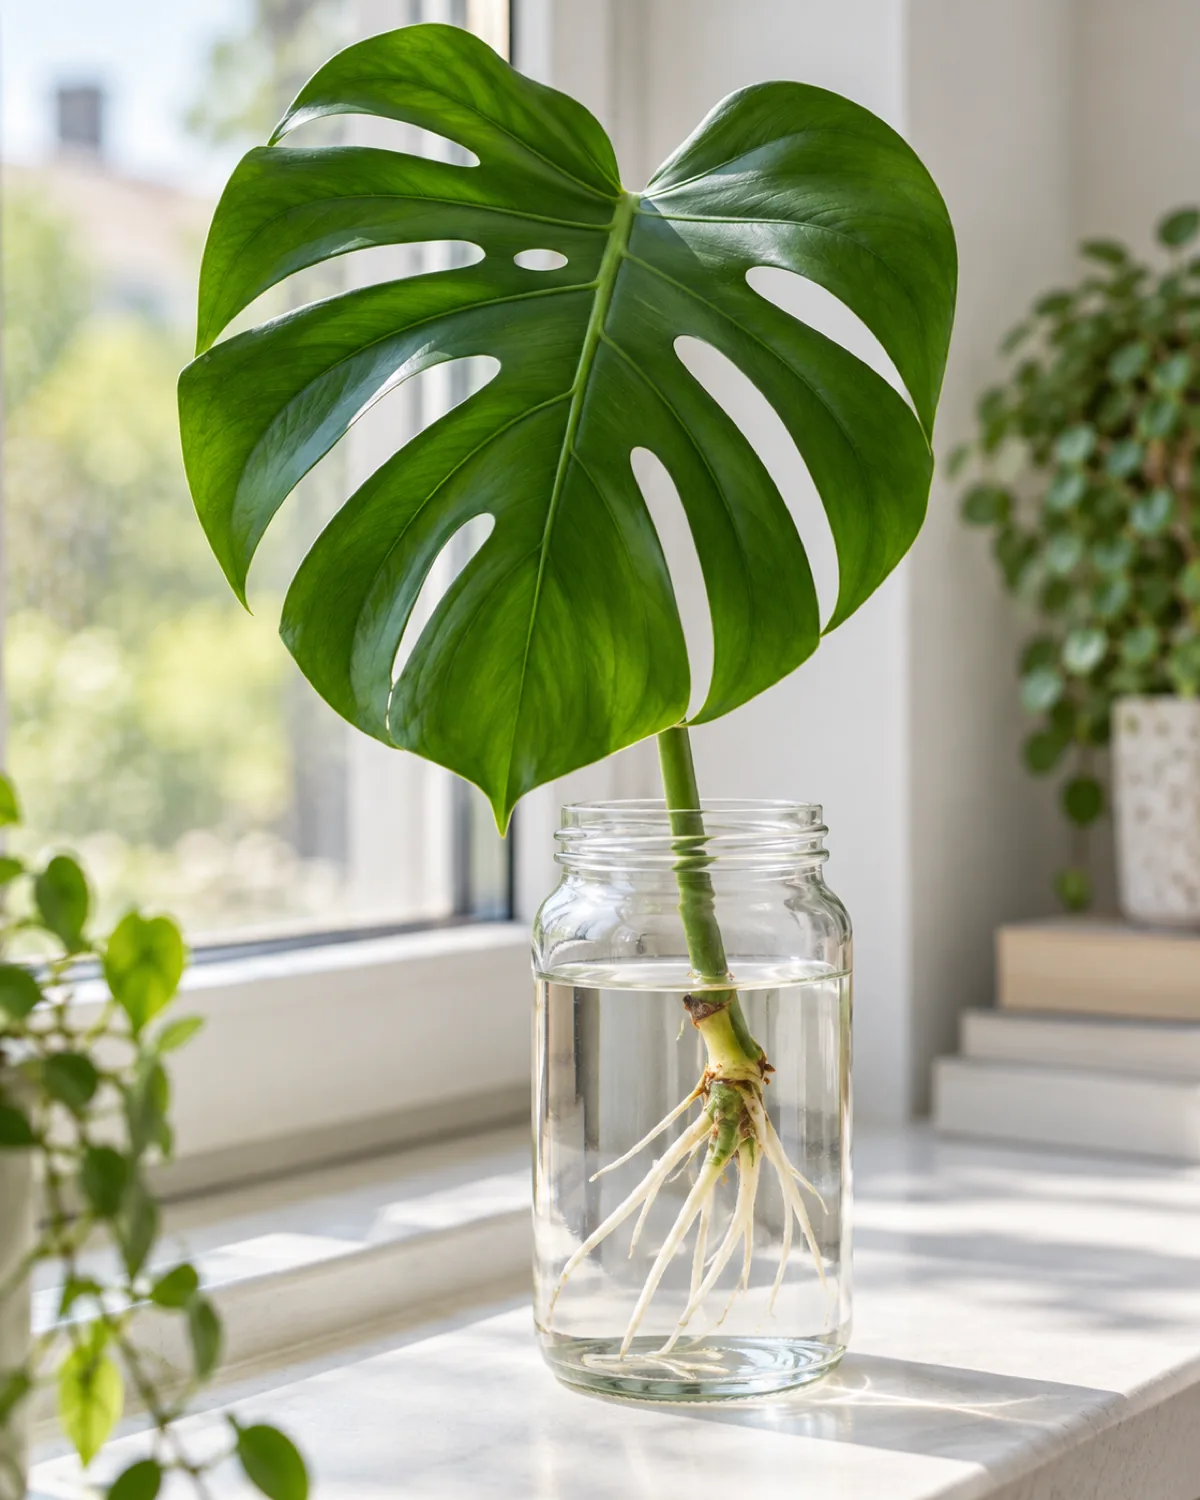
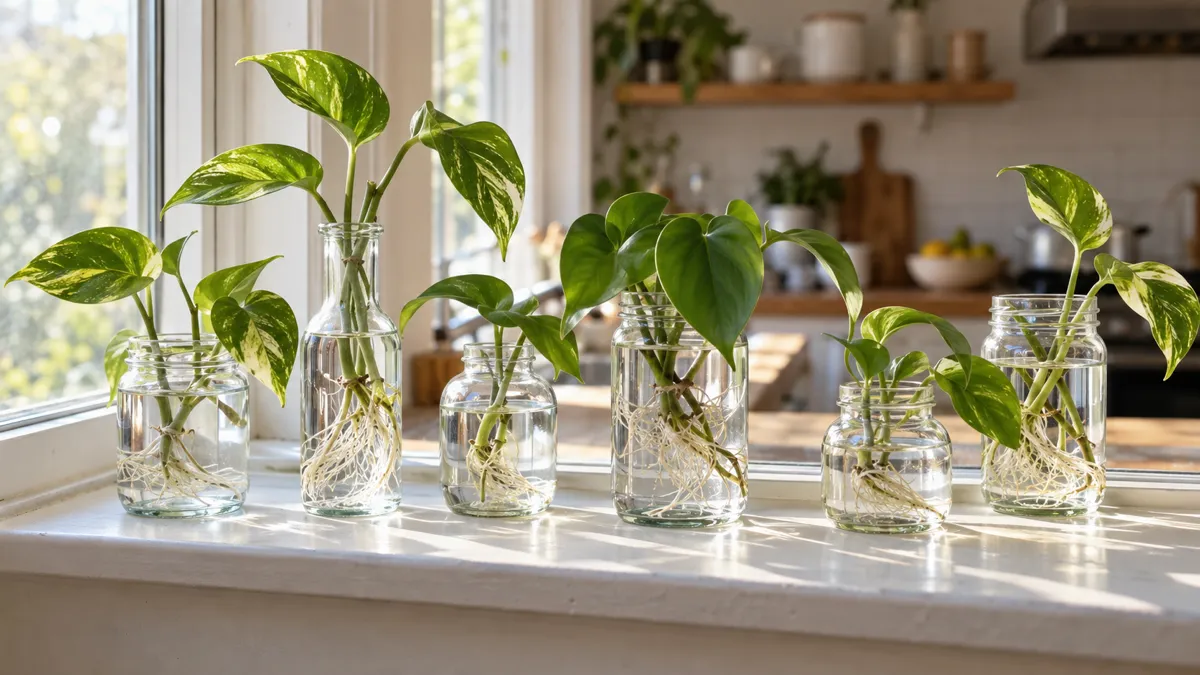
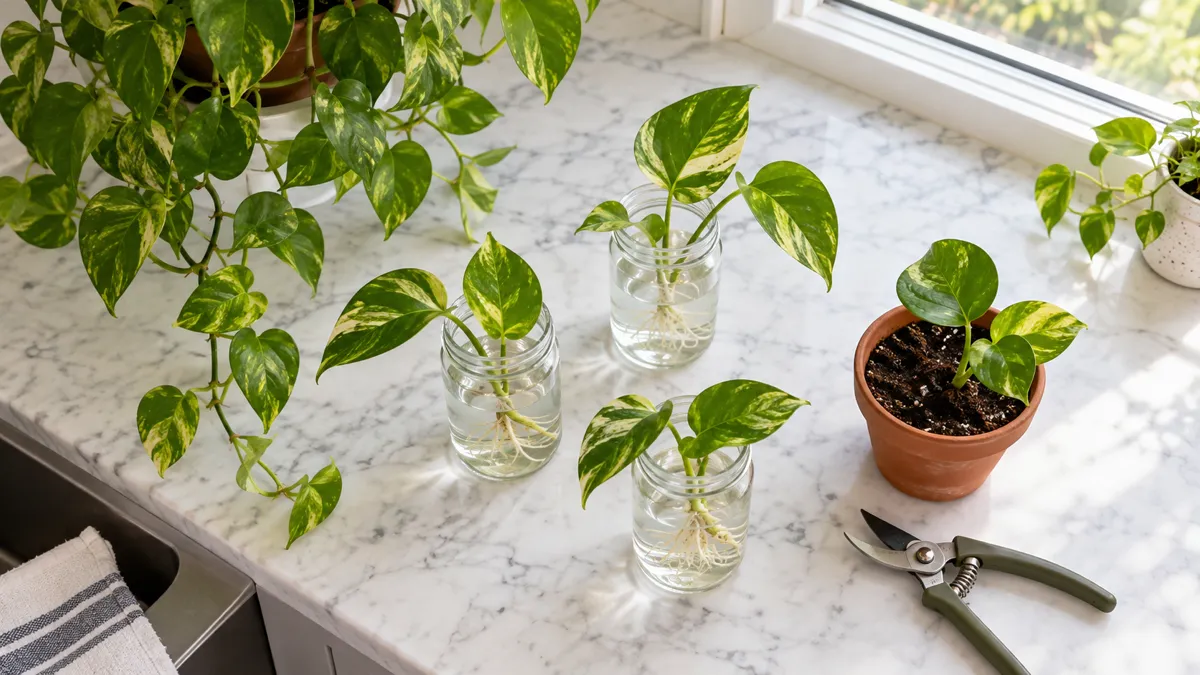
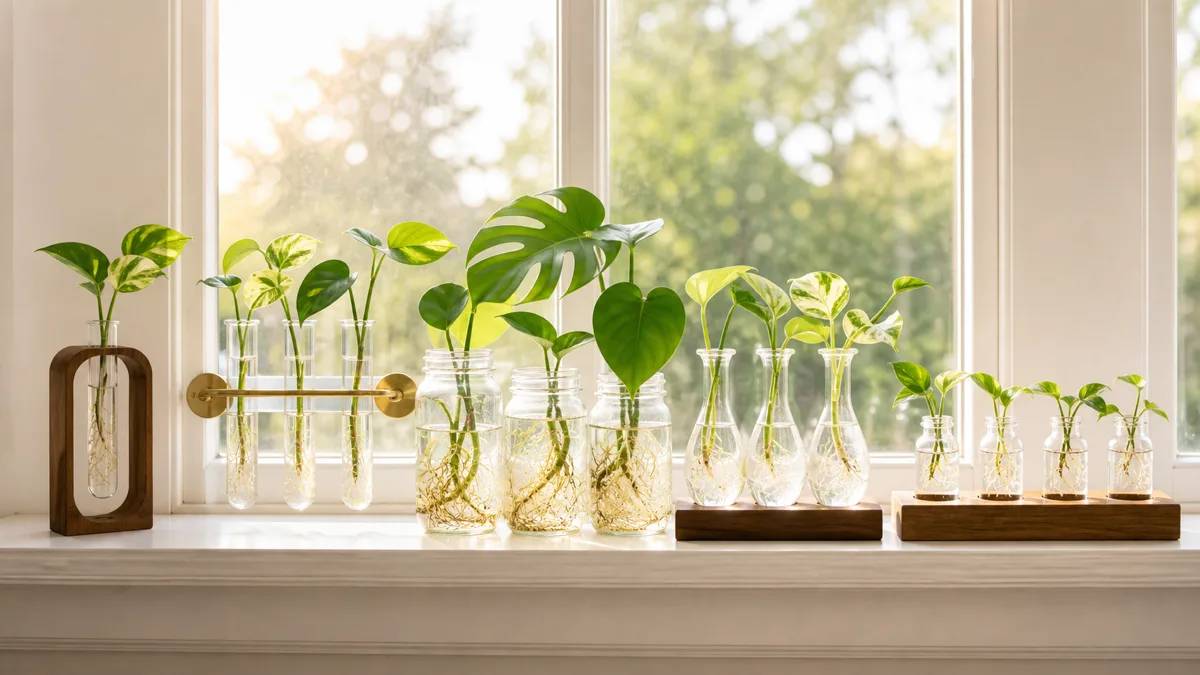
Water propagation is the most popular method because it is simple and lets you watch the roots grow in real time.
Place the cutting in a clear jar with the node and aerial root submerged. The leaf stays above the waterline. That is the entire setup.
Key details that affect success:
- Change the water every 3 to 5 days — stagnant water depletes oxygen and breeds bacteria; fresh water keeps the environment clean and oxygenated
- Use room-temperature water — cold water shocks the cutting and slows cellular activity at the cut site
- Place in bright indirect light — a north or east-facing windowsill works well; direct hot sun heats the water and encourages algae growth
- Do not add fertilizer to the water — the cutting cannot absorb nutrients until it has functional roots; fertilizer salts just feed bacteria
Root growth timeline:
- Week 1–2 — the aerial root starts extending; small white bumps (root initials) may appear at the node
- Week 3–4 — visible white roots emerging, typically 1 to 2 inches
- Week 6–8 — roots reach 2 to 3 inches with secondary branching; the cutting is ready to pot up
The longer you wait past the 2 to 3 inch mark, the harder the transition to soil becomes. Water roots are adapted to an aquatic environment and need time to acclimate to soil. Potting up early — while roots are still short and vigorous — reduces transplant shock.
Rooting Monstera Cuttings in Sphagnum Moss or Perlite
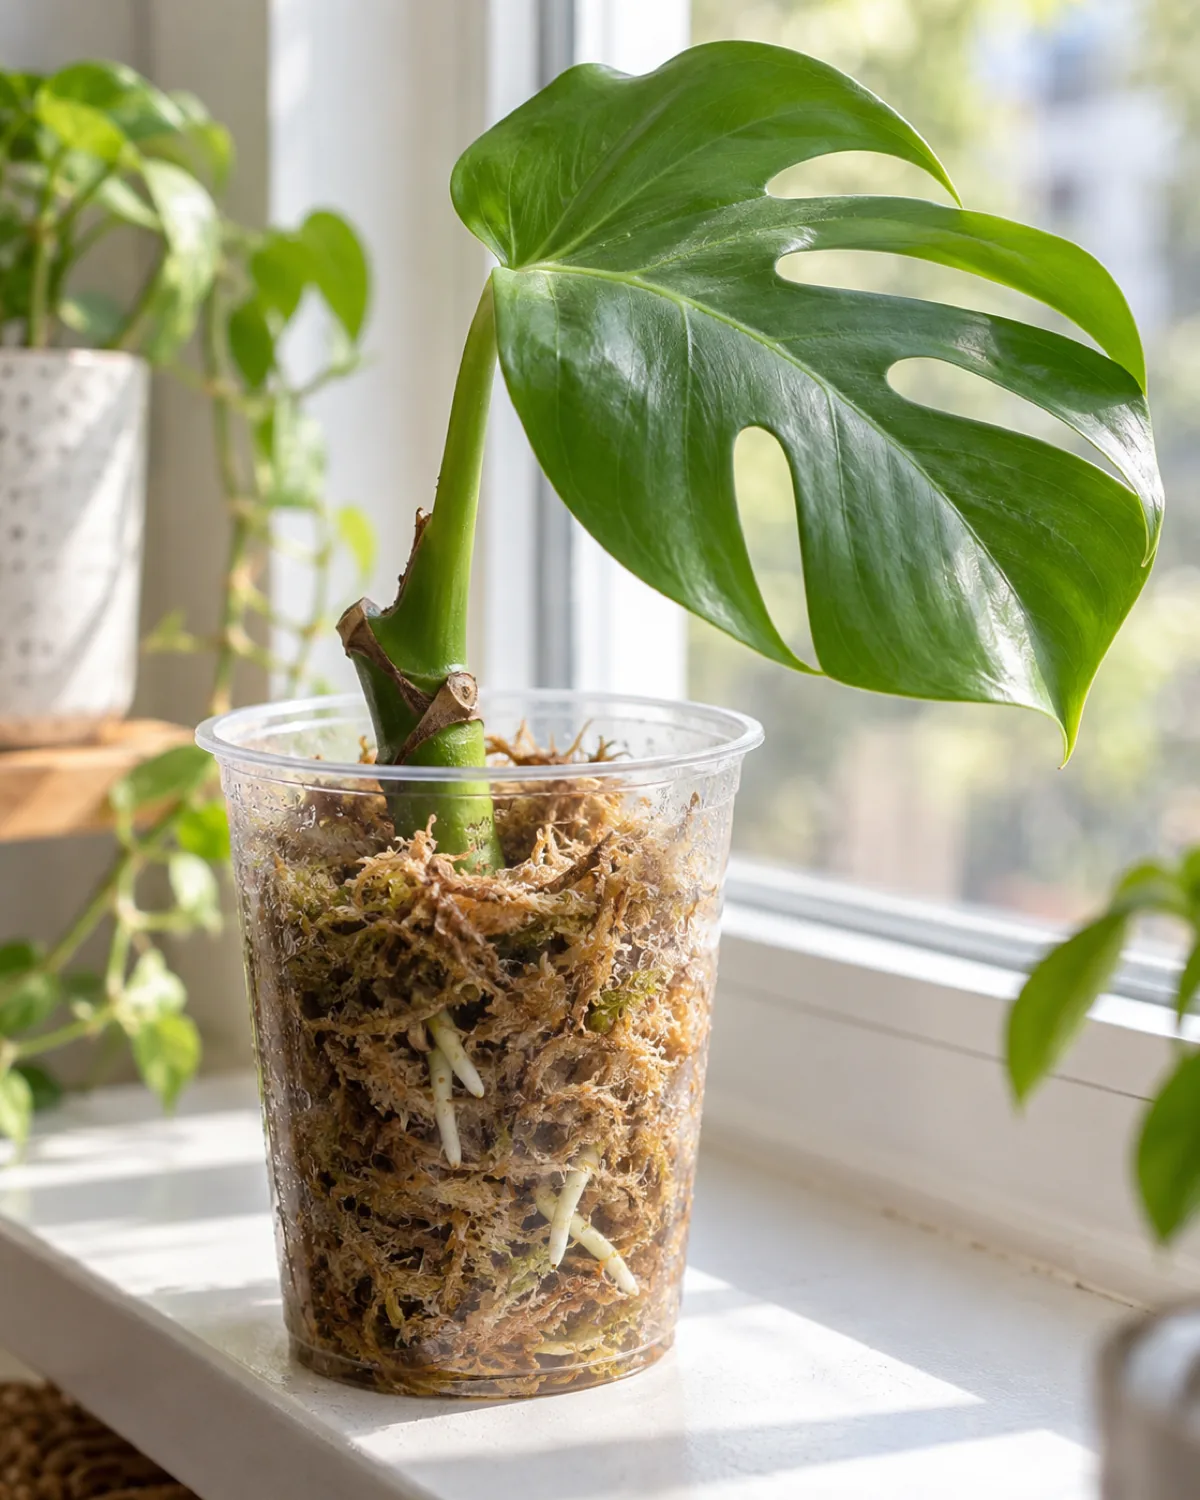
Moss and perlite rooting produces stronger roots that transition to soil with less shock. The tradeoff is that you cannot see root progress as easily as with water.
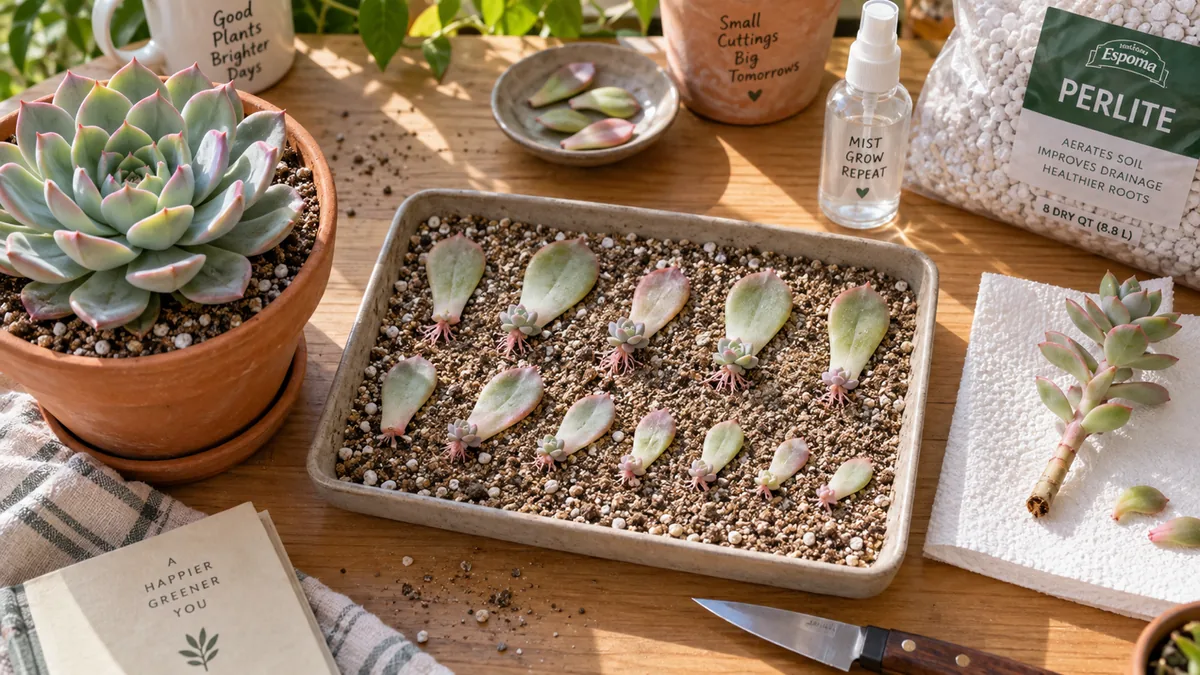
The method: nestle the node into damp sphagnum moss or coarse perlite inside a clear container. The aerial root should point downward into the medium. The leaf stays upright and exposed to light.
Both work. Your choice depends on whether you value visibility or root strength.
Practical tips for moss rooting:
- Squeeze the sphagnum until water stops dripping — it should feel like a wrung-out sponge, not a wet cloth
- Check moisture every three to four days; mist lightly if the top layer dries out
- A loose clear lid or plastic bag over the container raises humidity around the cutting without sealing it completely
Perlite works the same way. Fill a cup, moisten it, push the node in, and keep it bright. Perlite holds less moisture than moss, so check it more frequently — every two to three days.
Air Layering a Monstera Without Cutting First
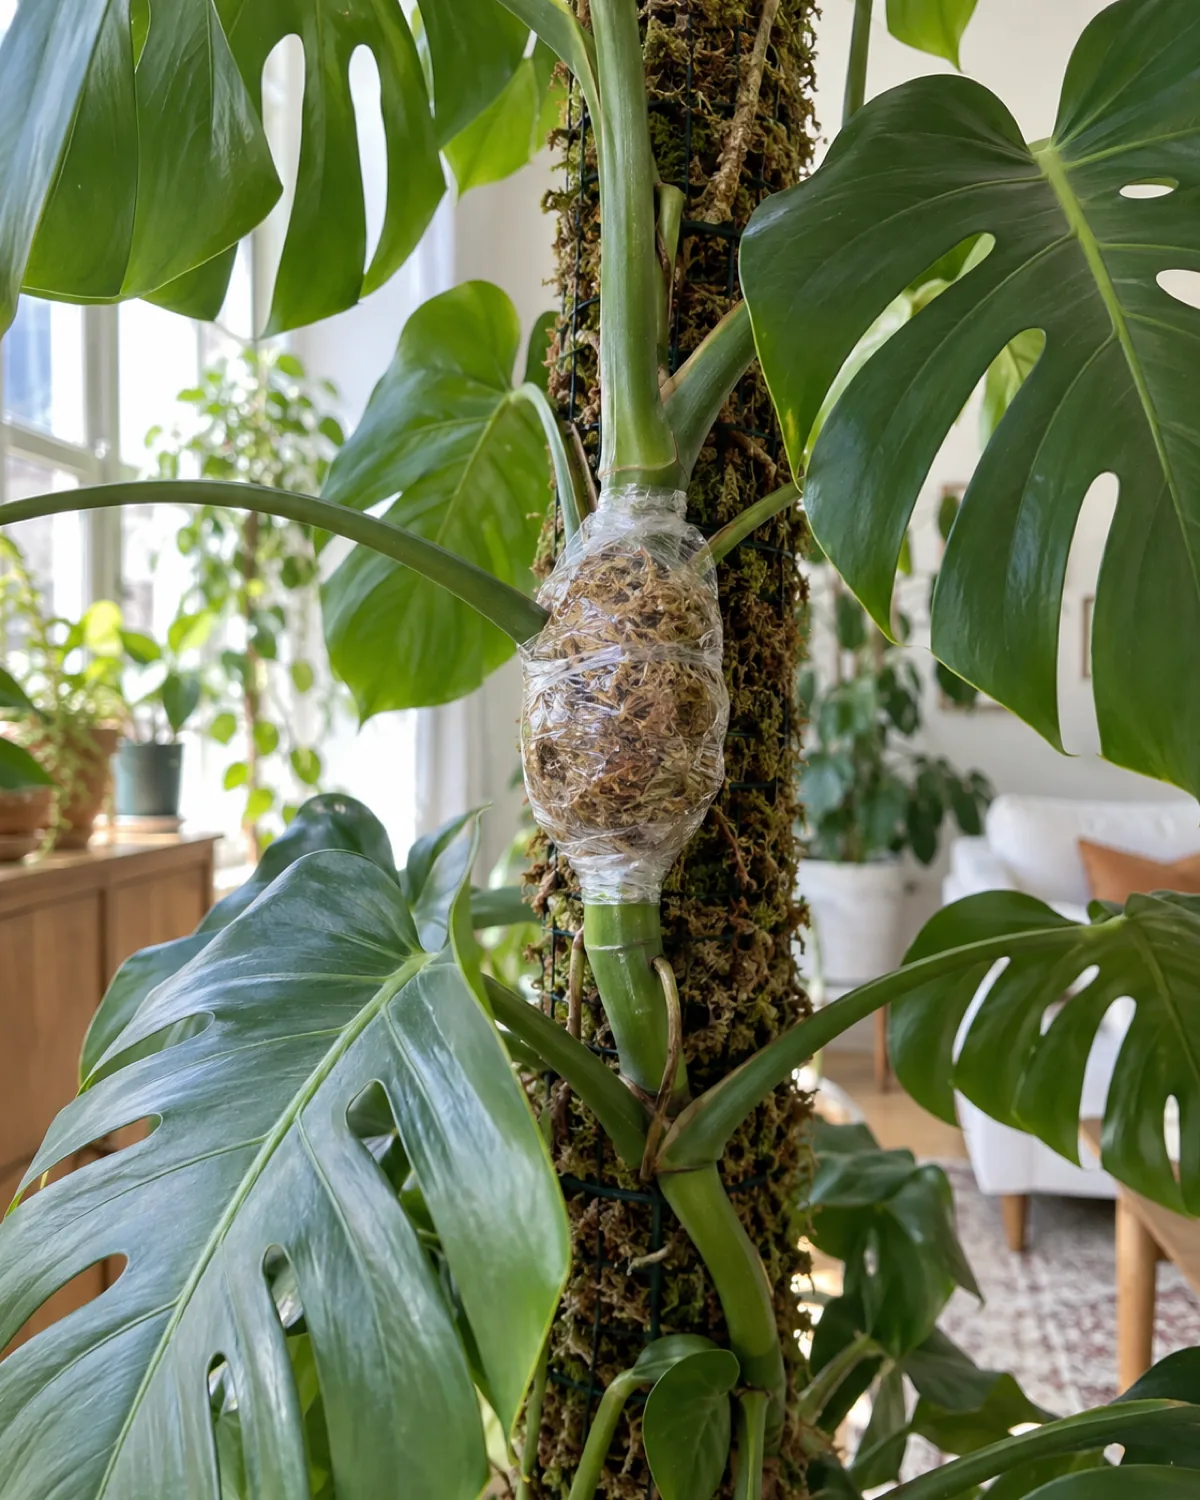
Air layering lets the cutting develop roots while still attached to the mother plant. The cutting never experiences the shock of being separated before it can sustain itself.
This method is ideal for:
- Large, tall monsteras where you want the top section as a separate plant
- Valuable or variegated cuttings where you cannot afford a failed cutting
- Situations where you want a guarantee of roots before you commit to cutting
How to air layer a monstera:
- Identify a node with an aerial root on the section you want to separate
- Wrap damp sphagnum moss around the node and aerial root — a ball of moss the size of a tennis ball is enough
- Secure the moss with clear plastic wrap — wrap it snugly but not airtight; leave a small gap at the top for moisture checks
- Wait four to six weeks — roots will grow into the moss ball, visible through the plastic wrap
- Once roots fill the moss, cut below the moss ball with sterile shears and pot the cutting directly into soil
The advantage is zero risk. If the air layer fails, you have not cut anything — the plant is untouched. If it succeeds, you have a pre-rooted cutting that goes straight into a pot with no transition at all.
Check the moss every week and mist it lightly if it starts to dry out. The plastic wrap retains most of the moisture, so you should not need to rewet it often.
Dividing a Multi-Stem Monstera at the Roots
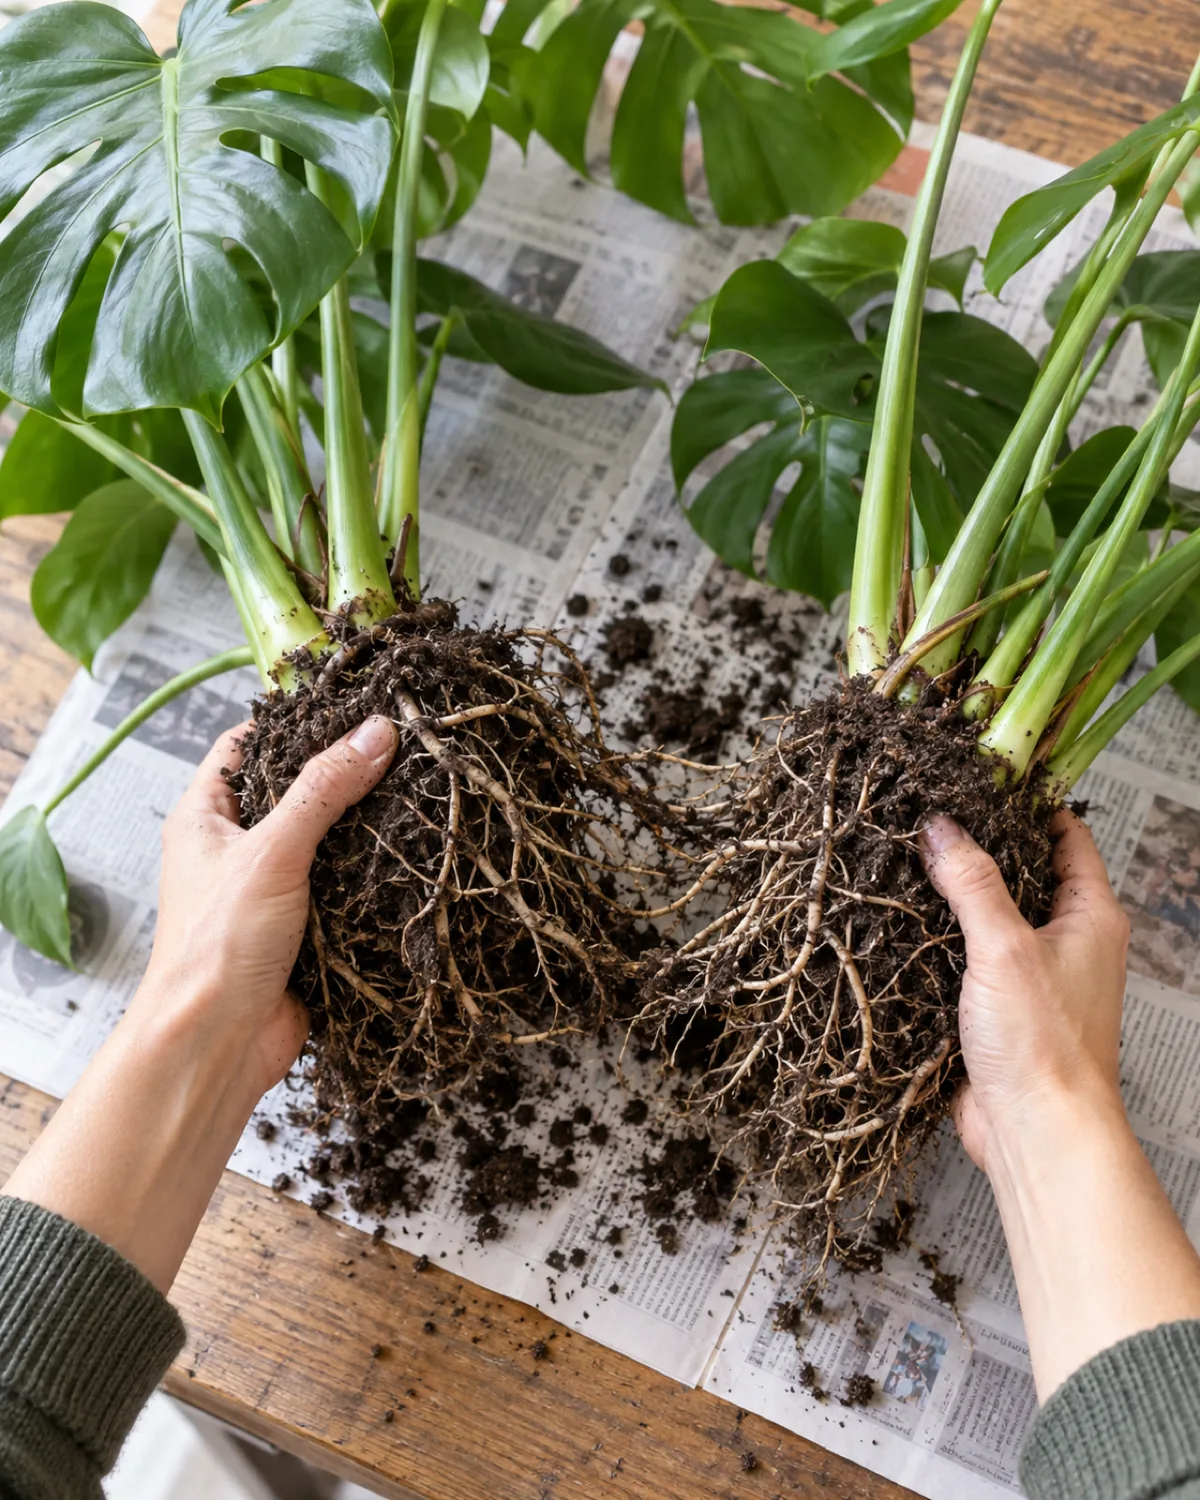
Division is the fastest path to two established plants. There is no rooting period — each division already has a functional root system.
This method works when your monstera has multiple distinct growth points sharing one pot. Many nursery monsteras are actually two or three plants potted together, and they eventually compete for space.
Steps for division:
- Unpot the plant and gently shake off excess soil so you can see the root structure
- Identify separate growth points — each should have its own stem, roots, and at least one leaf
- Gently pull the root masses apart — work from the outside in, untangling roots with your fingers rather than cutting
- Cut only if roots are truly fused — use a sterile blade to separate tangled roots; avoid cutting more than necessary
- Pot each division independently in fresh aroid mix and water thoroughly
Division is only appropriate when you can see distinct growth points that are not sharing a single root mass. If the plant has one continuous rhizome, stem cuttings or air layering are better options.
After division, both halves may droop for a week or two. This is normal — the roots need time to recover from being disturbed. Keep both plants in bright indirect light and maintain consistent moisture without overwatering.
Single-Node Propagation for Maximum Plants
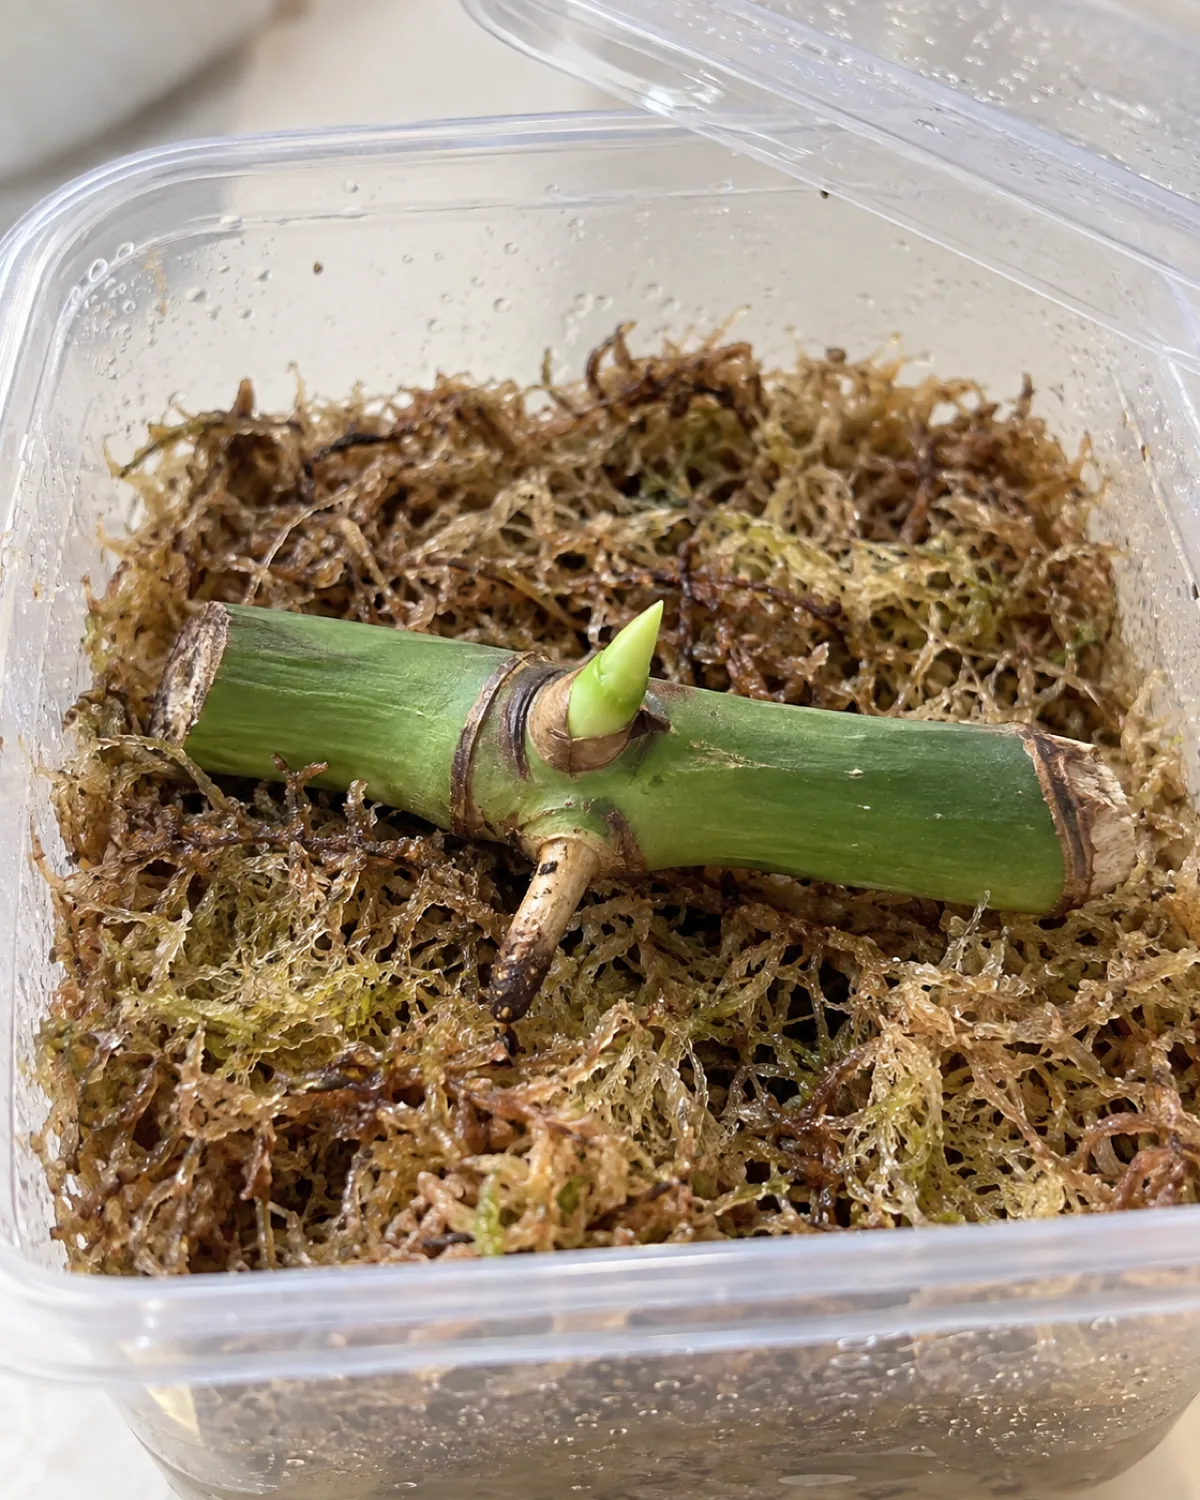
Single-node propagation — sometimes called the "chop and prop" method — turns one monstera vine into the maximum number of new plants. Each node segment, even without a leaf, can produce a new plant from its dormant axillary bud.
This method makes sense when:
- You have a long leggy vine and want to maximize the number of new plants
- You are propagating a rare or variegated monstera and every node is valuable
- The mother plant has lost lower leaves and you want to use the bare stem sections
How to do it:
- Cut the vine into individual node segments — each piece needs one node and ideally one aerial root; leaf is optional
- Lay each segment horizontally on damp sphagnum moss with the aerial root pointing downward
- Cover loosely with a clear lid or plastic bag to maintain humidity
- Place in bright indirect light and keep the moss consistently moist
The timeline is slower than standard stem cuttings:
- Week 2–4 — the aerial root extends into the moss; the axillary bud starts to swell
- Week 4–8 — a tiny green shoot emerges from the bud
- Week 8–16 — the first leaf unfurls; the root system is now functional enough to support the new growth
Single-node propagation requires patience. The cutting has no leaf to photosynthesize with, so all energy comes from reserves stored in the stem tissue. That limits how fast it can grow until the first leaf opens and starts producing energy.
What to Do With the Mother Plant After Cutting
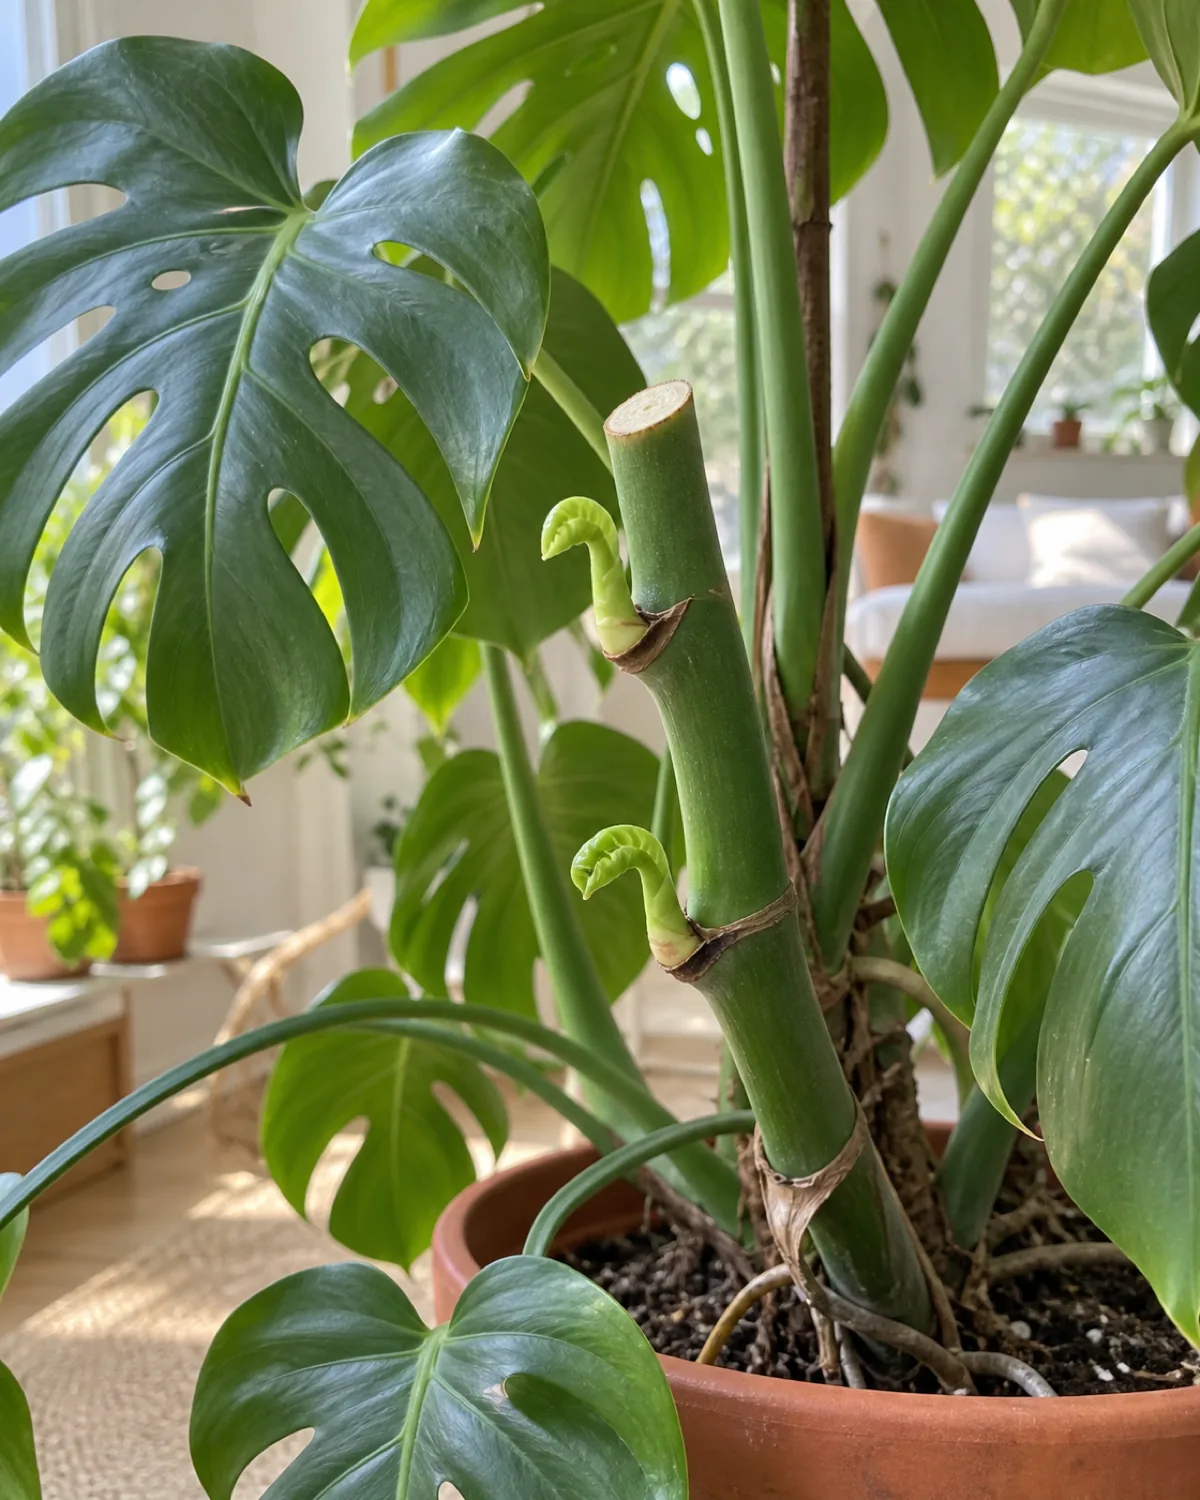
Cutting a monstera does not harm it. In fact, pruning stimulates the plant to branch — you often get a bushier, fuller plant as a result.
What happens after you cut:
- The nearest node below the cut will activate its dormant axillary bud within one to three weeks
- In many cases, two or even three buds activate, producing multiple new stems where there was one
- The mother plant redirects growth hormones to these remaining nodes, and the branching response is often vigorous
Care for the mother plant after cutting:
- Continue normal watering and light — the plant is not injured; it is responding to a growth signal
- Do not fertilize for two weeks — let the cut wound seal before the root system resumes nutrient uptake
- Leave the cut alone — it will dry and callus on its own; do not apply wax, glue, or sealant
- If the plant is on a moss pole, the new growth may emerge at a different angle — reattach when the stem is long enough to guide
If the mother plant was leggy before you cut it, the branching response gives you a second chance at a compact shape. Each new stem starts fresh and can be trained along the pole or support structure.
How to Pot Up Rooted Cuttings for Long-Term Success
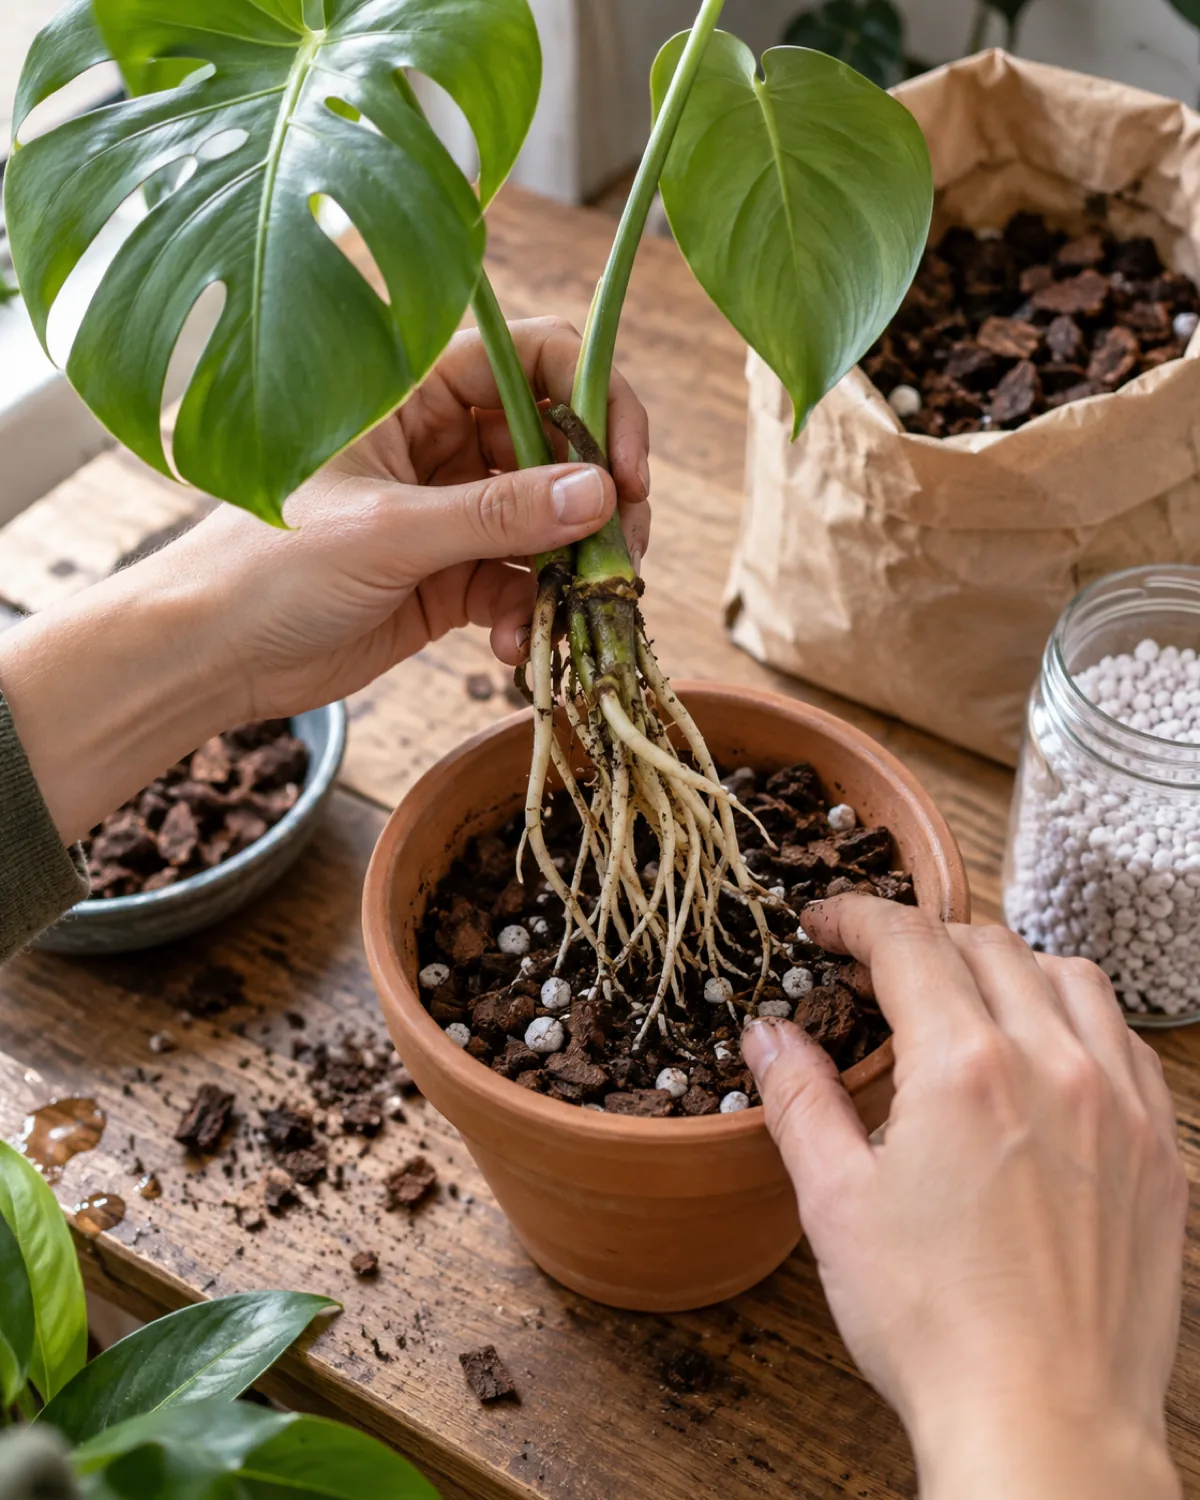
The transition from water or moss to soil is the moment where many propagations fail. Roots adapted to water or sphagnum need to acclimate to a drier, airier medium — rush it and the cutting wilts; delay it and the roots become so water-adapted that they struggle in soil.
The sweet spot: pot up when roots are 2 to 3 inches long with at least a few secondary branches. Waiting until roots are 6 inches long makes acclimation harder, not easier.
Potting mix and container:
- Chunky aroid mix — equal parts orchid bark, perlite, and potting soil (1:1:1 ratio); this provides the drainage monstera roots need while retaining enough moisture to prevent wilt
- Pot size — only 1 to 2 inches wider than the root ball; a pot that is too large holds too much moisture around sparse roots
- Drainage hole mandatory — no exceptions; use a nursery pot inside a cache pot if you want the decorative look
Potting steps:
- Fill the pot one-third full with aroid mix
- Position the cutting so the node sits at or just below the soil surface
- Backfill around the roots, pressing gently to eliminate air pockets
- Water thoroughly until it drains from the bottom, then let the top inch dry before watering again
For the first four to six weeks, skip fertilizer. The new roots are delicate and nutrient salts can burn them. Start with a dilute balanced fertilizer (half strength) once new growth appears.
Common Propagation Problems and How to Fix Them
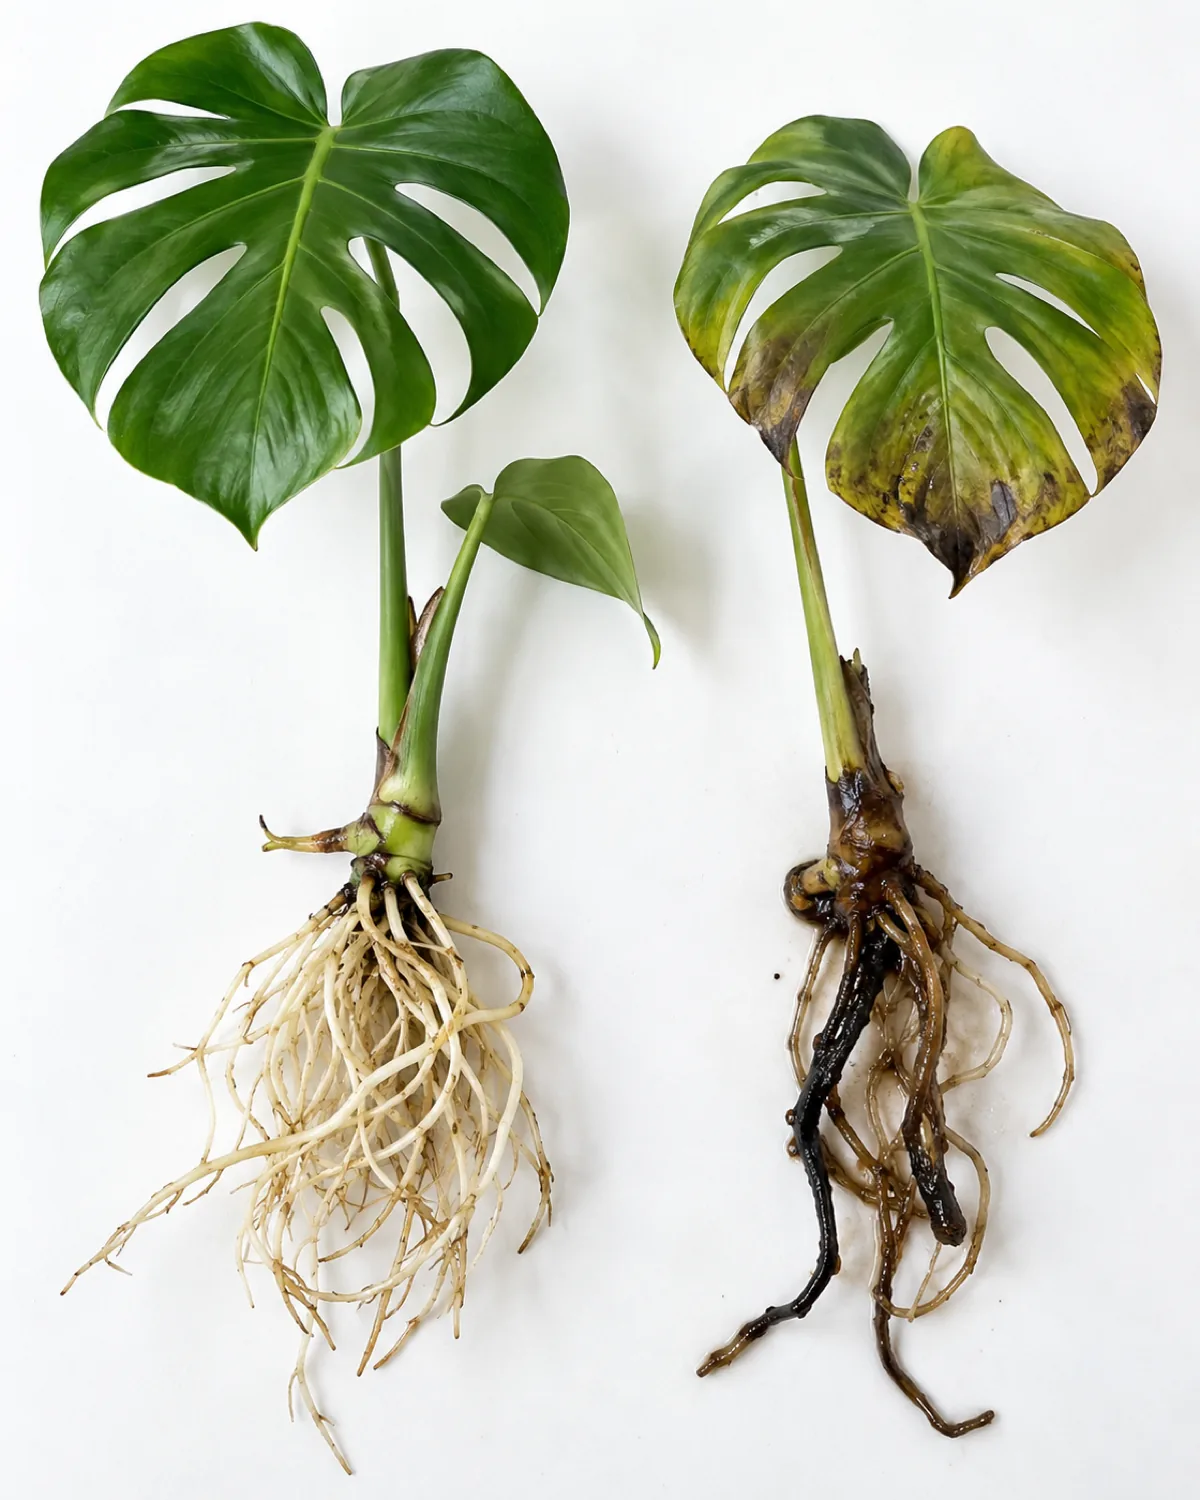
Most monstera propagation problems come down to three things: bacteria, insufficient light, or missing nodes. Here is how to diagnose and fix the most common issues.
Quick Reference
15 propagating monstera essentials to save
- 1Aerial roots give monstera cuttings a head startThey are pre-adapted rooting structures. Cuttings with aerial roots develop true roots faster than cuttings without.
- 2No node means no plant — the node holds the only growth budA cutting without a node may root but will never produce a new leaf. Always verify the node before cutting.
- 3Spring through midsummer is the ideal propagation windowActive growth hormones and long days mean faster rooting. Winter propagation is possible but significantly slower.
- 4Sterilize the blade with rubbing alcohol before every cutBacteria entering the cut wound is the top cause of stem rot during propagation. Clean tools prevent it.
- 5Cut at a 45-degree angle 1–2 inches below the nodeThe angled cut exposes more cambium and prevents water pooling on a flat wound. Let it callus 30–60 minutes.
- 6Change water every 3–5 days for water-rooted cuttingsStagnant water depletes oxygen and breeds bacteria. Fresh water keeps the environment healthy for root development.
- 7Moss and perlite produce stronger roots with less transplant shockThe roots grow thicker and branch more in a solid medium. They transition to soil seamlessly.
- 8Air layering lets roots develop before you cutWrap damp moss around a node, wait for roots, then sever. Zero risk to the mother plant.
- 9Division gives two established plants instantlyEach division already has functional roots. No rooting period needed — just unpot, separate, and repot.
- 10Single-node propagation maximizes plants from one vineEvery node can grow a new plant, even without a leaf. Lay horizontally on moss and wait for the bud to activate.
- 11Cutting the mother plant stimulates branchingThe nearest node pushes new growth within weeks. You often get two or three stems where there was one.
- 12Pot up when roots reach 2–3 inches with secondary branchingUse chunky aroid mix (1:1:1 bark, perlite, soil). A pot just 1–2 inches wider than the root ball.
- 13Mushy stem base means bacterial rot — trim and restartCut above the rot to healthy green tissue, re-callus, and start over in fresh water or medium.
- 14Fenestrations take 2–3 years from cutting to first split leafNew baby plants start with solid leaves. Bright light plus a moss pole accelerates the transition.
- 15Variegated monstera propagates slower and needs extra careCuttings need a leaf with green tissue for photosynthesis. Albo carries reversion risk; Thai Constellation is stable.
kultivy.com
Troubleshooting by symptom:
- Mushy brown stem base (bacterial rot) — the most common failure; trim above the rot to clean green tissue, re-callus, and start over in fresh water or medium; the cause is usually stagnant water or a cut that was not allowed to callus
- No root growth after four weeks — check that the cutting has a node (not just an internode); if the node is confirmed, the issue is usually insufficient light; move to a brighter spot
- Yellowing leaf on the cutting — some yellowing is normal; the cutting is drawing stored energy from the leaf to fuel root growth; if the stem remains firm and green, the cutting is fine; if the stem is soft, check for rot
- Root rot in water — brown slimy roots forming in the jar; change the water immediately, trim any brown roots, and rinse the remaining healthy roots under running water before placing in fresh water
- Mold on sphagnum moss — white fuzzy mold is common and usually harmless; increase air circulation by loosening the cover; if the mold is extensive, replace the moss
The golden rule of monstera propagation troubleshooting: as long as the stem is firm and the node is intact, the cutting is alive and recoverable. Soft mushy stems are the one signal that means start over.
How Long Until Your Propagated Monstera Gets Fenestrations
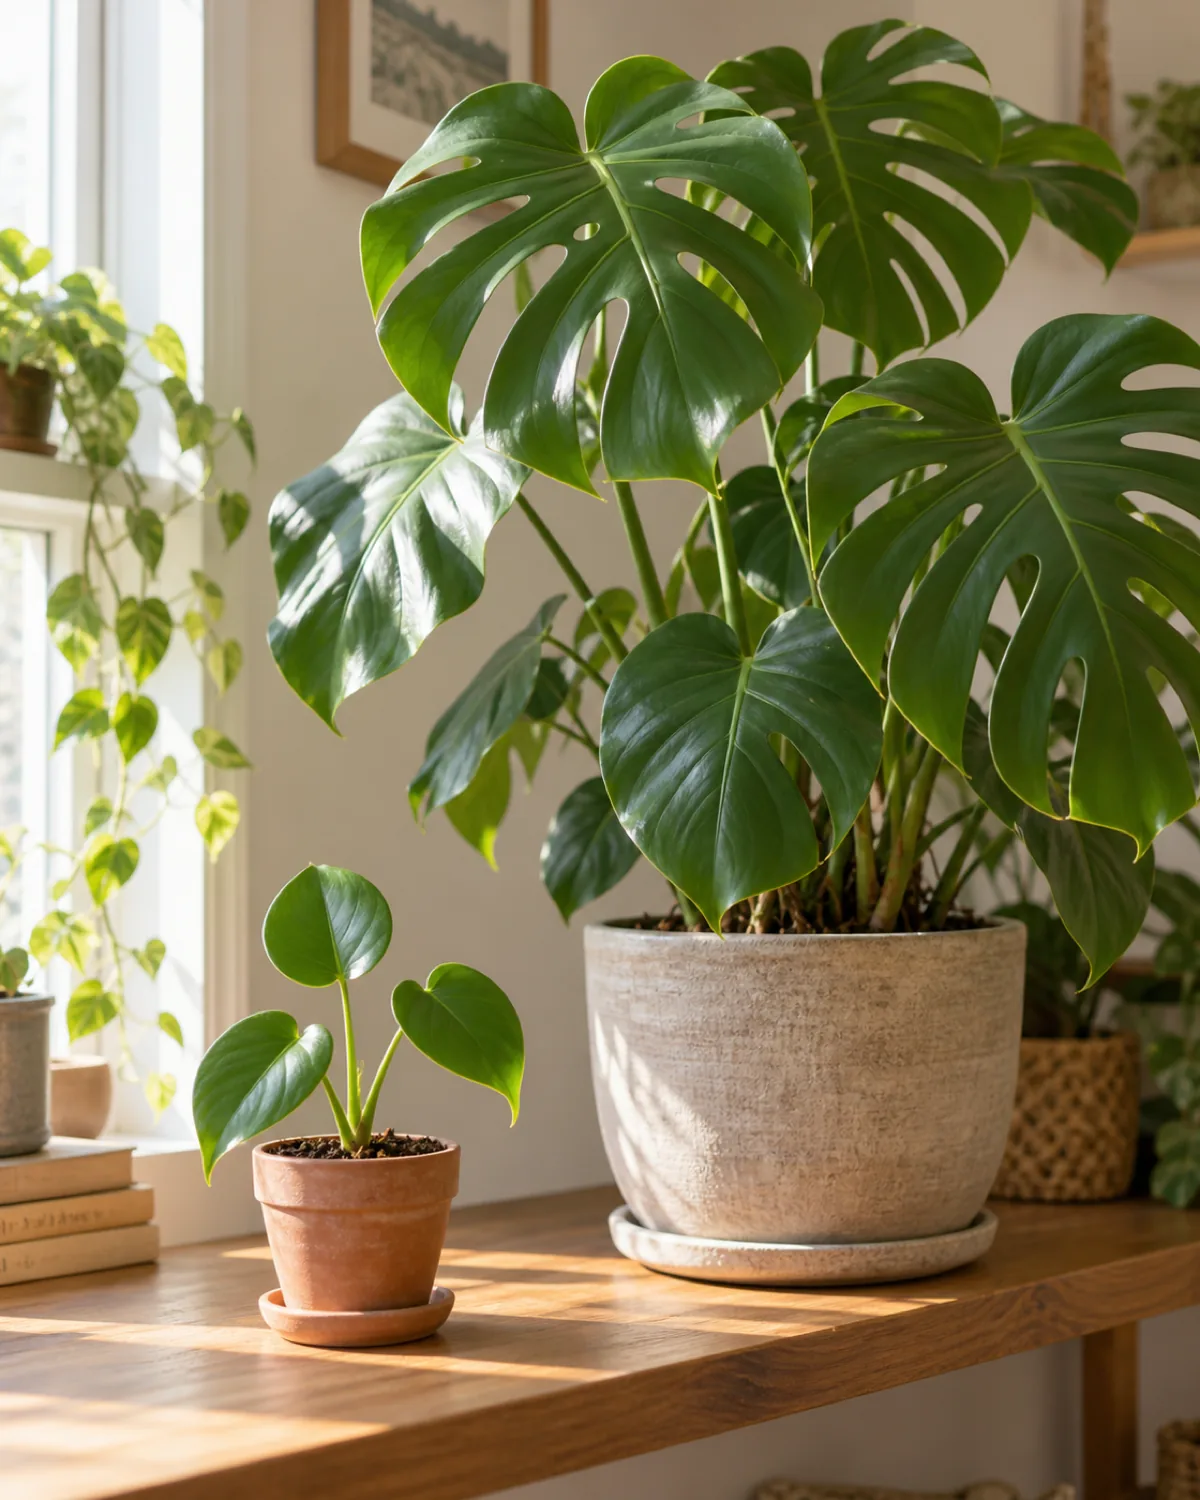
Every propagated monstera starts with solid heart-shaped leaves — no holes, no splits. This surprises people who propagated from a parent plant with dramatic fenestrations.
Fenestration is a function of maturity and light, not genetics. The cutting carries the genetic capacity for split leaves, but it needs to grow large enough for the plant to invest in that leaf architecture.
Typical timeline from rooted cutting to first fenestration:
- Year 1 — the plant establishes roots and produces small solid leaves; focus on consistent care and bright light
- Year 2 — leaves get larger; some may develop small holes (early fenestration) if light is strong
- Year 2–3 — the first true split leaf appears, usually when the plant has a stem thick enough to support the larger leaf structure
Factors that speed up fenestration:
- Bright indirect light — the single biggest accelerator; plants in low light may never fenestrate regardless of age
- Moss pole or support — monstera grown vertically produce larger leaves faster than those allowed to trail; the plant interprets vertical climbing as "approaching the canopy" and responds with bigger, more fenestrated leaves
- Consistent watering and fertilizing — a plant that is stressed by irregular care puts energy into survival, not into producing larger leaves
Do not be discouraged by the first few small solid leaves. They are the foundation. Every leaf is larger than the last, and once the tipping point hits, fenestration progresses rapidly.
Propagating Different Monstera Varieties
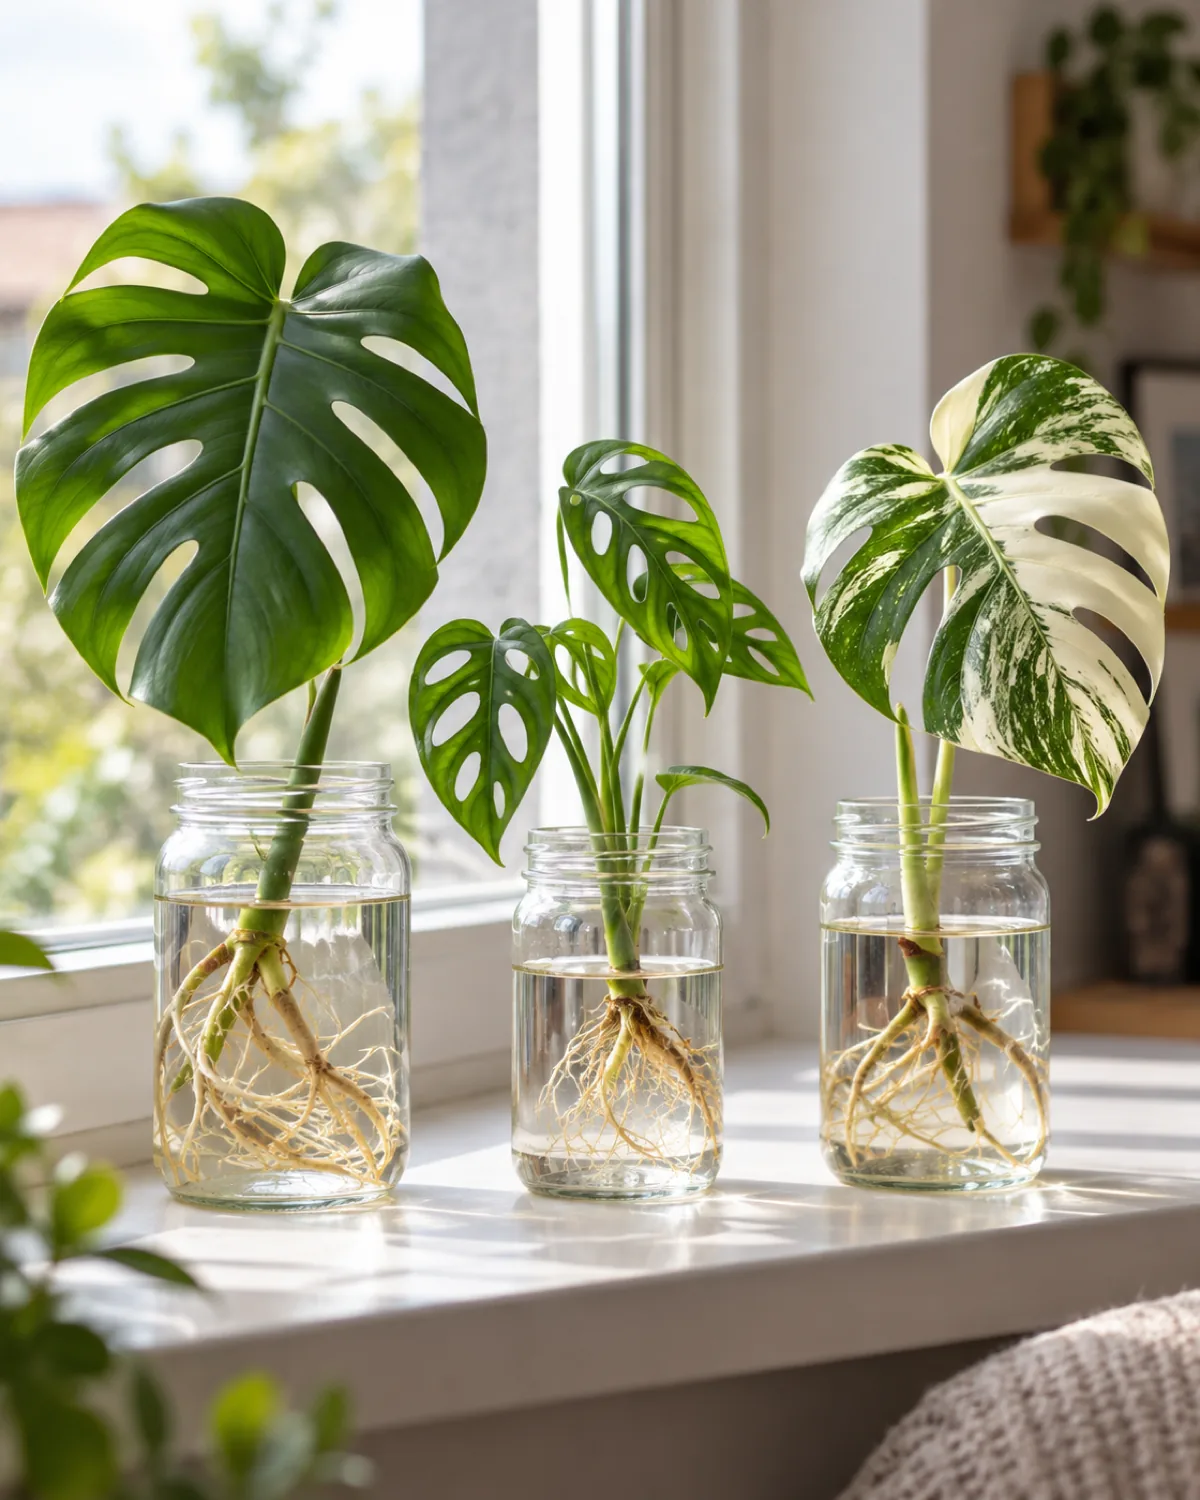
Not all monsteras propagate at the same speed or with the same level of difficulty. The species and variety determine how forgiving the process is.
Quick comparison by variety:
- Monstera deliciosa — the standard Swiss cheese plant and the easiest to propagate; thick stems with robust aerial roots root quickly and tolerate a range of conditions; this is the species most of this guide focuses on
- Monstera adansonii — the Swiss cheese vine; thinner stems with smaller nodes but roots even faster than deliciosa; cuttings are compact enough to fit multiple nodes in one jar; water propagation works exceptionally well
- Variegated monstera (Albo Borsigiana) — propagates the same way but significantly slower; the white tissue cannot photosynthesize, so cuttings must have a leaf with enough green for rooting; Albo carries reversion risk and all-white cuttings will not survive
- Thai Constellation — a tissue-culture mutation with stable variegation; easier than Albo because it does not revert, but still slower than standard deliciosa due to reduced chlorophyll
- Monstera peru (Monstera karstenianum) — a compact species with thick leathery leaves; propagates from vine cuttings similar to pothos; fast rooting in water
- Monstera siltepecana — a trailing species with silvery leaves; thin vines root quickly from stem cuttings, comparable to adansonii
The universal rule across all varieties: the cutting needs a node. Without one, no monstera — regardless of species — will produce new growth.
Frequently Asked Questions
- Can you propagate monstera from a leaf without a node? — No. A single leaf in water may stay alive for weeks and even grow roots from the petiole base, but it will never produce a new stem or leaf. The node contains the axillary bud, the only structure capable of generating new growth. Always verify the node before cutting.
- How long does it take monstera cuttings to root? — In water with bright indirect light, expect visible roots within two to four weeks and transplant-ready roots (2–3 inches with branching) within six to eight weeks. Moss rooting takes a similar timeframe. Winter or low-light conditions can double these timelines.
- Is it better to propagate monstera in water or soil? — Water is simpler and lets you see root development. Moss or perlite produces stronger roots with less transplant shock. For beginners, water is the easiest entry point. For experienced growers or valuable cuttings, moss gives a better outcome.
- Can you propagate a variegated monstera? — Yes, but the cutting must have a leaf with enough green tissue to photosynthesize. All-white cuttings will not survive. Variegated cuttings root more slowly and require more light. Albo Borsigiana carries reversion risk; Thai Constellation is stable. Expect the process to take roughly twice as long as standard deliciosa.

Mara writes about indoor plants for people who want honest, practical care advice without the fluff. She covers everything from first-time plant parents to collectors chasing rare aroids — always with the science behind why something works. More at kultivy.com.