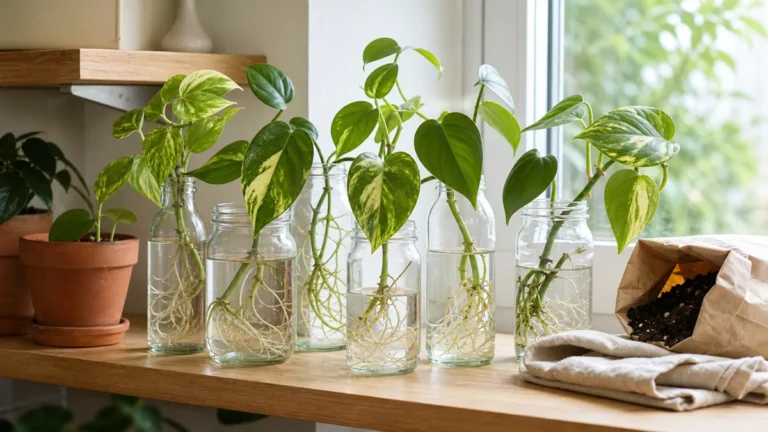
Pothos is the houseplant that practically begs to be shared. Every vine holds dozens of potential new plants at each node, and the cuttings root so willingly that propagating pothos is often the first success new plant parents experience.
This guide covers every method — water, soil, sphagnum moss, single-node maximization, layering, variety-specific tricks, and the fixes for common failures — so you can turn one trailing pothos into an entire collection.
From water cuttings to single-node maximization, variety-specific tricks, and common-problem fixes. Jump to the method that fits.
- 1Why Pothos Is the Easiest
- 2Node Anatomy
- 3Tools & Supplies
- 4How to Take a Cutting
- 5Rooting in Water
- 6Rooting in Soil
- 7Rooting in Moss
- 8Single-Node Method
- 9Layering Without Cutting
- 10Variety-Specific Tips
- 11Root Timeline by Medium
- 12Water to Soil Transfer
- 13Building a Fuller Pot
- 14Common Problems & Fixes
- 15First-Month Care
Why Pothos Is the Easiest Houseplant to Propagate
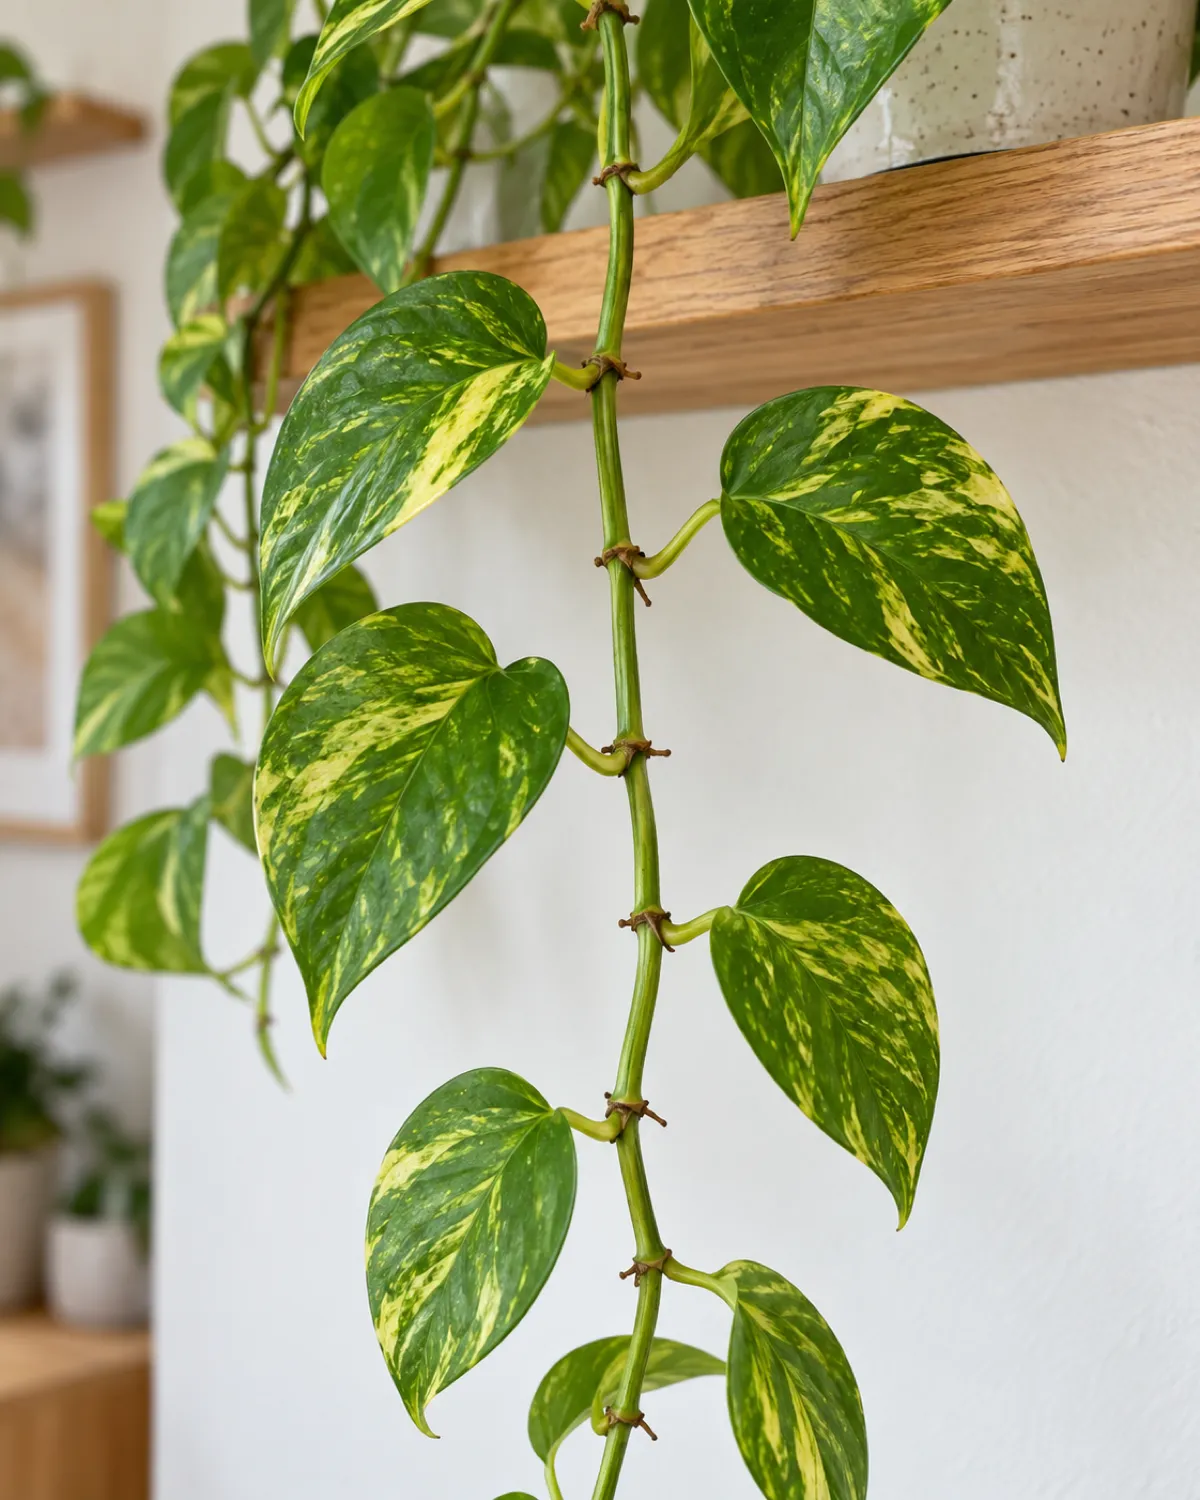
Pothos has a biological head start that most houseplants do not. Every single node along the vine already has an aerial root primordium — that small brown nub protruding from the stem opposite the leaf. The moment that node touches water or moist substrate, the nub activates and starts growing real roots.
Most houseplants need callous time, rooting hormone, or warm soil to push roots. Pothos skips all of that. A cutting placed in a glass of tap water on a kitchen counter will show visible white roots within seven to fourteen days, no hormone needed.
- Pre-formed aerial roots at every node eliminate the guesswork about where to cut
- Tolerant of low light and inconsistent watering during the rooting phase — the cutting does not need a perfect environment
- Roots in plain tap water without additives, making it the most accessible propagation method for beginners
The forgiving nature of pothos also means mistakes are recoverable. Cut in the wrong spot and the vine heals over. Forget to change the water for two weeks and the roots still grow.
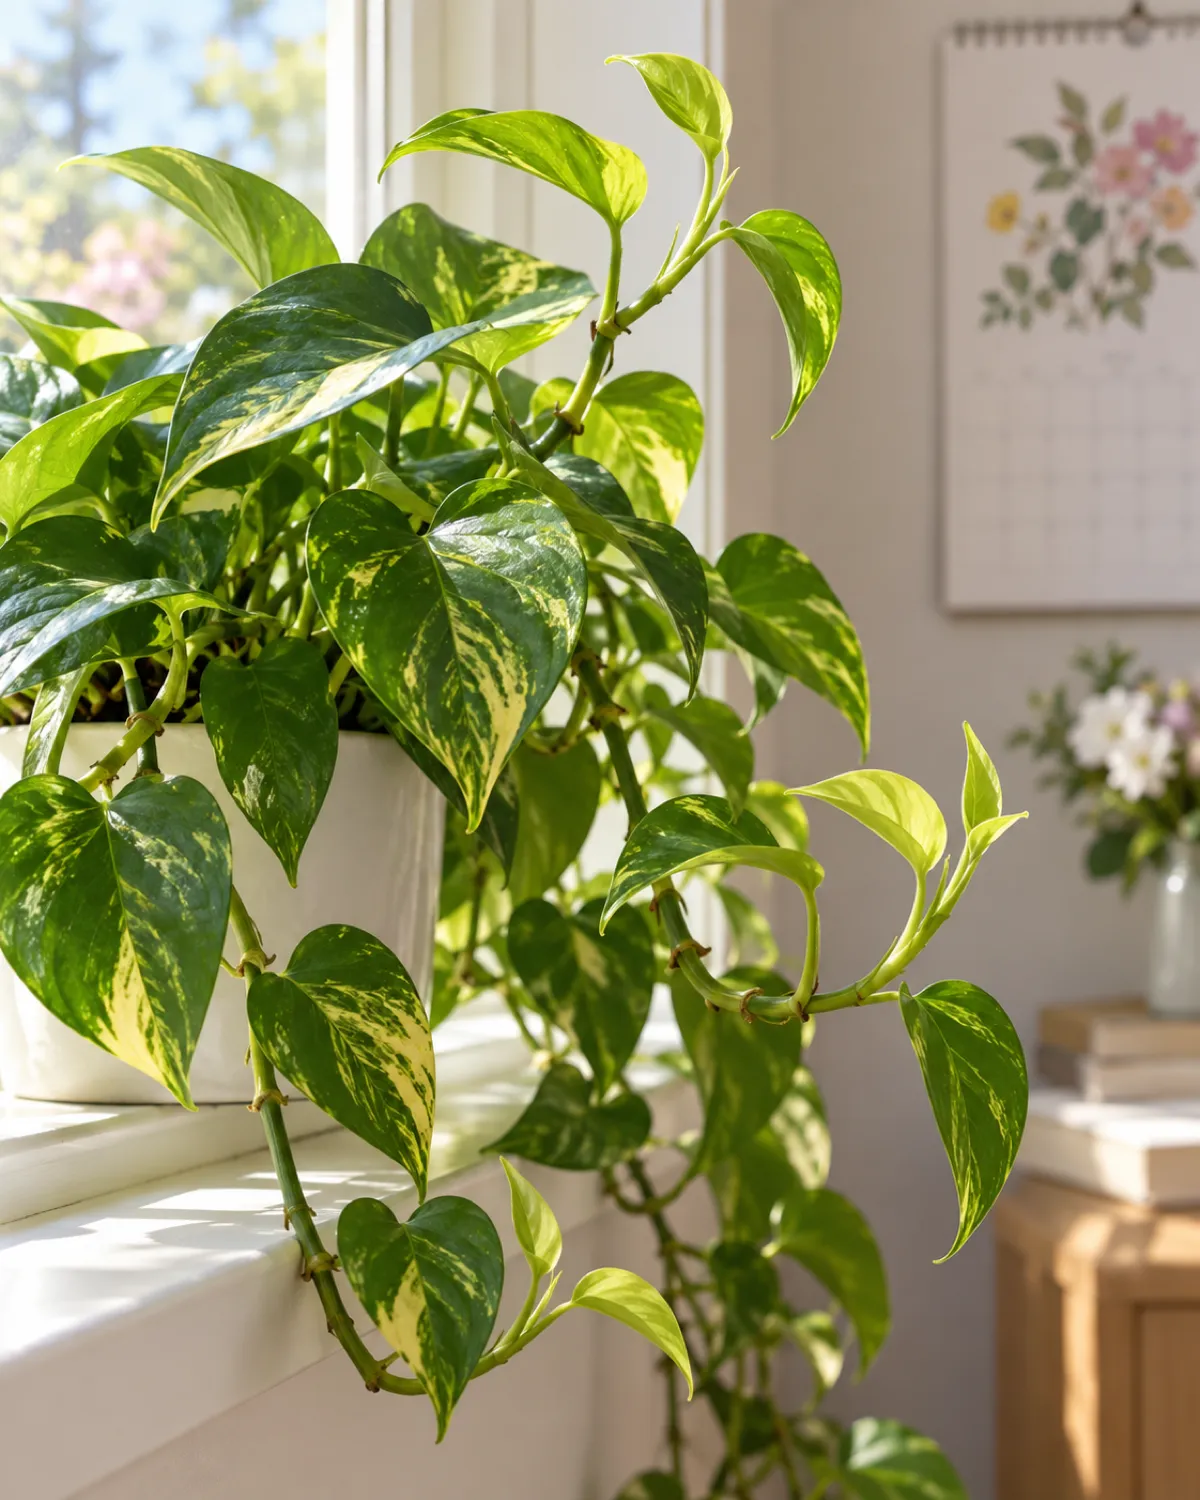
The best time to propagate is spring through early summer, when the plant is in active growth mode and hormone levels peak. A cutting taken in April roots in seven to ten days; the same cutting in December may take three to four weeks. That said, pothos is forgiving enough to root in any month — winter cuttings just need a brighter spot and patience.
- Best window: March through August — active growth and peak hormone levels
- Acceptable: September and October — slower but reliable
- Slowest: November through February — reduced light and cooler temperatures slow development by half
Pothos Node Anatomy and Exactly Where to Cut
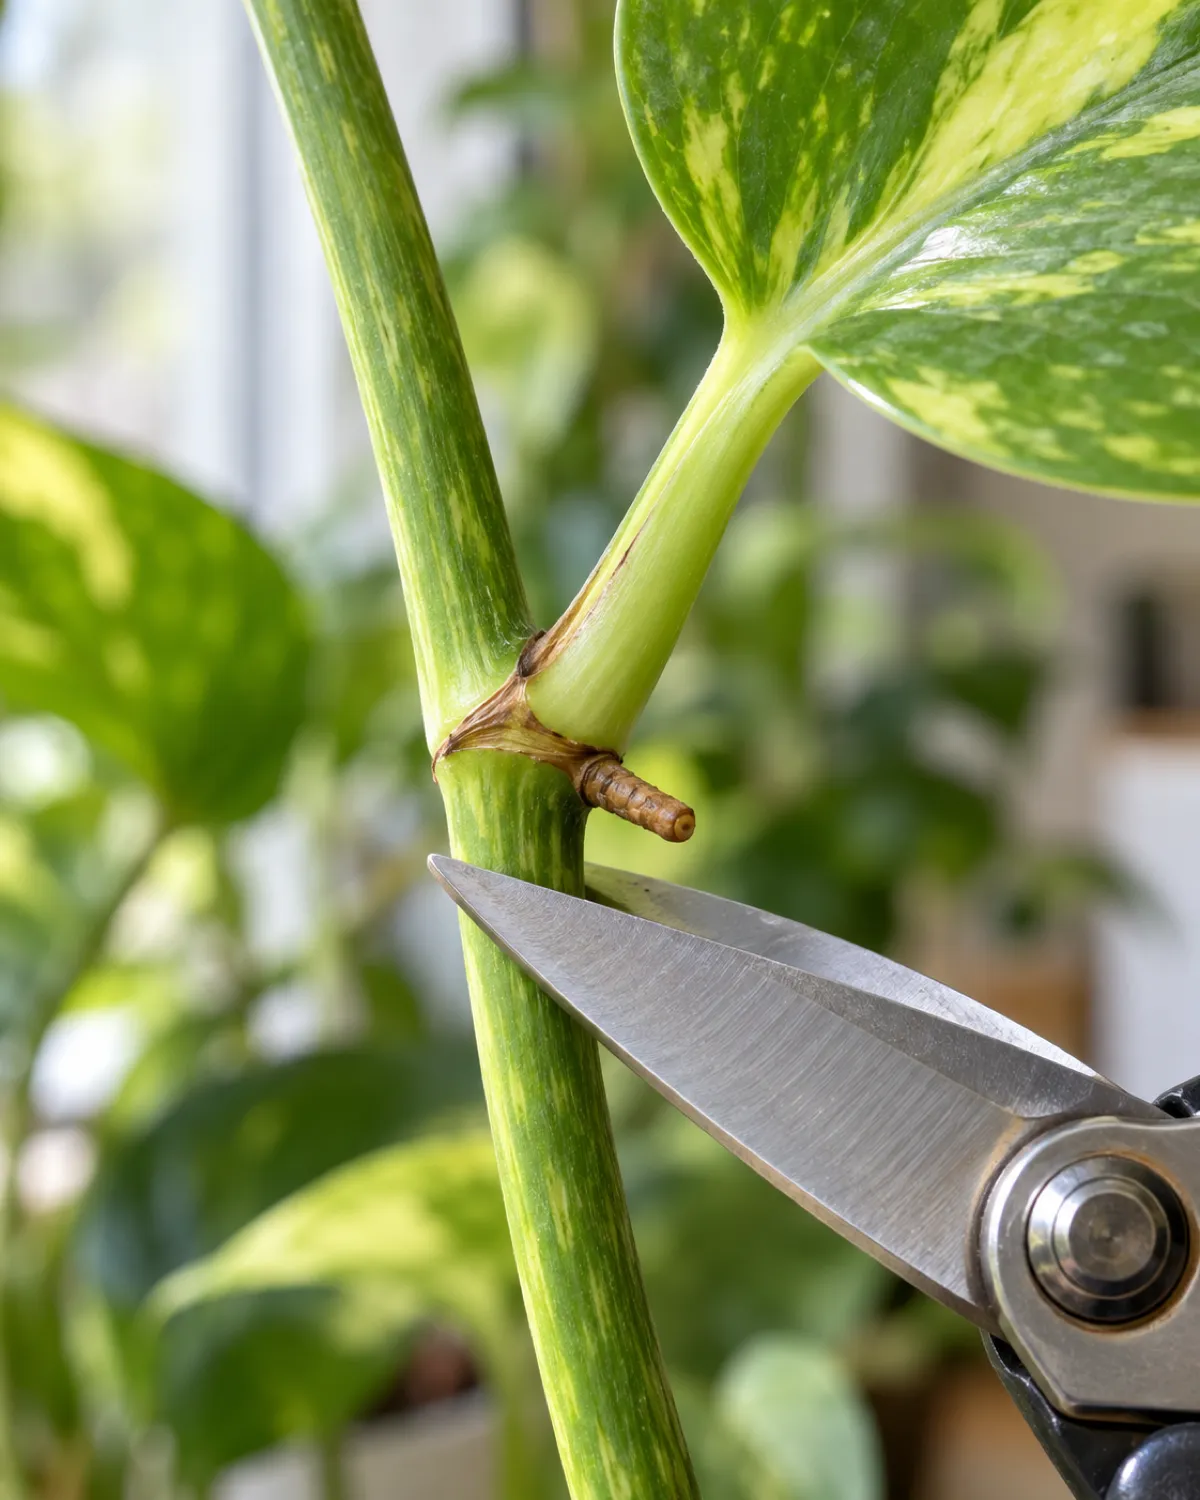
The node is everything in pothos propagation. It is the only part of the vine that can produce roots. Cutting between nodes gives you a piece of stem that will never root, no matter how long it sits in water.
A pothos node is the slightly thickened joint where a leaf petiole meets the main stem. On the opposite side, you will see a small brown bump — the aerial root primordium. Some nodes have bumps that are barely visible, while others on older vines have aerial roots already growing an inch or more.
- Node: the joint where the leaf connects to the stem — has the root-producing cells
- Internode: the smooth section of stem between two nodes — cannot produce roots
- Aerial root bump: the brown nub on the stem opposite the leaf — this is what grows into the root system
When you make your cut, position the blade a quarter inch below the node at a 45-degree angle. The angle increases the surface area exposed to water, which speeds root development. Always cut below the node, never above it — the node needs to be on the cutting, not left on the mother plant's stub.
For a deeper look at how node anatomy drives all houseplant propagation, see the propagation guide.
Tools and Supplies You Need Before Your First Cut
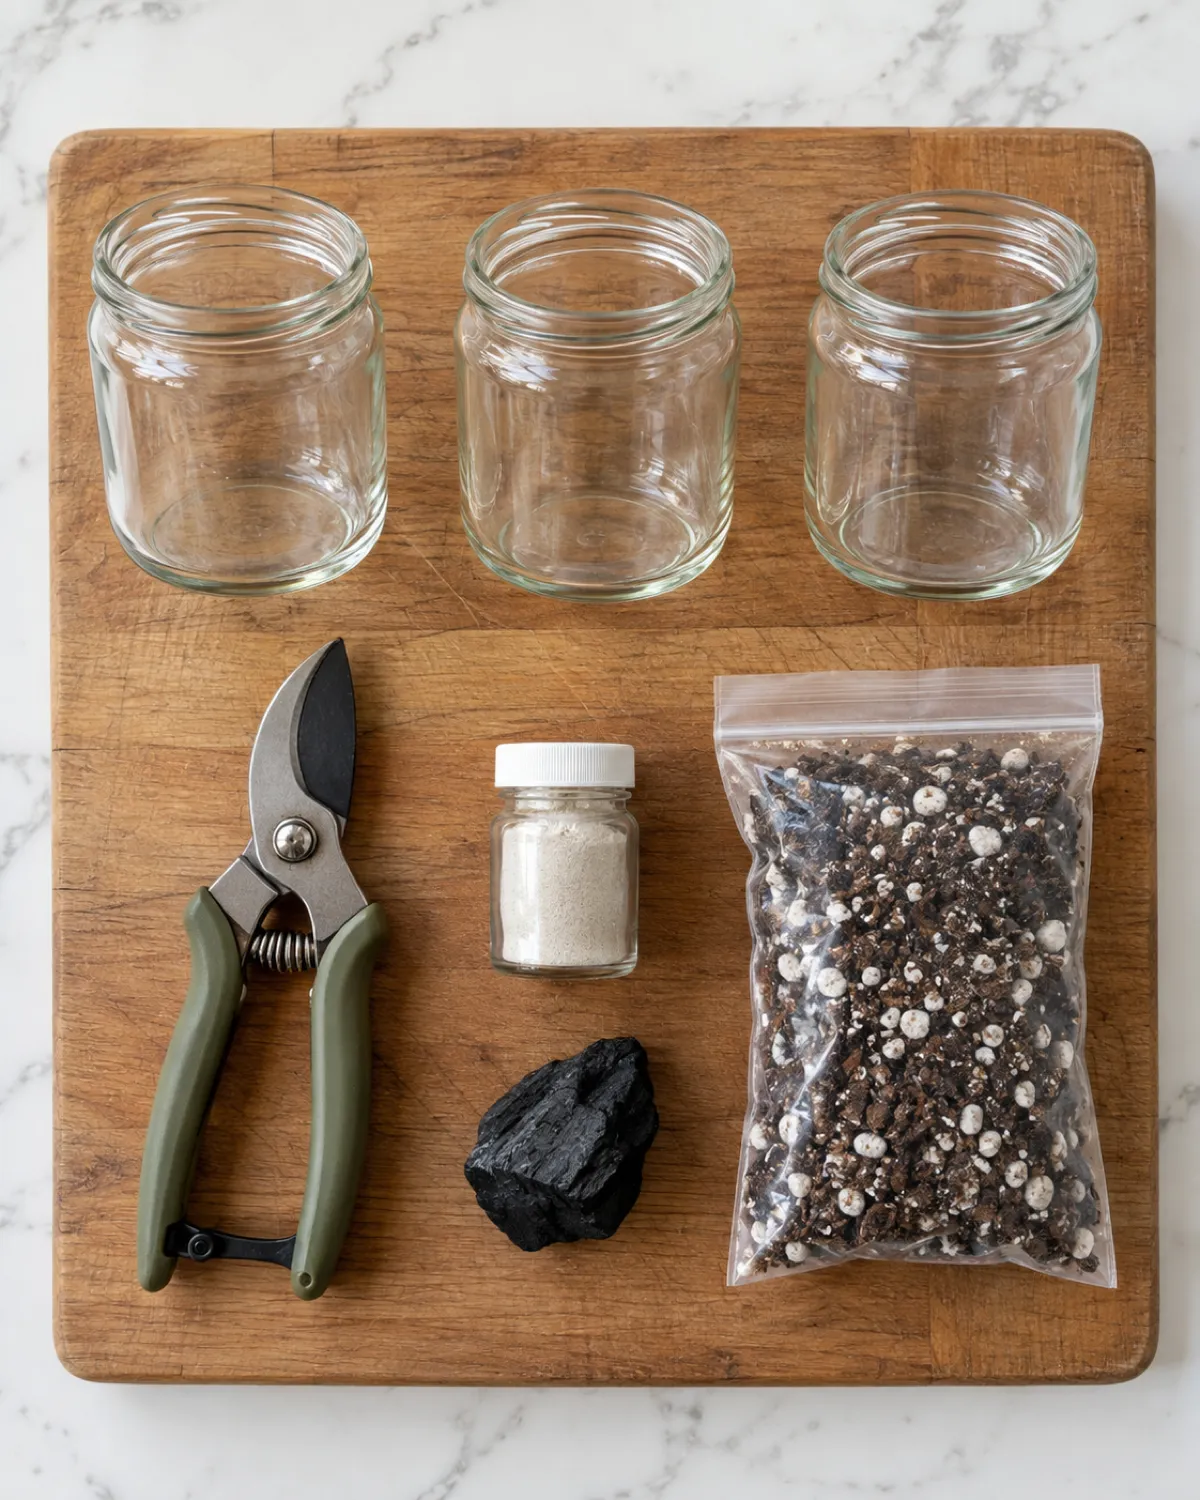
Propagating pothos requires almost nothing, which is part of why it works so well as a first propagation project. The essentials fit in one hand.
- Clean, sharp blade: pruning shears, kitchen scissors, or a razor blade — anything that makes a clean cut without crushing the stem
- Rooting vessel: a clear glass jar, vase, or cup (clear lets you monitor root growth without disturbing the cutting)
- Fresh water: room-temperature tap water works fine for most municipalities
Optional but helpful supplies:
- Rooting hormone (powder or gel) — speeds root initiation, useful for variegated varieties that root slower
- Activated charcoal — keeps water clean and inhibits bacteria in propagation jars
- Sphagnum moss — alternative rooting medium with higher moisture retention (section 8)
- Perlite — lightweight, airy substrate for soil rooting, mixed 50/50 with potting mix
- Small pots with drainage — for potting up rooted cuttings after roots reach two to three inches
Sterilize your cutting tool before each session. Wipe the blade with rubbing alcohol or dip it in a ten-percent bleach solution. Dirty tools transfer bacteria to the cut surface, which causes stem rot — the most common reason cuttings fail.
How to Take a Stem Cutting the Right Way
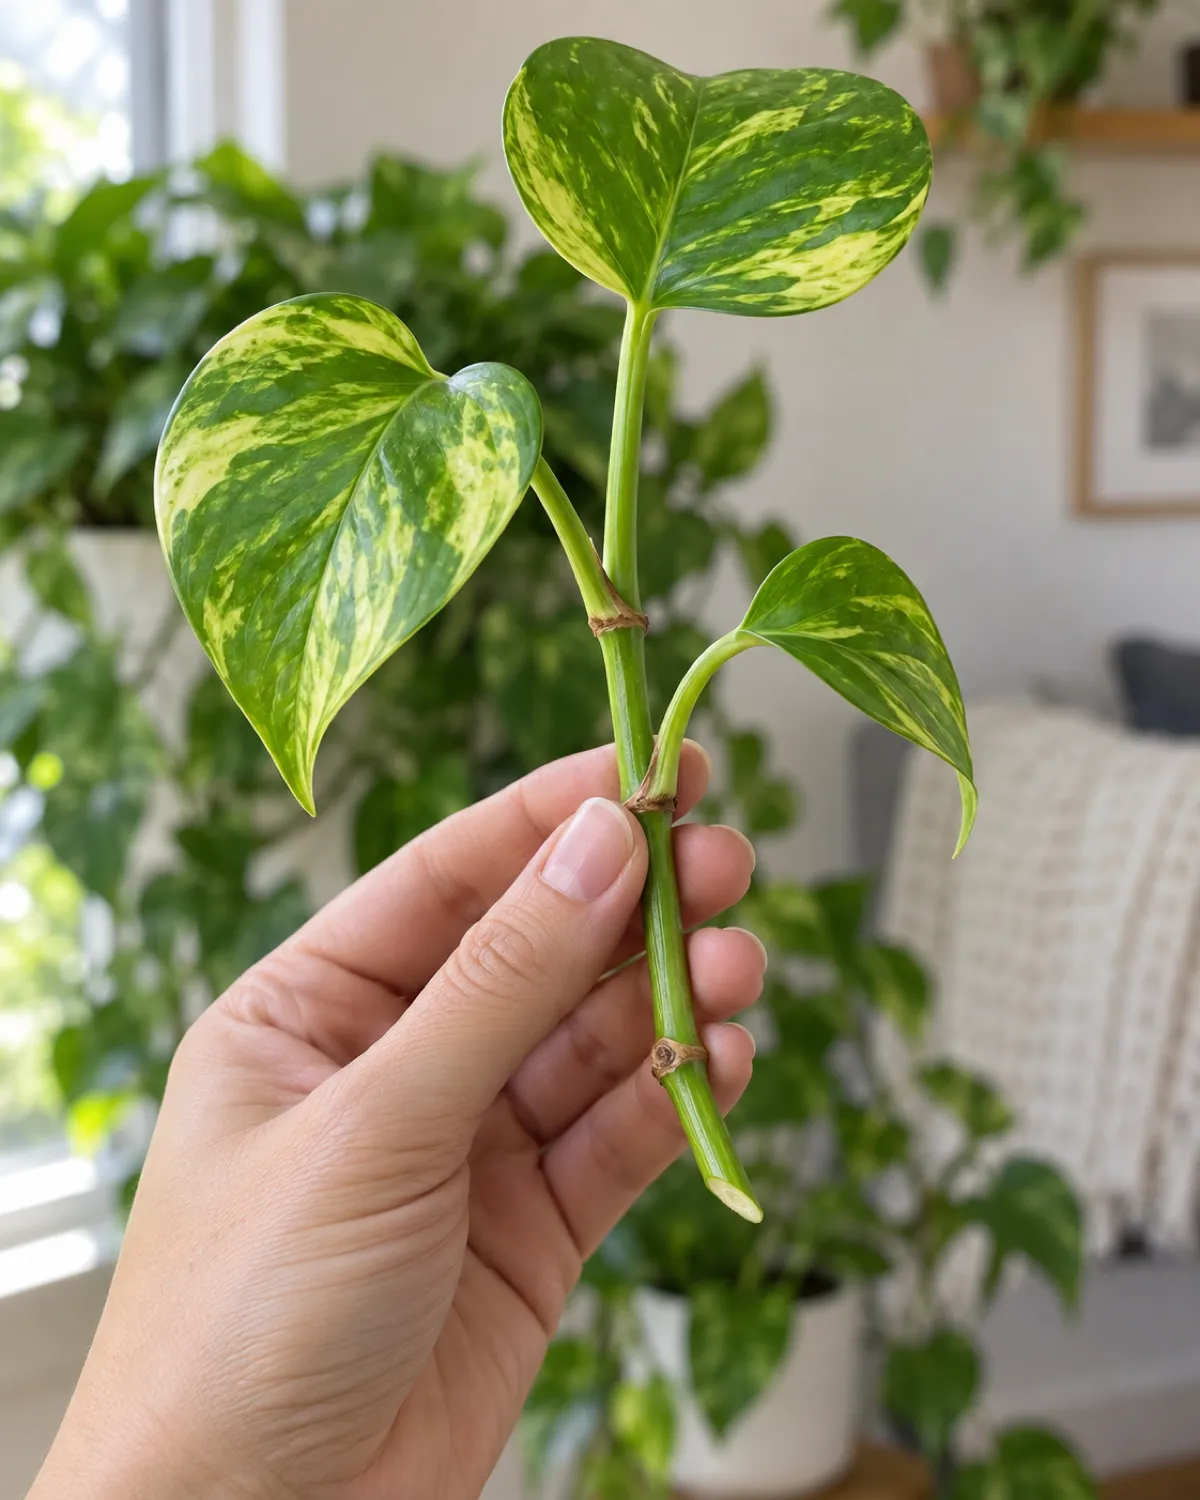
A good cutting has one to three nodes, at least one healthy leaf, and a clean cut at the base. That is it. The process takes less than a minute per cutting.
Start by identifying the nodes on the vine you want to cut. Count down two or three nodes from the tip of the vine — this gives you a cutting with enough stored energy to root without stress. Single-node cuttings also work (section 9), but multi-node cuttings root faster and produce bushier plants.
- Position your sterilized blade a quarter inch below the lowest node on your planned cutting
- Cut at a 45-degree angle in one clean motion — do not saw back and forth
- Remove the leaf from the bottom node (the one that will be submerged in water or buried in soil)
- Leave the upper leaves intact — they photosynthesize to feed the cutting while roots develop
- Single-node cutting: one node, one leaf — maximum yield from a single vine, slower to establish
- Two-node cutting: two nodes, two leaves — the sweet spot for most propagators, roots faster and produces a sturdier plant
- Long cutting: three or more nodes — roots quickly but wastes vine length, better to cut into individual two-node sections
Rooting Pothos Cuttings in Water
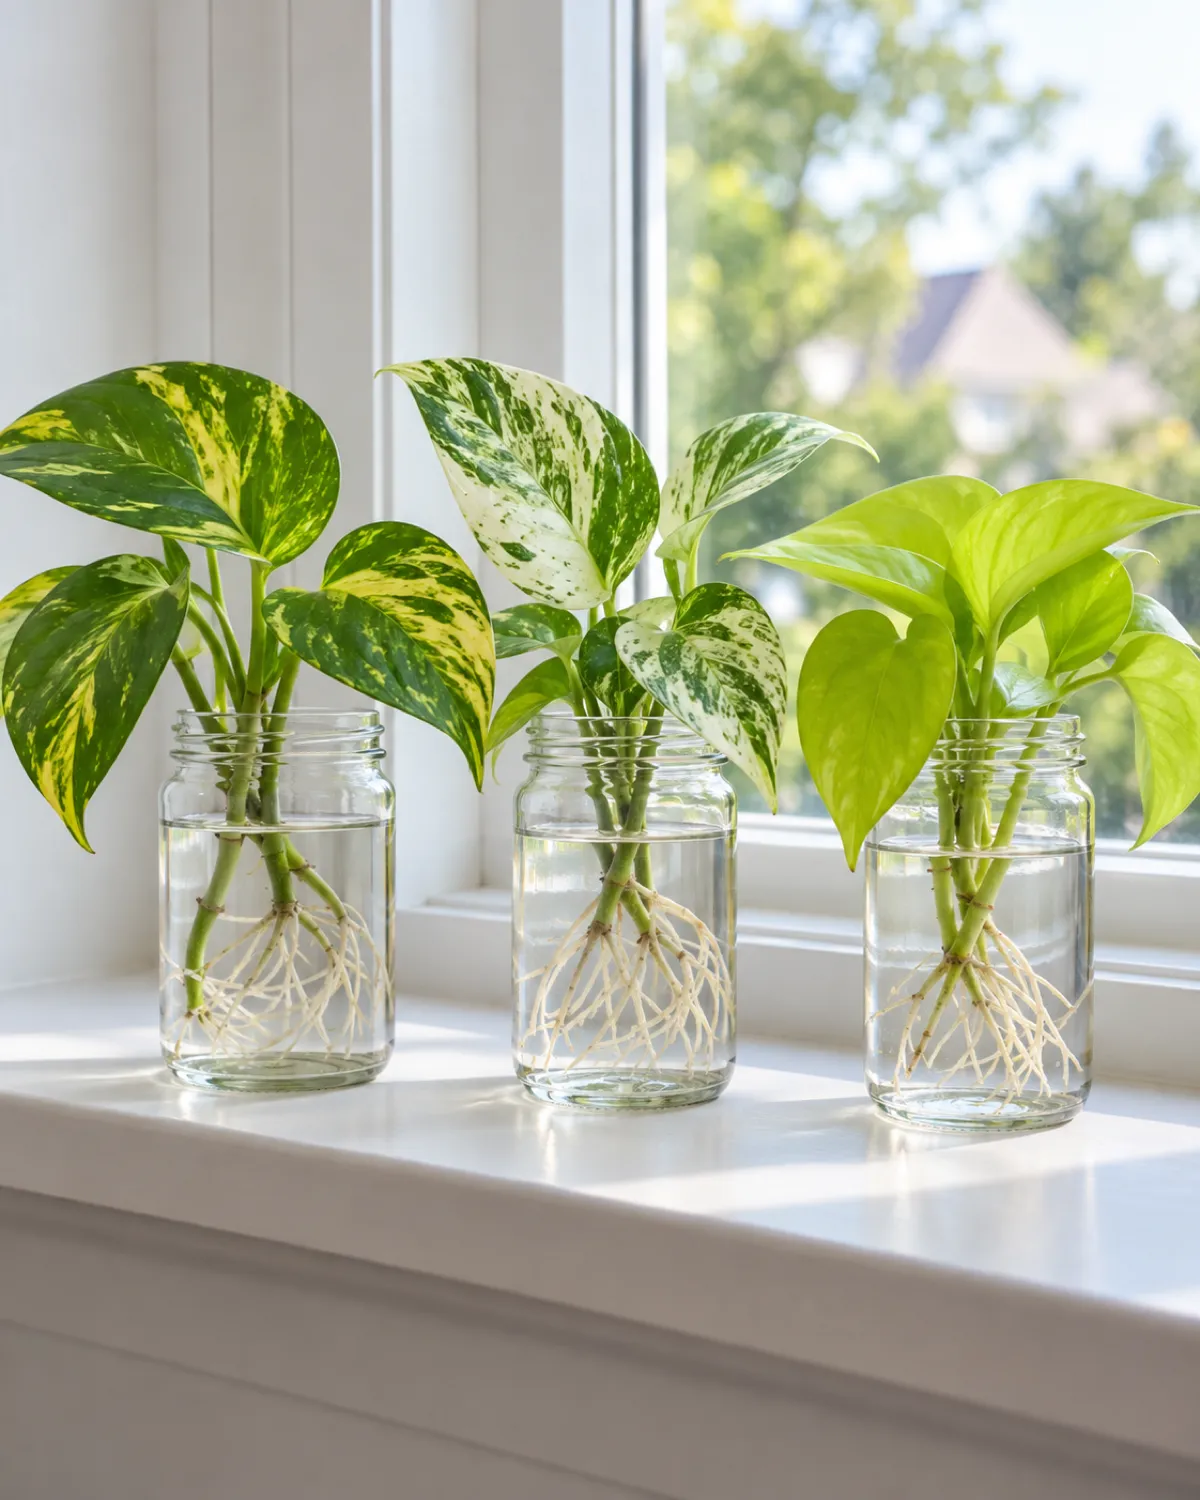
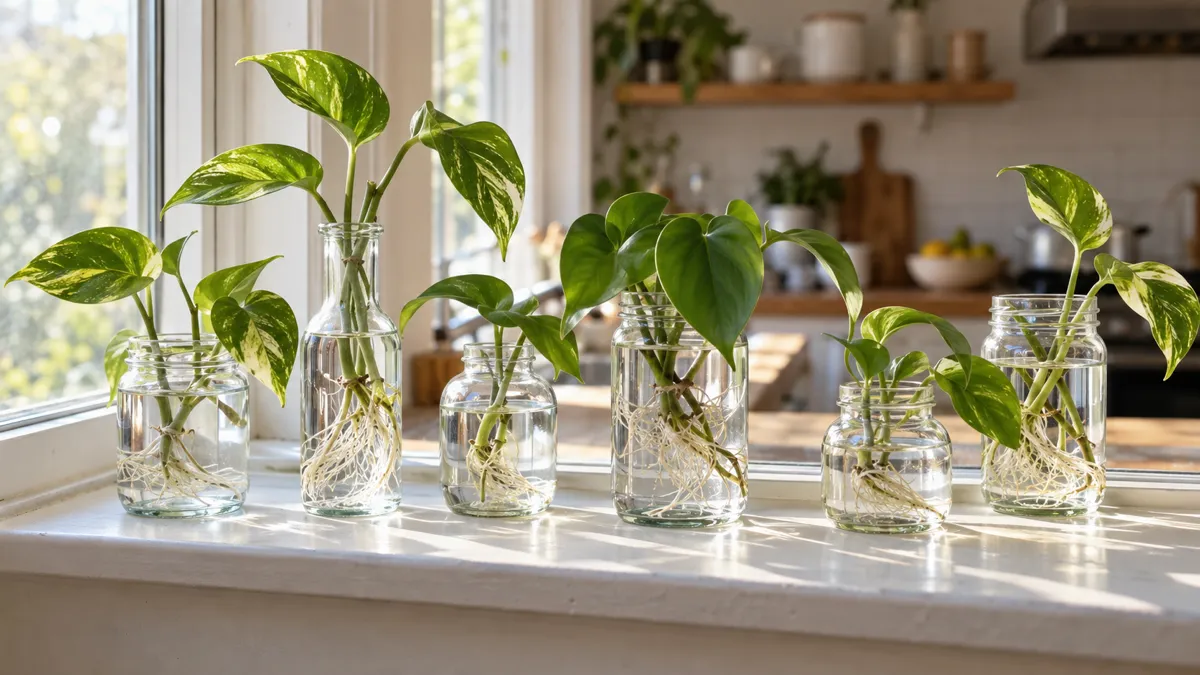
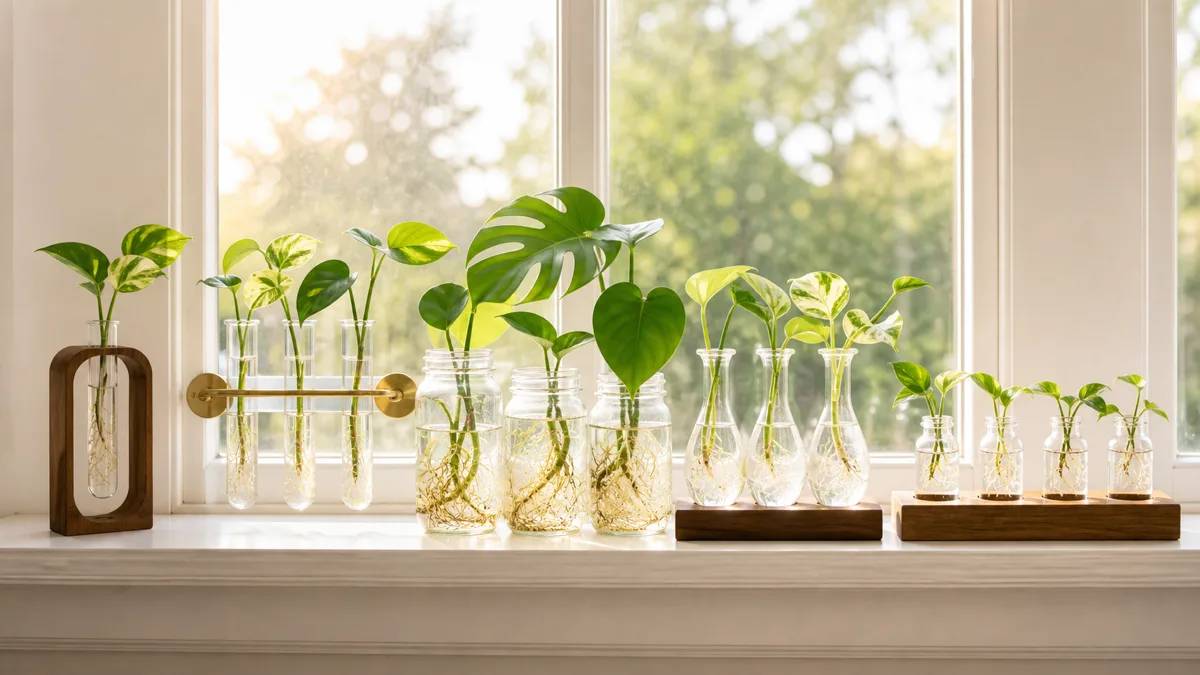
Water propagation is the most popular method for pothos because it is the simplest and gives you a front-row seat to root development. You can watch the roots grow in real time through the glass.
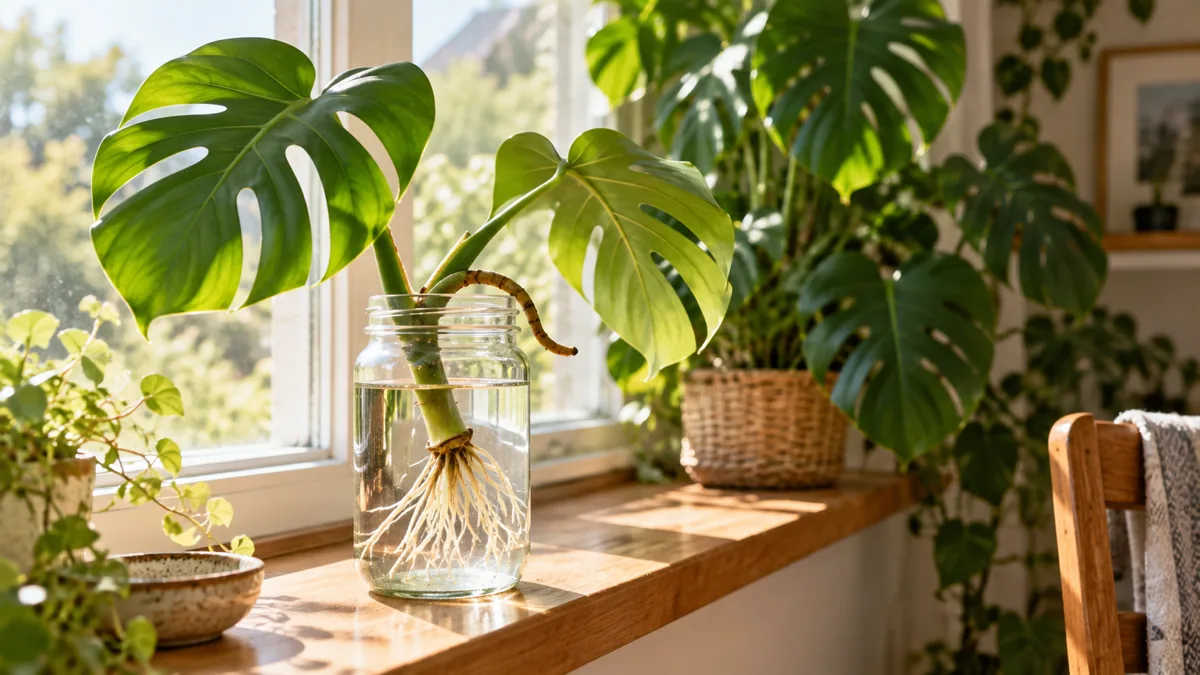
Fill a clear glass jar with room-temperature water. Place the cutting so that the node and any aerial root bump are submerged but the leaves stay above the waterline. Submerged leaves rot and contaminate the water.
- Water level: cover the bottom node by at least half an inch — too much water reduces oxygen, too little exposes the node
- Water changes: swap out the water every five to seven days to prevent bacteria buildup and keep dissolved oxygen fresh
- Light: bright indirect light — a windowsill that does not get direct afternoon sun is ideal
- Temperature: 65 to 80 degrees Fahrenheit — warm water speeds root growth
You will see the first white root tips emerge from the node within seven to fourteen days. Let the roots grow to at least two inches before potting up. Three inches is even better — longer roots establish faster in soil and reduce transplant shock.
One common mistake is adding rooting hormone to water. Gel and powder rooting hormones are designed for soil contact and dissolve uselessly in water. If you want to boost water propagation, add a small piece of activated charcoal to keep the water clean, or add a drop of liquid kelp fertilizer after the first roots appear.
Rooting Pothos Cuttings Directly in Soil
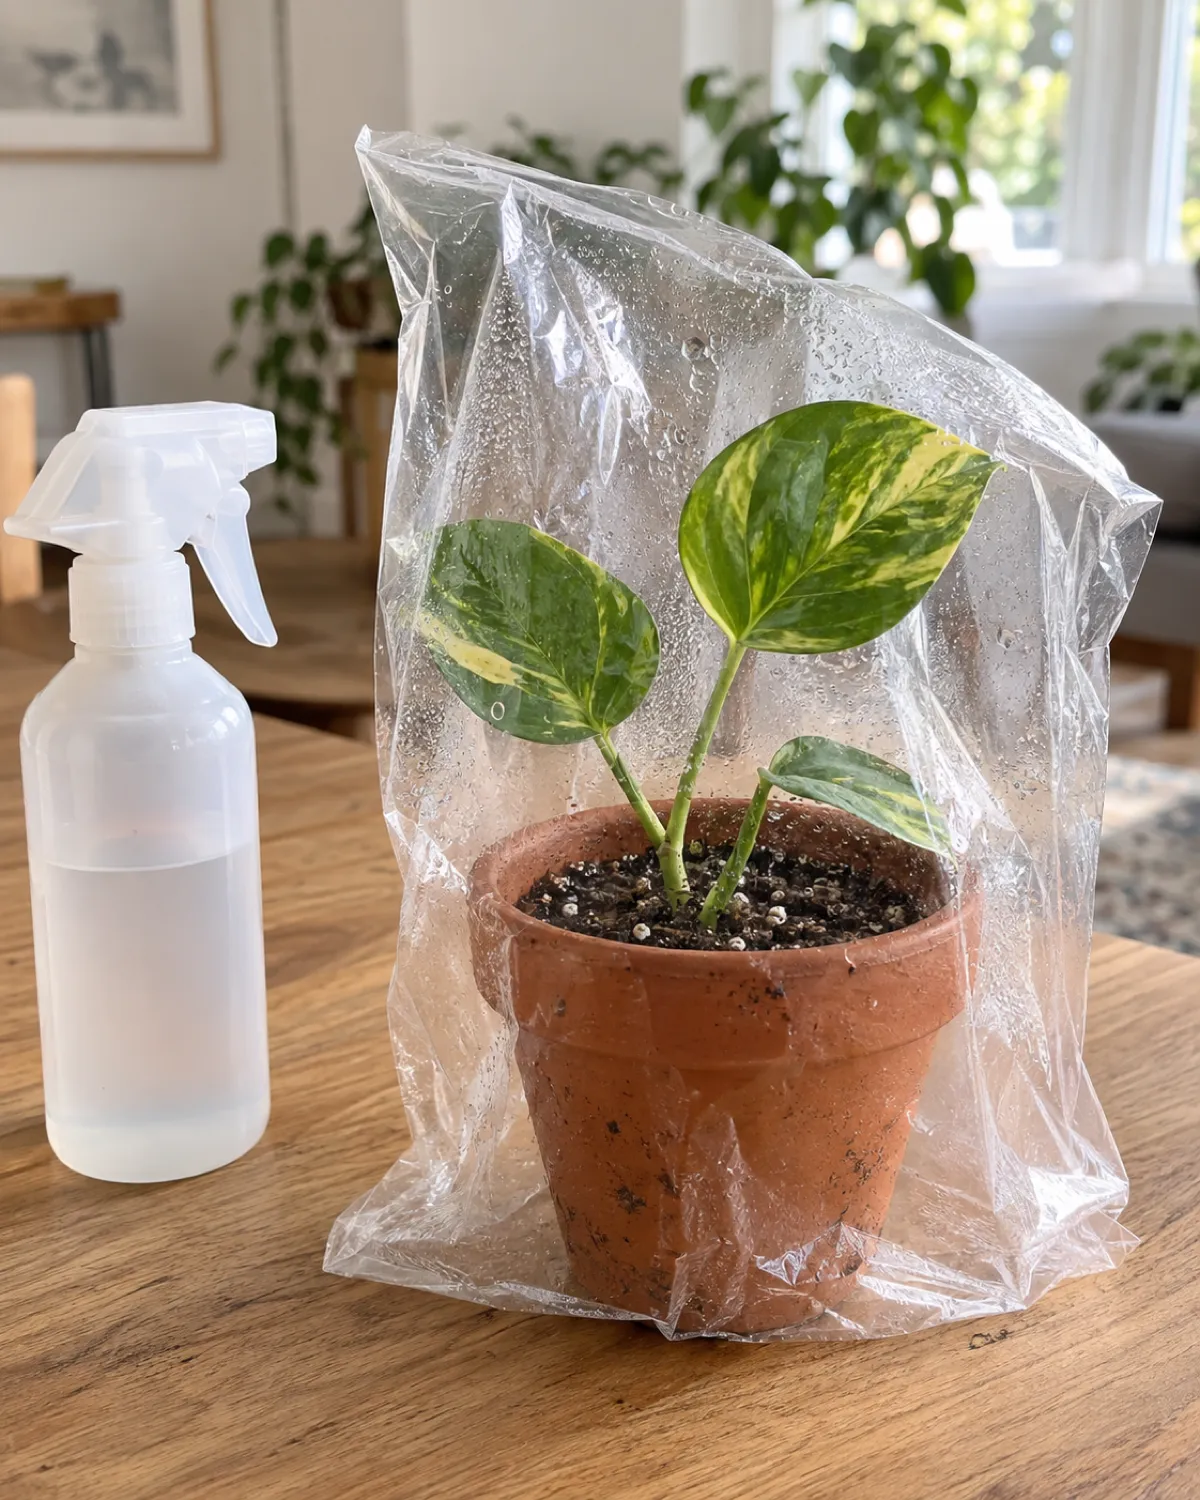
Soil propagation skips the water stage entirely. The cutting goes straight into moist potting mix and roots in place, which means no transplant shock later. The tradeoff is that you cannot see the roots developing, and the success rate is slightly lower if the soil dries out.
Mix equal parts standard potting mix and perlite. The perlite keeps the mix airy so the node gets both moisture and oxygen — pure potting mix can stay too wet and rot the cutting before roots form.
- Moisten the mix until it feels like a wrung-out sponge — damp but not dripping
- Poke a hole with a pencil or your finger deep enough to bury the bottom node
- Insert the cutting so the node is one inch below the surface
- Firm the soil gently around the stem to hold it upright
- Cover the pot loosely with a clear plastic bag to maintain humidity
- Humidity dome: the bag traps moisture around the cutting, mimicking a propagation tray — remove it for a few hours every two to three days to prevent mold
- Watering: keep the soil consistently moist but never soggy — mist the surface when it starts to dry
- Tug test: after three weeks, give the cutting a gentle tug — resistance means roots have formed
The soil method works especially well when you want to plant cuttings directly into the pot where they will live permanently. Skip the water stage, skip the transplant shock, and let the cutting root in its forever home.
Rooting Pothos Cuttings in Sphagnum Moss
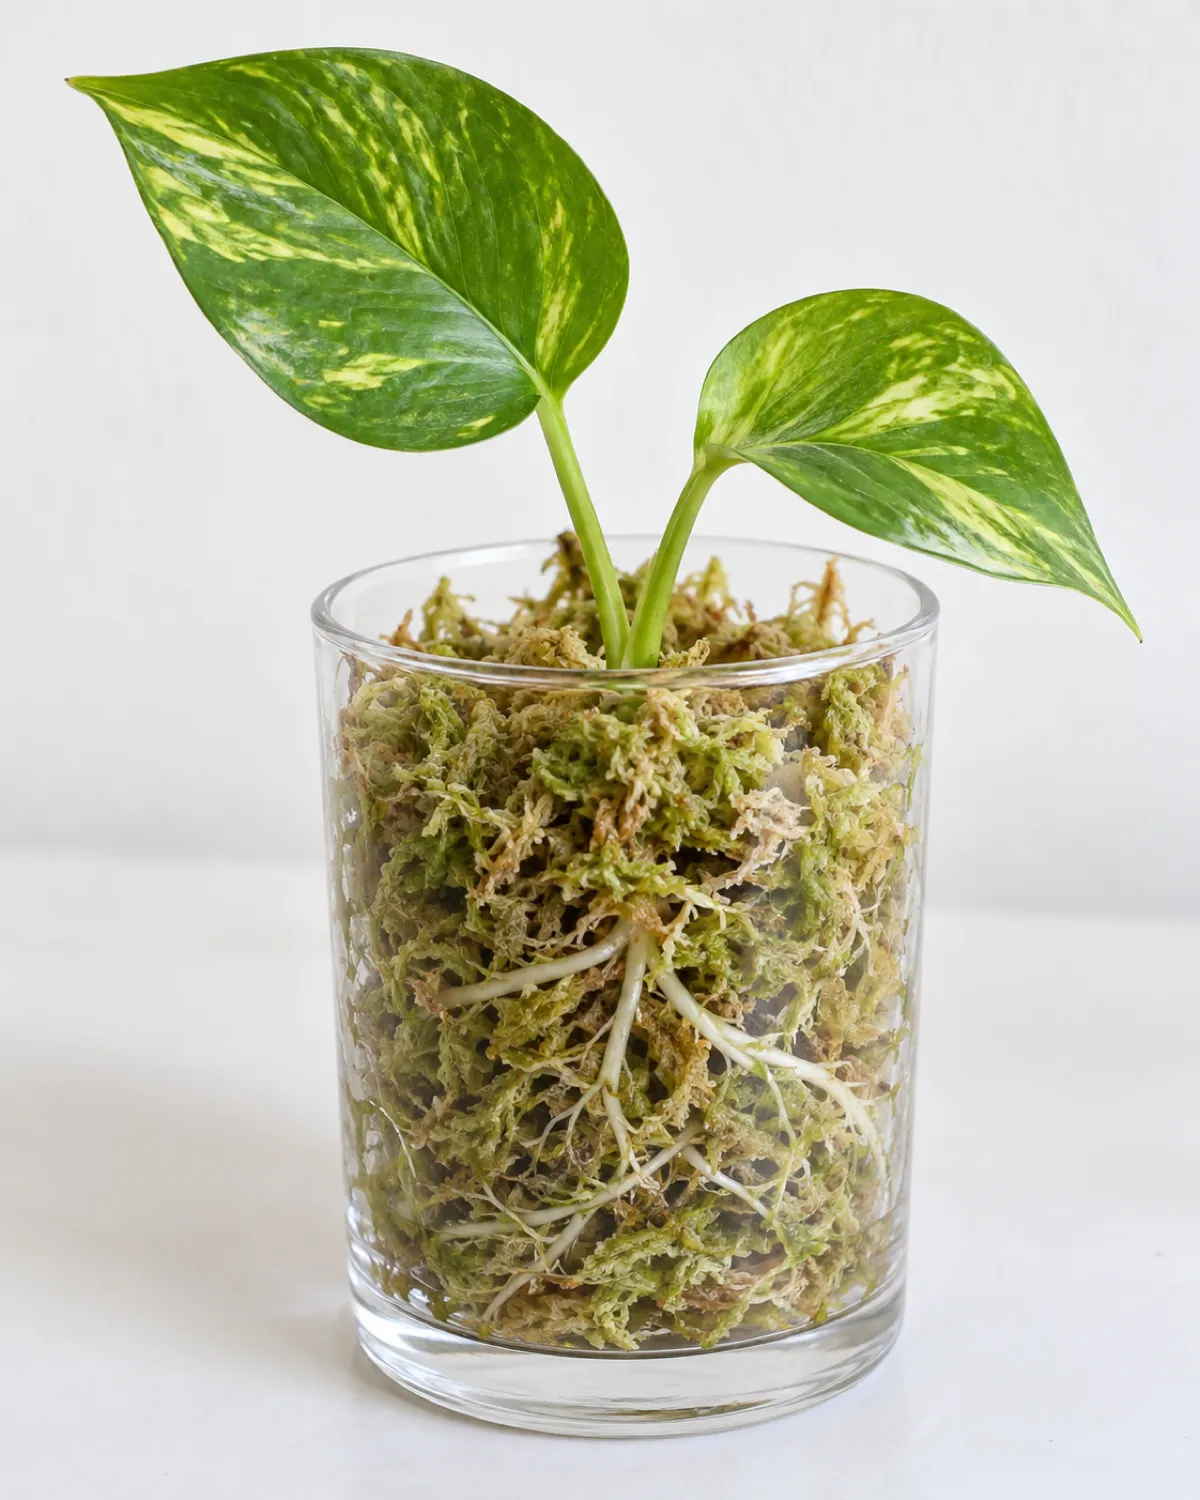
Sphagnum moss sits between water and soil in terms of moisture retention. It holds water without waterlogging the node, provides some aeration, and has mild antifungal properties that reduce the risk of stem rot. Many experienced propagators consider it the best medium for difficult-to-root varieties.
Soak a handful of long-fiber sphagnum moss in water for ten minutes, then squeeze it until it is damp but not dripping. You want the consistency of a wrung-out washcloth.
- Wrap method: wrap the damp moss around the node and lower stem, place the wrapped cutting in a clear cup or jar so you can monitor root growth
- Container method: fill a small clear container with damp moss, nestle the cutting's node into the center, and press the moss gently around it
Moss propagation typically produces roots in ten to eighteen days — faster than soil, slightly slower than water. The roots that form in moss are thicker and more soil-adapted than water roots, which means the transition to a permanent pot is smoother.
| Feature | Water | Soil | Moss |
|---|---|---|---|
| Visibility | Full | None | Partial |
| First roots | 7-14 days | 21-28 days | 10-18 days |
| Transplant shock | Moderate | None | Low |
| Rot risk | Low | Moderate | Low |
Check the moss every three to four days and re-moisten if it starts to feel dry. Unlike soil, moss dries from the outside in, so the outer layer may feel dry while the center around the node stays moist. Squeeze gently to check.
Single-Node Propagation for Maximum Plants
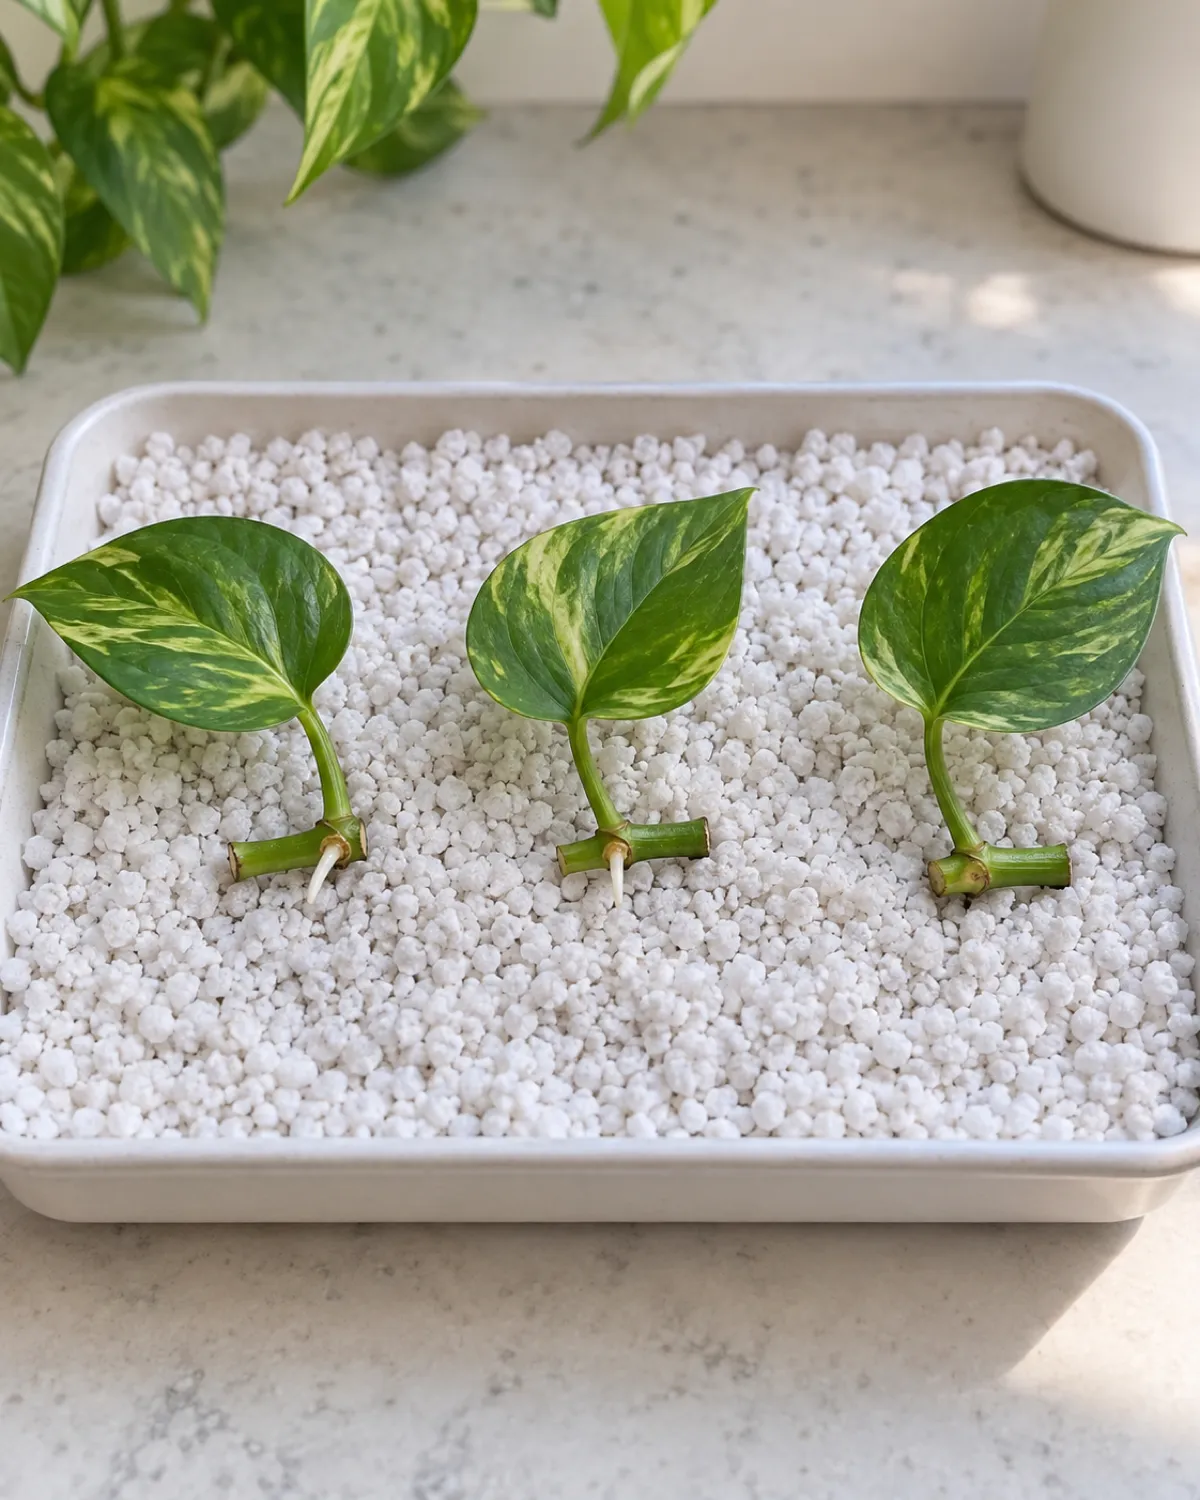
Single-node propagation is the method that gets you the maximum number of new plants from one vine. Instead of cutting the vine into sections with two or three nodes each, you cut it into individual segments with exactly one node and one leaf per piece.
A six-foot pothos vine with twelve nodes becomes twelve potential new plants instead of four or five multi-node cuttings. The tradeoff is time — single-node cuttings root more slowly and take longer to become full, bushy plants.
Two approaches:
- Vertical method: plant each single-node cutting upright in a small pot of moist perlite, node buried one inch deep, leaf sticking up — works just like a standard soil cutting but with less stored energy
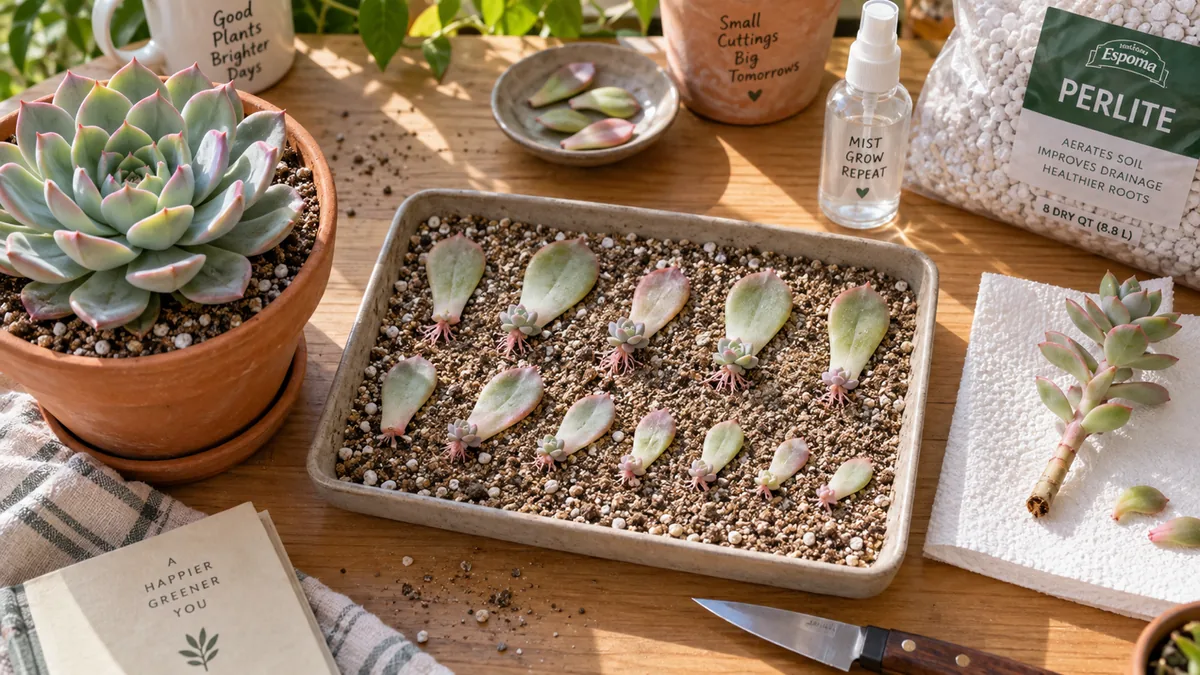
- Horizontal lay method: lay the cutting flat on damp perlite or moss with the node pressing into the surface — the root grows downward while the leaf stays flat or tilts upward as the new growth point activates
The horizontal method is especially useful when the vine section has lost its leaf but the node is still intact. The node can push a new growth point and root simultaneously, though it takes four to six weeks without a leaf to photosynthesize.
- Success rate: slightly lower than multi-node cuttings — about 80 to 85 percent versus 95 percent
- Time to rooted plant: three to five weeks versus one to two weeks for multi-node water cuttings
- Best use case: maximizing yield from a single vine, propagation projects, or sharing with many people at once
How to Propagate Long Trailing Vines Without Removing Them
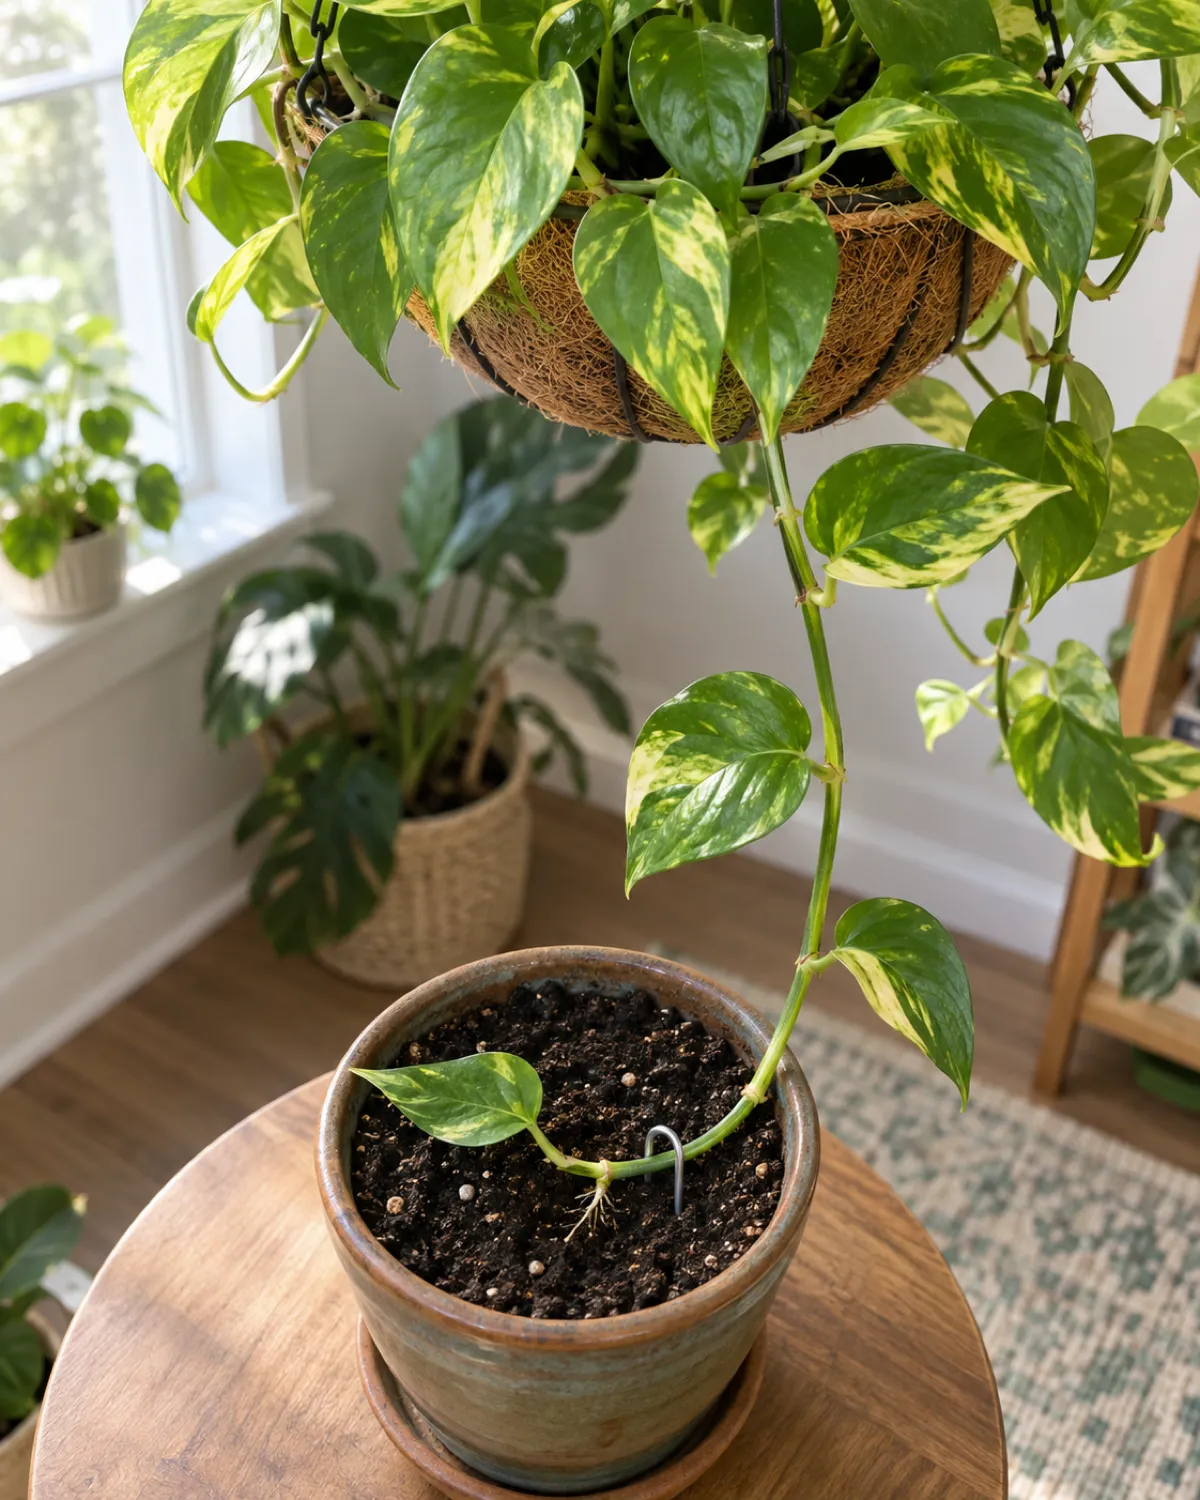
Layering lets you root a section of vine without cutting it from the mother plant. The vine stays attached and continues to receive water and nutrients from the parent root system while the pinned node develops its own roots in a separate pot.
This method works beautifully with hanging baskets where long trailing vines drape down and can reach a small pot placed on a surface below.
- Choose a node on a trailing vine that can reach a pot of moist soil without pulling the mother plant
- Press the node into the soil surface and pin it in place with a U-shaped plant pin, paper clip, or bobby pin
- Keep the soil consistently moist — the pinned node needs contact with damp substrate to trigger root growth
- Leave the vine attached to the mother plant for three to four weeks
After the pinned section has rooted — you will see new growth emerging from the node — sever the vine on the mother-plant side of the new roots. The new plant is now independent and already established in its own pot.
- Advantage: zero shock to the cutting because it never lost its water supply
- Limitation: only works with vines long enough to reach another pot
- Variation: serpentine layering — pin multiple nodes into the same long tray of soil for several new plants at once
Propagating Different Pothos Varieties
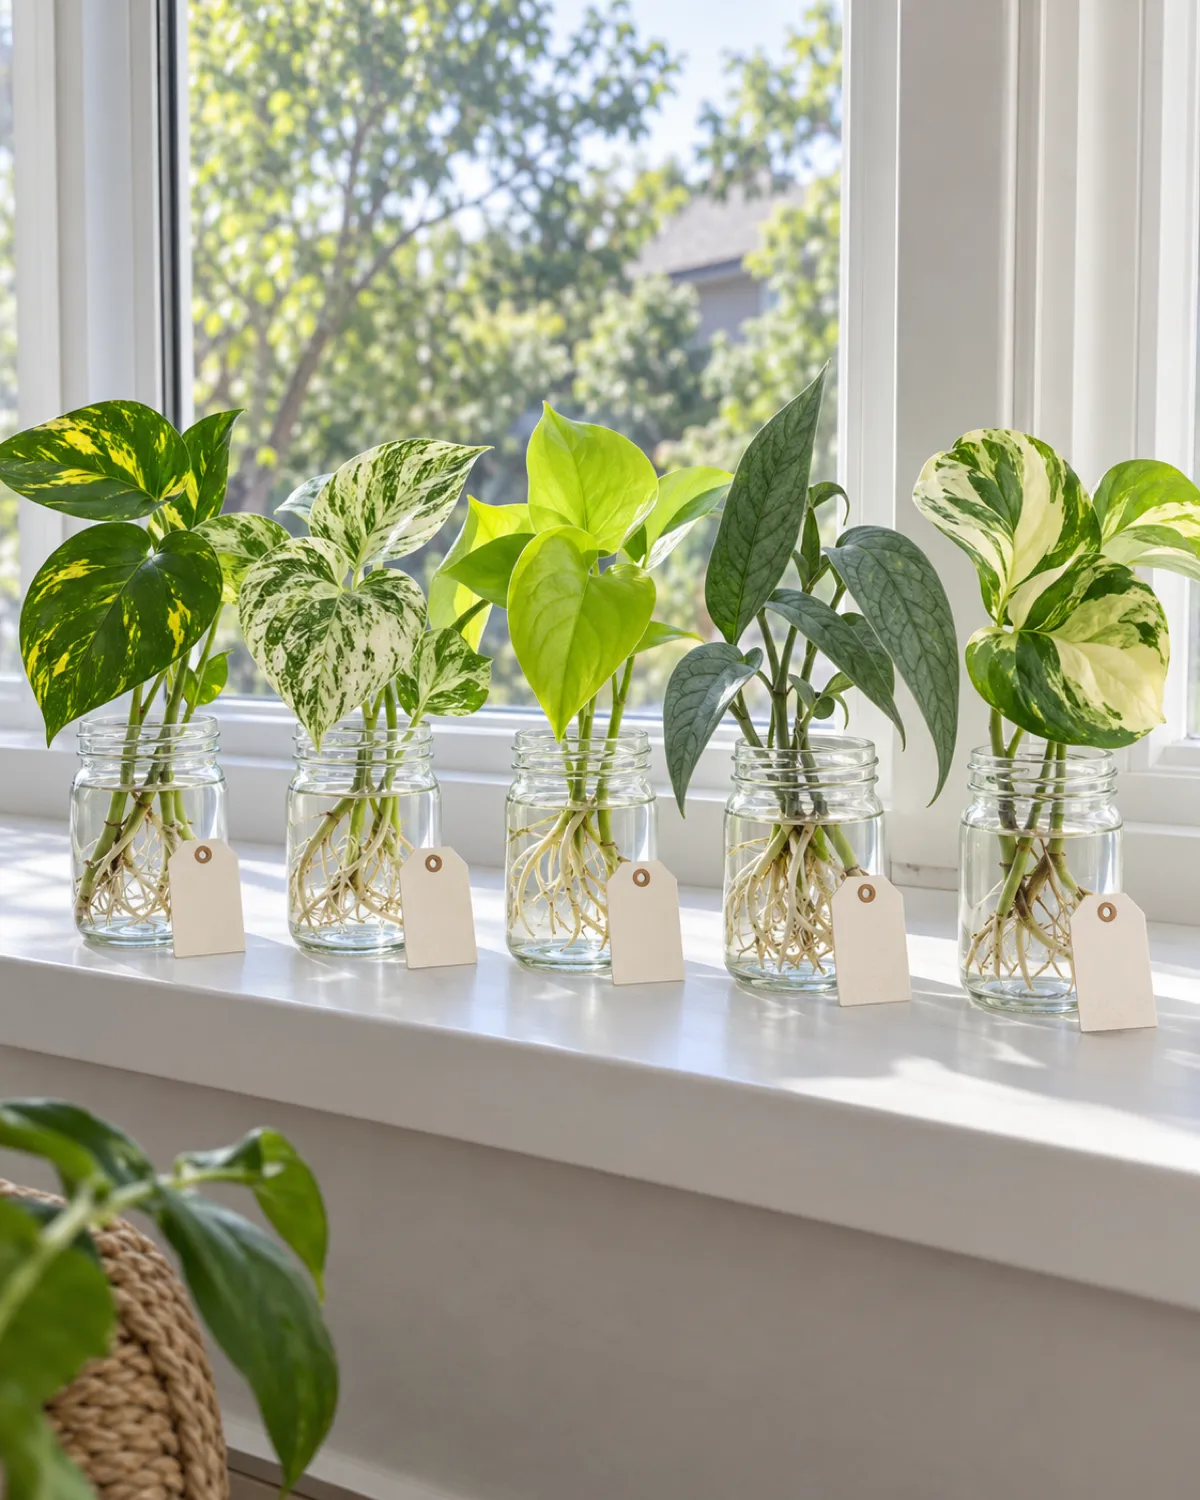
Not all pothos varieties root at the same speed. The amount of chlorophyll in the leaves directly affects how much energy the cutting can produce during the rooting phase, and heavily variegated leaves produce less energy than solid green ones.
Golden pothos, the classic variety with yellow-splashed green leaves, roots the fastest. It has enough chlorophyll to power rapid root development and tolerates a wide range of conditions during propagation.
| Variety | Speed | Days |
|---|---|---|
| Golden | Fast | 7-10 |
| Jade | Fast | 7-10 |
| Neon | Fast | 7-12 |
| Marble Queen | Moderate | 10-18 |
| Manjula | Slow | 14-21 |
| N'Joy | Moderate | 12-18 |
| Cebu Blue | Slow | 14-25 |
| Snow Queen | Slow | 18-28 |
Golden and jade root the fastest because they have the most chlorophyll to power root development. Neon is close behind. The heavily variegated varieties — Marble Queen, Manjula, Snow Queen — root progressively slower because their white or cream patches produce less energy. Cebu Blue is a special case: it roots slowly and needs higher humidity (60 percent or more) during propagation.
For slow-rooting variegated varieties, moss propagation gives better results than water. The antifungal properties of sphagnum reduce rot risk during the longer rooting window, and the roots that form are sturdier.
One important note about variegated cuttings: select cuttings that have at least 30 to 40 percent green on the leaf. Mostly-white cuttings can root but often fail to produce enough energy for sustained growth. The new leaves they push may revert to more green, which is the plant's survival mechanism for maintaining adequate photosynthesis.
For a complete breakdown of variety identification, see the pothos varieties guide.
Root Timeline by Medium — Water vs Soil vs Moss Compared Week by Week
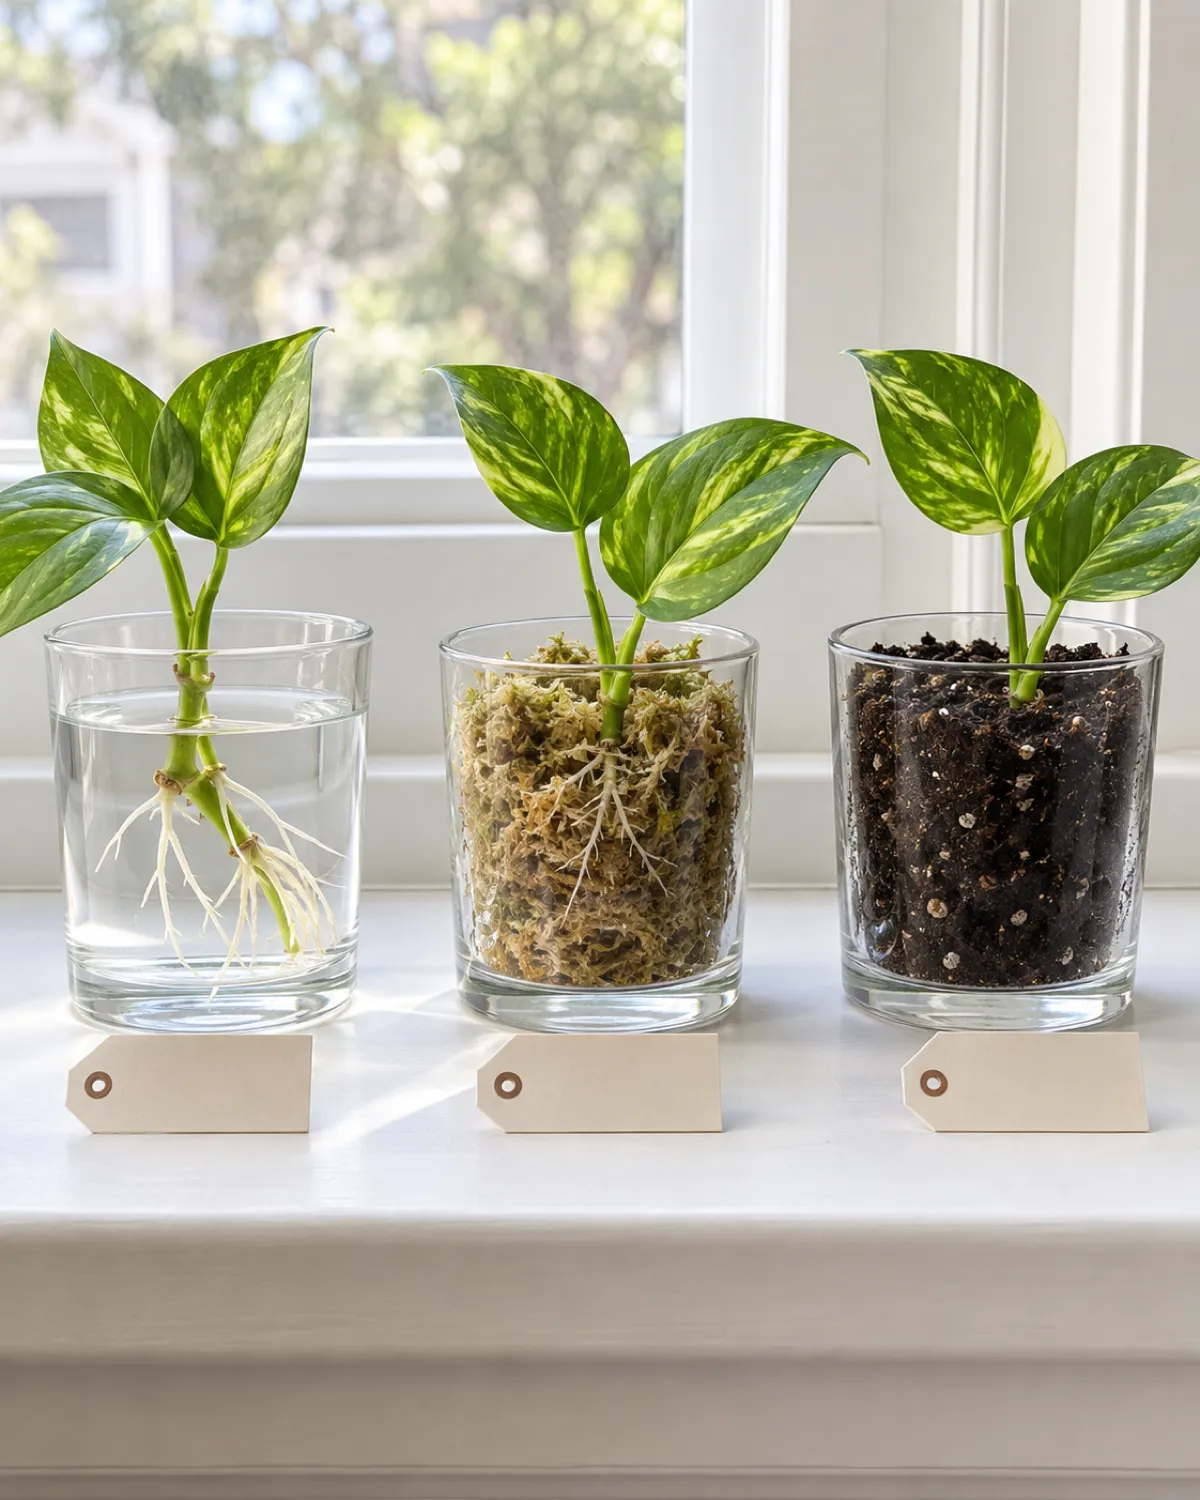
Knowing when to expect roots — and when to worry about their absence — eliminates the most common source of anxiety in pothos propagation. The timeline varies by medium, temperature, and season.
Water propagation timeline:
- Day 3-5: the cut end callouses over and the aerial root bump may start to swell
- Day 7-14: first white root tips emerge from the node
- Day 14-21: roots reach one to two inches, branching begins
- Day 21-28: roots reach two to three inches — ready to pot up
Soil propagation timeline:
- Week 1: no visible change above ground — the cutting is forming callous tissue
- Week 2-3: new root tips begin pushing into the soil (invisible from above)
- Week 3-4: tug test shows resistance — roots have anchored
- Week 4-6: new leaf growth appears, confirming the root system is established
Sphagnum moss timeline:
- Day 5-7: aerial root bump activates and begins elongating
- Day 10-18: visible roots threading through moss fibers
- Day 18-25: roots thick enough to transplant to soil
Temperature is the biggest variable. Cuttings rooting in a 75-degree room will hit each milestone about 30 percent faster than cuttings in a 65-degree room. If your home is cool, placing the propagation vessel on top of a refrigerator or near (not on) a heat mat adds a few degrees that make a noticeable difference.
If you see zero root activity after three full weeks in water, check the node. If the stem is mushy and brown, the cutting has rotted — take a fresh cutting from the mother plant. If the stem is firm and the node is intact, give it more time and move it to a warmer, brighter location.
Transferring Water-Rooted Cuttings to Soil Without Killing Them
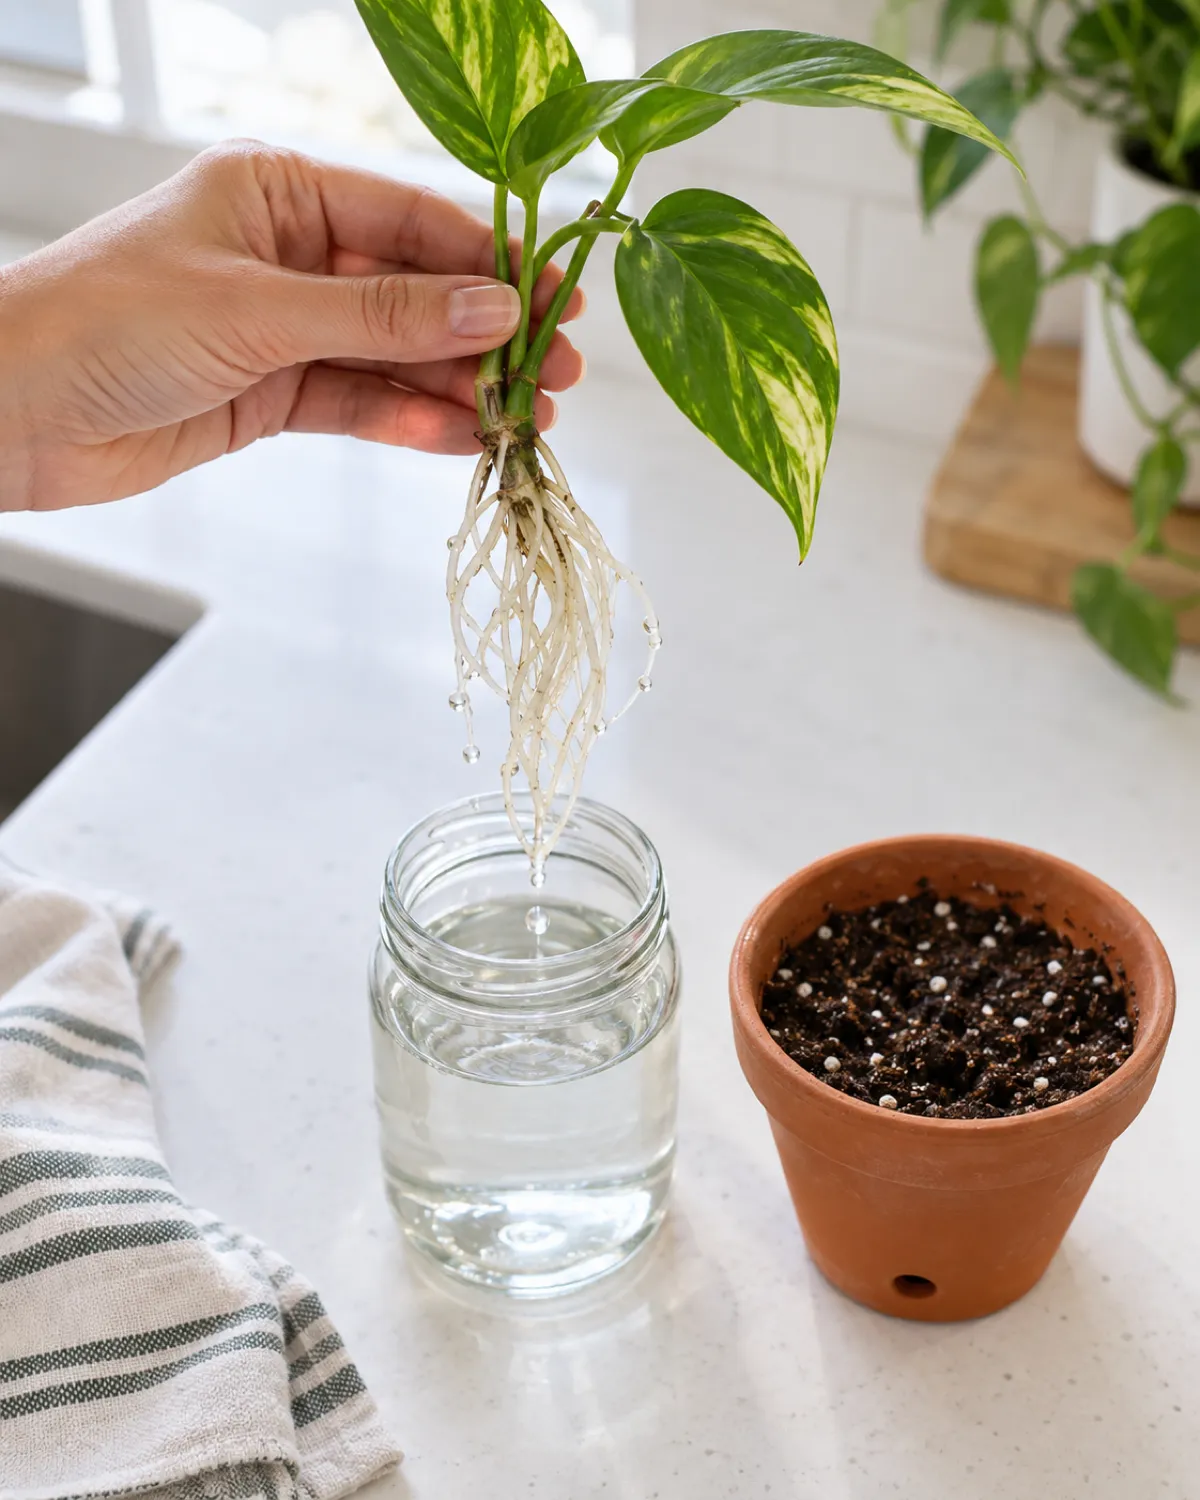
The transition from water to soil is where many propagators lose cuttings. Water roots are adapted to an aquatic environment — they are white, smooth, and brittle. Soil roots are adapted to pulling moisture from air pockets in substrate — they are thicker, tougher, and branched differently. The cutting needs time to grow soil-adapted roots while the water roots gradually take a secondary role.
The key is to keep the soil consistently moist for the first two weeks after transplanting. The cutting cannot yet pull water efficiently from dry soil, and allowing the mix to dry out during this window causes the water roots to desiccate and die before soil roots have formed.
- Wait until roots reach two to three inches
- Prepare a small pot with moist, well-draining mix
- Make a hole deep enough to bury the roots without cramming
- Place the cutting, fill around the roots, firm the soil
- Water until it runs from the drainage hole
- First week: water every two to three days to keep the soil continuously moist (not soggy)
- Second week: reduce to every three to four days, letting the top half inch dry between waterings
- Third week onward: transition to a normal watering schedule — water when the top inch of soil is dry
Do not fertilize for the first four to six weeks. New roots are tender and sensitive to salt burn. The potting mix contains enough nutrients to support the cutting until the root system matures.
Building a Fuller Pot by Combining Multiple Cuttings
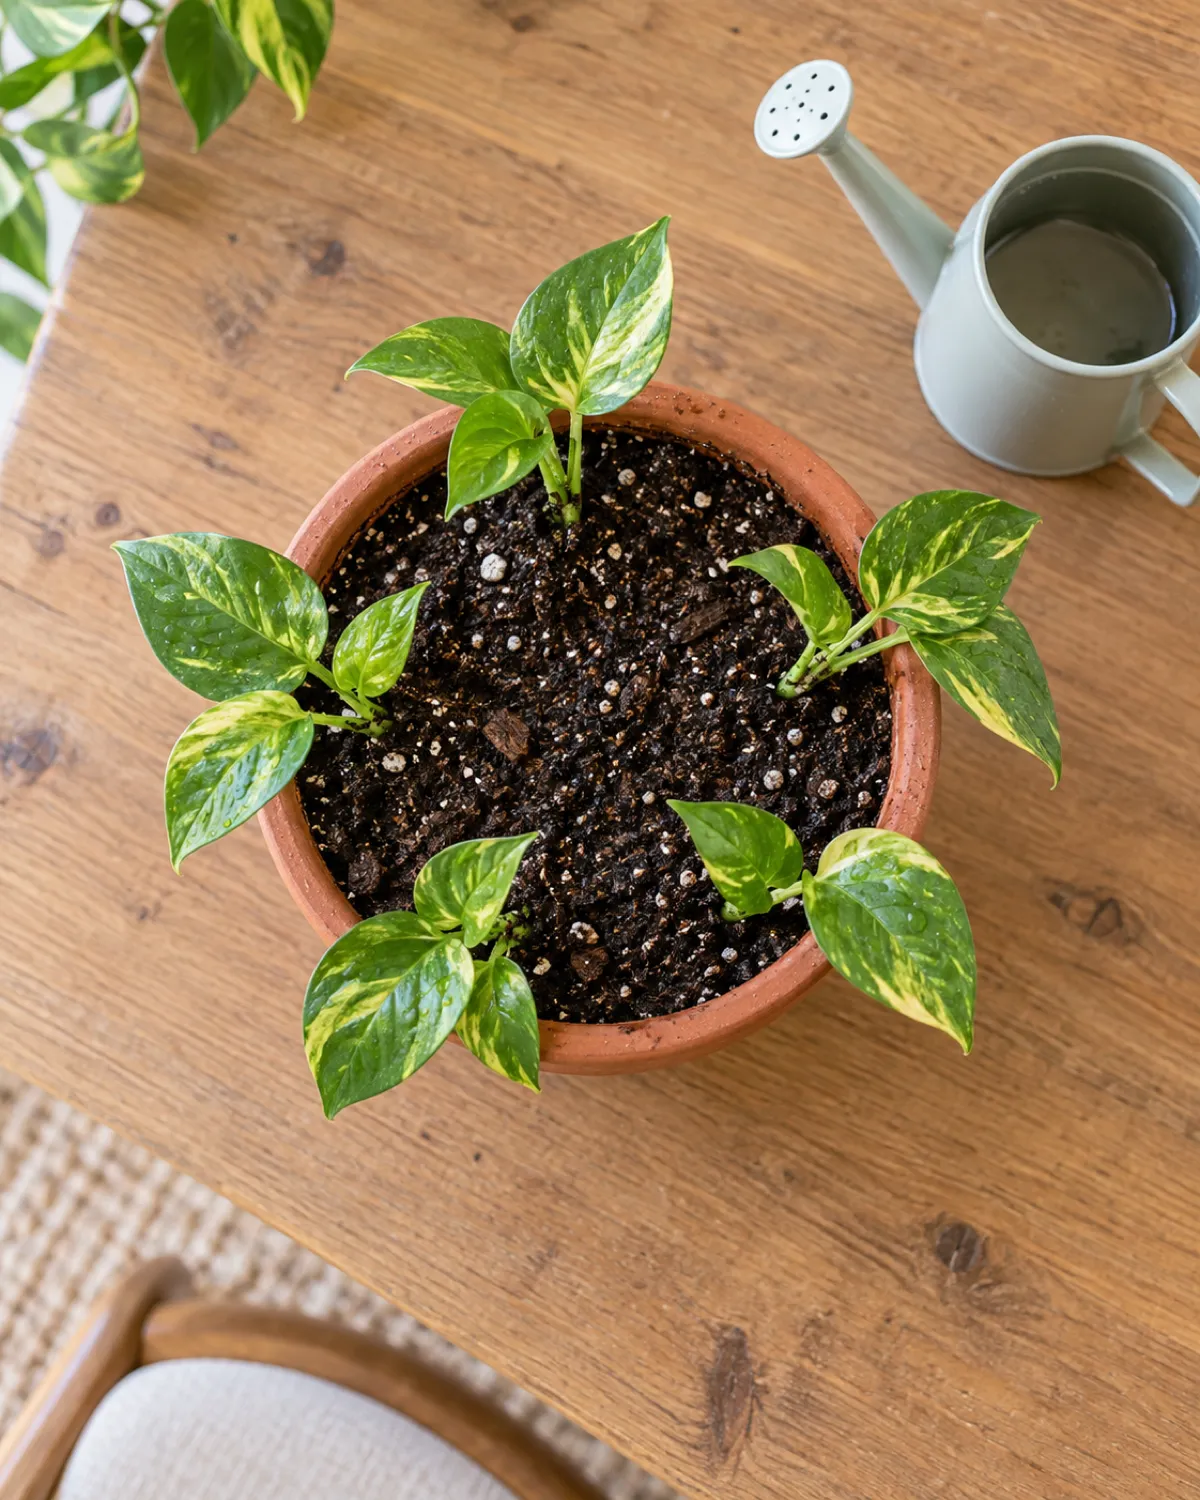
A single pothos cutting grows into a single vine. A pot with five or six cuttings grows into a lush, full plant that looks like it has been growing for years. This is the secret behind the full, cascading pothos you see in plant shops — they are not one plant, they are five or six cuttings planted together.
The technique is straightforward:
- Pot size: a six-inch pot holds four to six cuttings comfortably
- Arrangement: plant the cuttings in a circle around the rim, each one angled slightly outward so the vines will trail over different sides
- Spacing: keep at least one inch between cuttings — they do not mind being close, but cramming them against each other restricts airflow
- Depth: bury two nodes per cutting for maximum root anchoring
Once the cuttings establish and start producing new growth, pinch the growing tip of each vine when it reaches six to eight inches. Pinching forces the vine to branch from a lower node, and each branch eventually trails independently. The result is a pot with double or triple the number of vines from the same number of cuttings.
You can also add cuttings to an existing pothos that has gone bare at the top. Push rooted cuttings into the empty spots near the base of the pot and they will fill the gap while the original vine continues to trail.
Common Pothos Propagation Problems and How to Fix Each One
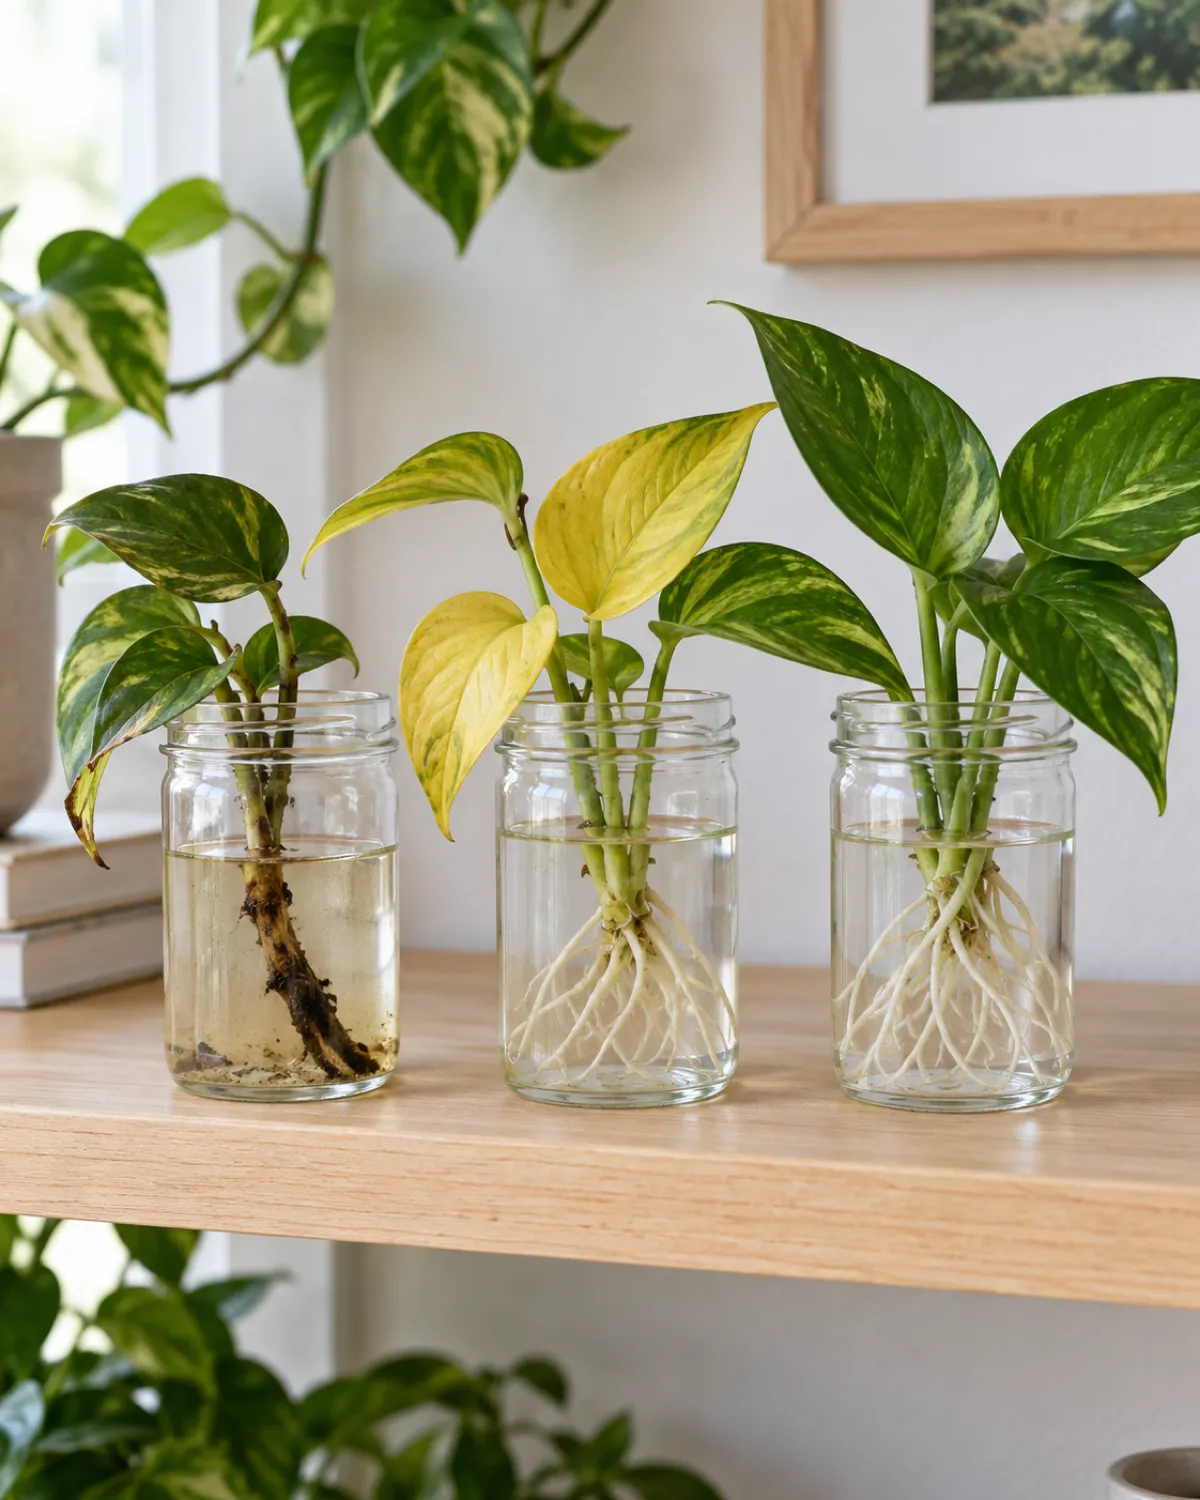
Even the easiest propagation plant runs into problems. The good news is that every common pothos propagation failure has a specific cause and a specific fix.
Stem rot in water is the most frequent problem. The stem turns brown and mushy starting from the cut end and spreading upward. The water becomes cloudy and smells sour.
- Cause: bacteria entered through a dirty cut or the water was not changed frequently enough
- Fix: take a fresh cutting with a sterile blade, use clean water, and change it every five days — add a small piece of activated charcoal to inhibit bacterial growth
No roots after three weeks means the node is not activating.
- Check the node: is there actually a node on the cutting? A piece of stem without a node will never root
- Check the temperature: below 60 degrees slows root initiation dramatically
- Try a different medium: switch from water to moss, or from soil to water — sometimes a change triggers activation
Yellowing leaves on cuttings usually mean too much direct sunlight.
- Move the cutting to bright indirect light — direct sun bleaches the leaves and diverts energy from root production
- One yellow leaf on a multi-leaf cutting is normal — the cutting is sacrificing its oldest leaf to redirect energy to the roots
Mushy cuttings in soil result from overwatering.
- The soil should be moist, not saturated — water less frequently and ensure the pot has drainage
- Remove the humidity dome more often to let air circulate
For the full spectrum of houseplant pest and disease identification, see the pests and diseases guide.
Caring for Newly Propagated Pothos in Their First Month
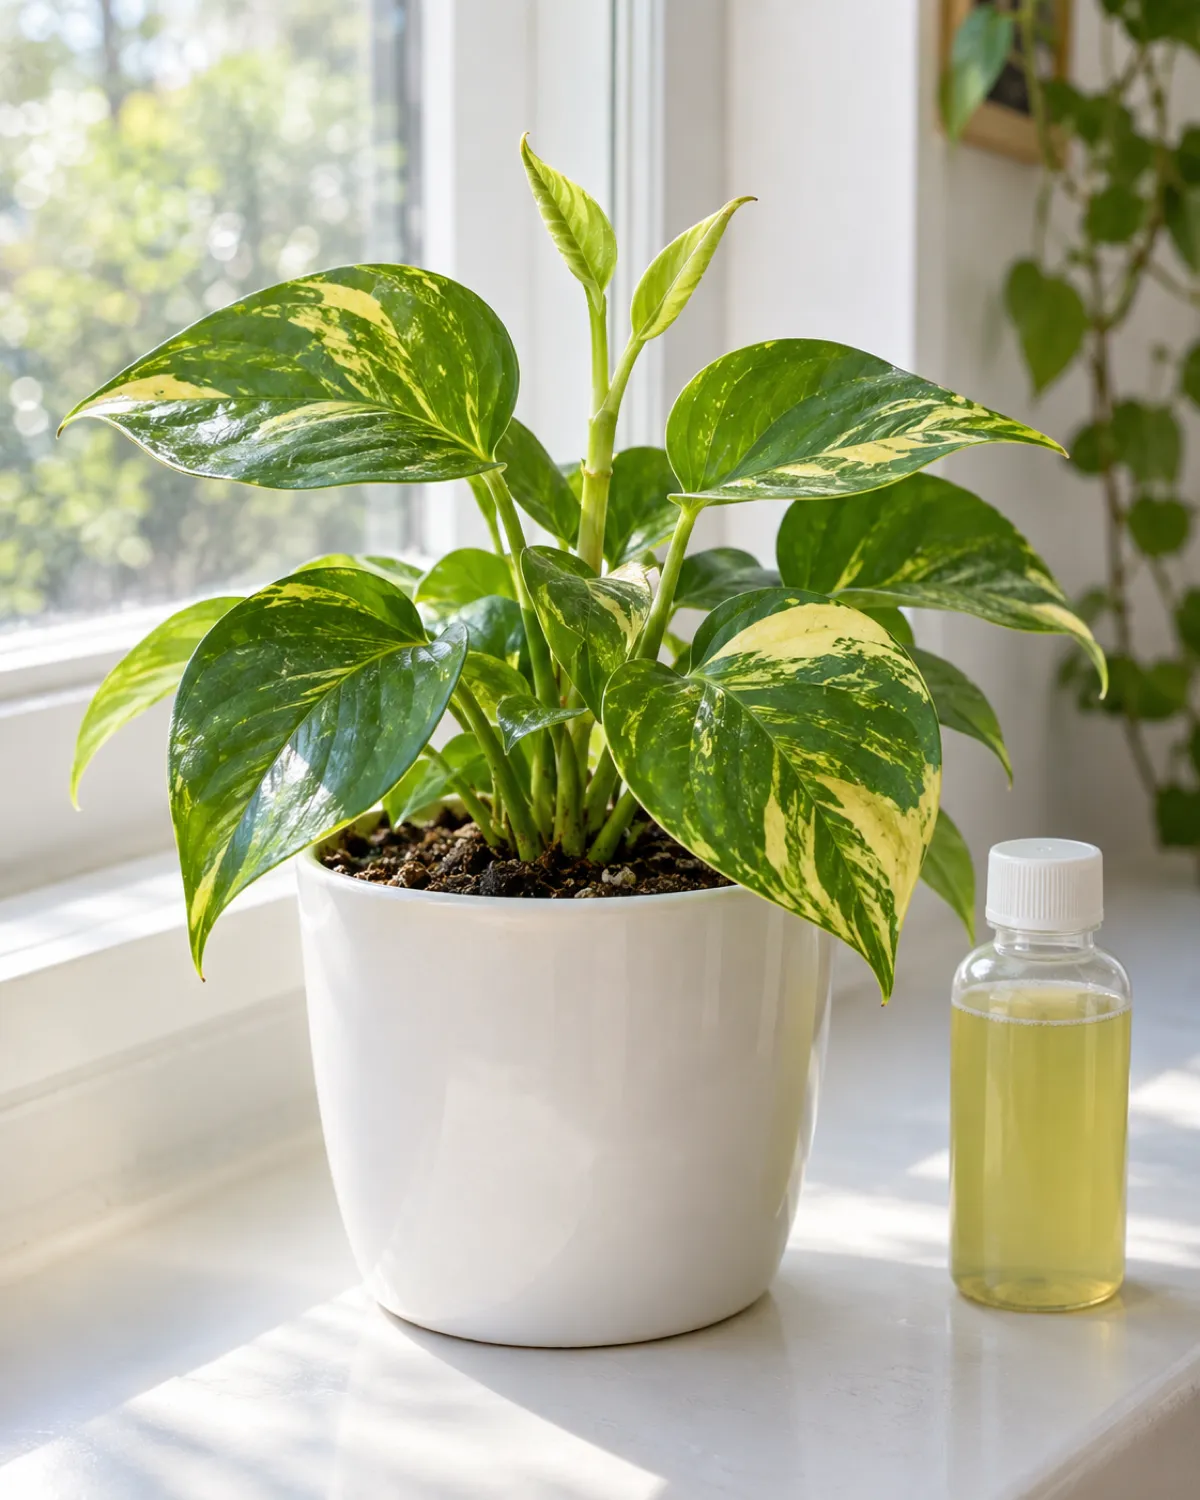
The first month after potting up is when a propagated pothos is most vulnerable. The root system is small, the cutting is adjusting to a new medium, and the plant does not yet have the reserves to bounce back from stress.
Light is the most important factor. Place the newly potted cutting in bright indirect light — the same kind of light you would give a healthy adult pothos. Avoid direct afternoon sun, which can stress the tender new roots through excessive transpiration demand.
- Watering: keep the soil lightly moist for the first two weeks, then transition to letting the top inch dry between waterings — the roots need consistent moisture but not saturation
- Temperature: maintain 65 to 80 degrees Fahrenheit — avoid cold drafts and heating vents
- Humidity: 40 to 60 percent is ideal for the first month — group the new plant with other plants or use a pebble tray if your home is dry
When to fertilize: wait at least four to six weeks after potting up. The roots need time to mature before they can handle fertilizer salts. When you do start, use a balanced liquid fertilizer diluted to half strength. For guidance, see the fertilizing houseplants guide.
Signs the propagated pothos has successfully established:
- New leaf unfurling from the growing tip — the plant is investing energy in growth, not survival
- The existing leaves maintain their color and firmness — no yellowing or drooping
- A gentle tug on the stem meets firm resistance — the roots are anchored
- The soil dries at a predictable pace — the root system is actively drinking
Once you see these signs, treat the plant like any other pothos. It has graduated from cutting to independent plant. For full ongoing care, see the pothos care guide.
Save for Later
Propagating Pothos in 15 Takeaways
- 1Pothos has pre-formed aerial roots at every nodeThat brown bump on the stem is ready to grow real roots the moment it touches water or moist substrate. Spring through summer gives fastest results.
- 2The node is the only part that can rootCut below the node at a 45-degree angle. A cut between nodes produces a piece of stem that will never root.
- 3You need almost nothing to startClean shears, a glass of water, and a bright windowsill. Rooting hormone is optional for pothos.
- 4Keep one leaf minimum per cuttingThe leaf photosynthesizes to feed root development. Sterilize the blade to prevent stem rot.
- 5Water rooting is simplest and most visualSubmerge the node, change water weekly, wait seven to fourteen days for white roots to appear.
- 6Soil rooting skips transplant shockMoist perlite-potting mix blend, humidity dome, tug test after three weeks.
- 7Sphagnum moss gives the best of bothVisible roots, antifungal protection, and soil-adapted roots that transition smoothly.
- 8Single-node cuts maximize yieldOne node per cutting turns a twelve-node vine into twelve plants instead of four.
- 9Layering roots a vine without cutting itPin a node to soil while the vine stays attached. Sever after roots establish for zero-shock propagation.
- 10Variegated varieties root slowerMarble Queen and Snow Queen need more time and brighter light. Select cuttings with at least 30 percent green.
- 11Root timelines vary by mediumWater is seven to fourteen days, moss ten to eighteen, soil three to four weeks. Warmth accelerates all of them.
- 12Water-to-soil transfer needs two weeks of moist soilWater roots are fragile. Keep soil consistently moist until soil-adapted roots take over.
- 13Five cuttings make a full potPlant in a circle around the rim of a six-inch pot. Pinch tips at six inches to force branching.
- 14Stem rot is the most common failureDirty tools and stale water cause it. Sterilize blades, change water weekly, add activated charcoal.
- 15Wait four to six weeks before fertilizingNew roots burn easily. Half-strength balanced liquid fertilizer after the first new leaf unfurls.
kultivy.com
FAQ
Quick-reference answers:
- Can you propagate pothos from a single leaf without a node? No. A leaf without a node can survive in water for weeks or even months, staying green and fresh, but it will never produce roots or a new growth point. The root-forming cells exist only at the node. A single leaf cutting is a common beginner mistake — always include the node
- Do pothos cuttings root faster in water or soil? Water is faster for visible root emergence — typically seven to fourteen days versus three to four weeks in soil. However, soil-rooted cuttings skip the transplant transition and establish into mature plants sooner overall. For the quickest path from cutting to thriving potted plant, water propagation followed by an early pot-up at two-inch roots is the most efficient
- Why are my pothos cuttings turning yellow in water? The most common cause is too much direct sunlight. Move the cutting to bright indirect light. One lower leaf yellowing is normal and not a cause for alarm — the cutting is redirecting stored energy from the old leaf to root production. If multiple leaves yellow simultaneously, check the water for bacterial cloudiness and do a complete water change
More common questions:
- Can you keep pothos in water permanently instead of potting up? Yes. Pothos is one of the few houseplants that grows well in water indefinitely. Add liquid fertilizer at quarter strength every two to four weeks to replace nutrients the plant would normally get from soil. Change the water completely every two weeks. The plant will grow more slowly than it would in soil, but it will stay healthy
- How many cuttings should you plant together for a full pot? Four to six cuttings in a six-inch pot create a full, bushy appearance from the start. Plant them in a circle around the rim, each angled outward. For a larger eight-inch pot, use six to eight cuttings. Pothos tolerates crowding well, so erring on the side of more cuttings gives a lush result faster

Mara Quinn edits Kultivy, where she shares houseplant care, propagation, beginner-friendly plant picks, and plant-styling ideas for anyone who wants their indoor plants to actually thrive. Every guide is image-led and reviewed for clarity, usefulness, image accuracy, and Pinterest-to-page alignment before it goes live. Visit the About page.