Most houseplant pest and disease advice jumps straight to a product recommendation, which is a problem when you don't actually know what you're looking at yet.
Every common houseplant pest and disease leaves a distinct, learnable visual clue — fine webbing, cottony white fluff, a waxy bump that won't move, mushy black roots. Reading that clue correctly determines whether you treat the actual problem.
This guide covers the six most common houseplant pests and diseases, how to tell them apart at a glance, the isolate-then-treat process that actually works, and how to judge whether a struggling plant is worth saving.
Every common houseplant problem leaves a distinct, learnable visual clue. The thirteen sections below cover how to read that clue, isolate the plant, treat it properly, and judge whether it's worth saving.
Most pest and disease problems have a visible signature — learn to read it before treating anything
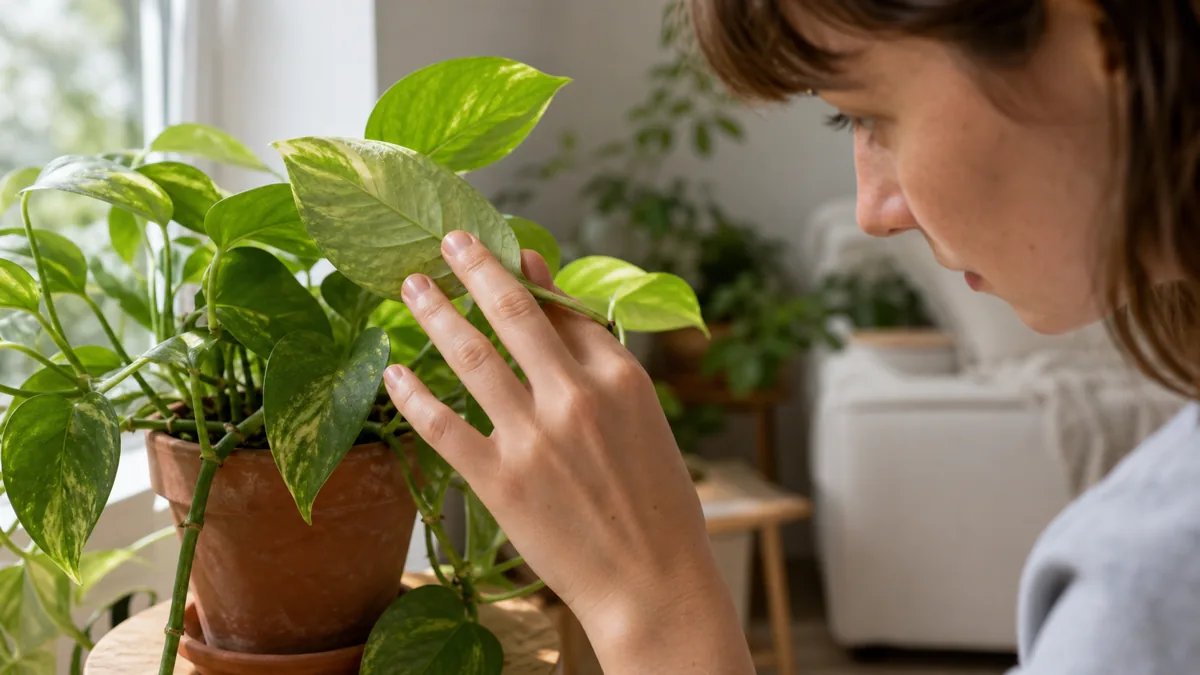
Guessing and reaching for a random spray wastes weeks while the actual problem keeps spreading to nearby plants. Every common houseplant pest and disease leaves a distinct, learnable visual clue once you know where to look.
Working through the signature first, then isolating and treating, is a faster path back to a healthy plant than trying several products in a row and hoping one works.
- A specific visual clue exists for almost every common problem.
- Guessing before identifying wastes treatment time the plant doesn't have.
- Isolation and identification always come before any product.
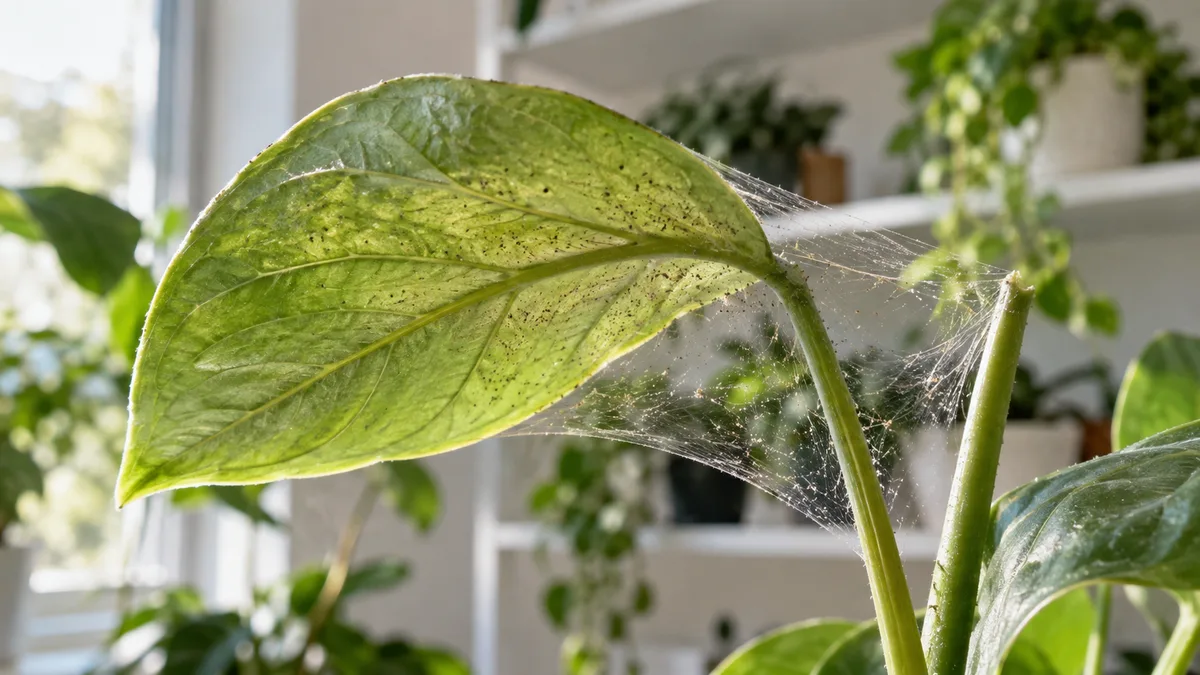
Spider mites: fine webbing and stippled pale or bronze dots, worse in dry warm air
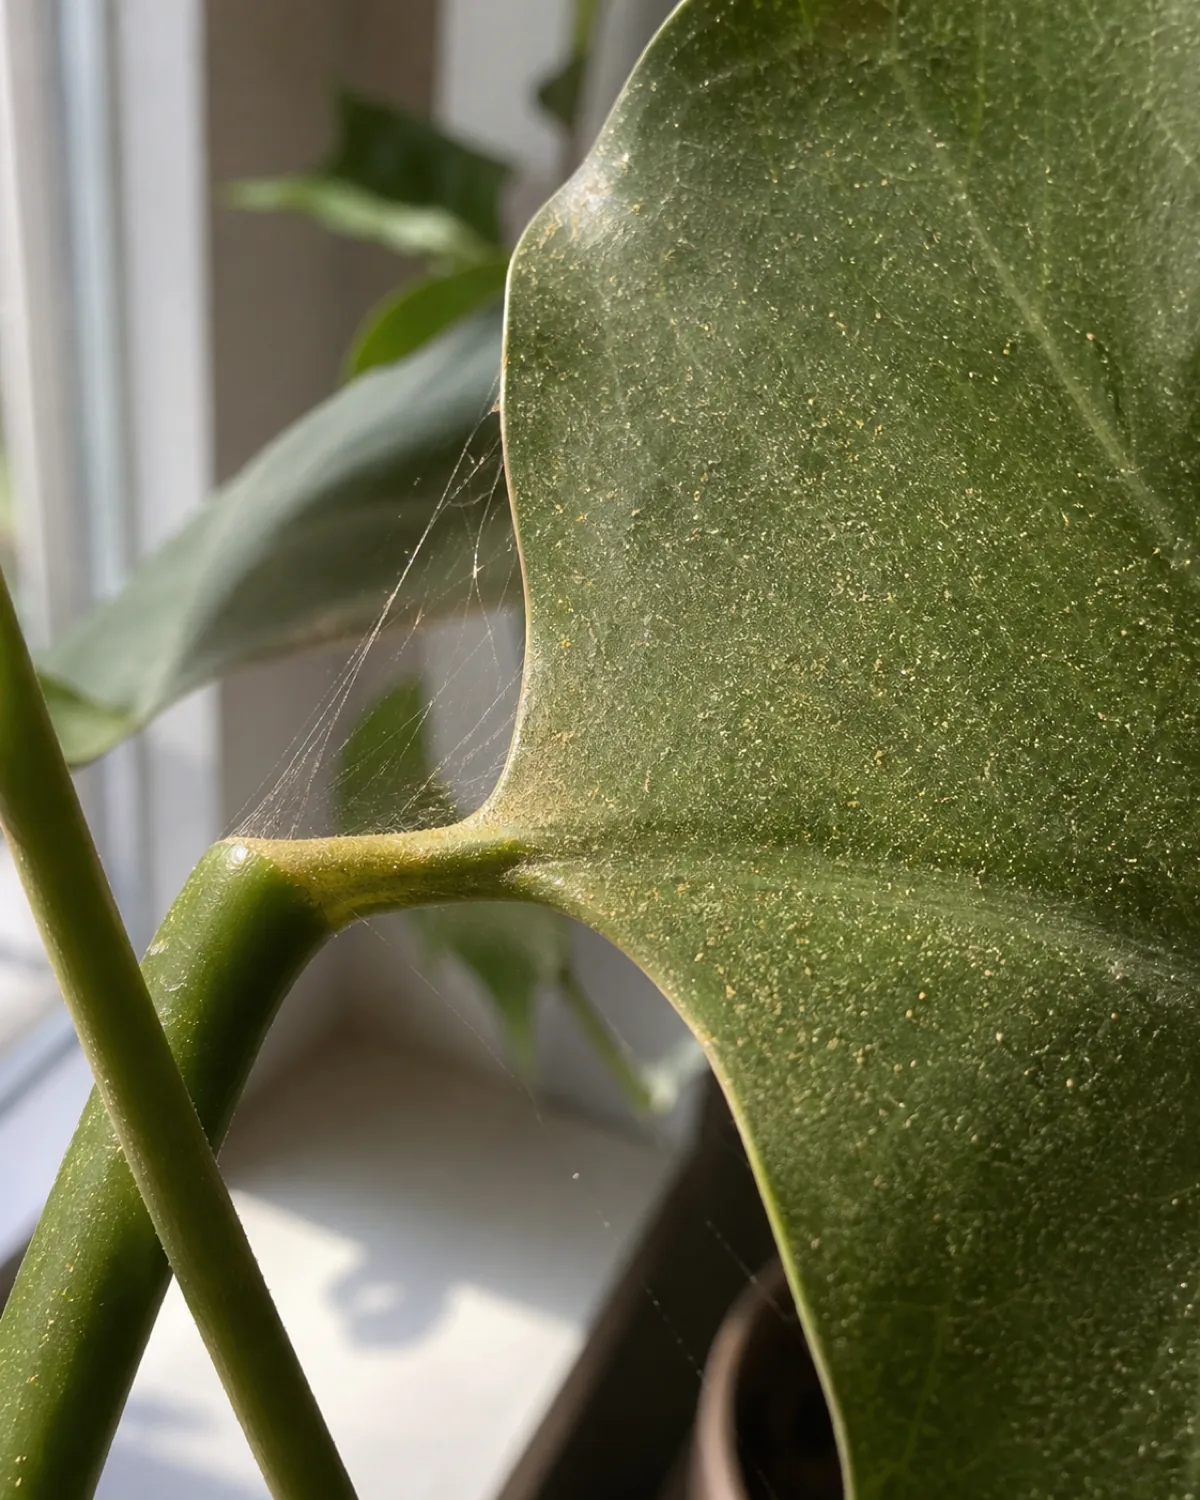
Near-invisible mites that thrive in low-humidity, warm windowsill spots are one of the most common houseplant pests, especially on plants sitting close to a bright direct-light window.
The houseplant light requirements guide covers how a hot, dry spot right against the glass can stress a plant in ways that also make it more attractive to mites.
Look for faint, fine webbing between leaves and stems and a stippled, dusty-looking bronze speckling across the leaf surface, most visible when a leaf is held up to the light.
- Faint webbing between leaves and stems is the clearest confirming sign.
- Stippled bronze or pale speckling shows up before the webbing is obvious.
- Dry, warm windowsill spots are where mites establish fastest.
Mealybugs: white cottony fuzzy clusters tucked into leaf axils and undersides
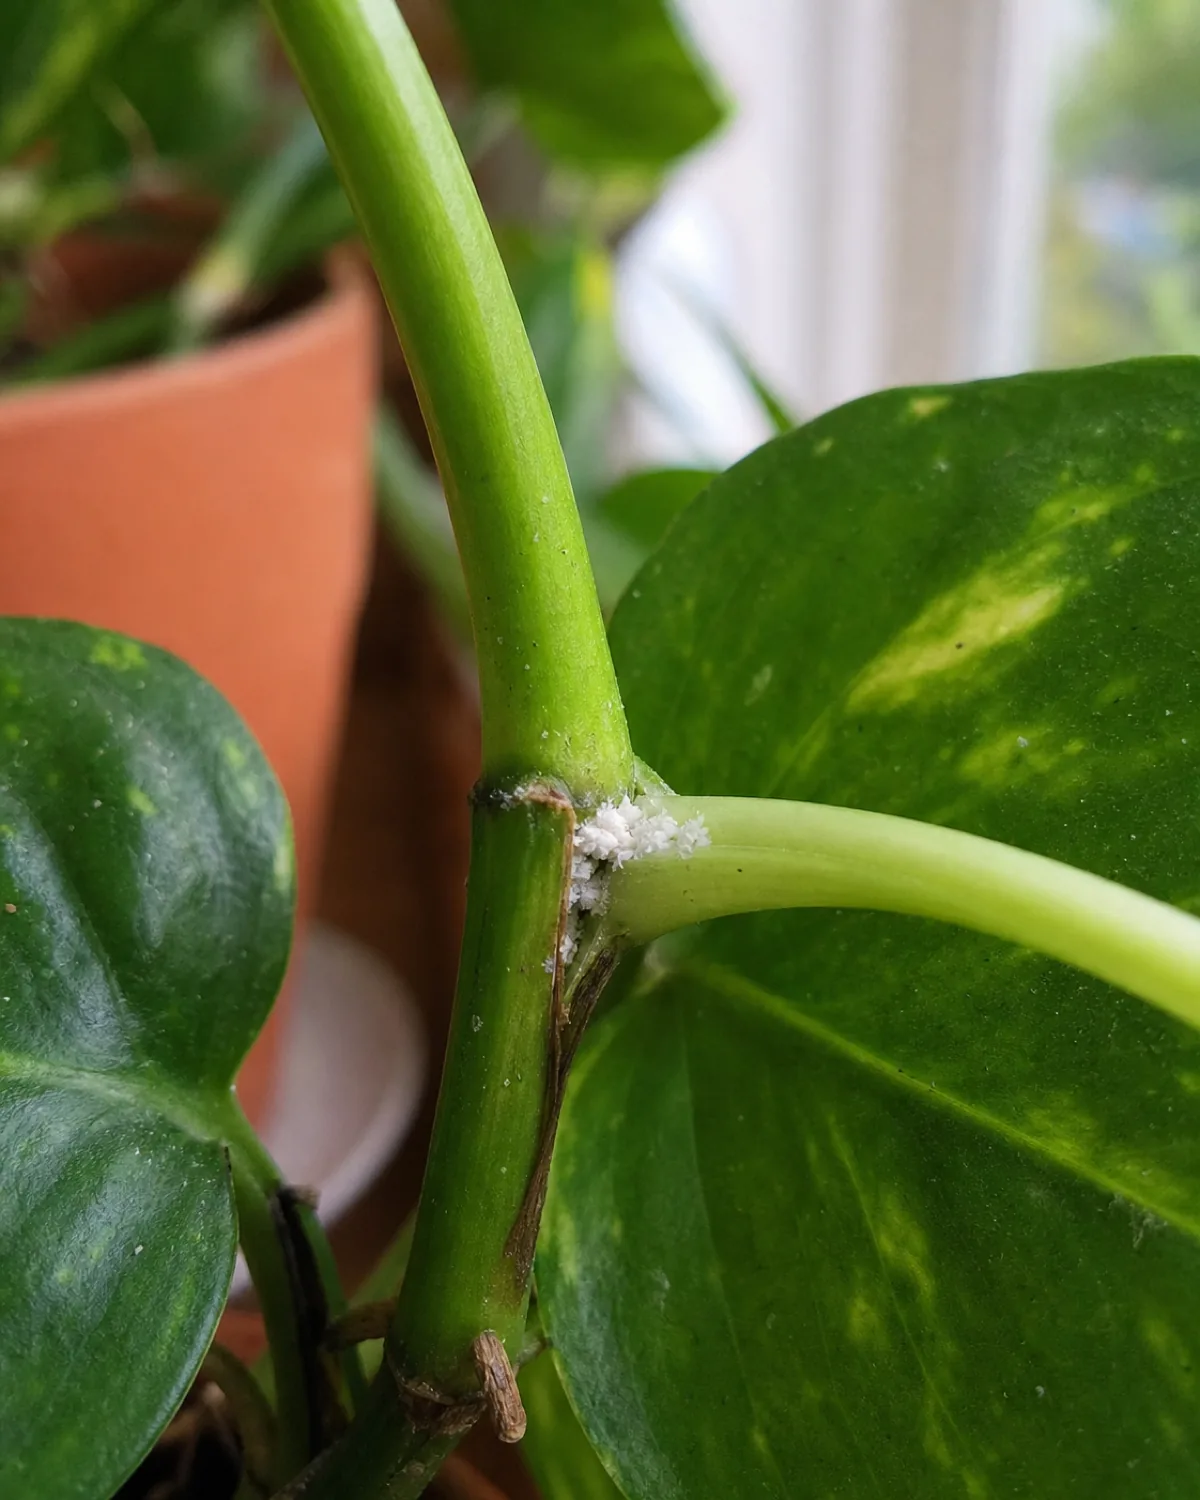
Small soft-bodied insects that coat themselves in a waxy white fluff tend to hide exactly where a leaf meets the stem, or tucked along the midrib on the underside of a leaf.
They're easy to miss on a quick glance because the fluff looks a little like lint, but it doesn't wipe away as easily and tends to cluster in the same few spots rather than scattering randomly.
- White cottony fluff, not scattered dust is the giveaway texture.
- Leaf axils and undersides are the two spots to check first.
- Clusters in the same few spots, not spread evenly across the plant.
Scale: small brown or tan waxy bumps stuck flat along stems and leaf midribs that don't move
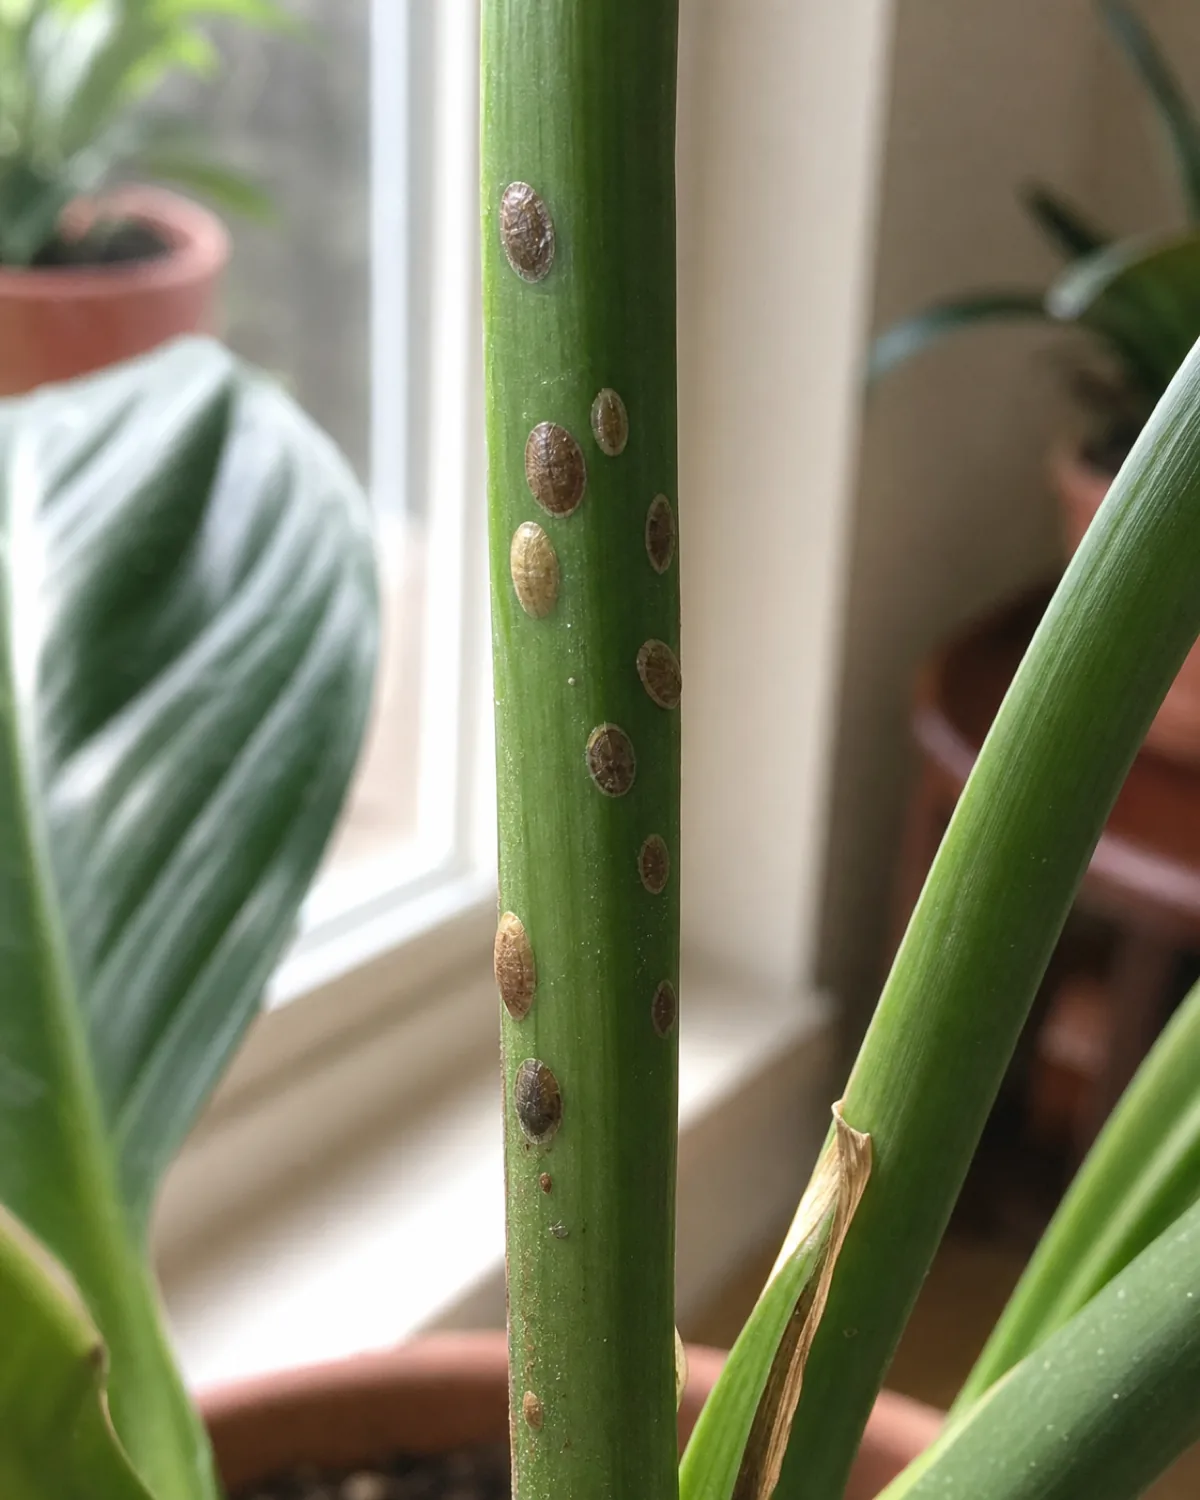
Unlike most pests, scale looks like part of the plant itself — a small, hard, shell-like bump sitting flat against a stem or leaf midrib, easy to mistake for a natural leaf marking or a bit of dried sap.
Scraping one gently with a fingernail is the fastest way to confirm it's alive: a real scale insect comes away from the surface, while a natural marking or scar doesn't.
- A hard, shell-like bump that doesn't move is the visual signature.
- Stems and leaf midribs are the two places scale sits most often.
- A fingernail scrape confirms it when a bump looks ambiguous.
Fungus gnats: tiny black flies hovering near the soil, larvae feeding in soil that stays wet too long
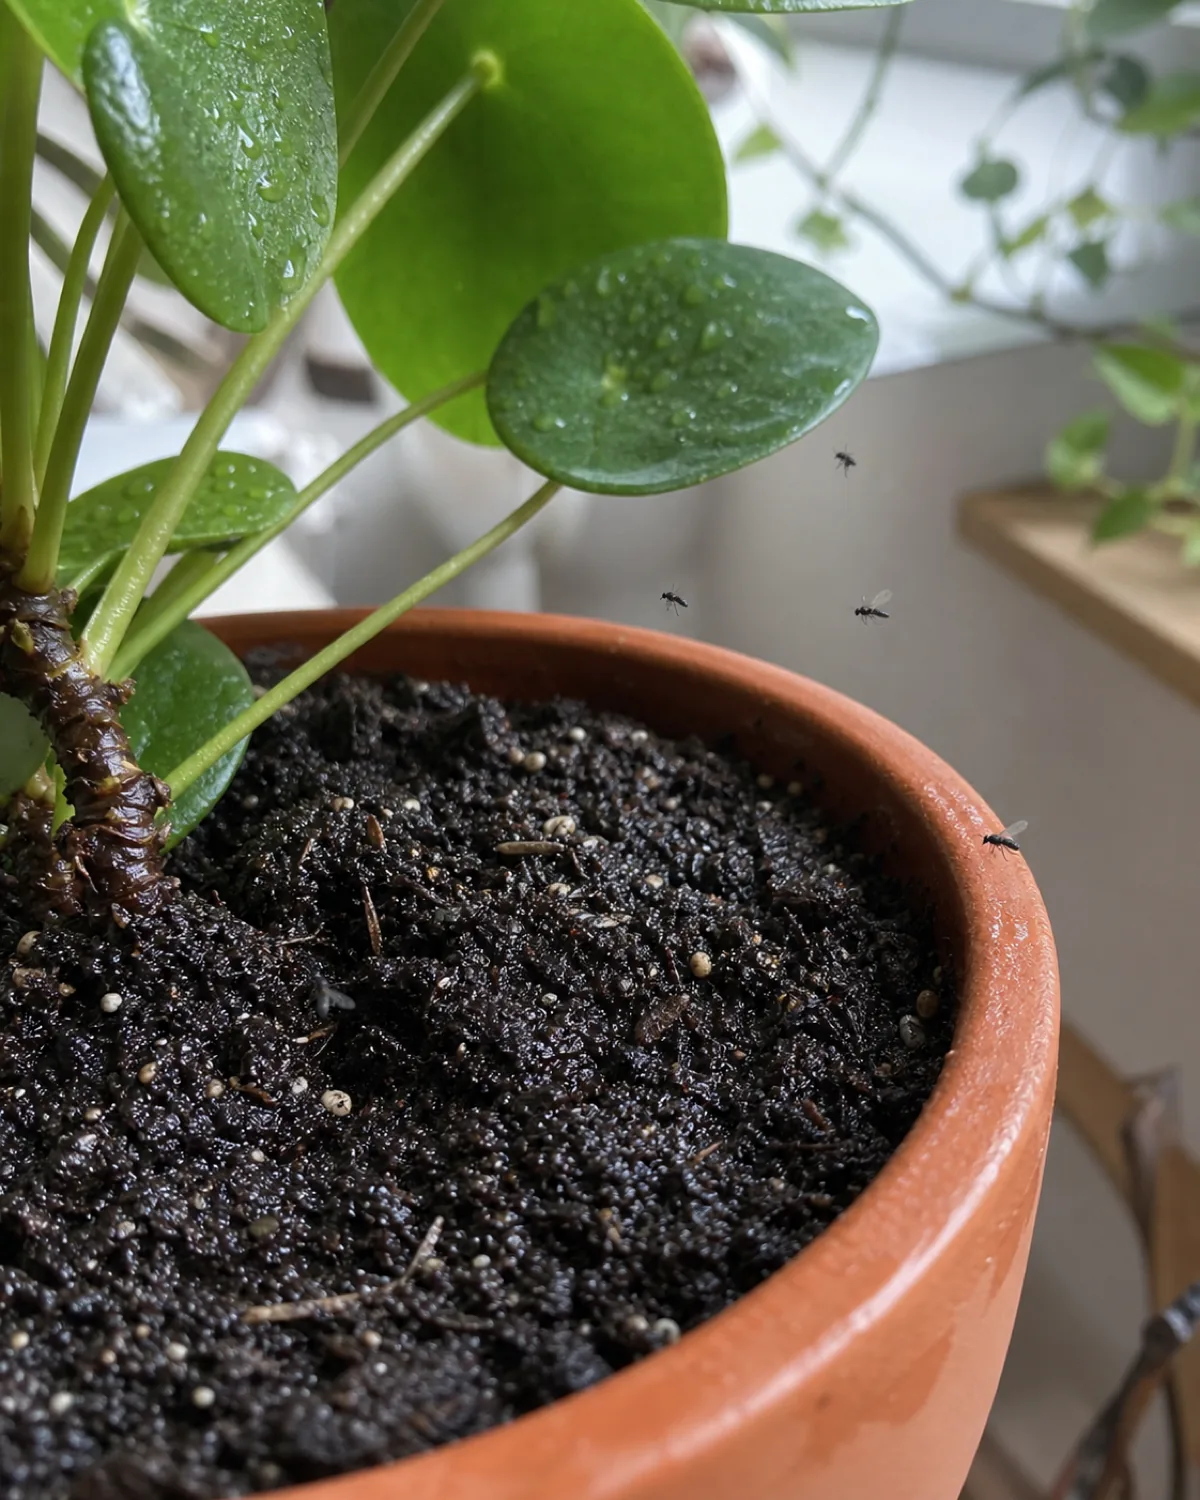
The adult gnats flying up near the soil surface are mostly a harmless nuisance, but their larvae living in the top inch of soggy soil are a direct sign the plant is being watered more often than it actually needs. The watering indoor plants guide covers the finger test that catches overwatering before it turns into a gnat problem.
Letting the top inch or two of soil dry out fully between waterings removes the wet environment the larvae depend on, which usually solves the problem without any product at all.
- Adults hovering near the soil surface are the visible tip-off.
- Larvae live in soil that stays wet too long, not dry soil.
- Letting the top inch dry out removes the problem at its source.
Aphids: small soft-bodied insects clustered on tender new growth, sticky residue on nearby leaves
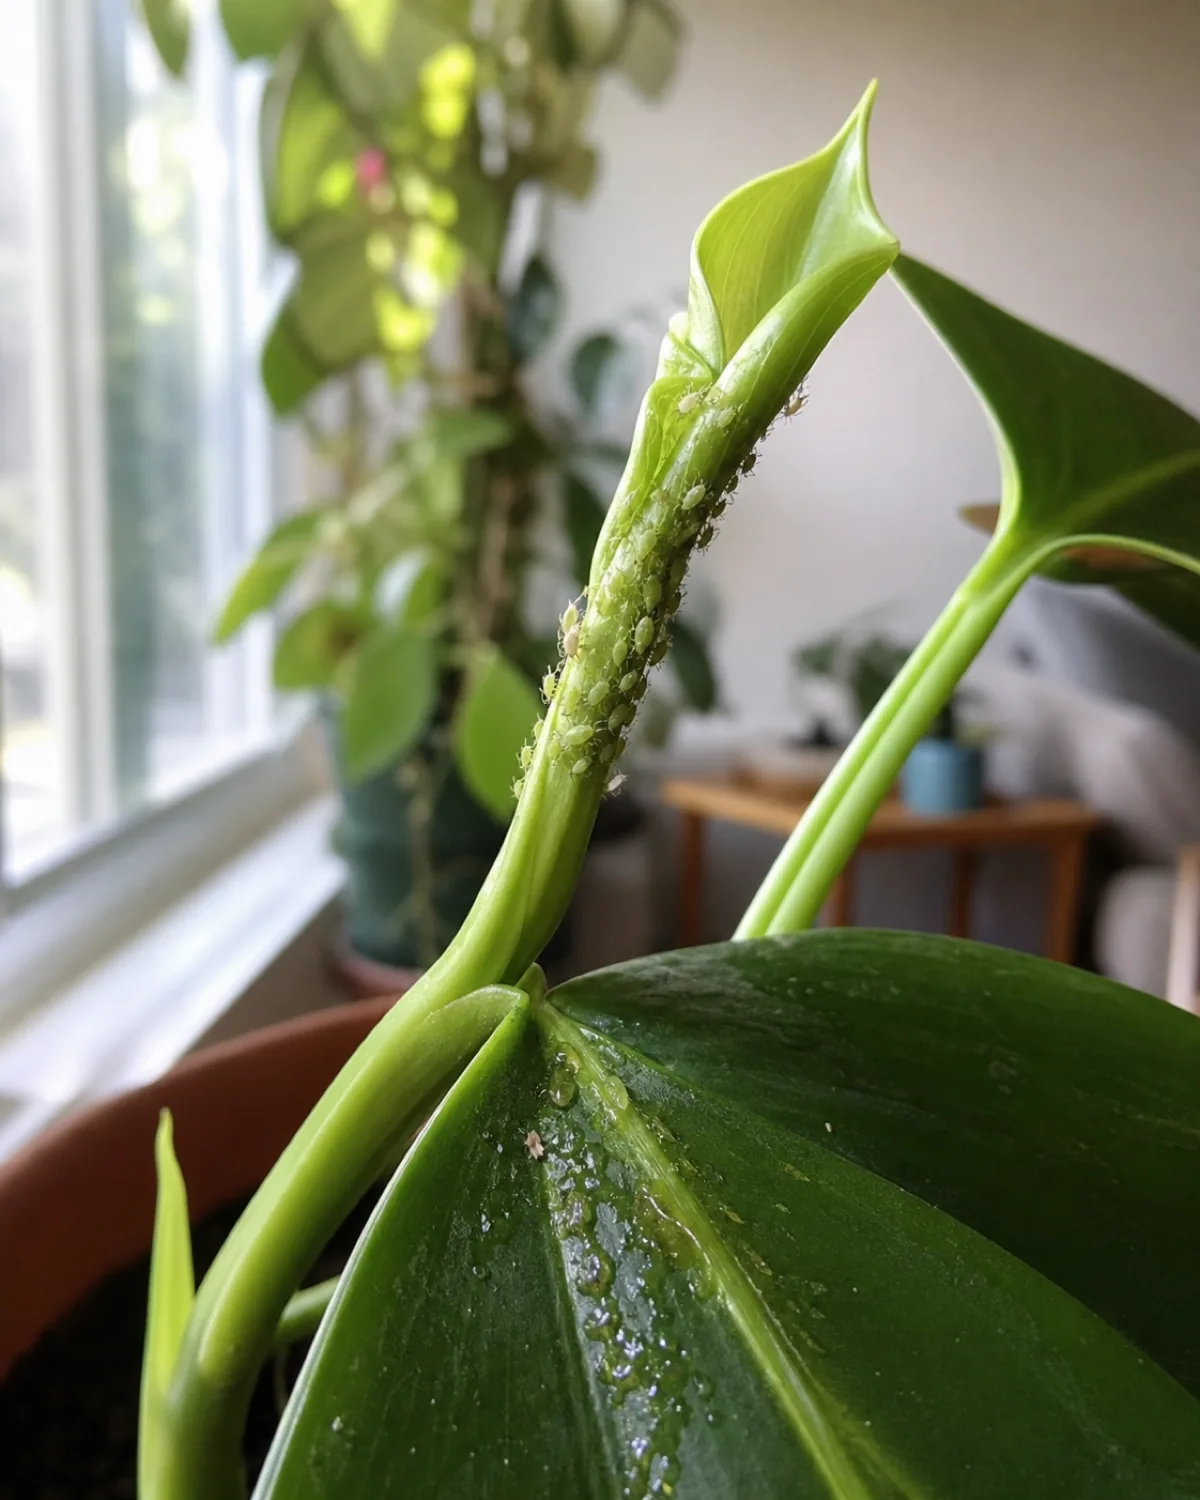
Aphids cluster on the newest, softest stems and leaf tips first, rather than spreading evenly across a plant, which makes new growth the first place worth checking.
They leave behind a sticky film called honeydew on the leaves below the cluster, which can attract a black sooty mold if it sits there long enough — a second, secondary sign that aphids have been active for a while.
- New, tender growth is where aphids cluster first.
- A sticky residue on leaves below is a strong secondary sign.
- Black sooty mold following the residue means the infestation has been active a while.
Root rot: mushy blackened roots, a sour smell, and yellowing leaves despite regular watering
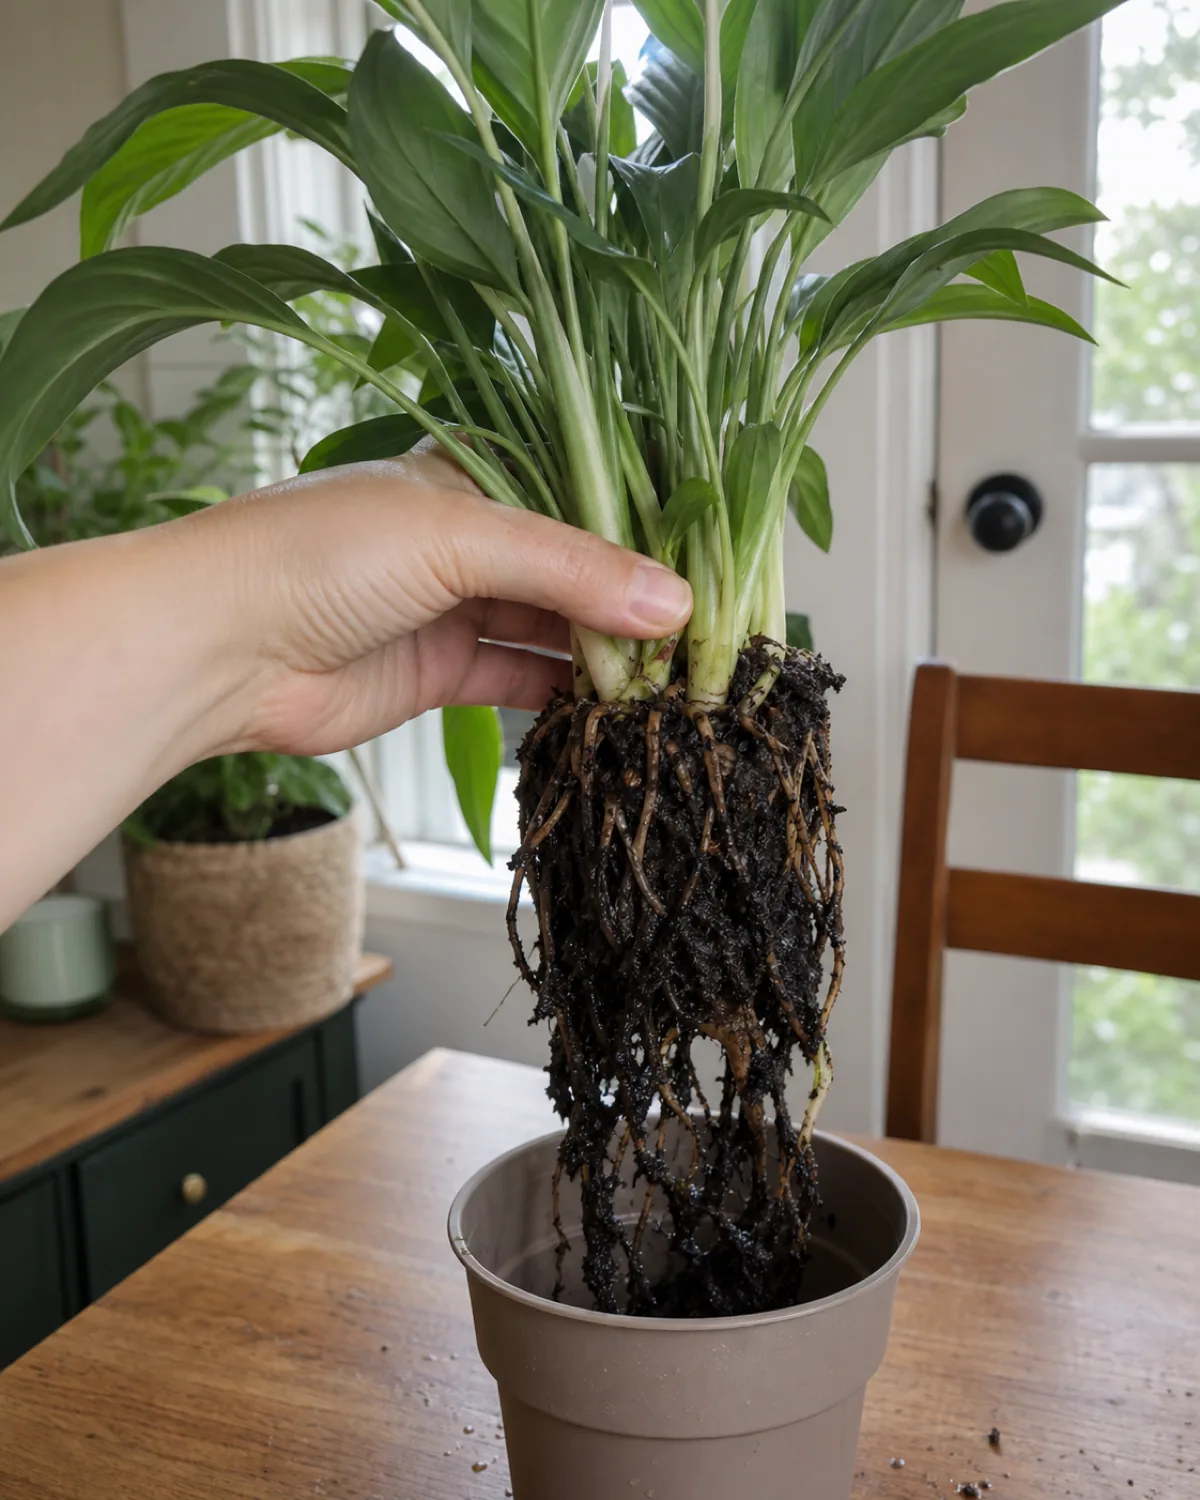
The most serious problem on this list happens underground, caused by soil staying wet too long with nowhere for excess water to drain away. Healthy roots are firm and pale; rotted roots are dark, soft, and fall apart when handled.
The repotting indoor plants guide covers how to pull a plant from its pot to check the roots directly, which is the only way to confirm root rot rather than guess at it.
Yellowing leaves that keep appearing despite a consistent watering routine, paired with a sour smell from the soil, are the above-ground clues that send you checking the roots in the first place.
- Firm and pale roots are healthy; dark, soft, falling-apart roots are rotted.
- A sour smell from the soil often shows up before the leaves do.
- Pulling the plant to check roots directly is the only way to confirm it.
Bacterial or fungal leaf spot: brown or black spots, often ringed with a yellow halo, spreading in still humid air
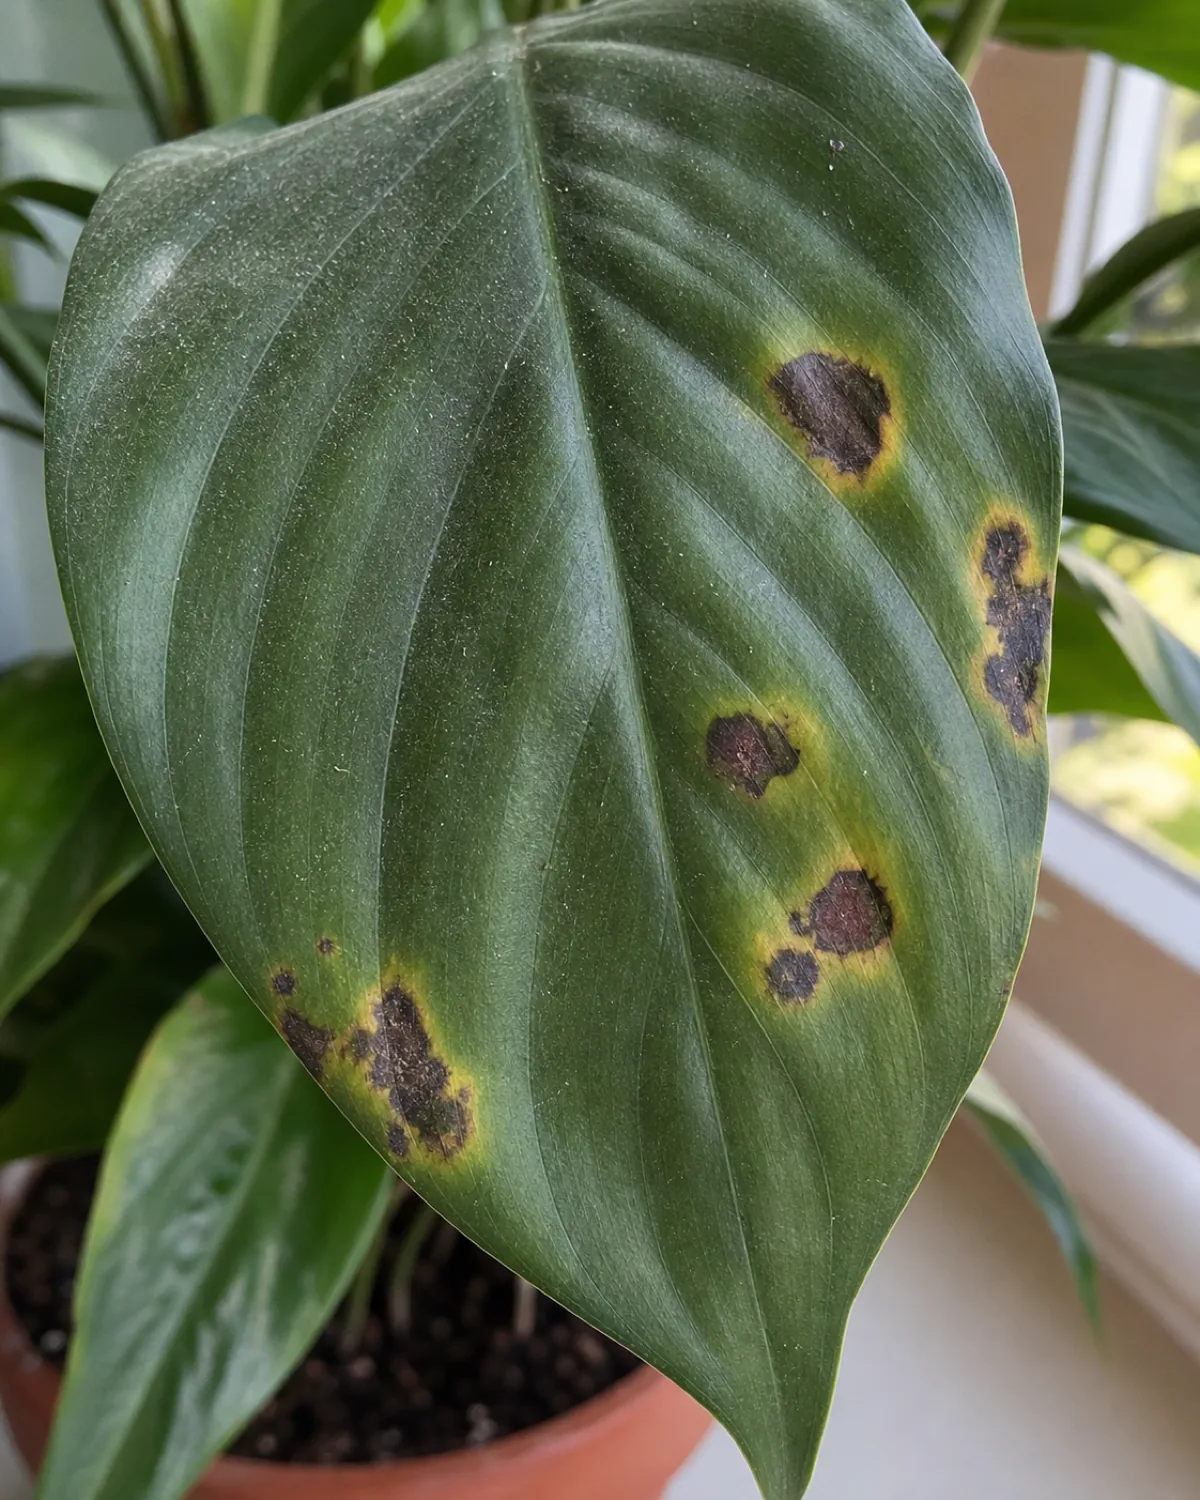
Leaf spot starts as small brown or black spots that expand over time, frequently outlined by a yellow halo where healthy and damaged tissue meet.
It spreads fastest in still, humid air where water sits on leaves rather than drying quickly, which makes airflow as much a part of the fix as any product.
- A yellow halo around the spot is a common confirming detail.
- Spots expand over time, unlike a single static old scar.
- Still, humid air with poor airflow speeds the spread.
Powdery mildew: a white powdery coating on leaves that thrives in humid, poorly ventilated rooms
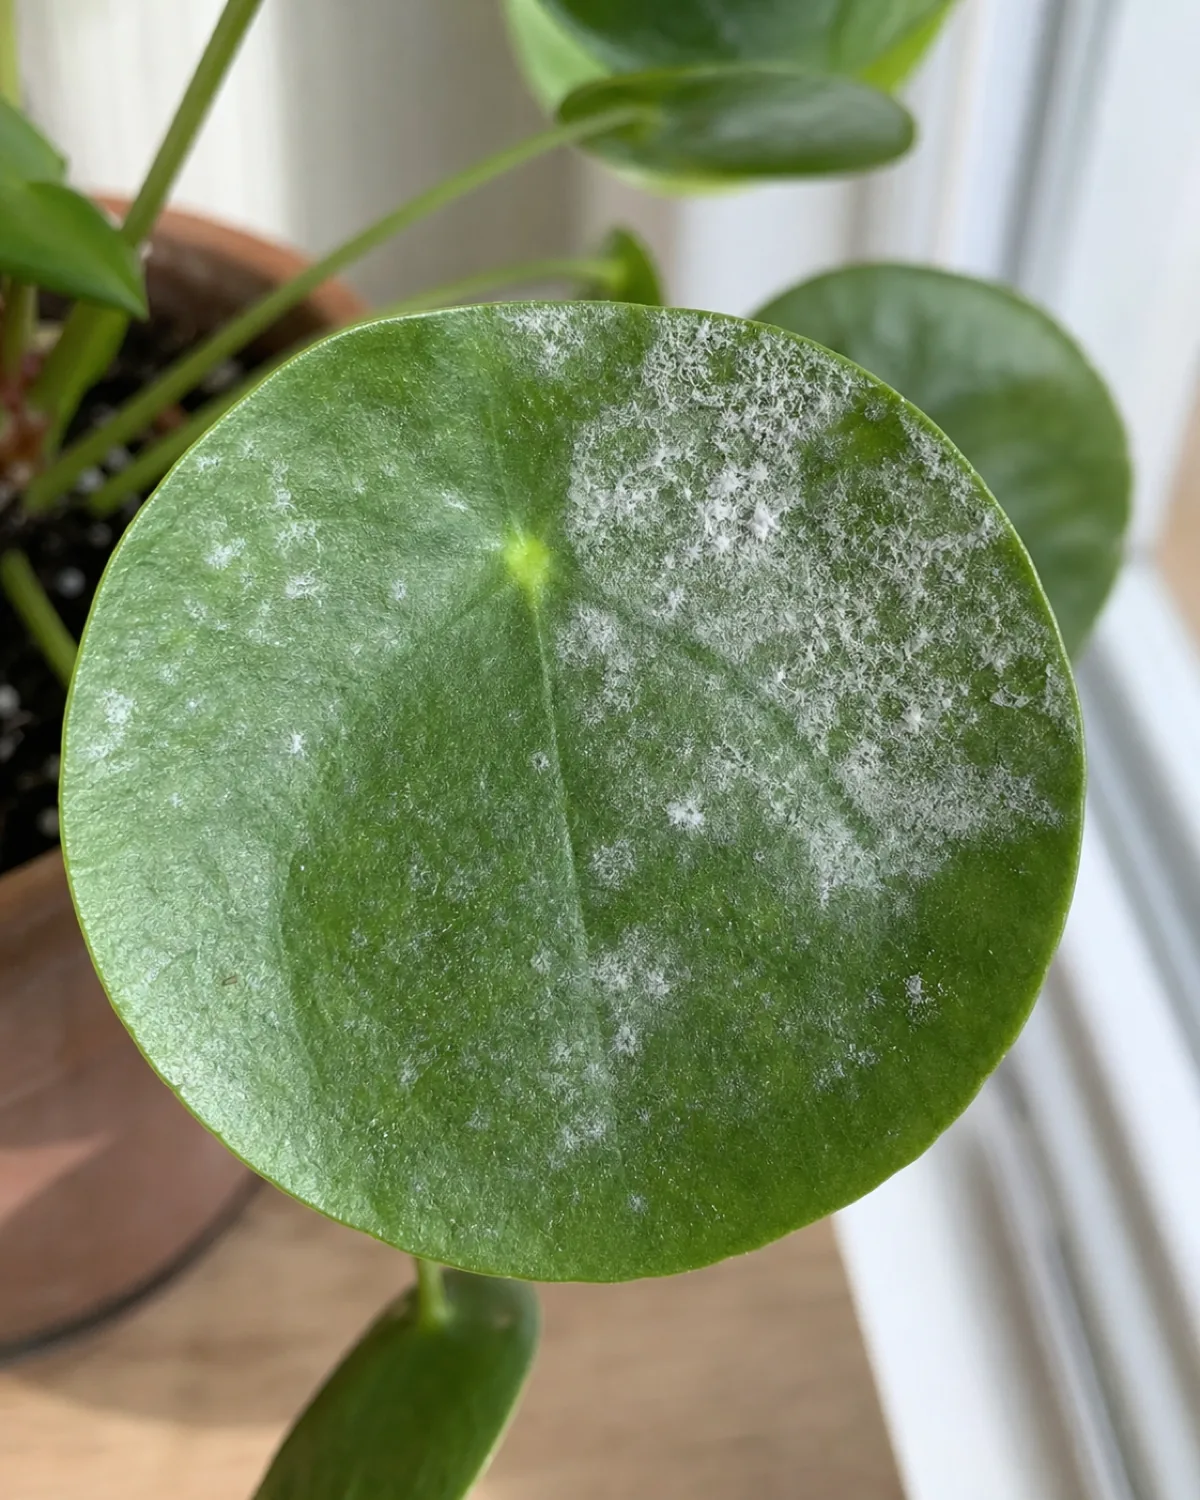
Powdery mildew looks like a light dusting of flour across the leaf surface, a distinct texture from the waxy clusters of mealybugs or the hard shell of scale.
Like leaf spot, it spreads fastest where air sits still, so improving airflow around a crowded plant grouping is often as useful as any treatment applied directly to the leaves.
- A dusty, flour-like white coating is the clearest visual signature.
- Poorly ventilated, humid rooms are where it spreads fastest.
- Improving airflow helps as much as any direct treatment.
Most pest and disease questions trace back to one of four situations. Start with whichever one describes yours, then return to the rest later.
Quarantine every new plant for two weeks before it goes near the rest of a collection
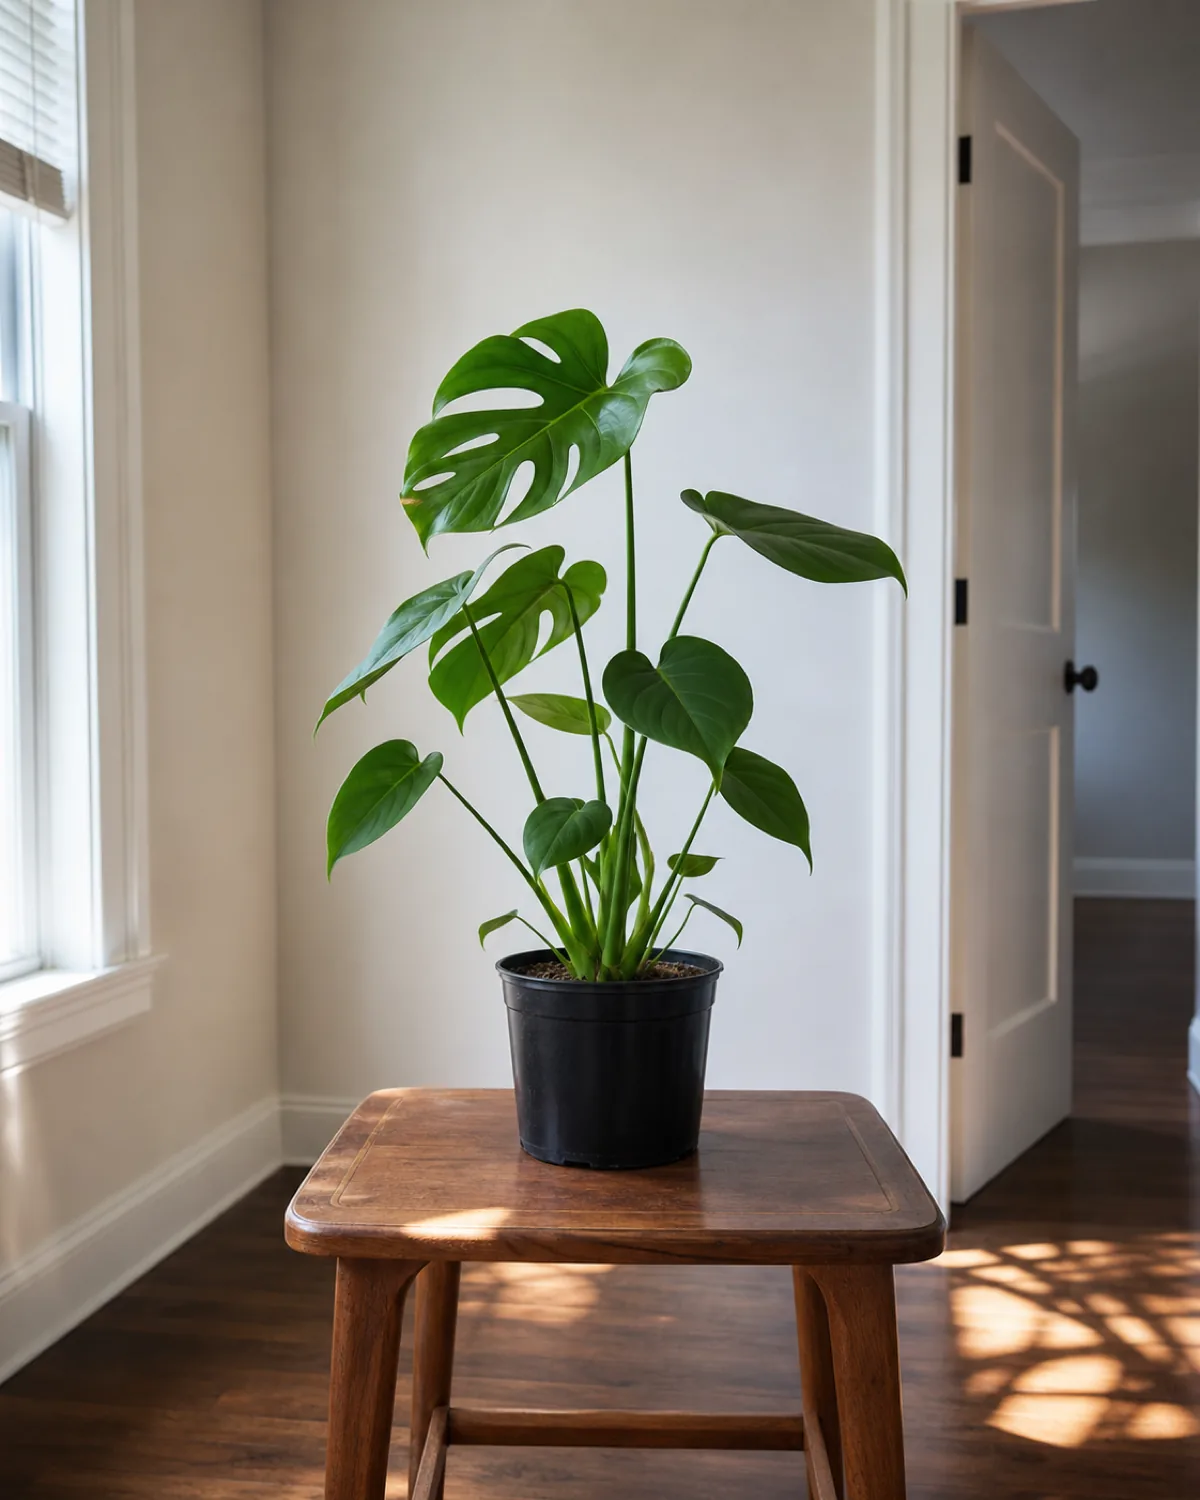
Most infestations arrive on a single new plant, carried home from a shop or a plant swap without any visible sign at the time of purchase.
Keeping a new arrival in a separate room and checking its leaves and soil daily for about two weeks catches a hitchhiking pest or early disease before it has the chance to spread to everything else nearby.
- New plants are the most common entry point for pests and disease.
- Two weeks of separation is enough time for most problems to show themselves.
- Daily checks during quarantine catch a problem while it's still small.
First response: isolate the plant, then physically remove what's visible before reaching for any product
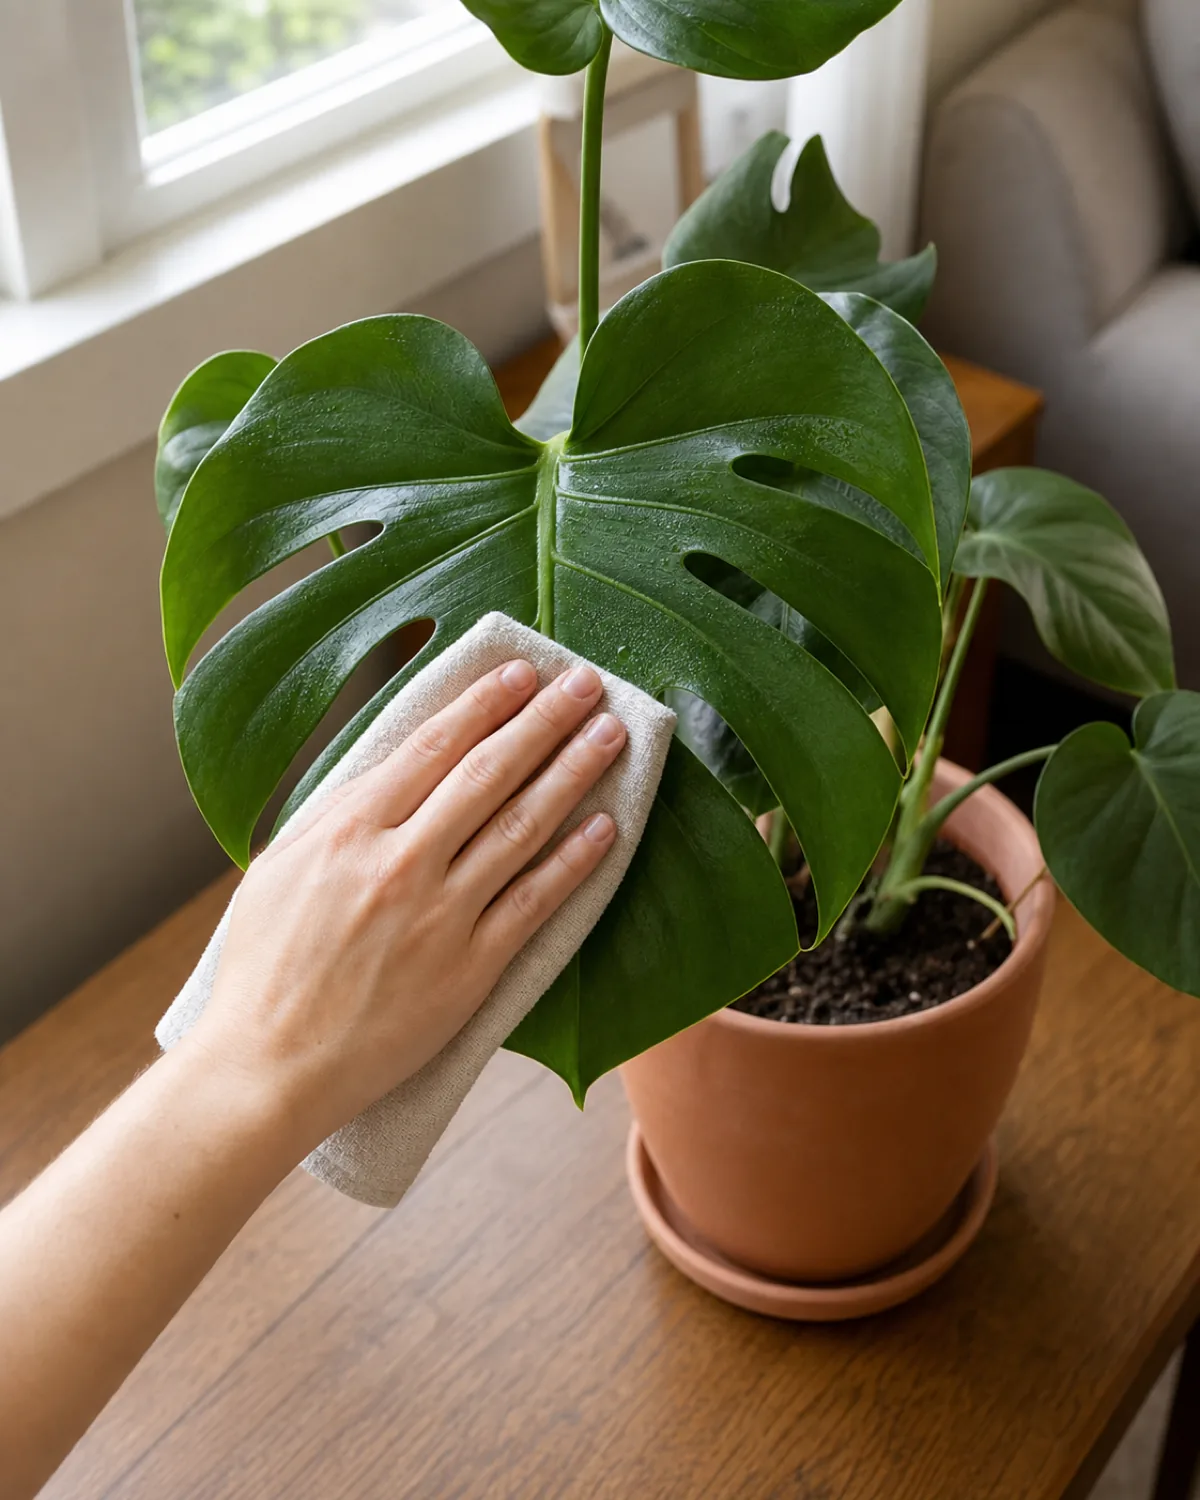
Move the affected plant away from others immediately, since most common pests spread fastest where leaves from different plants are touching.
Wipe leaves with a damp cloth or an alcohol-dipped cotton swab, or rinse the whole plant under a lukewarm tap, before treating with anything else. Physical removal alone often knocks a light infestation down enough that a follow-up product finishes the job quickly.
- Isolation first stops the spread to nearby plants immediately.
- A damp wipe or lukewarm rinse removes a surprising amount before any product is used.
- Physical removal makes any treatment that follows more effective.
Insecticidal soap and neem oil: how to apply them correctly and why one treatment is never enough
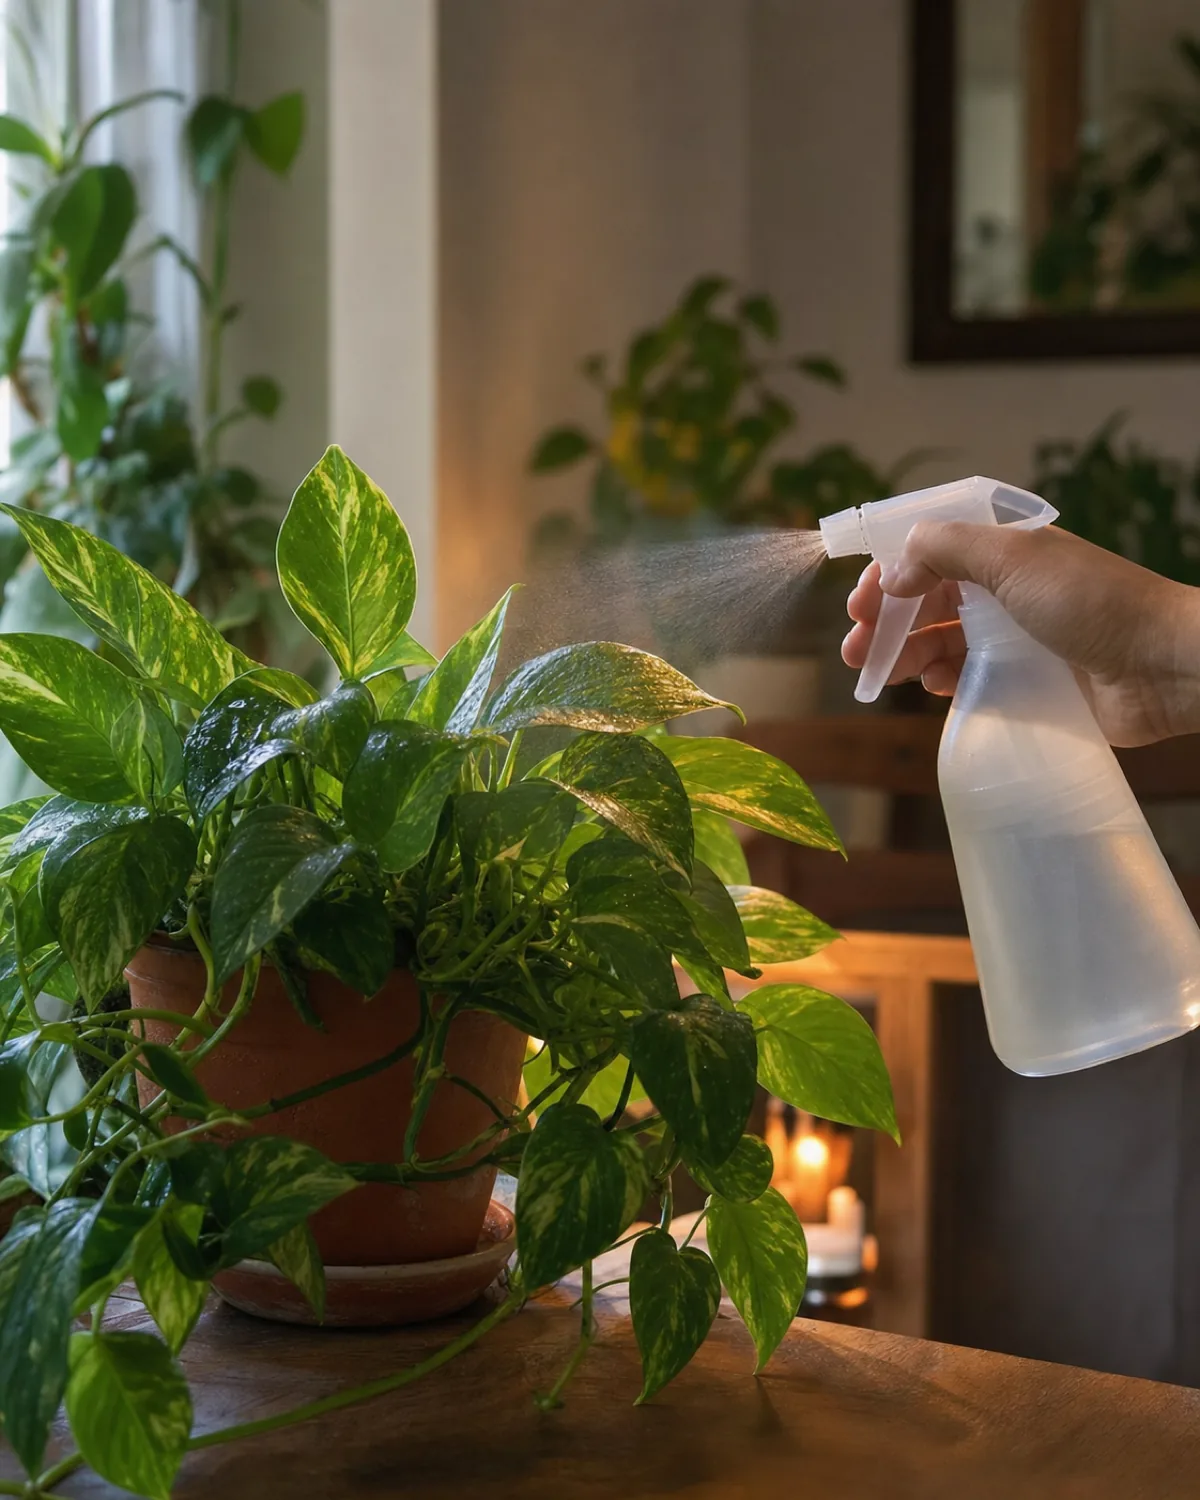
Coat both the top and underside of every leaf fully, apply in the evening or somewhere out of direct sun to avoid leaf burn, and repeat every seven to ten days for at least three full cycles.
Most sprays only kill the active, visible stages of a pest, not the eggs, which is why a single treatment almost always looks like it worked at first and then the problem reappears a week or two later.
- Coat both leaf surfaces fully, not just the tops.
- Apply out of direct sun to avoid leaf burn from the spray itself.
- Repeat every 7 to 10 days for at least three cycles, since eggs survive the first round.
When a plant is worth saving versus when it's time to let it go
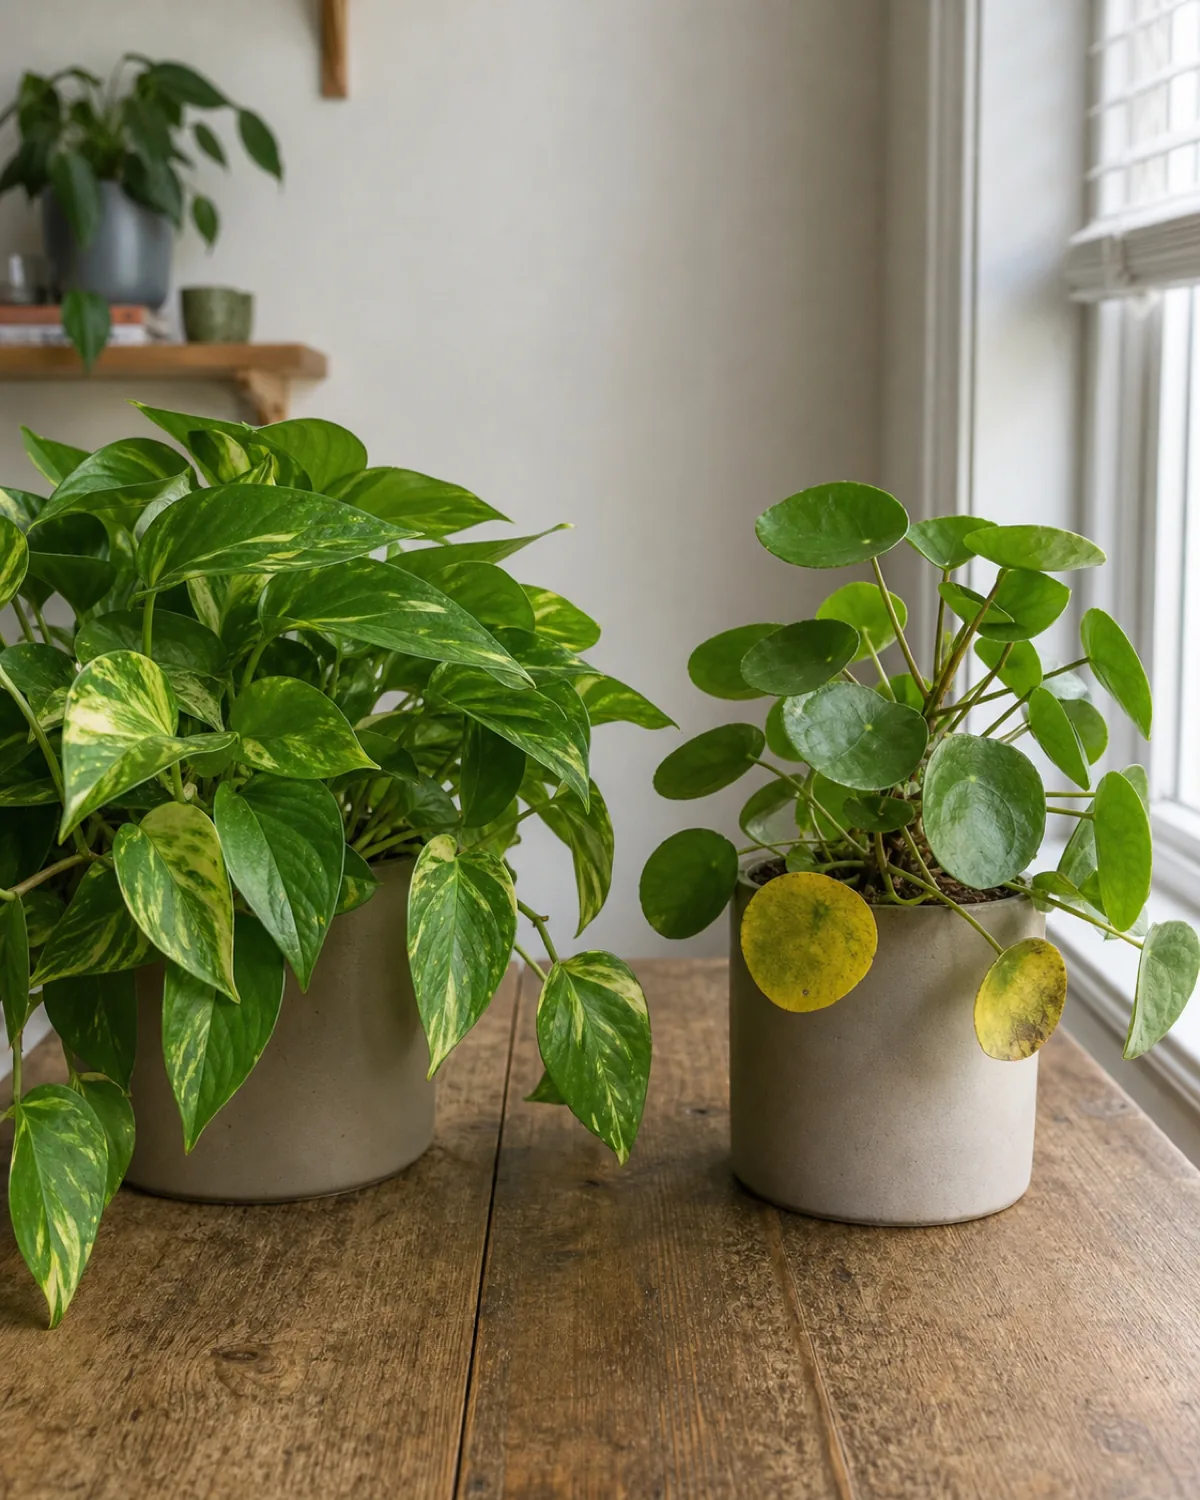
A plant with healthy, firm roots and less than half its leaves affected is usually worth treating through to a full recovery.
Weak or stressed plants take longer to bounce back from any setback — the fertilizing houseplants guide covers how salt buildup from over-fertilizing can leave a plant less able to recover from a pest or disease problem on top of everything else.
A plant with mostly rotted roots, or an infestation that keeps returning after several full treatment cycles, is often not worth the ongoing effort, and letting it go frees up the spot for something that will actually thrive there.
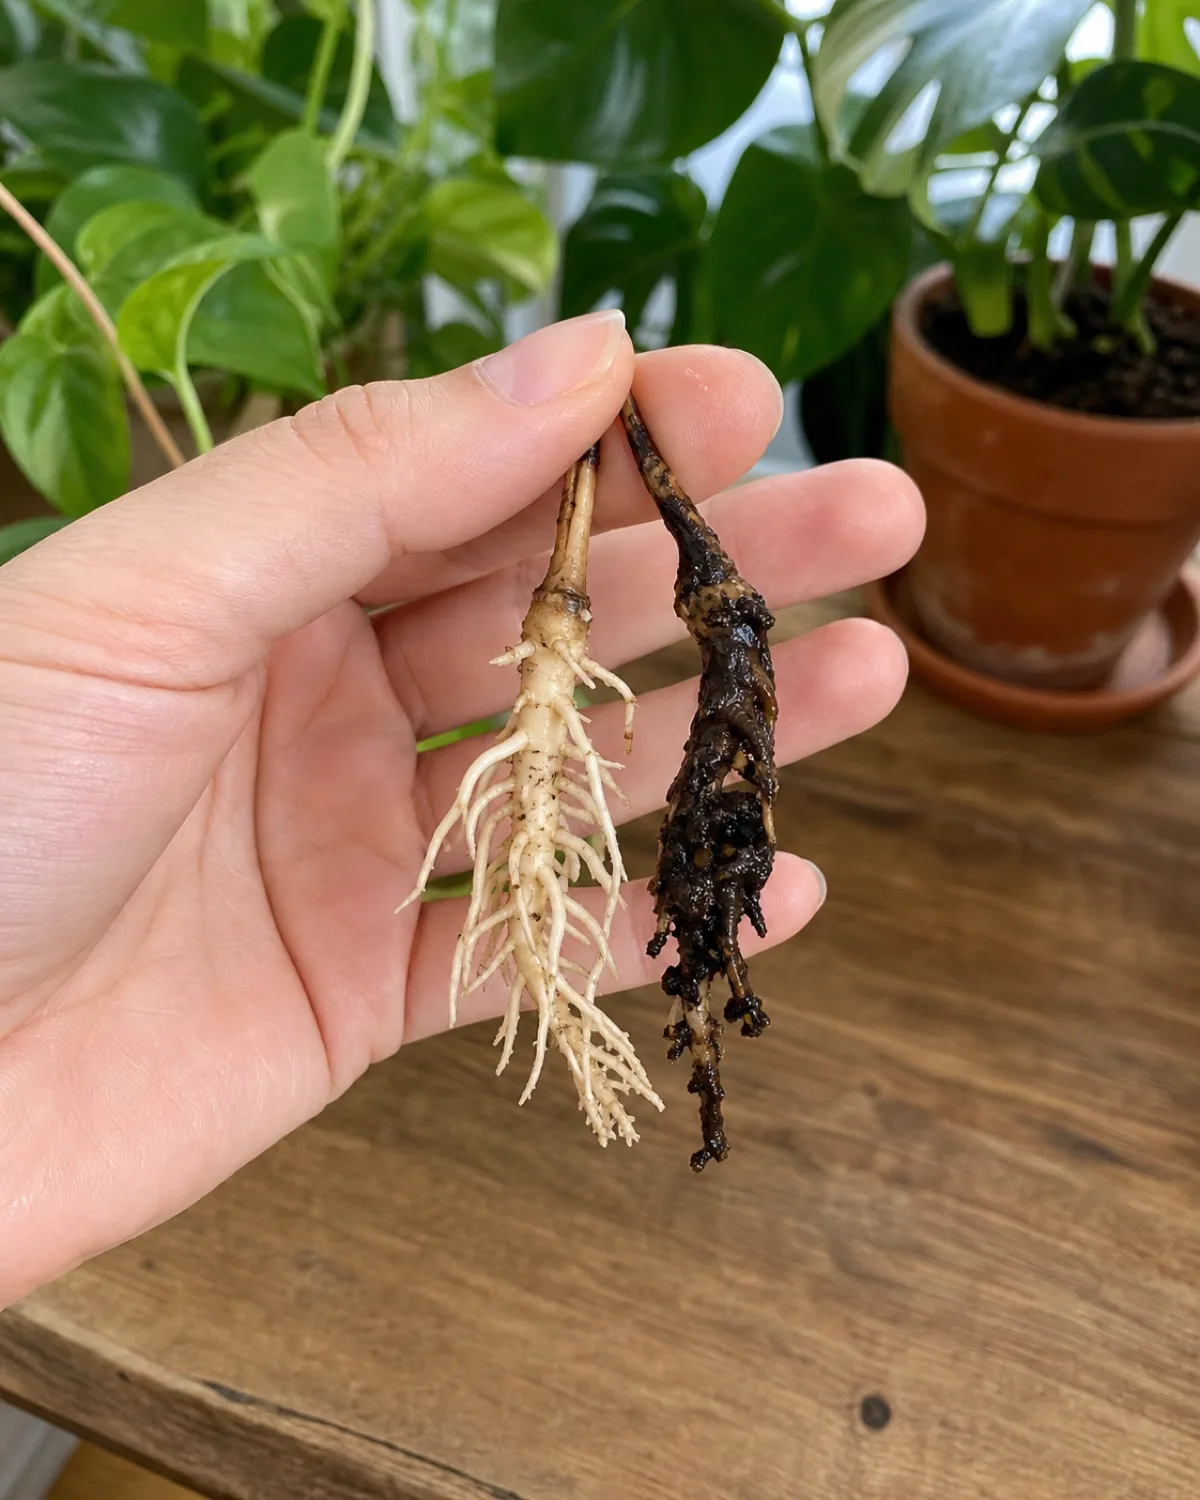
- Firm roots and under half the leaves affected usually means treating through is worth it.
- A weakened or over-fertilized plant recovers more slowly from any setback.
- Recurring infestations after multiple full cycles are a reasonable point to stop.
Most pest and disease problems trace back to one of four moves people skip. Hold these four and almost any early infestation stays contained and treatable.
Houseplant Pests and Diseases: The Quick Reference
- 1Every problem has a visible signatureGuessing before identifying wastes treatment time the plant doesn't have.
- 2Spider mites: fine webbing, stippled bronze dotsWorse in dry, warm windowsill spots close to direct light.
- 3Mealybugs: white cottony clustersHide in leaf axils and along the underside midrib.
- 4Scale: hard waxy bumps that don't moveA fingernail scrape confirms it's alive, not a natural marking.
- 5Fungus gnats: larvae live in soil that stays wetLetting the top inch dry out removes the problem at its source.
- 6Aphids: cluster on tender new growthSticky honeydew residue on leaves below is a strong secondary sign.
- 7Root rot: mushy blackened roots, sour smellPulling the plant to check roots directly is the only way to confirm it.
- 8Leaf spot: yellow-haloed brown or black spotsSpreads fastest in still, humid air with poor airflow.
- 9Powdery mildew: flour-like white coatingImproving airflow helps as much as any direct treatment.
- 10Quarantine new plants for two weeksMost infestations arrive on a single new plant.
- 11Isolate, then physically remove firstA damp wipe or lukewarm rinse before any product.
- 12Repeat soap or neem every 7-10 days, 3 cyclesSprays kill active stages, not eggs.
- 13Firm roots + under half the leaves affected = worth savingMostly rotted roots or repeated recurrence is a reasonable point to stop.
kultivy.com

Mara Quinn edits Kultivy, where she shares houseplant care, propagation, beginner-friendly plant picks, and plant-styling ideas for anyone who wants their indoor plants to actually thrive. Every guide is image-led and reviewed for clarity, usefulness, image accuracy, and Pinterest-to-page alignment before it goes live. Visit the About page.