Boston ferns look spectacular in every garden center, then slowly deteriorate on your shelf. The fronds thin out, leaflets carpet every surface, and within months the lush cascade looks like a green skeleton.
The problem is almost always humidity. Most homes sit at 30 to 40 percent in winter. Boston ferns need 50 percent at minimum. Get that one factor right and most of the shedding simply stops.
What makes the Boston fern the most popular indoor fern
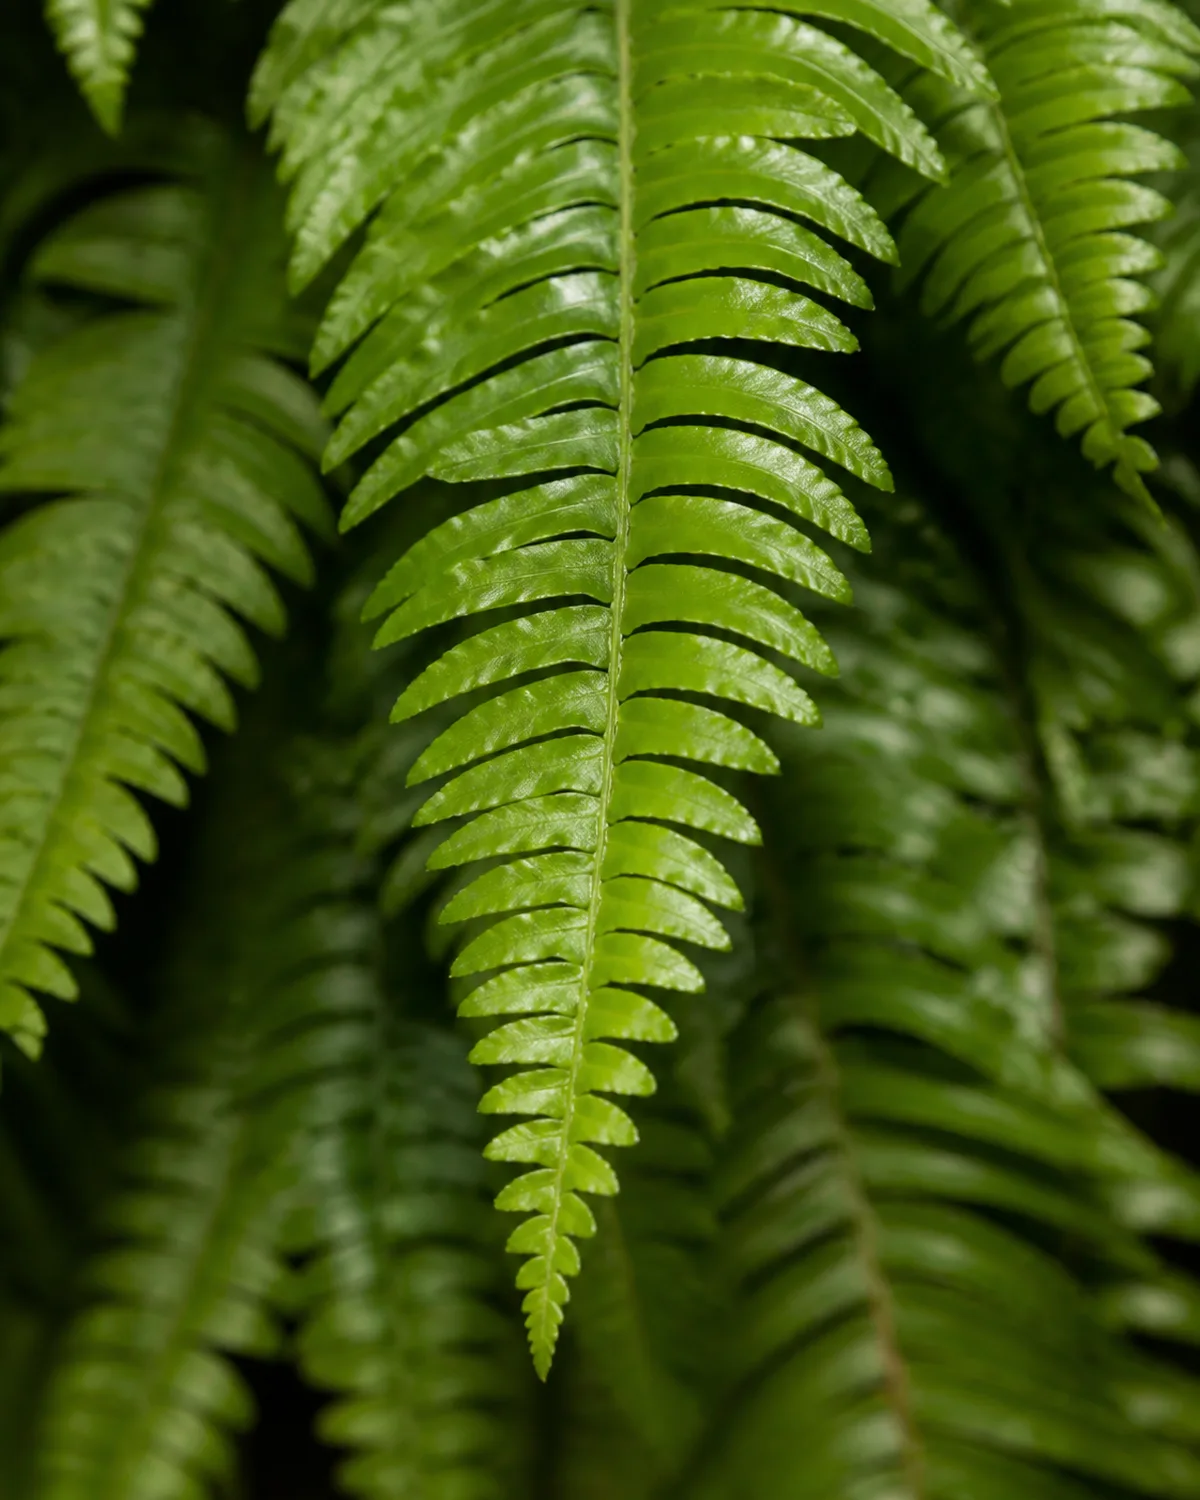
The Boston fern is not a separate species. It is a cultivar — Nephrolepis exaltata 'Bostoniensis' — discovered in 1894 as a natural mutation among a shipment of common sword ferns sent from Philadelphia to Boston. The mutant had more gracefully arching fronds with pinnae set more closely together than the stiff, upright wild type.
Victorian-era plant enthusiasts recognized its potential immediately. Within a few years, the Boston fern became the defining indoor plant of the late 1800s, displayed on parlor pedestals and in the hanging baskets that became inseparable from its identity. It has never left that position.
Each frond is a long, tapering sword shape that arches outward from a central crown, reaching two to three feet in mature plants. Along the central stalk — the rachis — sit 50 to 80 tiny individual leaflets called pinnae.
Those pinnae are the reason for both the plant's beauty and its most notorious habit: they detach easily, carpeting surfaces beneath the plant in a perpetual light shower of tiny green fragments.
Unlike most houseplants, Boston ferns send out long, thin, wiry stems called stolons or runners that grow along the soil surface. When a runner's node contacts moist soil, it roots and produces a new rosette. This is how the plant propagates naturally . This process happens with no intervention from the owner.
The ASPCA lists Boston ferns as non-toxic to both cats and dogs, making them one of the safest statement plants for pet-owning households. For the full overview of fern biology — spore reproduction, fiddlehead crosiers, and the 360-million-year evolutionary backstory — see the fern care hub.
Four cultivars that cover the most common indoor situations — pick the one that fits your space and your tolerance for shedding.
Light: bright shade, not dark corners
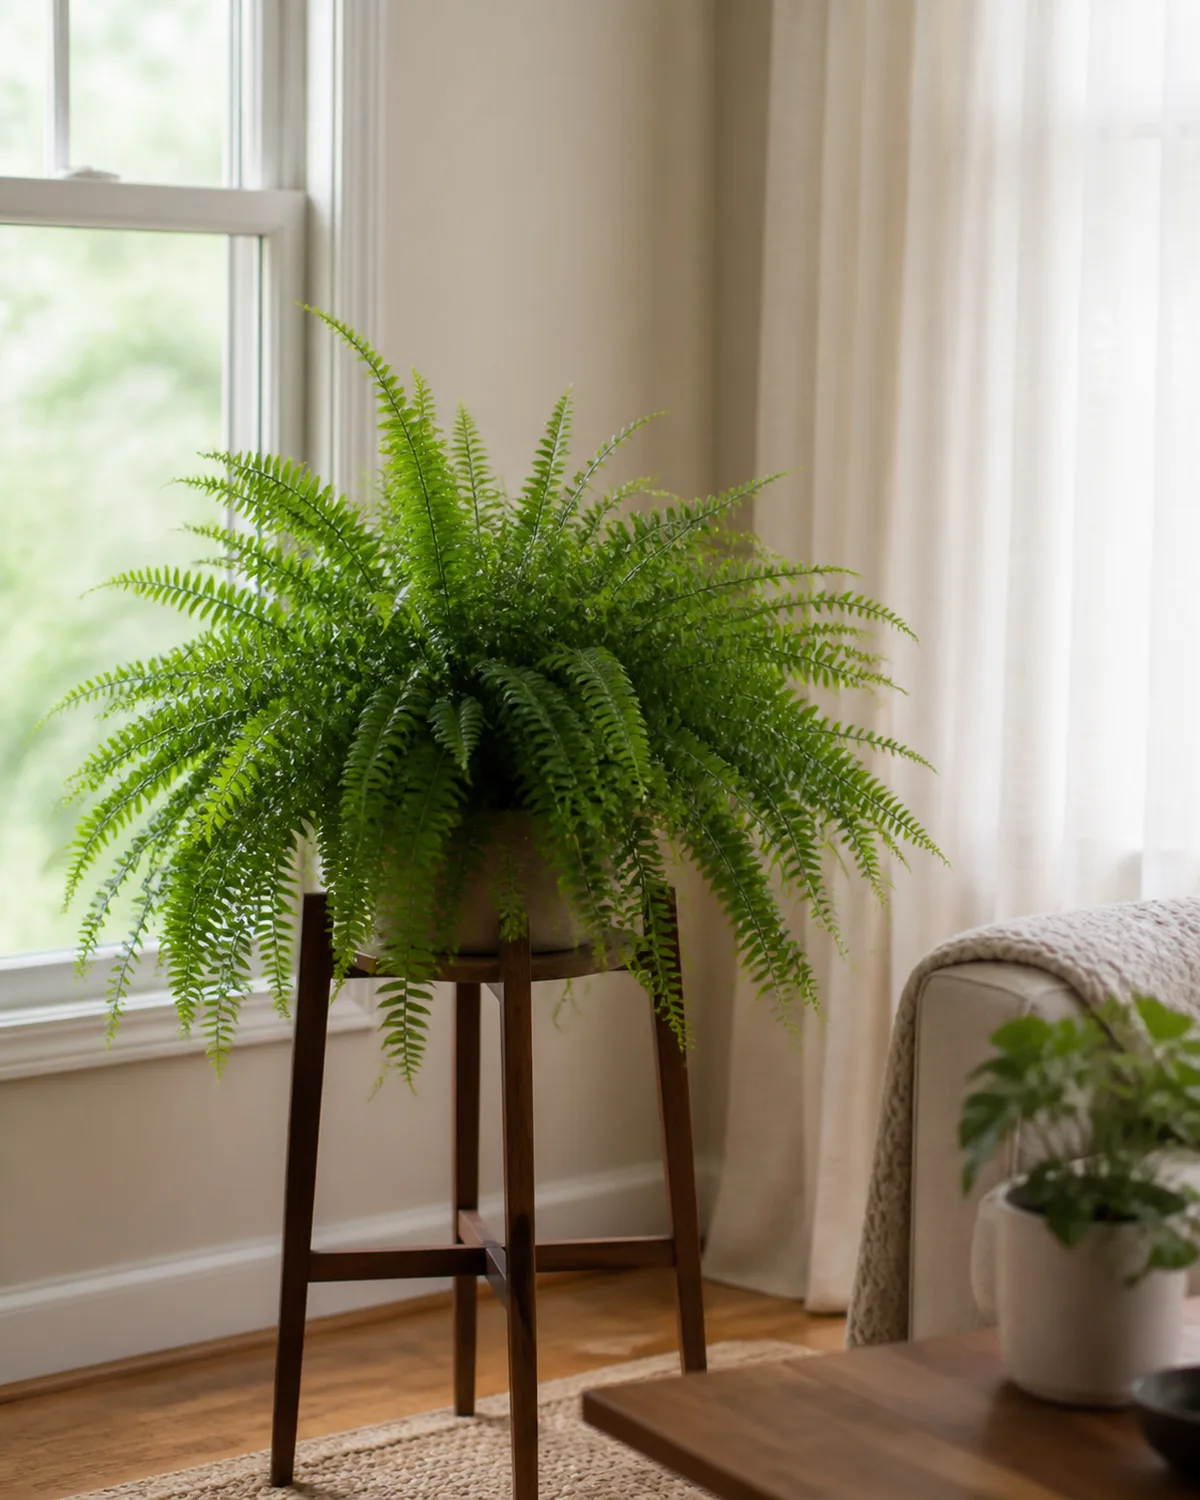
Bright indirect light is where Boston ferns thrive. A north-facing window or a position several feet back from an east window delivers the intensity they need without the direct exposure that damages fronds.
The distinction matters. Boston ferns are not low-light plants, despite the persistent myth that ferns belong in dark corners. They evolved in the understory of tropical and subtropical forests — shaded by a canopy but surrounded by abundant ambient light. Place one in a genuinely dim corner and the fronds grow thin, sparse, and leggy within weeks.
Direct sunlight causes the opposite problem. Afternoon sun from a south or west window scorches pinnae, turning them brown and papery. Morning sun — a gentle hour or two from an east window — is tolerated and can actually improve frond density.
Shedding increases noticeably in low light. The plant drops inner pinnae to conserve the energy it cannot generate through photosynthesis. If your Boston fern is losing leaves faster than seems normal, insufficient light is the second most likely cause after humidity.
Rotate the pot or basket a quarter turn every few weeks. One-sided light creates lopsided rosettes, and hanging baskets positioned against a wall naturally develop a bare back side without rotation.
The reason Boston ferns look spectacular on covered porches every summer — air circulation, naturally higher humidity, and strong indirect light — is exactly the combination that is hardest to replicate indoors.
For supplemental lighting strategies, see the grow light guide. For matching any houseplant to your specific window direction, the light requirements guide covers every scenario.
Watering: the narrow margin between moist and soggy
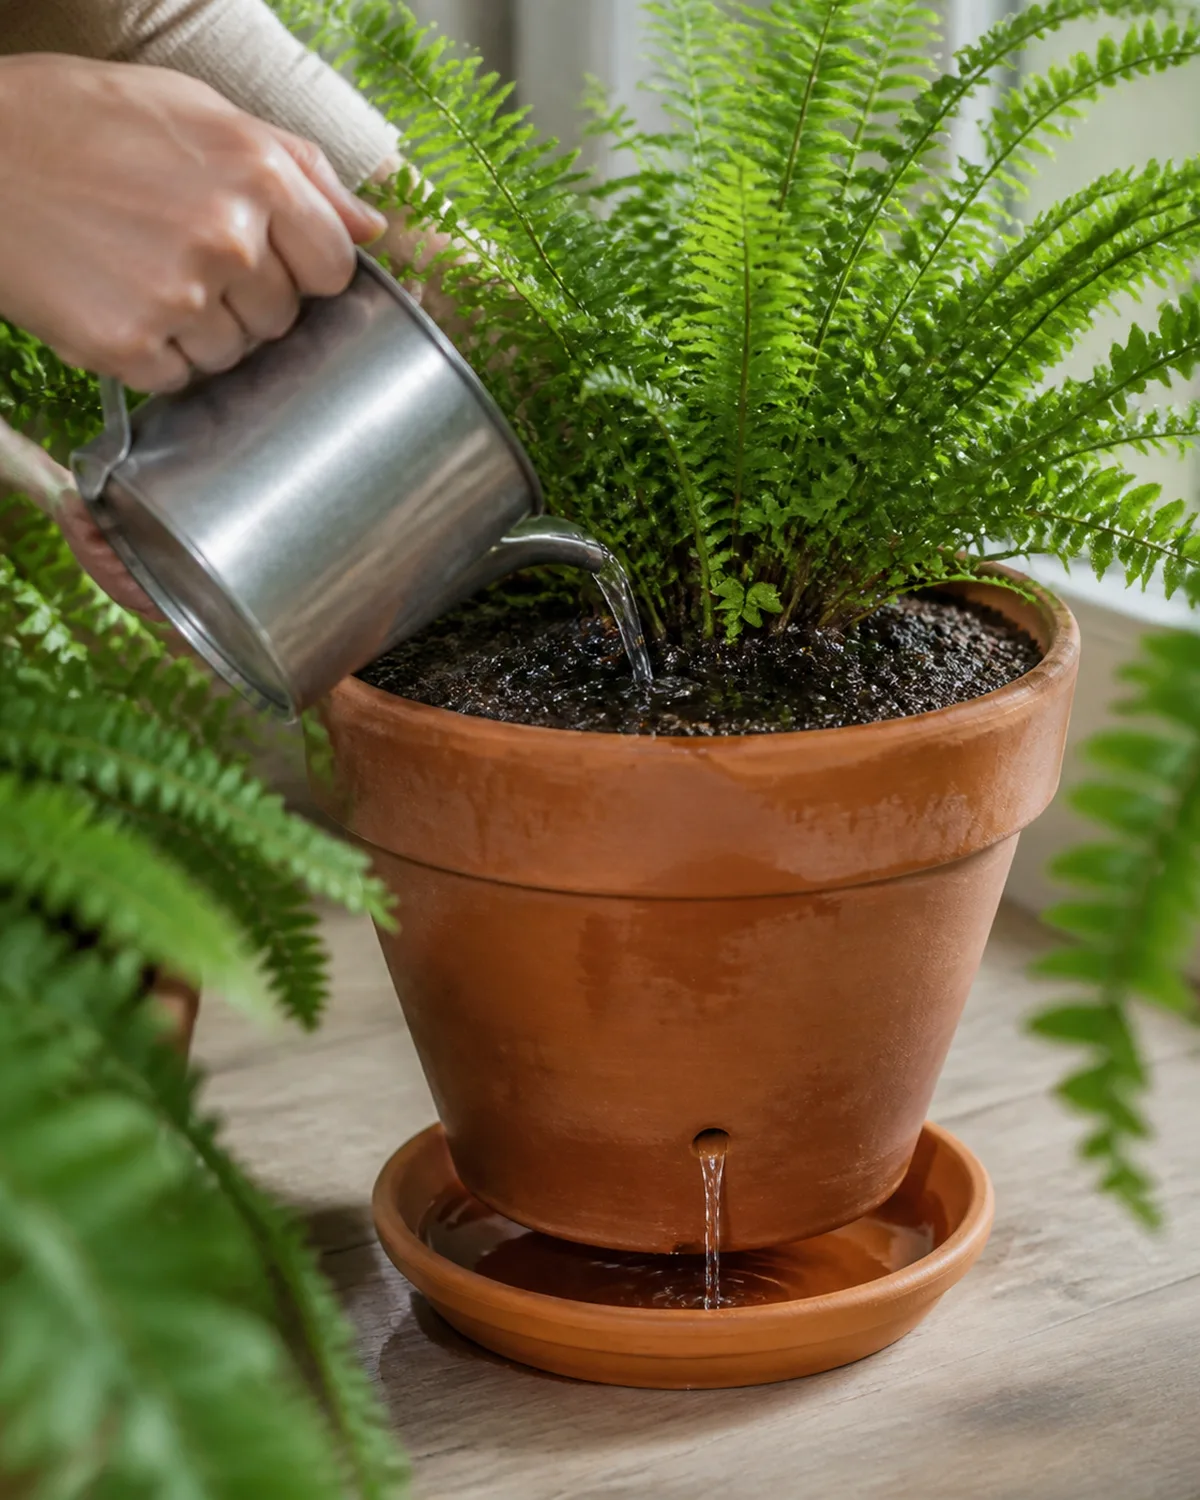
Boston ferns need consistently moist soil — not wet, not dry, not cycles of feast and famine. The target is the feeling of a wrung-out sponge: damp throughout but not dripping.
Water when the top inch of soil feels dry to the touch. Do not wait longer. The single biggest watering mistake with Boston ferns is letting the soil dry out completely even once. A full dry-out triggers mass frond die-back: the pinnae crisp, curl, and drop in an avalanche that can strip a lush plant to bare stems within days.
Hanging baskets dry out faster than tabletop pots because air circulates around all sides of the pot. Check hanging Boston ferns twice as often as you would check a shelf plant. On warm dry days, a hanging basket may need water daily.
Water thoroughly until it drains from the bottom. Discard any excess from the saucer after 15 minutes — sitting in standing water leads to root rot just as surely as drought leads to shedding.
One Boston-fern-specific trap: peat-based mixes — the standard medium for ferns — become hydrophobic when they dry out completely. Water poured on the surface runs straight through the pot without absorbing into the root zone. If this happens, the only fix is a 15-to-20-minute bottom soak: set the pot in a basin of water and let capillary action pull moisture back into the peat from below.
Yellow fronds progressing from the base upward signal overwatering. Brown, crispy fronds curling inward from the tips signal underwatering. Reduce watering frequency in winter when lower light and cooler temperatures slow evaporation, but never allow a full dry-out. For the complete watering framework across different plant types, see the watering guide.
Humidity: the single factor behind most Boston fern failures
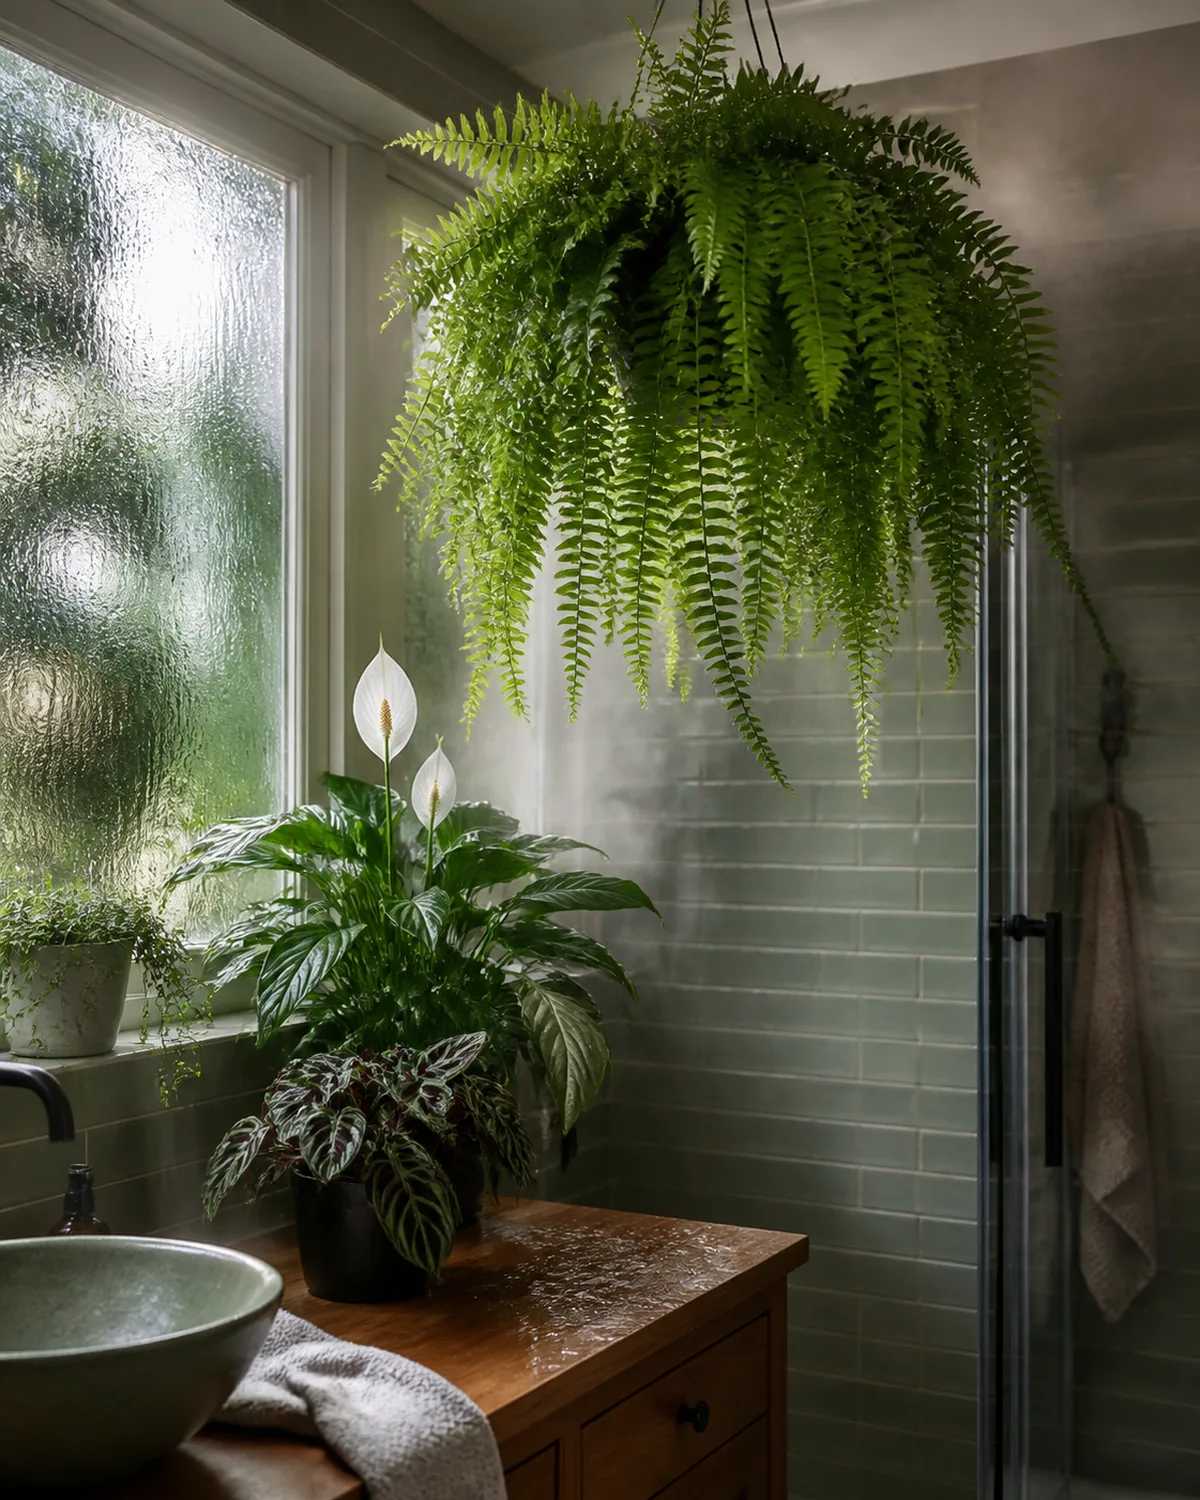
Boston ferns require 50 to 80 percent relative humidity consistently. This is the single most important piece of Boston fern care and the single most common point of failure.
Most homes run 30 to 40 percent humidity in winter with central heating. That is not close to adequate.
The misting myth needs direct confrontation. Nearly every Boston fern care guide recommends misting. Here is what misting actually does: it raises humidity for approximately 5 to 15 minutes before the droplets evaporate.
A Boston fern needs sustained humidity around the clock. Misting three times daily provides roughly 45 minutes of adequate humidity out of 1,440 minutes in a day — three percent coverage. That is why misting is not solving anyone's problem.
Effective humidity strategies, ranked by impact:
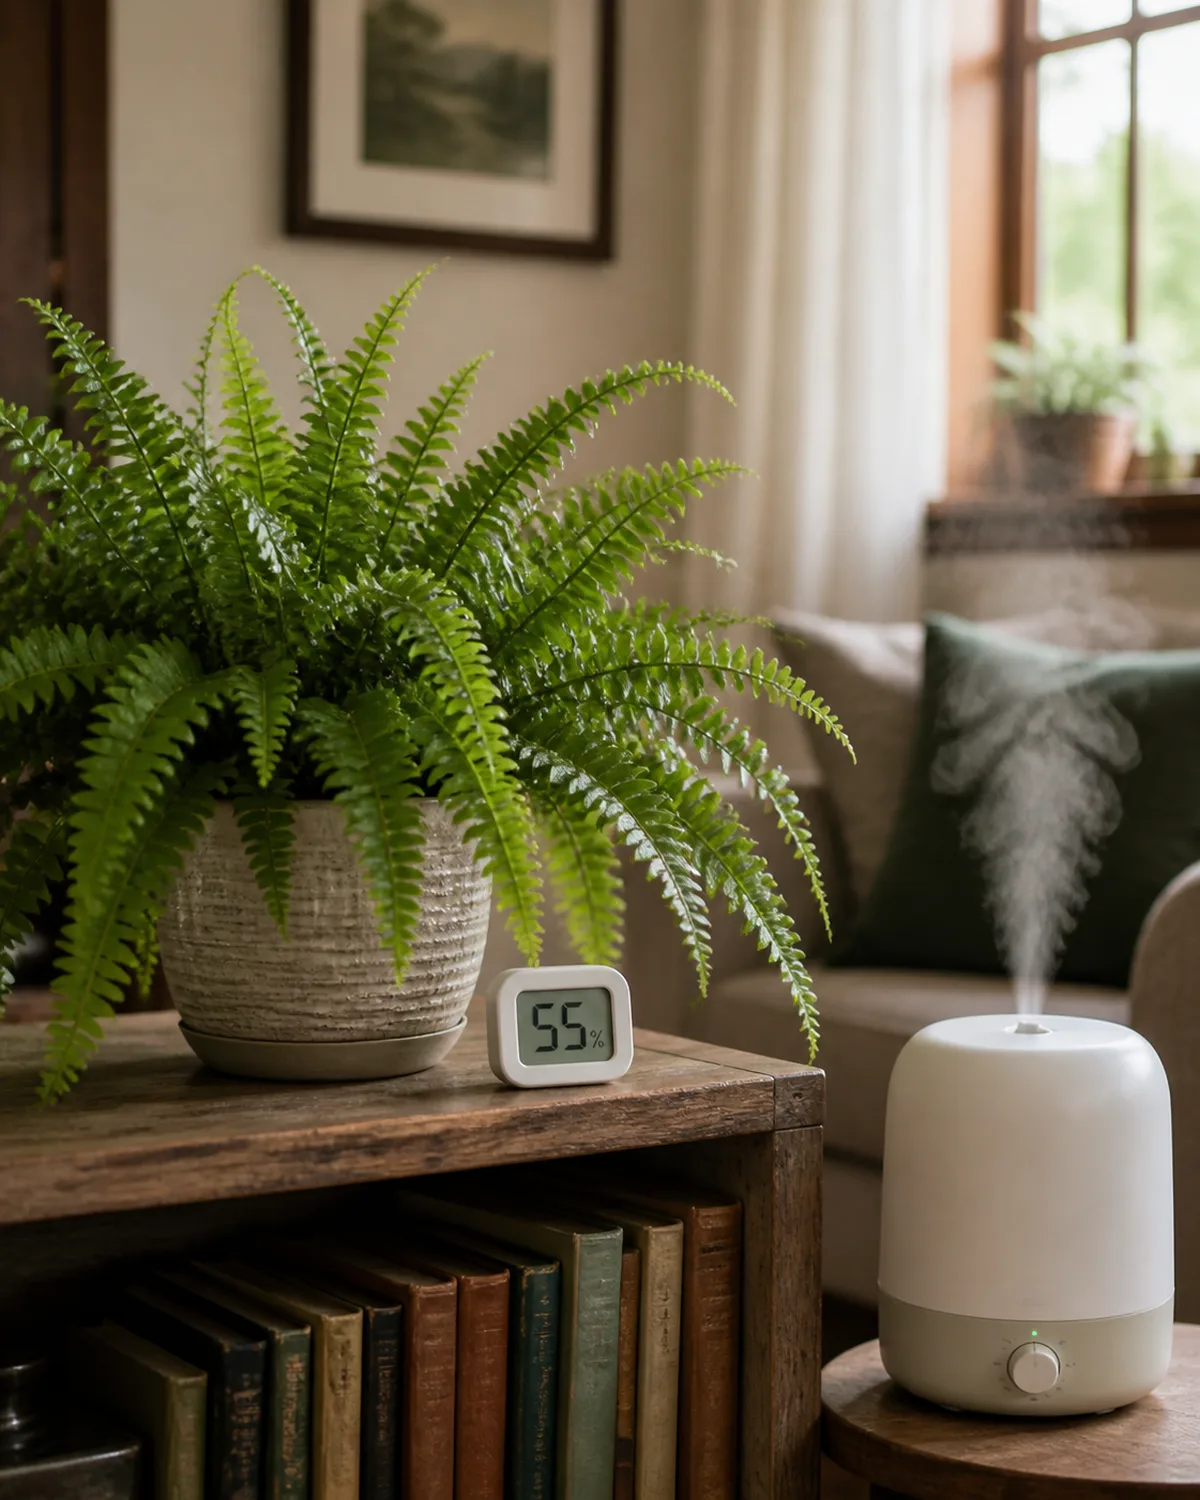
A humidifier running in the same room is the only genuine solution for homes in dry climates or during heated winter months. Set it to 50 percent or higher. This single investment has saved more Boston ferns than every other intervention combined.
A pebble tray with water beneath the pot provides modest but continuous passive evaporation. Fill a tray with pebbles, add water to just below the top of the pebbles, and set the pot on top. The evaporating water creates a localized humid microclimate.
Grouping with other plants raises local humidity through collective transpiration . The combined effect of multiple plants releasing moisture through their leaves can increase the immediate area by 5 to 10 percent over ambient.
Bathroom placement with adequate light is often the best low-effort solution. Daily showers and baths naturally maintain 60 percent or higher humidity.
Signs of insufficient humidity: browning pinnae tips starting at the edges, leaflets that crisp and detach at the slightest touch, fronds that curl inward protectively, and above all — accelerated shedding. A ten-dollar hygrometer placed next to your Boston fern is genuinely the most useful diagnostic tool you can buy for this plant.
Temperature: steady warmth with a cool winter rest
The ideal temperature range for Boston ferns is 60 to 75°F (16 to 24°C) during the growing season. They tolerate cooling down to 50°F (10°C) in winter, which slows growth but causes no damage.
Frost is fatal. Even brief exposure below 40°F kills fronds outright. Outdoor Boston ferns must come inside before nighttime temperatures consistently drop below 50°F — do not wait for the first freeze warning.
Heating vents and radiators create a double problem: they deliver high temperature and low humidity simultaneously. Position the plant well away from any forced-air outlet.
Cold drafts from doors, single-pane windows, and air conditioning units trigger stress shedding. The plant responds to sudden temperature drops by releasing pinnae . This survival mechanism reduces the tissue it needs to support through adverse conditions. If your Boston fern drops leaves every time the front door opens in winter, the draft is the cause.
The reason Boston ferns transform covered porches in summer is partly about temperature stability. Outdoor air maintains a steady range without the cycling of indoor heating and cooling systems. That consistency, combined with higher natural humidity and air movement, creates conditions that indoor environments rarely match.
Soil mix: moisture retention without suffocation
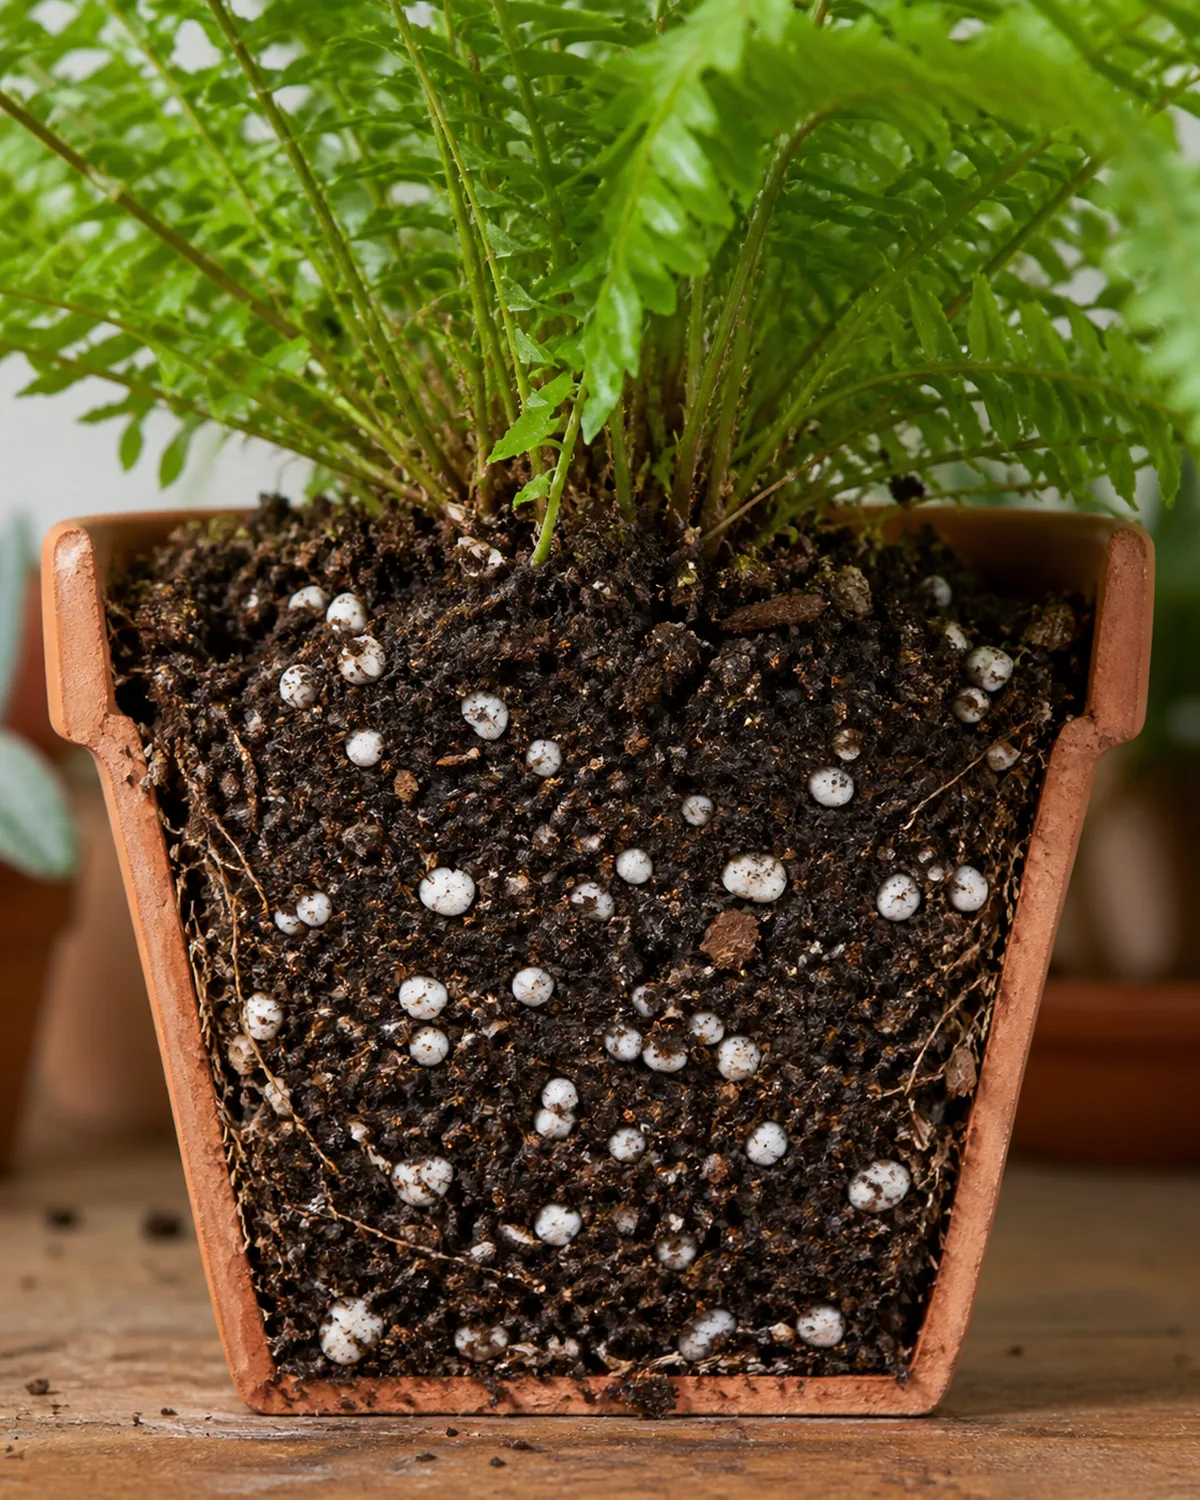
Boston ferns need soil that holds moisture without staying soggy — the opposite of what succulents and cacti require.
A peat-based mix with perlite in roughly a 2:1 ratio hits the target. The peat retains moisture throughout the root zone, while the perlite creates air pockets that prevent waterlogging and allow oxygen to reach the roots.
Add a handful of compost or worm castings to provide gentle, slow-release nutrition built directly into the growing medium.
Avoid 100 percent peat. It compacts over time, reducing air space and drainage. Worse, pure peat that dries out once becomes hydrophobic — it repels water on contact, which is the exact cause of the problem where water runs straight through the pot without wetting the roots.
Coco coir is a sustainable peat alternative that performs nearly identically for ferns. It resists hydrophobic behavior better than peat and has a more neutral pH, making it a practical swap if peat sourcing concerns you.
Boston ferns prefer slightly acidic soil in the 5.5 to 6.5 pH range. Both peat and coir naturally fall within this range without amendment.
Repot when roots fill the pot or the soil has broken down into a dense, compacted mass — typically every two years. Pot up only one size, one to two inches larger in diameter. Boston ferns in oversized pots sit in too much wet soil around the root periphery, which invites root rot. For the complete repotting protocol, see the repotting guide.
Fertilizing: gentle feeding for gentle roots
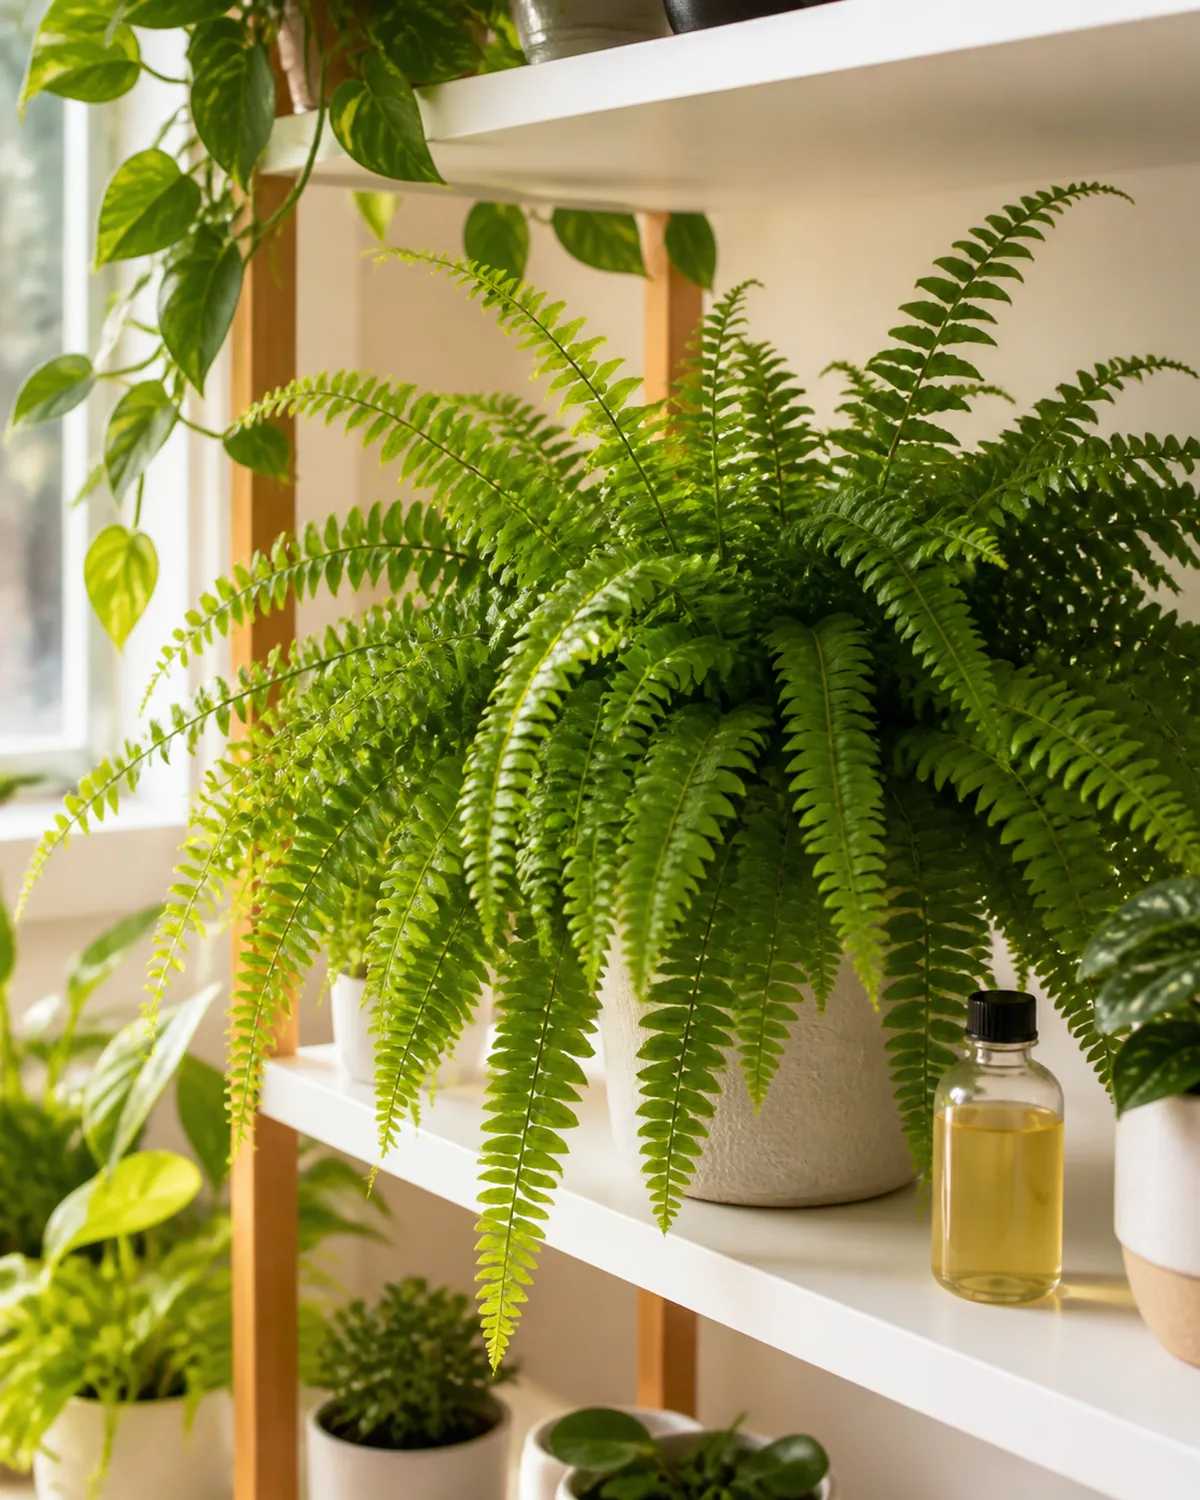
Boston fern roots are fine and delicate — far more sensitive to chemical concentration than the thick roots of a monstera or rubber plant. Full-strength fertilizer burns them, producing brown frond tips that look identical to humidity damage.
Use a balanced liquid fertilizer (20-20-20 or 10-10-10) diluted to half the label rate. Apply every four to six weeks during spring and summer.
Stop fertilizing entirely from October through February. The plant enters a rest period with minimal growth, and nutrients it cannot use accumulate as salts in the soil. Those salts burn roots when concentrations build high enough.
Slow-release granules are a practical alternative for anyone who forgets scheduled feeding. One spring application covers the entire growing season with a steady, low-dose nutrient supply.
If the entire plant — not just a few older fronds — turns uniformly yellow-green, nitrogen deficiency may be the cause. Increase feeding frequency slightly and observe whether the color improves over two to three weeks.
Flush the soil thoroughly with plain water every two to three months during the growing season. Running several pot-volumes of water through the soil washes out accumulated fertilizer salts before they reach damaging levels.
Never fertilize a bone-dry plant. Water first to moisten the root zone, then apply the fertilizer solution. Feeding dehydrated roots amplifies chemical burn. For the complete fertilizer framework — NPK explained, organic versus synthetic, and species-specific adjustments — see the fertilizing guide.
Runners and division: two ways to propagate Boston ferns
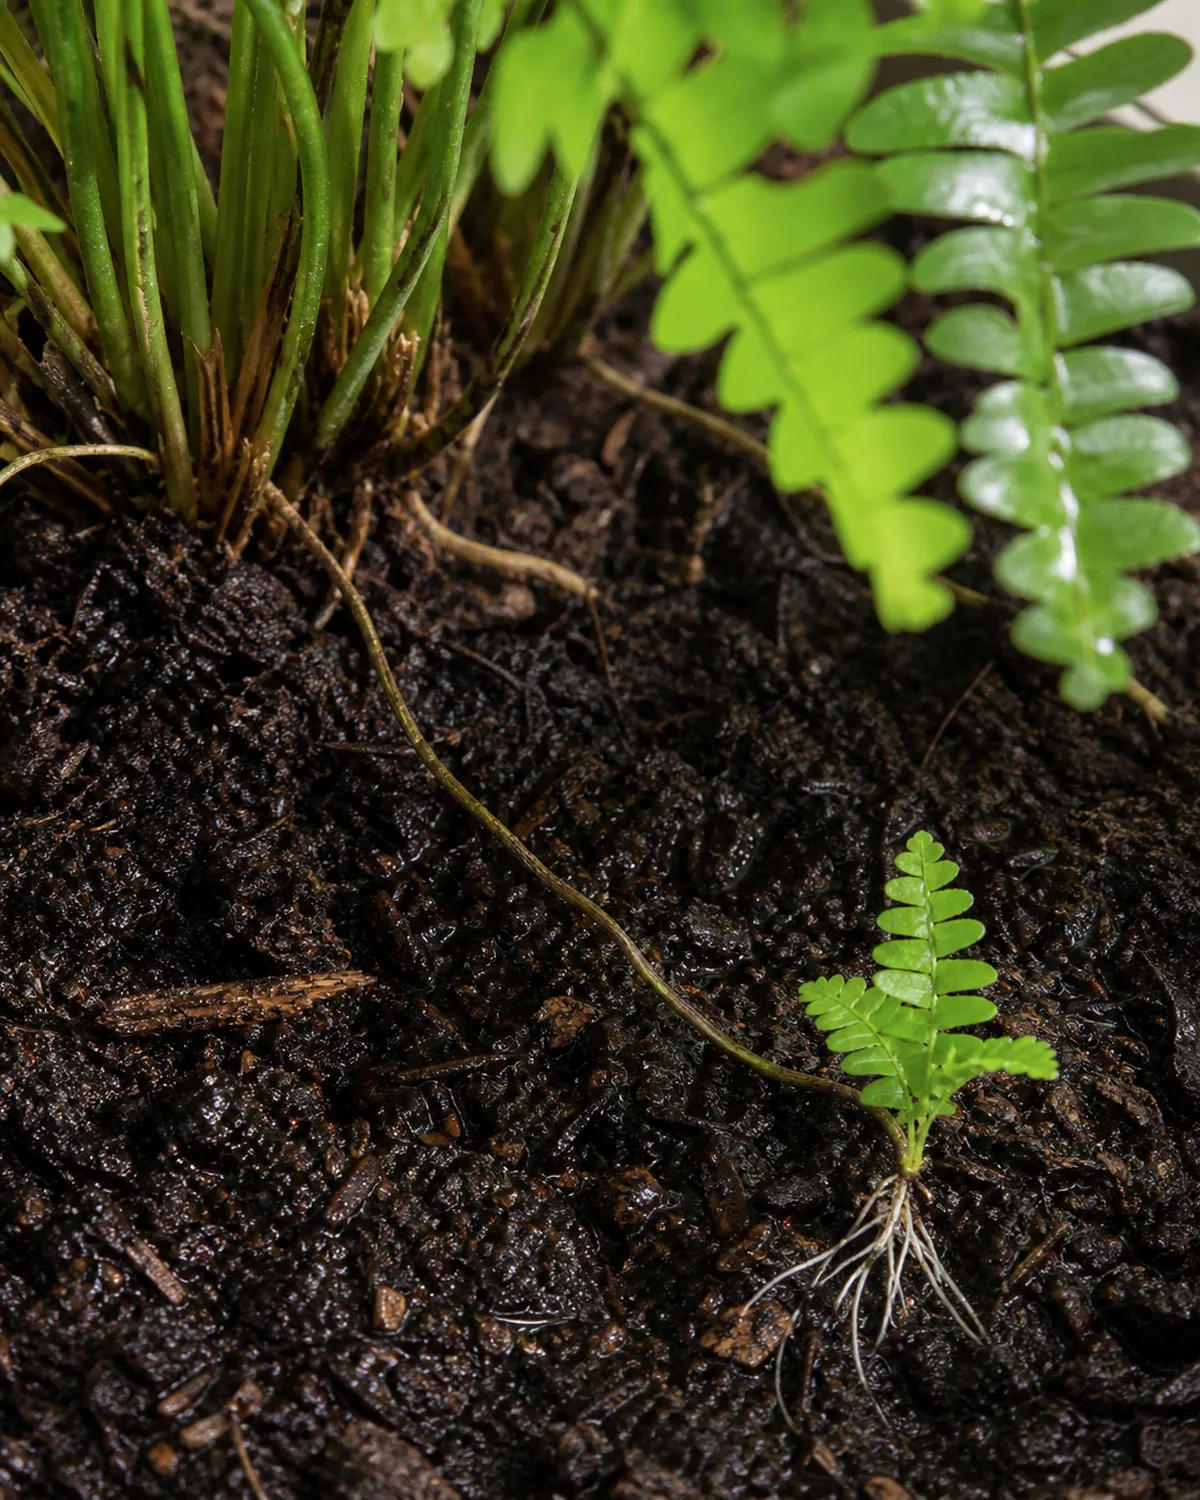
Boston ferns propagate through two methods, and both are reliable enough for beginners.
Stolons are the signature method. Long, thin, wiry stems grow outward from the crown along or just above the soil surface. At intervals along each runner, nodes develop that sprout tiny plantlets — miniature rosettes with their own fronds and, critically, their own roots once they contact moist soil.
The process requires almost nothing from you. Pin a runner down to moist soil in a small adjacent pot using a bent paperclip or hairpin. Keep the soil consistently moist. Roots develop at the pinned node within two to four weeks.
Once the plantlet is producing its own new fronds and feels anchored when gently tugged, sever the runner connecting it to the mother plant. The new plant is now independent.
If you see long wiry stems trailing over the edge of a hanging basket, do not cut them off assuming they are dead fronds. Those are runners — the plant is trying to propagate.
The stolon method differs from spider plant propagation in one important way. Spider plants produce aerial stolons with dangling plantlets that root when they contact soil. Boston fern stolons stay at ground level, creeping along the surface. The result is the same — clonal offspring — but the growth habit is distinctly different.
Division is faster for producing multiple plants from one large specimen. Remove a mature, dense Boston fern from its pot and divide the root ball into two to four sections using a clean, sharp knife. Each section needs several healthy fronds and a portion of the root system.
Pot each division in fresh mix at the same depth it occupied before. Keep newly divided plants warm and humid for two to three weeks — a clear plastic bag draped loosely over the top creates a temporary humidity tent. Division works best in early spring when new growth is just beginning.
For the broader propagation framework covering all methods across species, see the propagation guide.
Pruning: managing the mess without ruining the shape
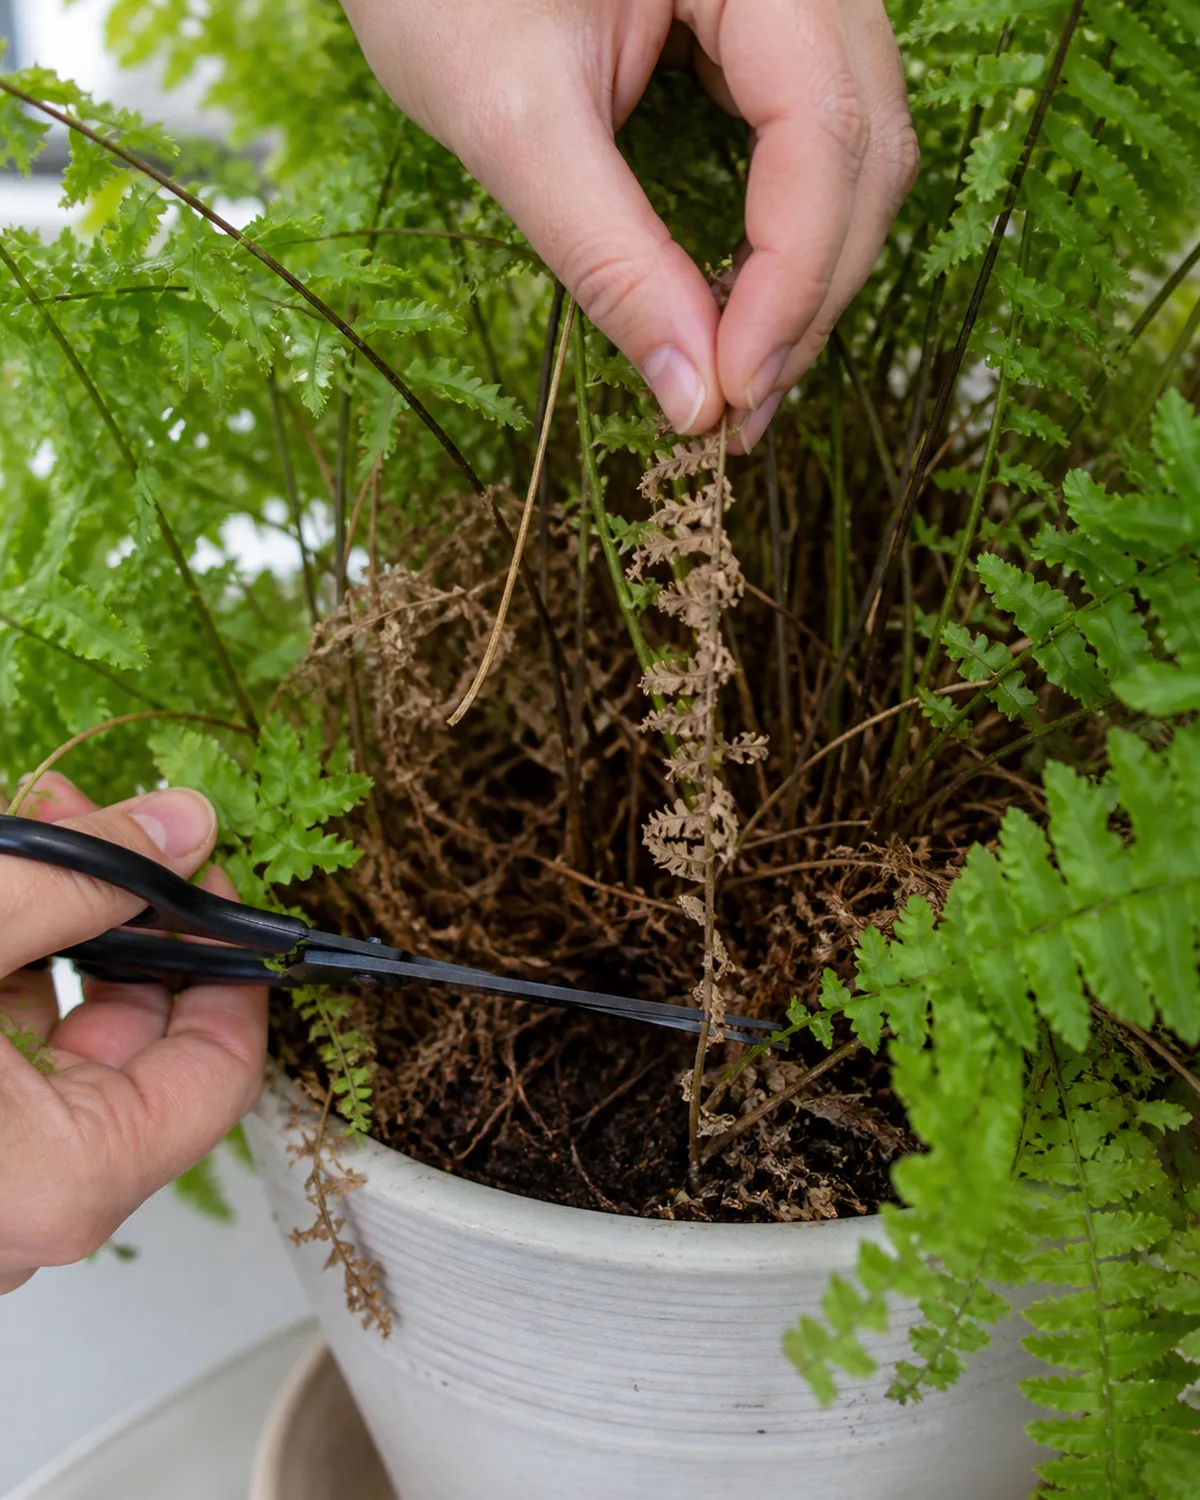
Regular pruning is not optional for Boston ferns. Unlike many houseplants that can go years without being trimmed, Boston ferns need periodic grooming to stay healthy and attractive.
Remove entire brown or yellow fronds at the base. Cut as close to the soil line or crown as possible with clean scissors. This matters: do not trim the brown tips off individual fronds. It looks terrible — the cut ends brown further back from the wound, and the frond never recovers its appearance. Whole-frond removal keeps the plant looking clean.
The interior of a mature Boston fern hides a tangle of dead and dying fronds beneath the green outer canopy. Reach into the center periodically and remove this debris. Dead fronds trapped inside harbor pests — particularly mealybugs and scale — and block air circulation that the plant needs to prevent fungal problems.
In late winter, before spring growth begins, consider a hard prune if the plant looks sparse or has declined over winter. Cut every frond back to two inches above the soil. The plant regrows vigorously from its rhizome crown, producing fresh fronds that form a denser canopy than the tired growth they replaced.
This sounds drastic, but it is the single best reset for a declining Boston fern.
When bringing an outdoor Boston fern inside for fall, prune back by one-third. This reduces the stress of transition — the plant has less foliage to support while adjusting to lower light and humidity — and removes any pest-harboring foliage before it enters the confined indoor environment.
For managing shedding specifically: place the pot on a tray slightly larger than the frond canopy to catch fallen pinnae. Accepting some shedding as a normal characteristic rather than a solvable problem is part of successful Boston fern ownership.
The shedding problem: what is normal and what is not
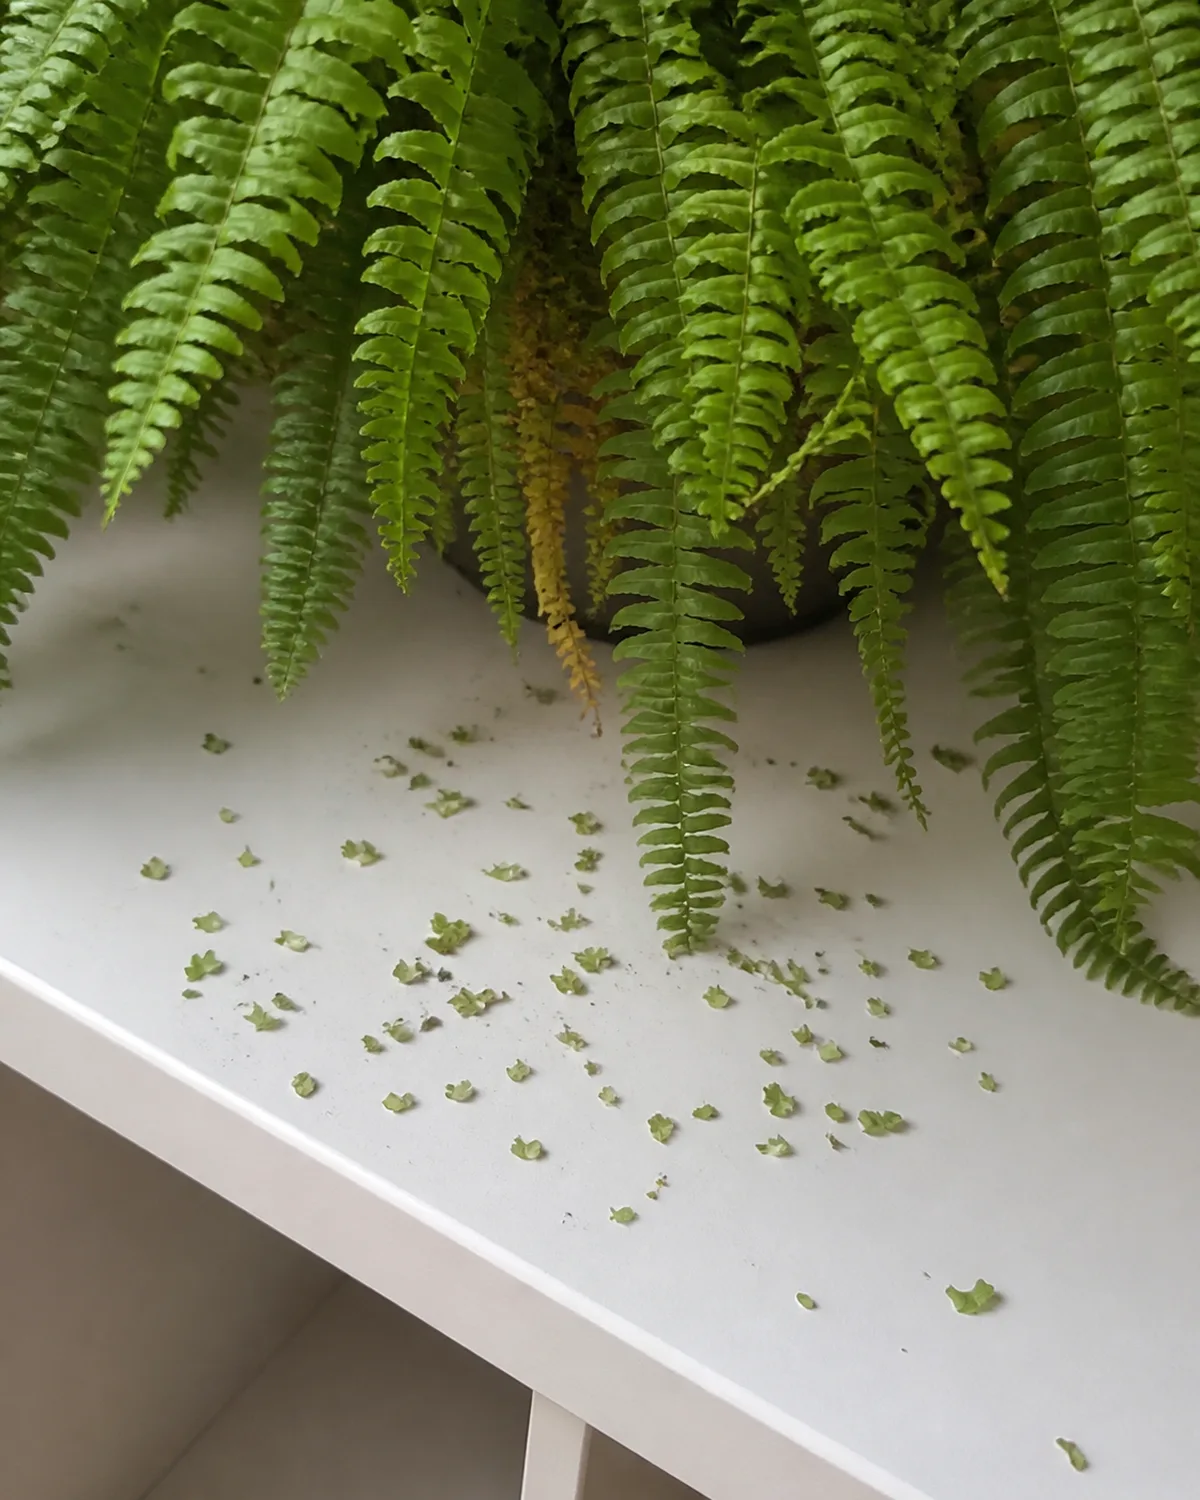
All Boston ferns shed. This is an inherent characteristic of the species, not a care failure. A few tiny pinnae on the shelf or floor each day is normal — the plant replaces old growth continuously.
The line between normal and problematic is visible. Normal shedding: scattered individual leaflets from older interior fronds. You notice them during routine cleaning. The outer fronds remain full, green, and arching. Abnormal shedding: entire fronds browning and crisping, clumps of pinnae falling together, visible bald patches appearing in the canopy.
The five triggers of excessive shedding, ranked by how often they are the cause:
Insufficient humidity is cause number one by a wide margin. Below 40 percent relative humidity, the plant enters survival mode and sheds to reduce the tissue it must keep hydrated. A humidifier solves this.
Complete soil dry-out is second. The damage from even a single full dry-out event takes weeks to recover from — fronds that have lost turgor do not rehydrate. They brown, drop their pinnae, and eventually need to be pruned away.
Sudden environment change ranks third. Moving the plant to a new location, bringing it indoors from a porch, or even placing it in a different room triggers an acclimation response that manifests as shedding. This type is temporary and resolves in two to four weeks if the new conditions are adequate.
Too little light is fourth. Dark corner placement causes the plant to shed inner foliage it cannot maintain through photosynthesis. This shedding is slow, progressive, and easy to mistake for a different problem.
Temperature stress — cold drafts, proximity to heating vents, sudden AC cycling — ranks fifth. The plant drops pinnae immediately in response to thermal shock.
If your Boston fern is shedding excessively, the first intervention to try is always humidity. A thirty-dollar humidifier has saved more Boston ferns than any other action.
Newly purchased Boston ferns from nurseries and garden centers shed heavily during the first two to four weeks at home. This is acclimation shock — the plant is adjusting from greenhouse conditions of 80 percent humidity to your home's 35 percent. Maintain humidity, keep the soil moist, and wait. The shedding stabilizes.
Four Boston fern mistakes that cause the shedding
- 1Relying on misting for humidityMisting raises moisture around the plant for minutes, not hours. A humidifier running in the same room or bathroom placement is the real solution. Misting three times daily covers about three percent of the day.
- 2Letting the soil dry out completely even oncePeat-based mix goes hydrophobic when it dries and then repels water on contact. Fronds drop en masse within days. Bottom-soak for 15 minutes to rehydrate if the water runs straight through.
- 3Cutting brown tips off individual frondsThe cut ends brown further back from the wound, making the frond look worse. Remove the entire frond at the base instead. Healthy new fronds replace the old ones from the crown.
- 4Placing it in a dark corner because ferns like shadeBoston ferns need bright indirect light. Dark corners cause sparse leggy growth, fewer fronds, and accelerated shedding as the plant drops tissue it cannot maintain through photosynthesis.
kultivy.com
Pests that target Boston ferns and how to treat them
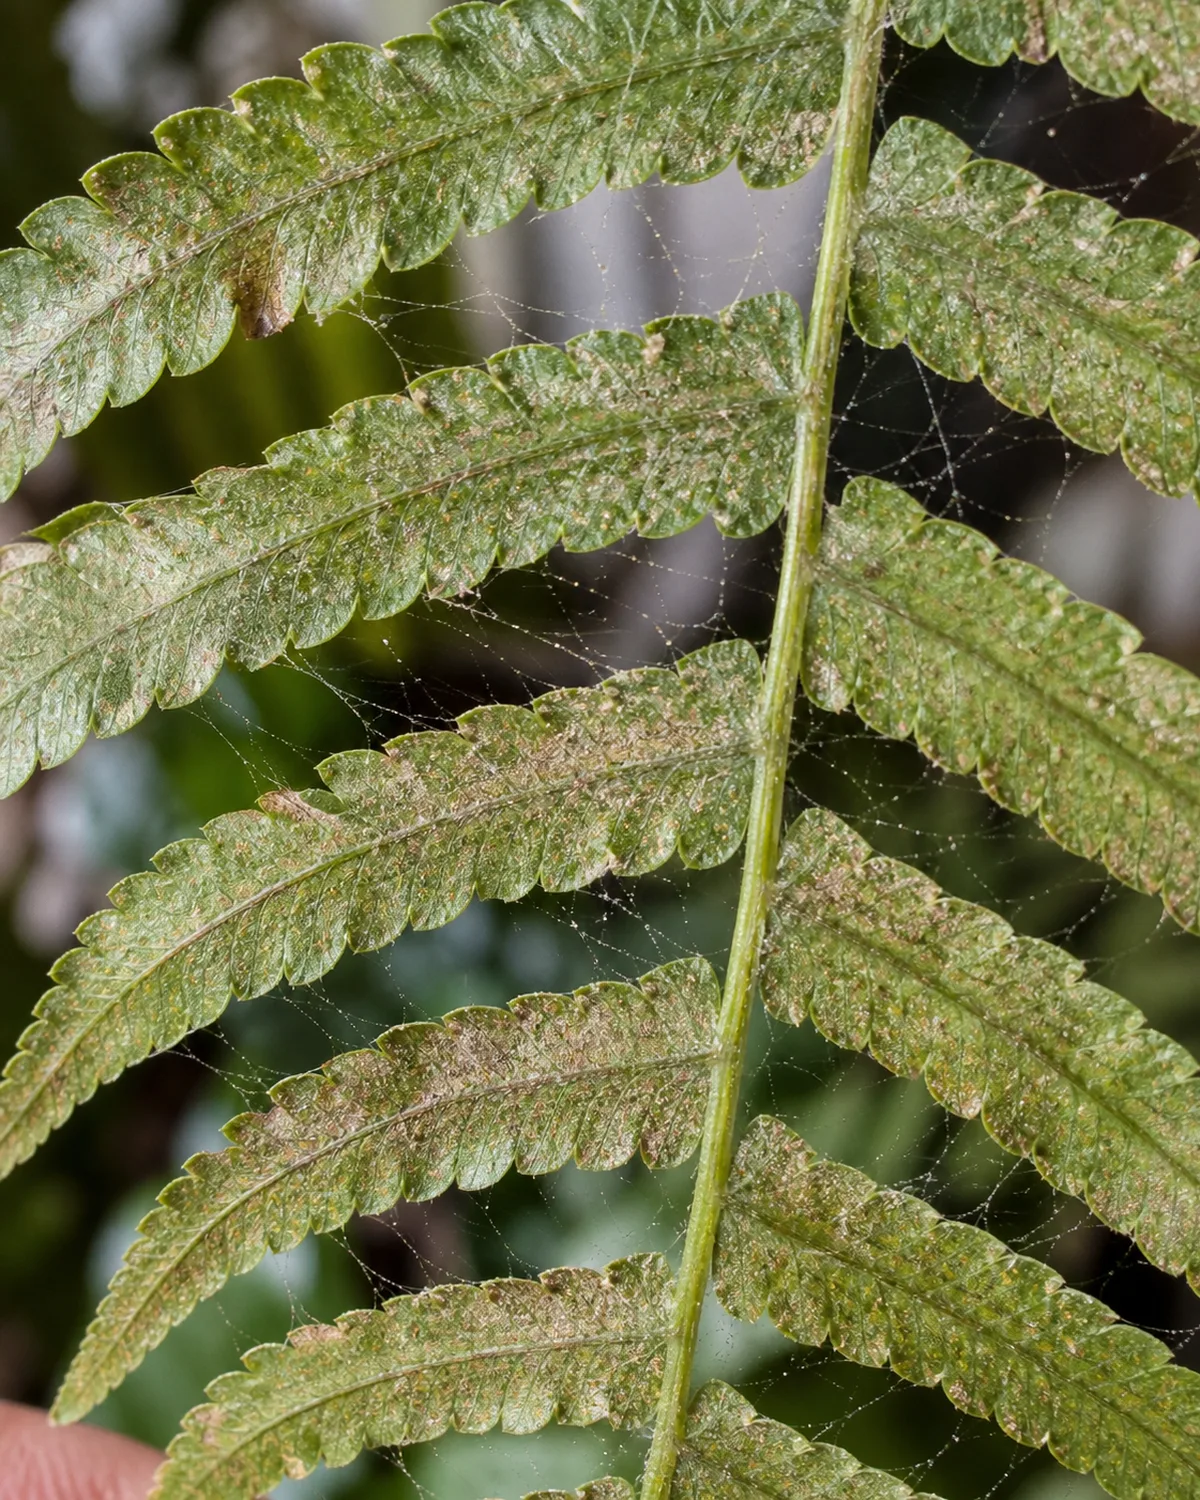
The dense, humid canopy of a Boston fern creates an ideal sheltered microclimate . Both for the plant and for the pests that find it..
Scale insects appear as small brown or white bumps on frond undersides and along the rachis. They feed by piercing the tissue and draining sap, causing yellowing and weakened growth. Scrape them off individually with a fingernail or a cotton swab dipped in rubbing alcohol. Their immobility makes manual removal effective . Each bump you remove is one fewer pest.
Mealybugs hide in the leaf axils where fronds emerge from the crown , tight crevices that are difficult to inspect without parting the foliage. White cottony clusters are the telltale sign. Treat with insecticidal soap, spraying directly into the axils where they shelter.
Spider mites are the most likely pest in dry indoor conditions. Fine webbing stretched between pinnae and stippled, discolored leaflets are diagnostic. Increasing humidity is both a cure and a preventive measure — spider mites thrive in dry air and decline when humidity rises above 50 percent. Spray affected fronds with neem oil diluted according to label instructions.
Fungus gnats breed in consistently moist soil. Tiny flies hovering around the plant indicate larvae feeding on roots below the surface. Yellow sticky traps catch adults, and allowing the soil surface to dry very slightly between waterings breaks the larval cycle without drying the core root zone enough to stress the fern.
One important note for fern-specific pest treatment: avoid oil-based sprays at full concentration on fern fronds. The delicate pinnae can suffer leaf burn from heavy oil coatings. Use water-based treatments (insecticidal soap, diluted neem) and test on a single frond before treating the entire plant.
For the full pest identification and treatment protocol across all houseplant species, see the houseplant pests guide.
Reading your Boston fern fronds: a diagnostic guide
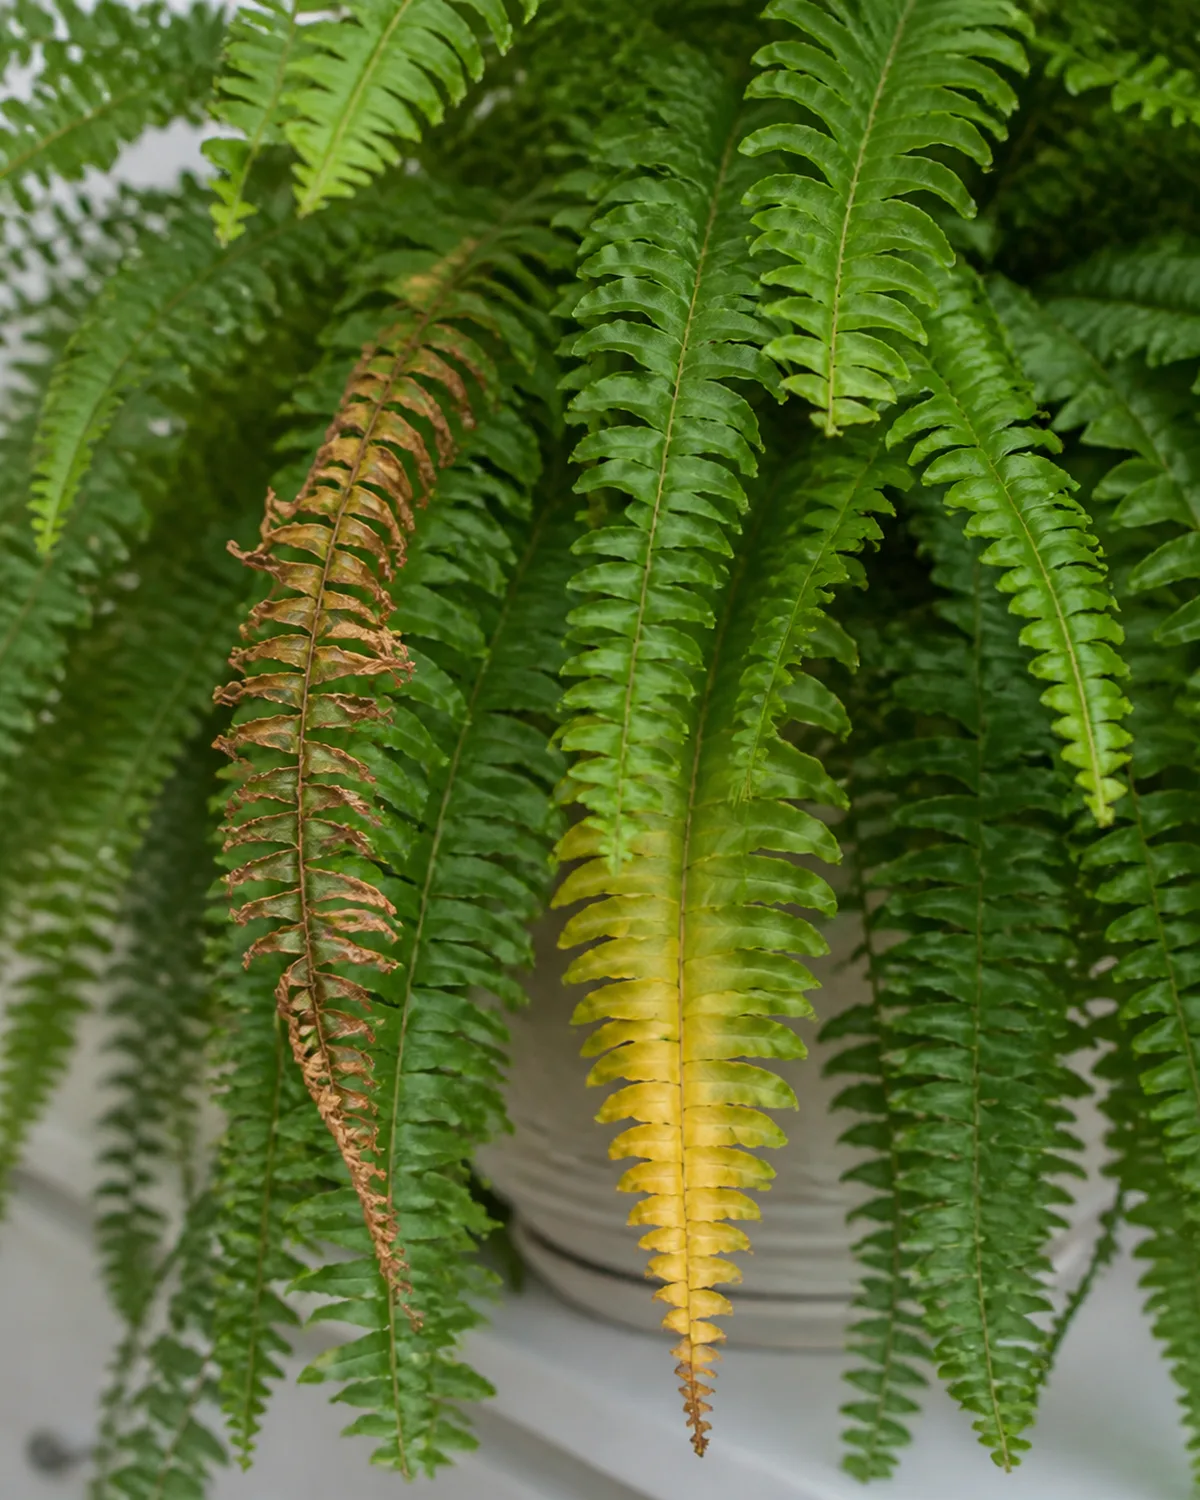
Boston fern fronds telegraph every problem weeks before the plant reaches a crisis. Learning to read the signals turns reactive rescue into proactive adjustment.
Yellow fronds creeping upward from the base with mushy, darkened stems indicate waterlogged roots. The soil is staying too wet for too long, or the pot is sitting in a saucer of standing water. Reduce watering frequency, ensure the pot drains freely, and check whether the soil has compacted into a dense, airless mass that needs replacing.
Pale, washed-out pinnae on sun-facing fronds mean direct light is bleaching the chlorophyll. Move the plant back from the window or add a sheer curtain. The damage to existing fronds is permanent, but new growth will emerge with normal color once the light level is corrected.
Brown, crispy tips on otherwise green pinnae are the most common Boston fern symptom and the hardest to diagnose. Two completely different causes produce identical damage: low humidity dries the pinnae edges first, and fertilizer burn from accumulated salts does the same thing.
If you are fertilizing regularly, flush the soil thoroughly with plain water first. If you are not fertilizing, the cause is almost certainly humidity.
The hydrophobic peat crisis is Boston-fern-specific. When peat-based soil dries completely, it shrinks and pulls away from the pot walls. Water poured on the surface channels down the gap between soil and pot without wetting the root zone.
The fronds curl and crisp despite what looks like regular watering. The fix is a 15-minute bottom soak — no amount of top-watering will rehydrate compacted peat.
Gray fuzzy mold at the crown where fronds emerge signals stagnant air trapped inside the dense foliage canopy in overly humid conditions. Increase air circulation — a gentle fan on low, a few feet away — rather than reducing humidity. Remove affected fronds at the base.
Stunted new fronds curling at emergence in spring mean the roots have circled the inside of the pot with nowhere left to grow. Unpot, gently loosen the root ball, and repot in fresh mix one pot size larger.
Boston fern varieties that thrive indoors
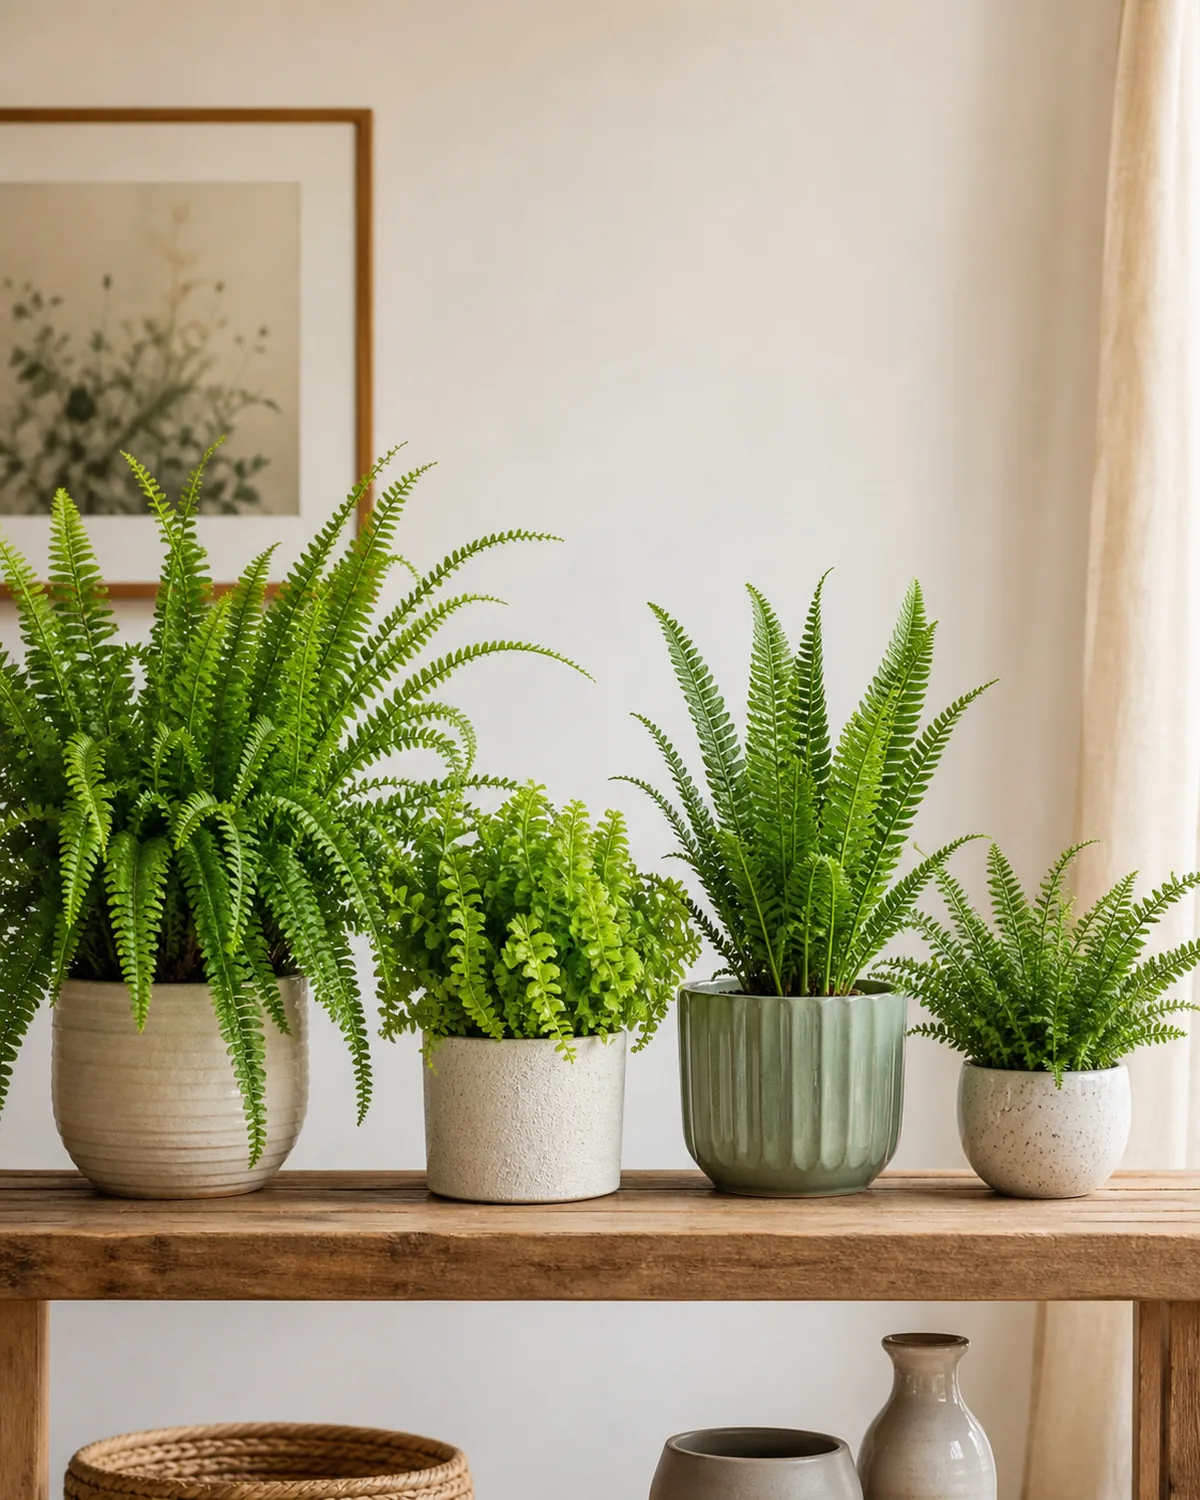
'Bostoniensis' is the classic . The one you picture when someone says Boston fern. Long arching fronds reach two to three feet in mature specimens, creating the cascading green fountain that defines the cultivar. It is widely available, reliable, and the benchmark against which all other Boston fern varieties are measured. It is also the most demanding about humidity.
'Dallas' is the variety to choose if your home is dry. Its compact fronds reach 12 to 18 inches and tolerate lower humidity and lower light better than the classic cultivar. The trade-off is a smaller, less dramatic silhouette , but a living Dallas fern is more impressive than a dead Bostoniensis.
'Fluffy Ruffles' produces dense, tightly ruffled pinnae that give each frond a thick, bushy texture. The overall growth habit is compact. It is slightly more drought-tolerant than the classic variety, and its unusual texture makes it a conversation piece on shelves and tabletops where a full-sized Boston fern would overflow.
'Kimberly Queen' is technically a different species — Nephrolepis obliterata rather than N. exaltata — but it is sold alongside Boston ferns and fills the same role. Its fronds grow upright rather than arching, producing a neater, more contained habit.
The critical advantage: it sheds significantly less than any true Boston fern cultivar. For anyone who loves ferns but cannot tolerate the constant cleanup, Kimberly Queen is the solution.
'Tiger Fern' has variegated yellow-green striped pinnae that create a striking visual effect. It needs brighter light than solid-green varieties to maintain its variegation . In low light, the stripes fade and the fronds revert to uniform green. More finicky overall than other cultivars.
'Rita's Gold' produces lime-green to golden fronds that glow in bright indirect light. The color is unusual and eye-catching, but it requires consistent brightness to maintain. In shade, the golden tones fade to a standard green.
'Compacta' is a miniature with fronds just 6 to 12 inches long. It fits terrariums, small shelves, and spaces where any larger fern would overwhelm the proportions. For a broader look at the fern family beyond Boston ferns, the fern care hub covers five genera and their distinct growing requirements.
Toxicity and display ideas
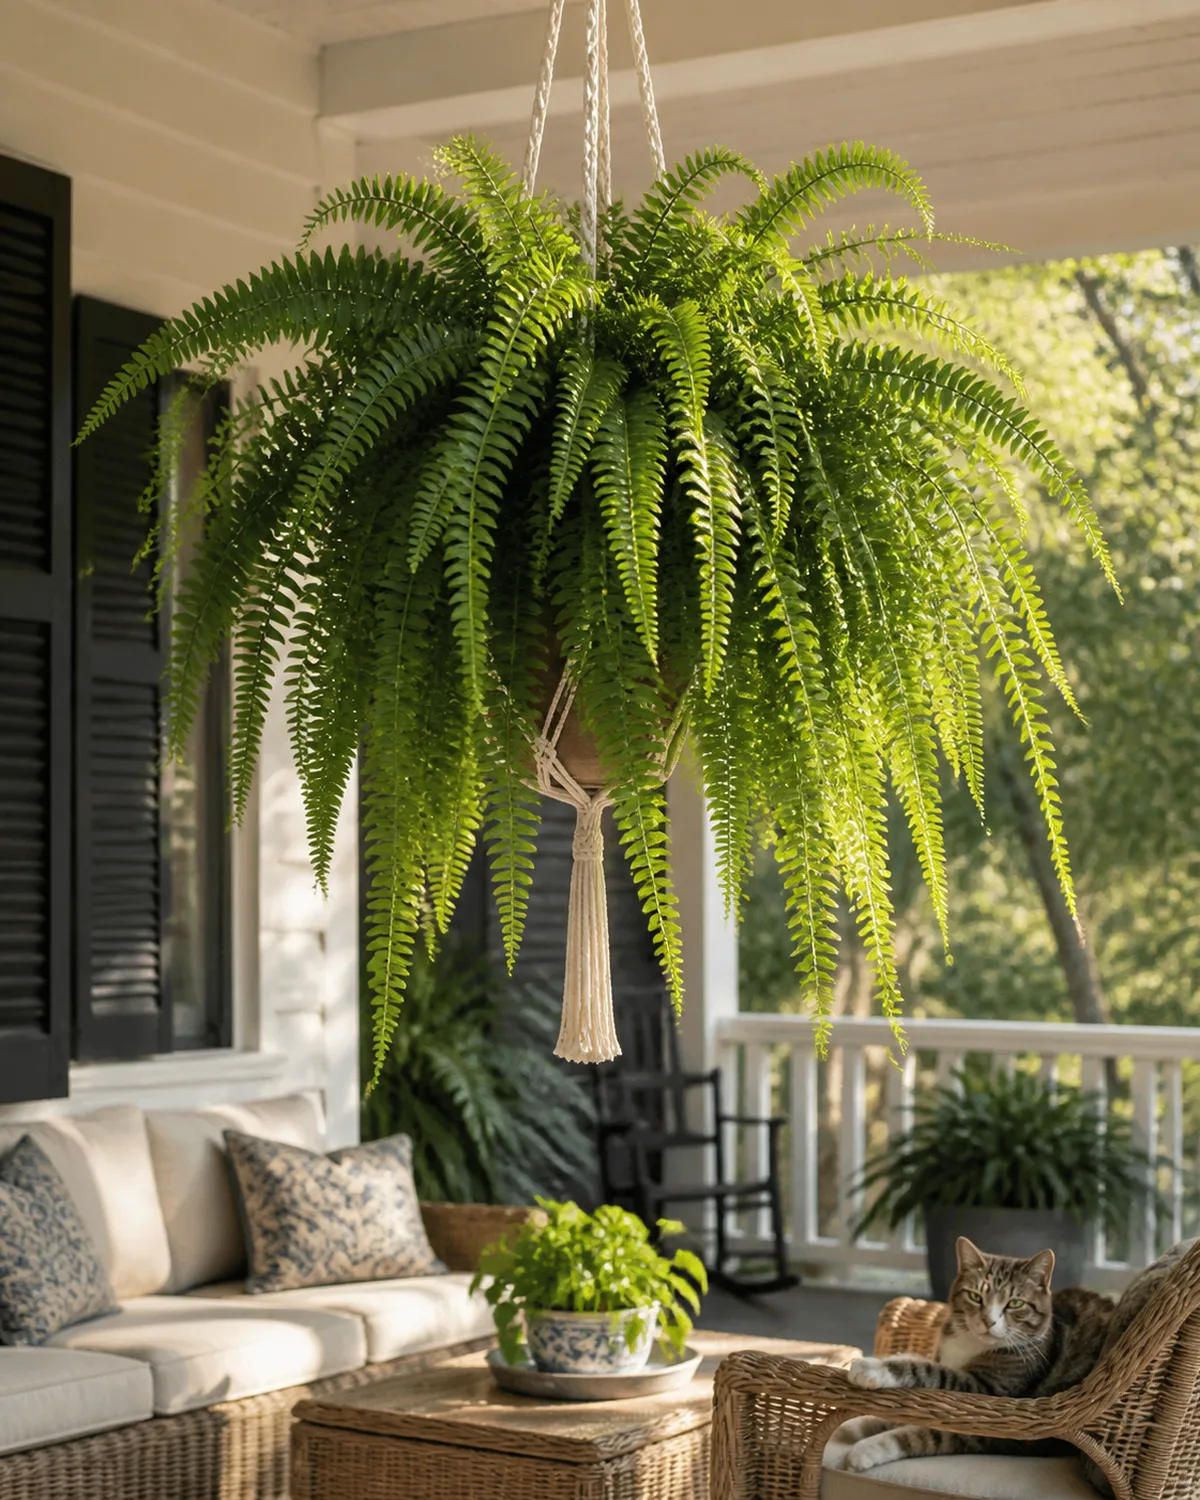
Boston ferns are ASPCA-verified non-toxic to cats, dogs, and humans. They are one of the safest statement plants available for households with pets or young children. No part of the plant contains harmful compounds.
Cats love batting at the dangling fronds of a hanging Boston fern. This is harmless to the cat and only mildly annoying for the plant owner. Hang the basket high enough that fronds are just barely out of reach to reduce the entertainment value.
For a complete list of every verified non-toxic houseplant on this site, see the plants safe for cats guide.
The classic Boston fern display remains the hanging basket — a woven or macrame hanger positioned where the fronds can cascade without obstruction. A bathroom window with bright filtered light provides the humidity the plant craves.
A covered porch in summer is arguably the highest-impact placement: a row of hanging Boston ferns transforms any covered outdoor space into a Southern veranda.
On a tall plant stand, fronds spill over the edges and cascade downward, creating the same visual drama as a hanging basket at eye level. For macrame and woven hangers, the 1970s revival is real, and Boston ferns are the reason that revival works.
Compact varieties like 'Dallas' or 'Compacta' fit tabletop and shelf displays where a full-sized cultivar would overwhelm the space. A wide shallow pot suits them better than a tall narrow one — Boston fern root systems spread outward more than downward.
Grouping with humidity-loving companions — calathea, peace lily, prayer plant, maidenhair fern — creates both a visual display and a practical microclimate. Their collective transpiration raises the immediate area by 5 to 10 percent over ambient.
For more hanging plant ideas, the dedicated guide covers species and display methods.

Mara Quinn edits Kultivy, where she shares houseplant care, propagation, beginner-friendly plant picks, and plant-styling ideas for anyone who wants their indoor plants to actually thrive. Every guide is image-led and reviewed for clarity, usefulness, image accuracy, and Pinterest-to-page alignment before it goes live. Visit the About page.