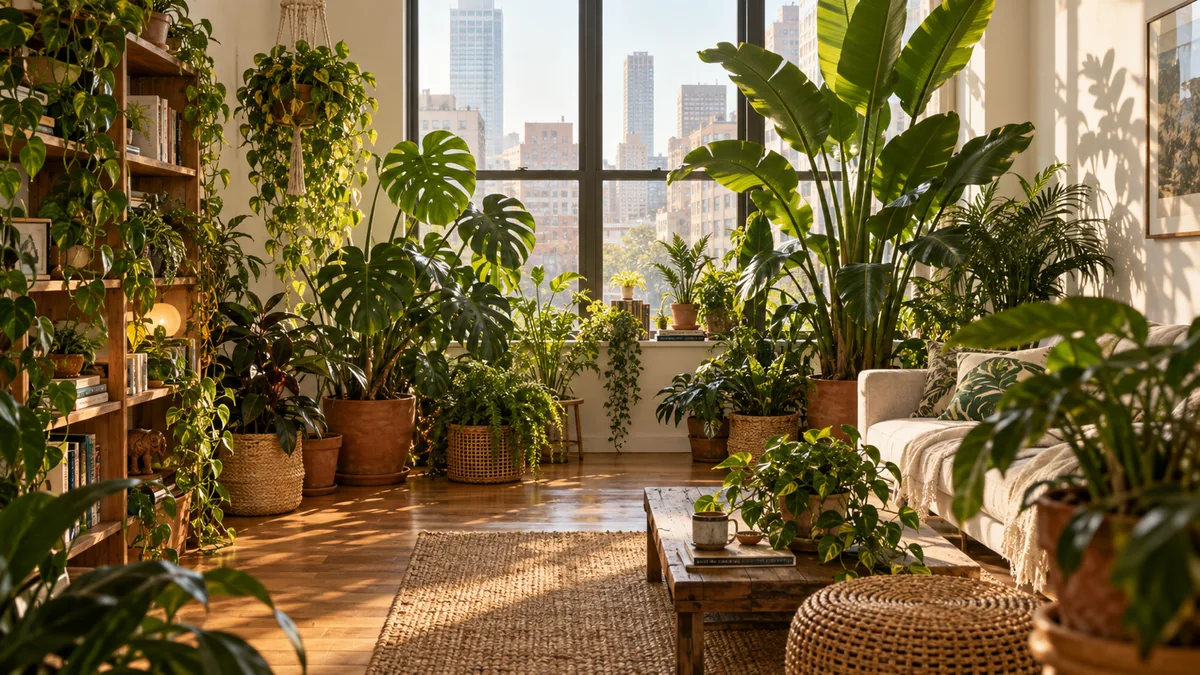
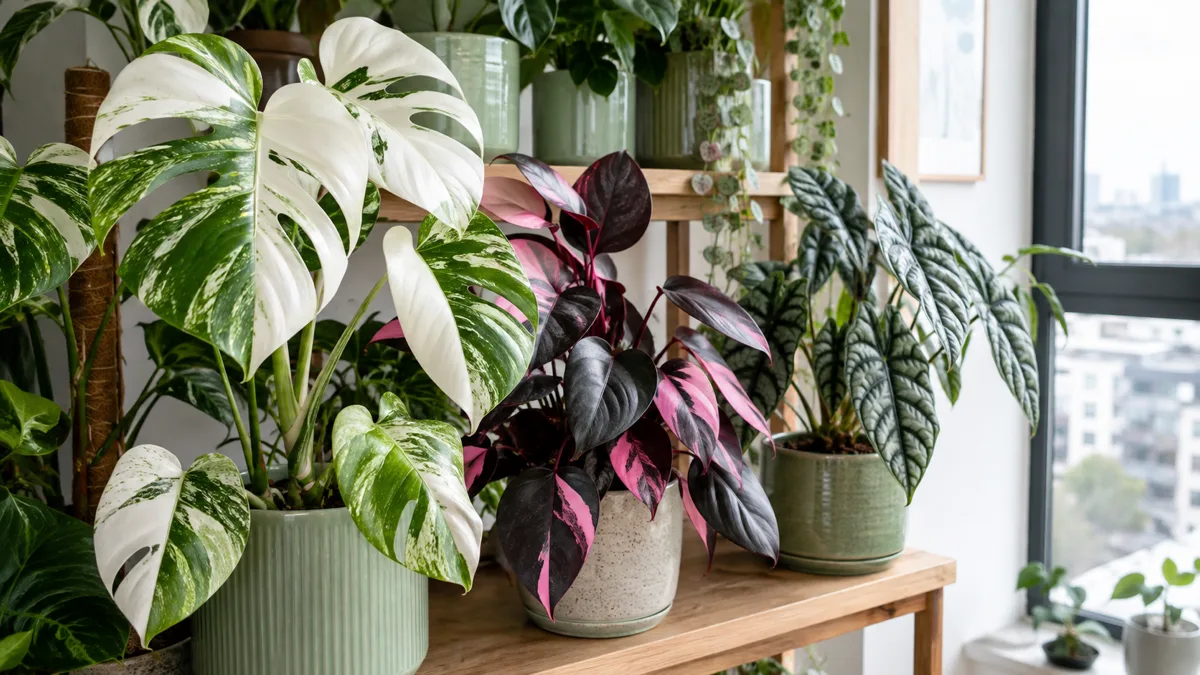
A terrarium turns a glass container into a self-sustaining pocket of green. No yard required, no dedicated windowsill, no daily watering schedule — just a clear vessel, the right plants, and a few layers of substrate that keep everything alive.
The concept dates back to the 1840s when Nathaniel Bagshaw Ward grew ferns inside a sealed glass jar by accident. He realized the water cycle inside the container was self-sustaining. Nearly two centuries later, the principle has not changed.
What has changed is the range of setups. These twelve terrarium ideas cover every skill level and light condition, from sealed tropical jars that run for years to open succulent bowls that sit on a sunny ledge.
From self-watering tropical jars to open succulent bowls, each setup includes the exact container, plants, and layers. Tap any to jump to the full build guide.
Closed tropical terrarium in a bell jar
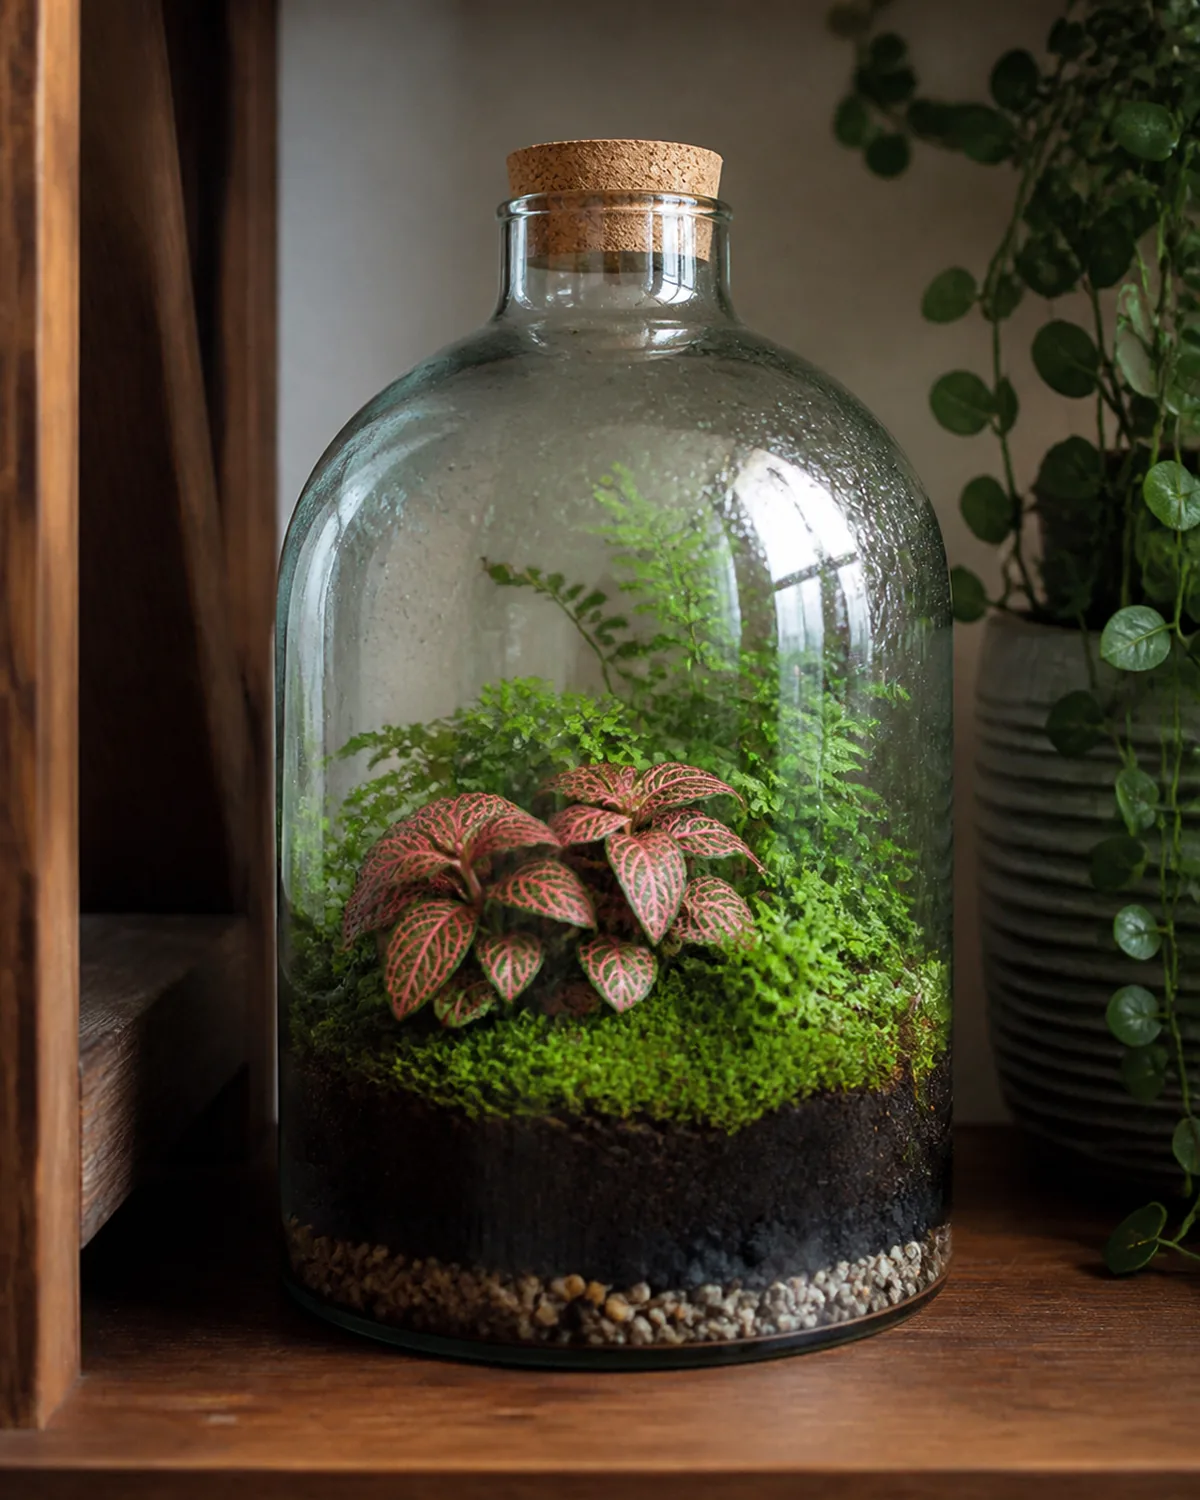
A sealed glass bell jar with tropical plants inside is the closest thing to a set-and-forget garden. The water cycle runs itself — moisture evaporates from the soil, condenses on the glass walls, drips back down to the roots, and the loop repeats indefinitely. Some sealed terrariums have run for over fifty years without being opened.
Start with a bell jar large enough to fit your hand inside for planting — anything under eight inches tall makes positioning plants frustrating.
Layer the bottom with one inch of pebbles for drainage, a thin layer of activated charcoal to absorb odors, a sheet of sphagnum moss to keep soil from sifting into the drainage layer, and two inches of tropical potting mix on top.
The plants that thrive in this sealed, humid environment are Fittonia (nerve plant with its striking pink or white veins), Selaginella (spikemoss that carpets the soil surface), and miniature ferns like Pteris that stay compact. All three tolerate the high humidity and low air circulation that would rot most houseplants.
Seal the jar with a cork or glass lid and place it in bright indirect light. Direct sunlight through sealed glass creates a greenhouse effect that will cook the plants within hours.
The condensation on the glass walls is healthy — wipe it only if the fog becomes so thick you cannot see the plants. Open the lid for thirty minutes once a month to exchange air and remove any dead foliage with long tweezers.
Every setup in this guide works indoors, but some demand more attention than others. Start where your confidence is.
Open succulent bowl on a sunny ledge
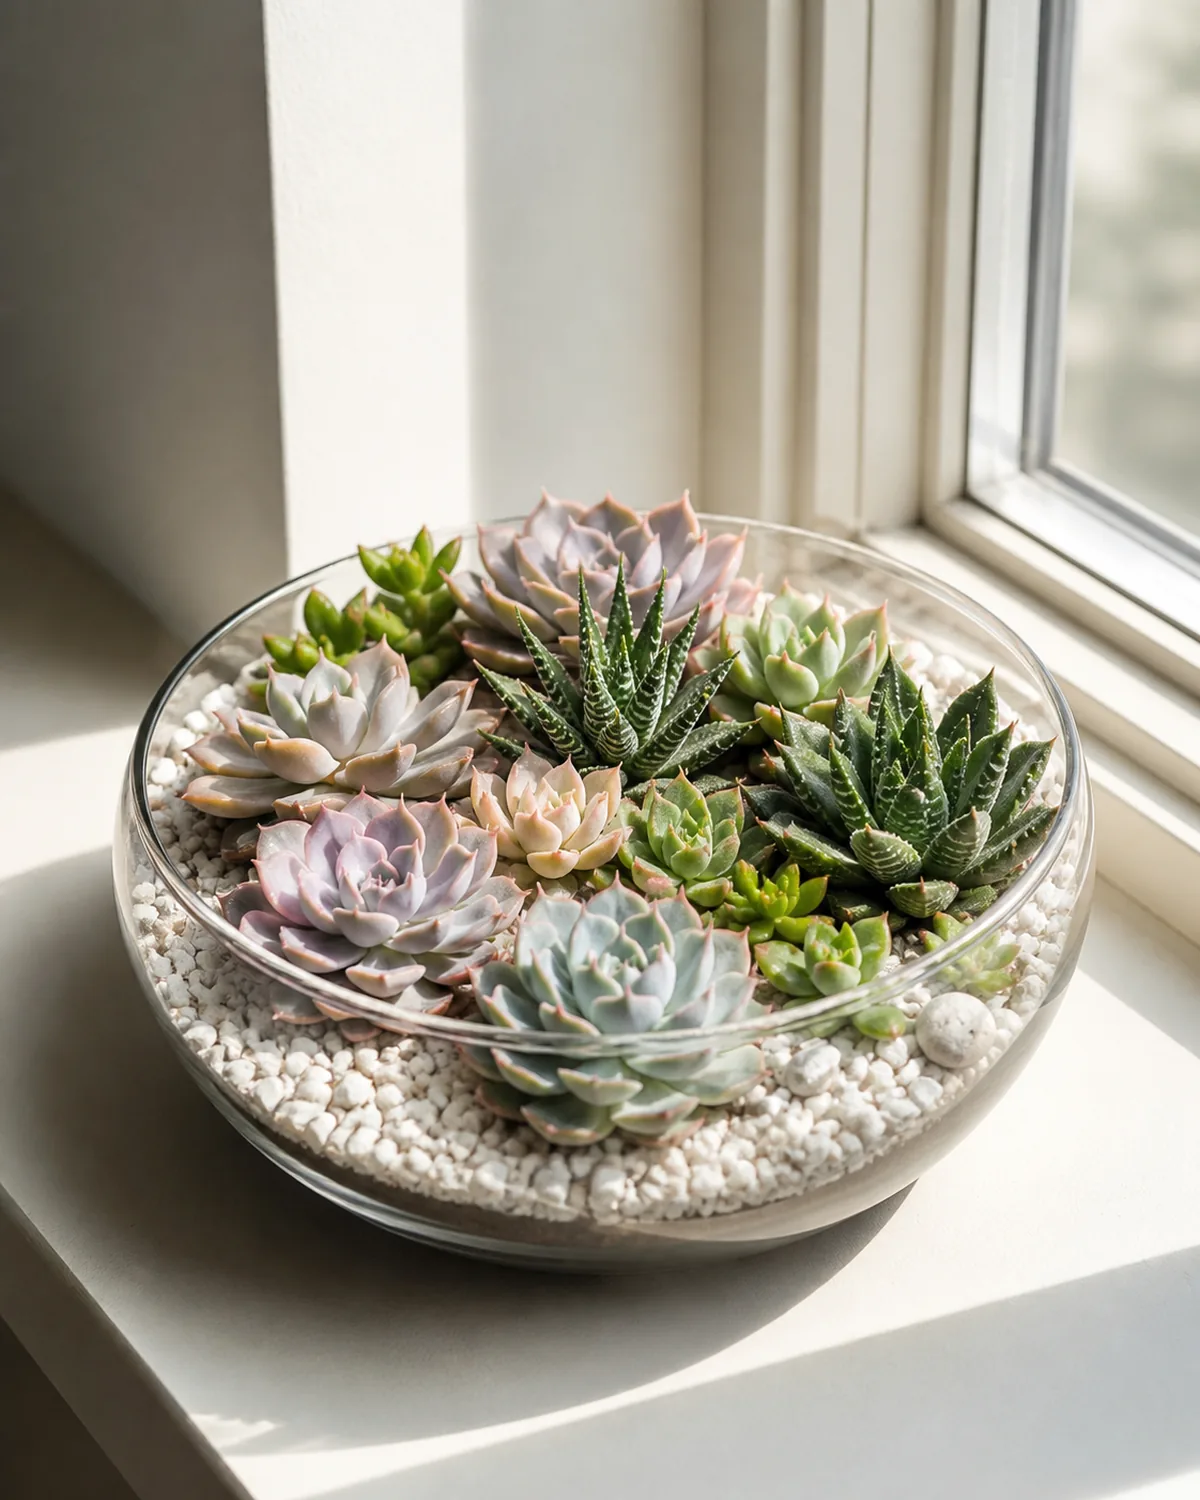
An open succulent terrarium is the exact opposite of a sealed tropical jar. There is no lid, no humidity trap, no self-sustaining water cycle. Everything about it is designed to let moisture escape as quickly as possible, because succulents store water in their leaves and rot when they sit in damp soil.
Use a wide, shallow glass bowl — the kind sold as decorative fruit bowls works perfectly. If the bowl has no drainage hole, create a false-bottom drainage layer by filling the first inch with coarse pebbles or perlite before adding cactus mix soil. The gravel gives excess water somewhere to go that is not touching the roots.
Plant a mix of textures: Echeveria rosettes for the focal point, striped Haworthia for height contrast, and Sedum as a low ground cover that spills over the edges.
Top-dress the soil surface with white decorative gravel or crushed granite. This keeps the soil from splashing onto the leaves during watering, prevents algae growth on the exposed surface, and makes the whole arrangement look intentional.
Place the bowl where it gets four to six hours of direct sunlight — a south-facing windowsill is ideal. Water only when the soil is completely dry, typically every two to three weeks depending on the season.
The most common mistake with this terrarium is choosing a container that looks beautiful but traps water. If you cannot drill a drainage hole, the pebble layer and extremely careful watering are your only protection.
Moss landscape in a geometric terrarium
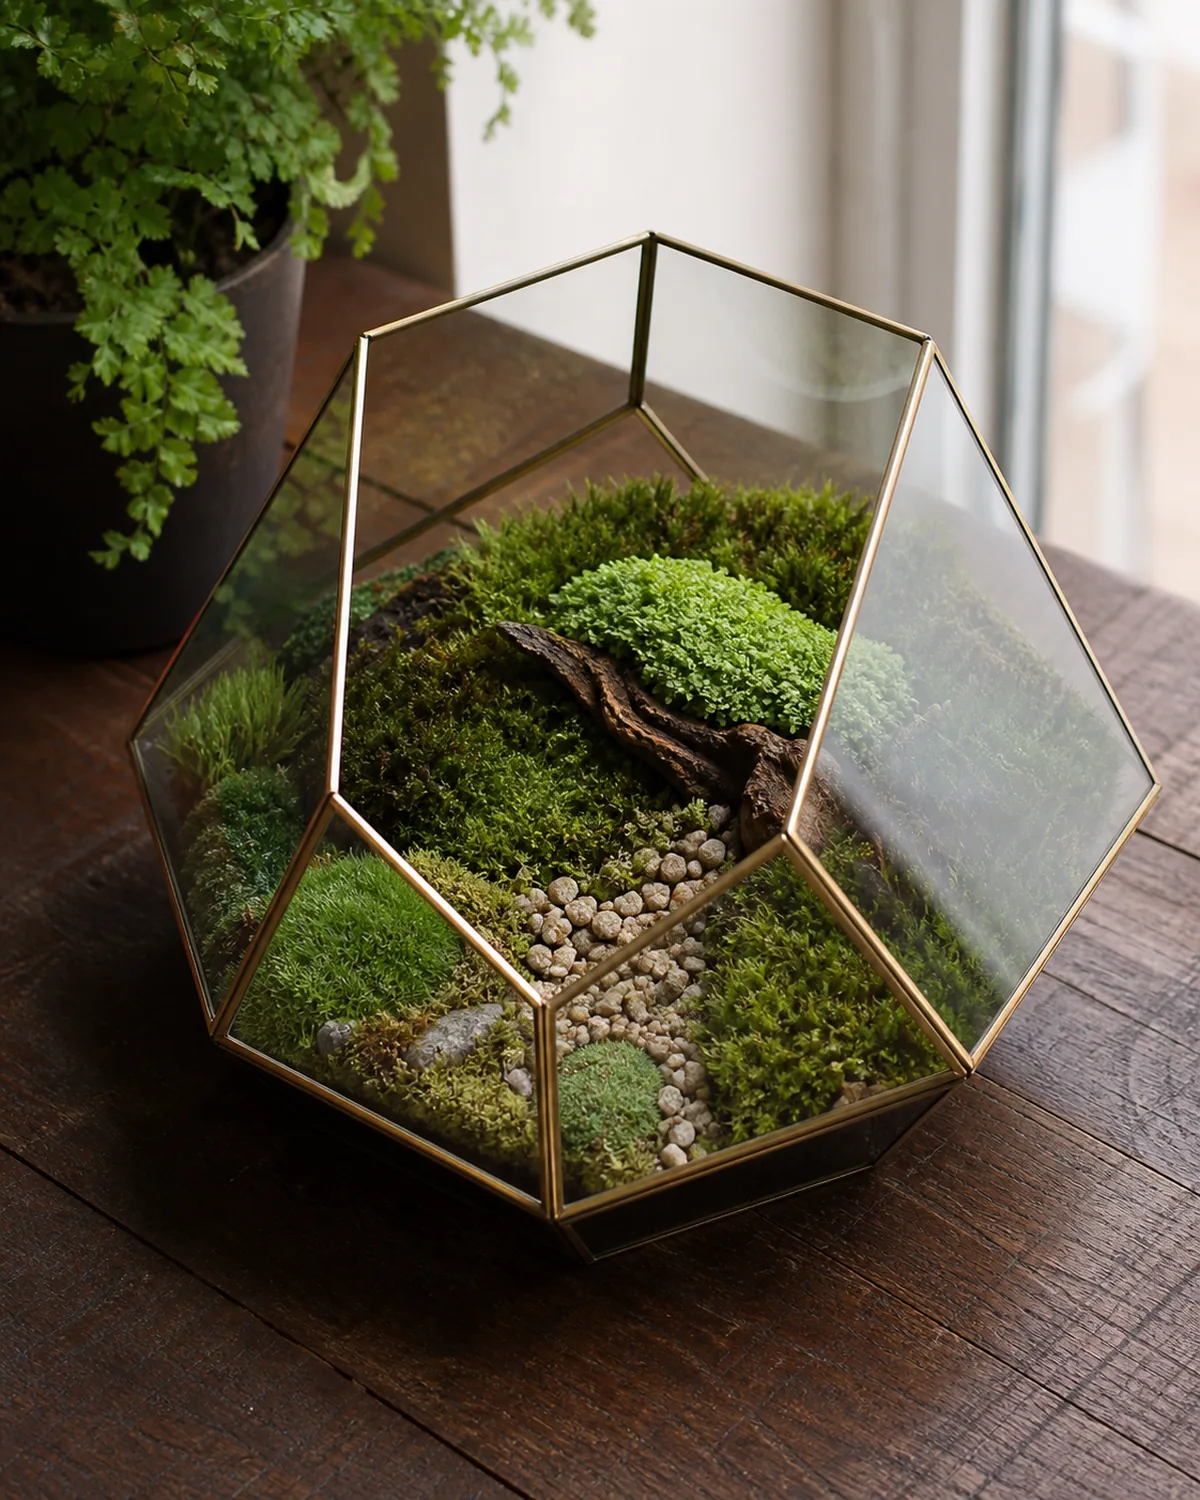
A moss terrarium is the most forgiving setup on this list because mosses have no true roots to rot, no flowers to deadhead, and no stems to prune. They grow as living carpets that need only consistent moisture and shade.
Use a low geometric terrarium — the brass-and-glass frames that have become ubiquitous in home decor stores are perfect because they sit open at the top and provide air circulation while still trapping enough humidity near the moss surface. Fill the base with a thin layer of gravel, then a layer of peat-based soil, then the mosses themselves pressed firmly into contact with the substrate.
Combine three moss types for texture variety: sheet moss (Hypnum) as the primary ground cover, mood moss (Dicranum) for the taller mounded sections that create hills, and pillow moss for the rounded cushion shapes that break up the flat carpet. Arrange them to mimic a forest floor — the sheet moss as open meadow, the mood moss as undergrowth, the pillow moss as mossy boulders.
Add a few decorative elements to sell the scale: miniature stones laid as a winding path, a small piece of driftwood positioned as a fallen log, a tiny patch of bare gravel as a dry creek bed. The result reads as a miniature landscape viewed from above.
Mist the moss two to three times per week — enough to keep the surface damp but not waterlogged. Never place a moss terrarium in direct sunlight. Mosses evolved on the forest floor under dense canopy; direct sun bleaches them to brown straw within days. Indirect light or even a north-facing windowsill provides exactly what they need.
Fern grotto in a large apothecary jar
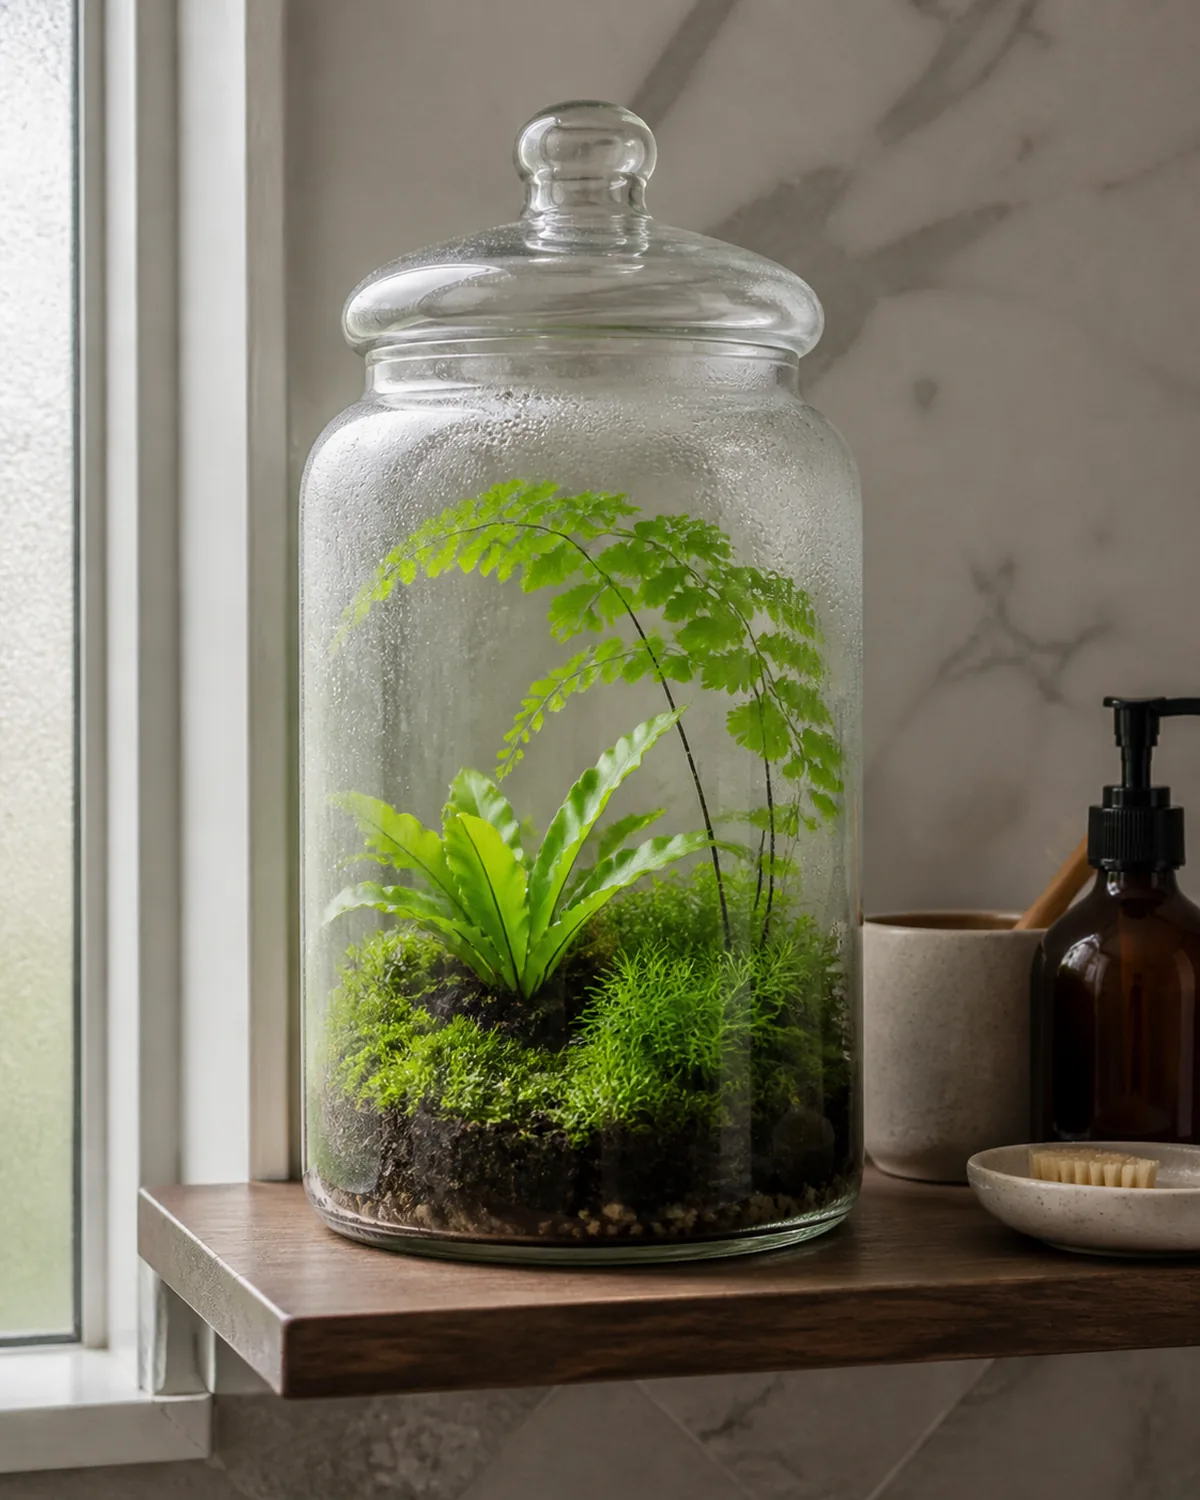
Ferns evolved in humid understory environments where the air stays moist and the light stays soft. A tall apothecary jar recreates those conditions almost perfectly — the height gives arching fronds room to unfurl, the glass walls trap humidity, and the removable lid lets you control ventilation without dismantling the setup.
The plant combination that works best in this container is Adiantum (maidenhair fern) as the star specimen with its delicate, fan-shaped leaflets on wiry black stems, Asplenium nidus (bird's nest fern) as a contrasting bold-leaved anchor, and Selaginella spikemoss carpeting the soil surface to retain surface moisture and prevent the substrate from drying unevenly.
Maidenhair fern is notoriously difficult as a standalone houseplant because it demands humidity above sixty percent — a level most homes never reach. Inside a sealed or semi-sealed jar, that humidity level is the default. The jar solves the one problem that kills maidenhair ferns in every other setting.
Keep the soil consistently moist but not waterlogged. Unlike the closed tropical terrarium that recycles its own water, a fern grotto with an apothecary lid benefits from being opened slightly more often — every week or two — because ferns need more fresh air circulation than fittonia or mosses. If you see browning frond tips, the air inside is too stagnant; leave the lid off for a full day.
The best location is a bathroom shelf near a frosted window. The ambient humidity from showers supplements the jar's internal moisture, and the diffused light through frosted glass is exactly the intensity ferns prefer.
Air plant terrarium without any soil
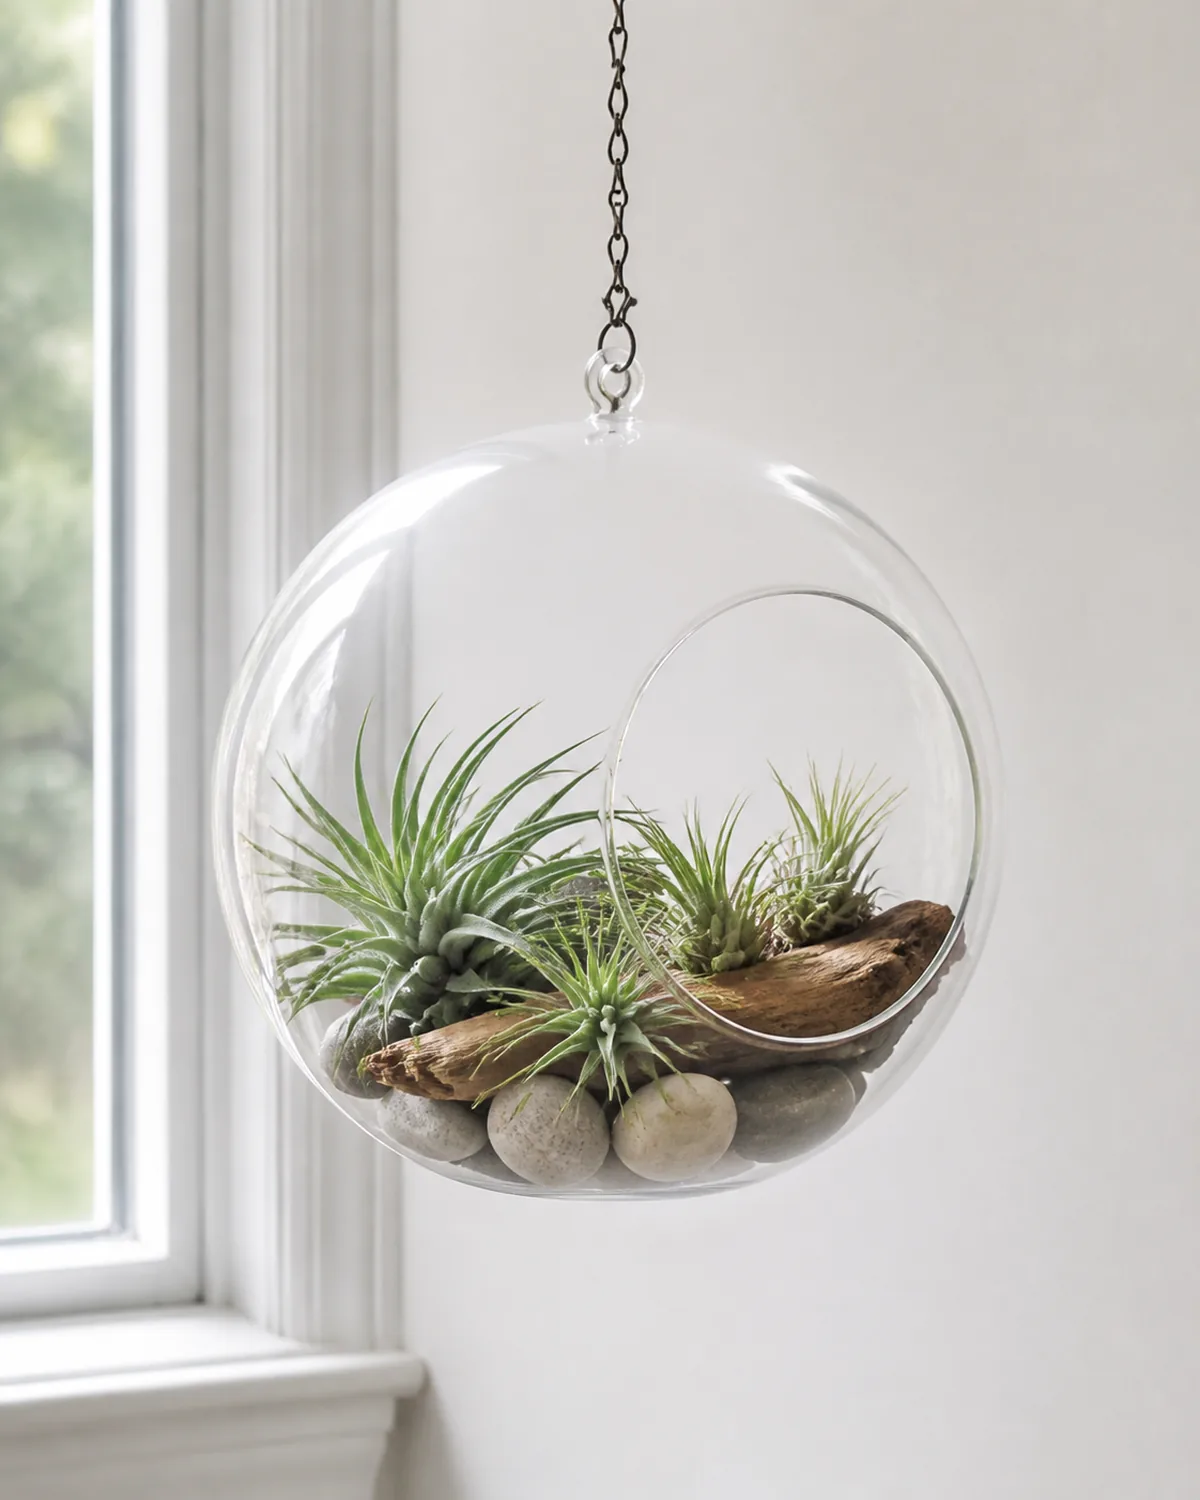
Air plants — Tillandsia species — absorb water and nutrients through specialized cells on their leaves called trichomes. They have no functional root system for water uptake, which means they need no soil, no drainage layer, no charcoal, no substrate of any kind. An air plant terrarium is the simplest build possible: glass container, decorative base material, plants.
Use an open glass globe or hanging teardrop with a wide opening. The container must remain unsealed because Tillandsia rots rapidly in trapped humidity — the opposite of every other terrarium on this list. Place smooth river stones, sea glass, or small pieces of driftwood inside the globe as a base, then nestle the air plants on top.
Combine Tillandsia ionantha (compact, turns red before blooming) with T. xerographica (the large silver curling rosette) and T. caput-medusae (snake-like twisted leaves) for a range of textures and sizes.
The maintenance routine is unusual for a terrarium. Once a week, remove the air plants from the glass, soak them in room-temperature water for twenty to thirty minutes, then dry them upside down on a towel before returning them to the container. The upside-down drying step is critical — water trapped in the central crown causes rot, and rot kills an air plant within days.
Between soaks, mist the plants lightly if your home is particularly dry. Place the glass in bright indirect light — air plants tolerate brief direct sun, but the glass magnifies heat enough to damage the thin leaf tissue.
Woodland fairy garden in a wide glass bowl
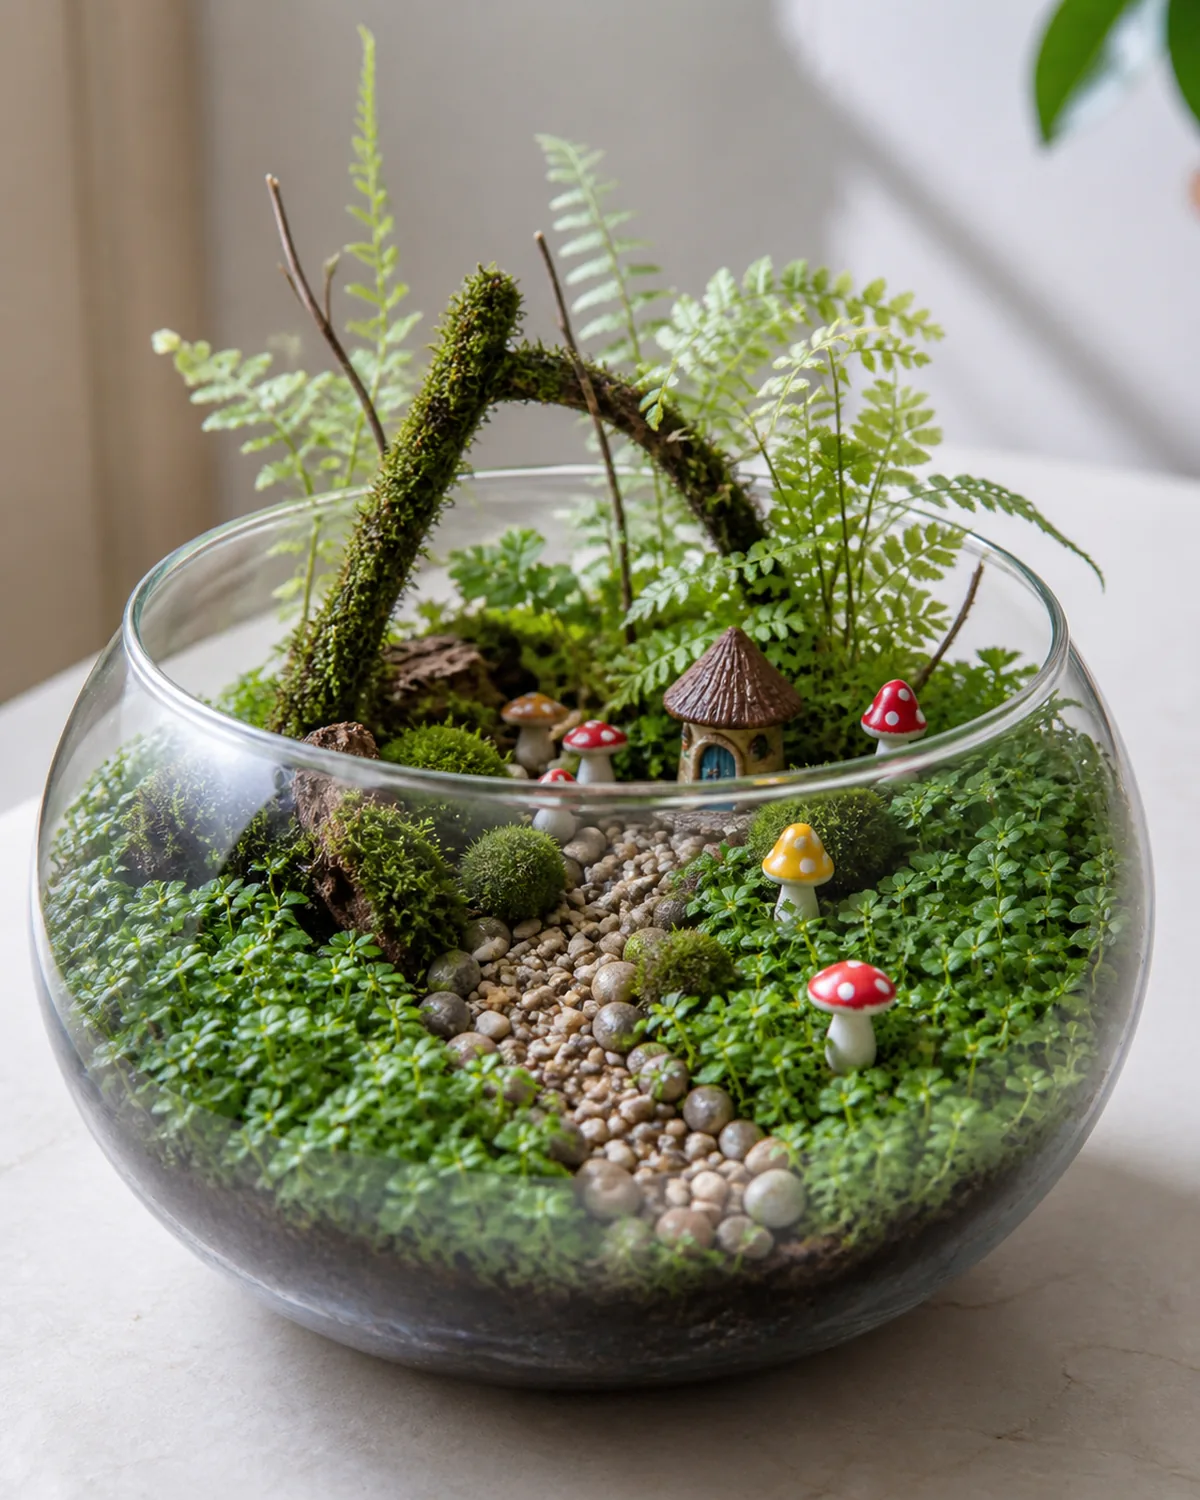
A fairy garden terrarium is where horticulture meets miniature set design. The plants are simple — low-maintenance ground covers and small ferns — but the arrangement tells a story through scale, path, and detail.
Use a wide glass bowl with low sides — twelve to sixteen inches in diameter gives enough room to create depth and perspective.
Plant Soleirolia (baby tears) as the primary ground cover; its tiny bright green leaves read as miniature grass at terrarium scale. Add a small fern or two for height, and train a cutting of creeping fig (Ficus pumila) to vine along a twig positioned as a fallen tree.
The decorative elements are what make this setup distinct. Miniature mushroom stakes, tiny fairy-door figurines, pebble pathways winding between moss mounds, moss-covered twigs positioned as forest logs — all widely available in craft stores or online terrarium supply shops.
The trick to making them look natural is restraint: three or four deliberate accents work better than covering every surface.
Create depth by planting taller elements toward the back of the bowl and low ground cover toward the front. Slope the substrate so the back sits half an inch higher than the front. This creates the illusion of a landscape receding into the distance when viewed from the front.
This is a semi-open terrarium — no lid. Mist two to three times per week to keep the baby tears and moss surfaces damp. Avoid direct sunlight, which dries out the exposed surfaces too quickly. A spot with bright indirect light or even a well-lit shelf in a room that gets ambient daylight is sufficient.
Whether you build a sealed tropical jar or an open succulent bowl, these layers go in the same order every time.
Carnivorous plant bog in a tall cylinder
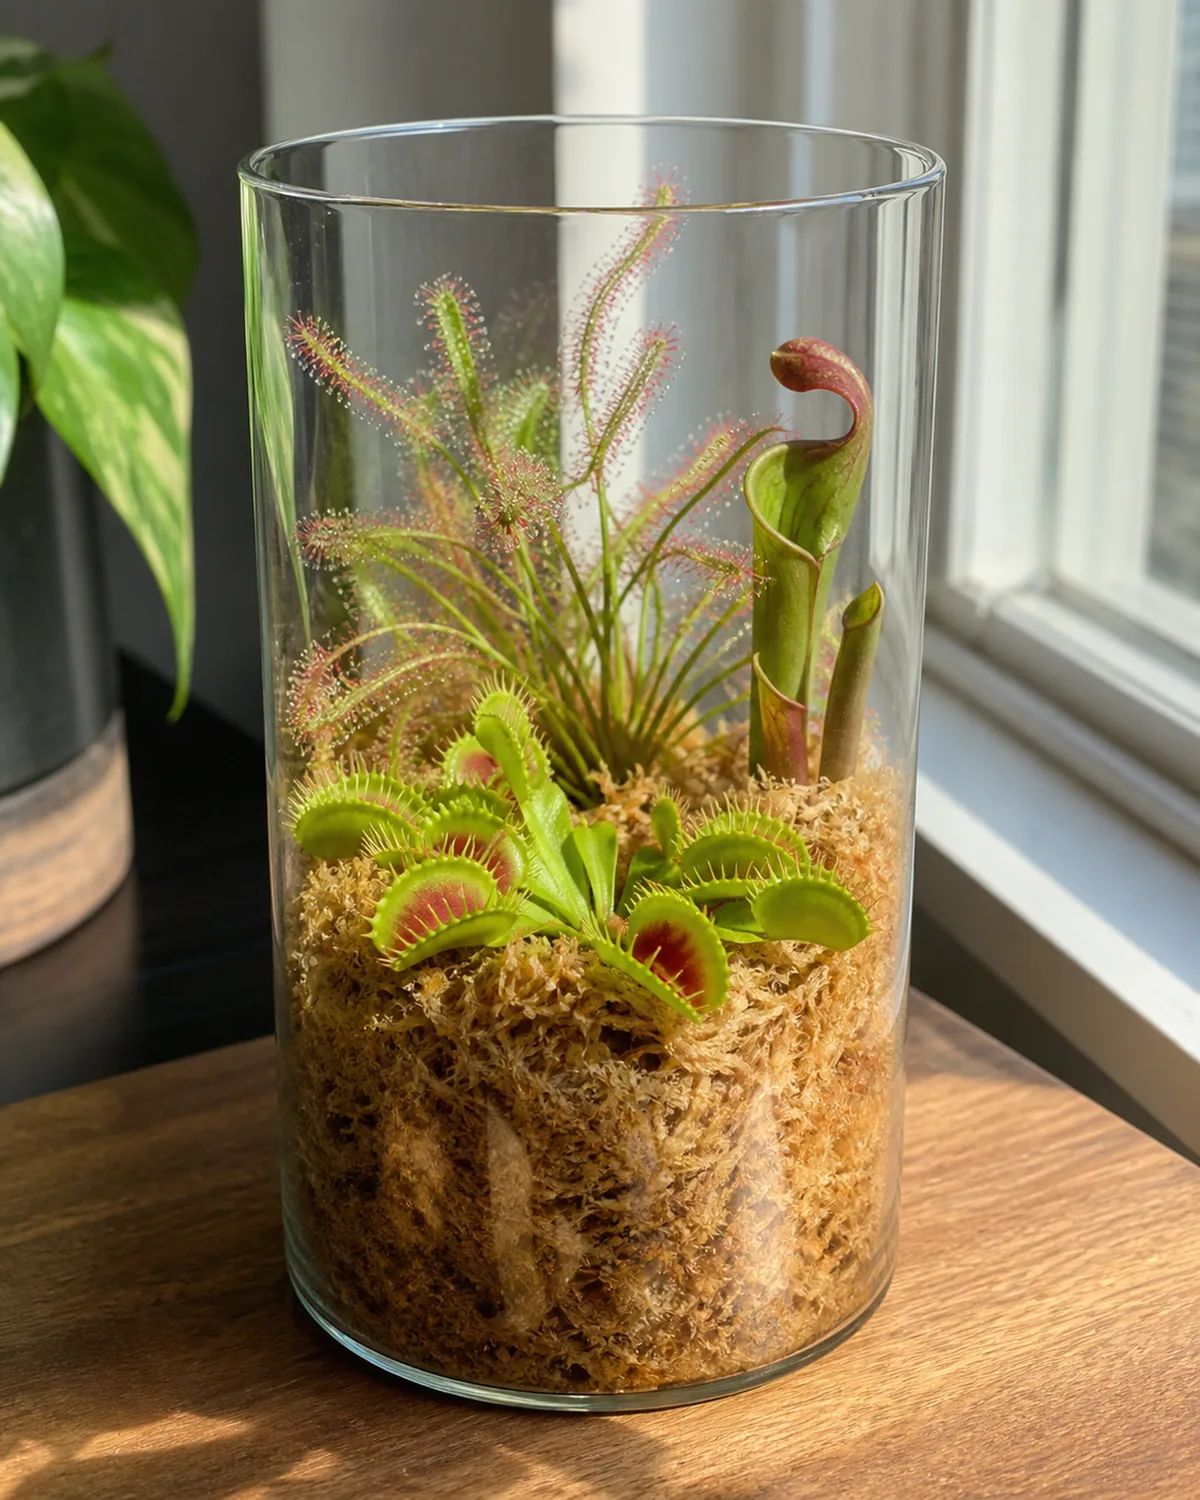
A carnivorous plant terrarium is the only setup on this list where the plants eat insects instead of absorbing nutrients from soil. That reversal changes every rule — the substrate must be nutrient-free, the water must be mineral-free, and the container must stay open so flying insects can enter.
Use a tall clear glass cylinder — the height gives pitcher plants room to grow upright and makes the Venus flytrap traps visible from a viewing angle rather than looking straight down.
Fill the cylinder with a fifty-fifty mix of peat moss and perlite. Do not add activated charcoal, fertilizer, or any enriched potting mix. Carnivorous plants evolved in nutrient-poor bogs and die if their roots encounter standard fertilizer levels.
The classic combination is Dionaea muscipula (Venus flytrap) as the crowd-pleasing centerpiece, Drosera (sundew) with its glistening red-tipped tentacles that trap gnats, and Sarracenia (pitcher plant) with its tall tubular leaves that lure insects into a digestive pool.
All three coexist because they share identical care requirements: full direct sunlight for four to six hours daily, consistently wet peat substrate, and distilled or rainwater only.
The distilled water rule is non-negotiable. Tap water contains dissolved minerals — calcium, chlorine, fluoride — that accumulate in the peat and poison carnivorous plants over weeks. Use distilled water, reverse-osmosis water, or collected rainwater exclusively.
Venus flytraps also require a winter dormancy period of ten to twelve weeks at temperatures between 35 and 50 degrees Fahrenheit. Without this cold rest, the plant exhausts its energy reserves and declines. If you live in a warm climate, an unheated garage or a refrigerator (in its pot, inside a plastic bag) provides the necessary chill.
Herb windowsill terrarium for the kitchen
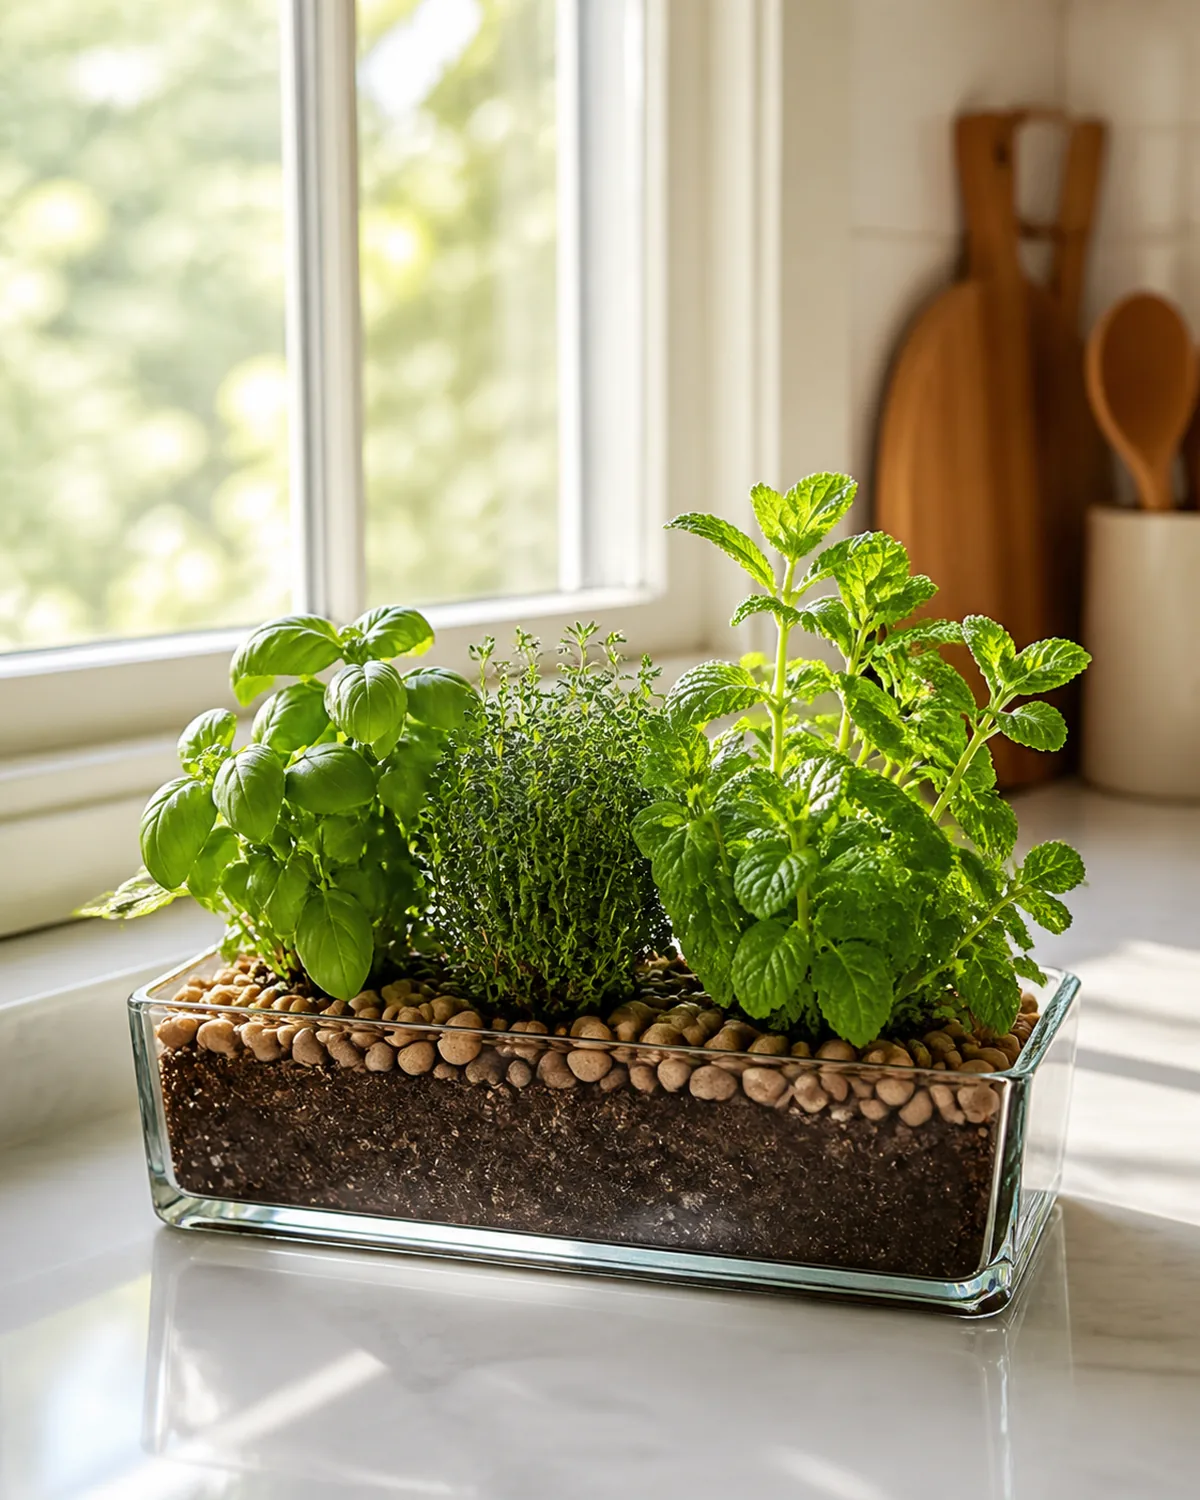
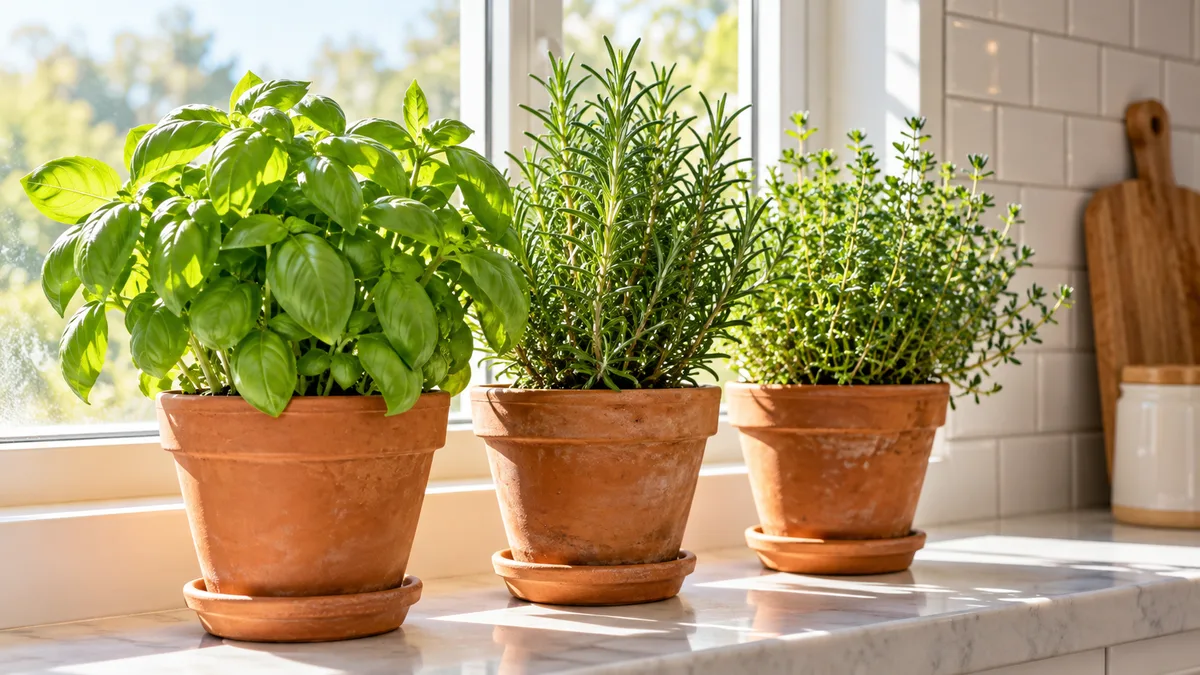
A kitchen herb terrarium is the one setup on this list where you harvest from your garden. The glass container adds a styling element that a row of plastic nursery pots cannot match, and the enclosed sides help retain moisture around herbs that dry out fast on a bare windowsill.
Use a wide rectangular glass container with an open top — herb roots need abundant airflow to avoid rot, so a sealed container is a bad match. If you can find a glass planter with drainage holes, use it. If not, add a generous drainage layer of pebbles and water with extreme restraint.
Plant compact basil, thyme, and mint — but keep the mint in its own section or a separate small pot inside the container. Mint sends out aggressive underground runners that colonize every inch of available soil within weeks, smothering its neighbors. A physical barrier or a separate vessel inside the terrarium prevents this.
Place the terrarium on a windowsill that gets six or more hours of direct sunlight. Herbs are sun-demanding plants that stretch and lose flavor in low light. If your kitchen window faces north or is shaded, a small grow light positioned above the terrarium can compensate.
Harvest regularly by pinching off the top growth. This keeps the herbs compact and bushy rather than tall and leggy, and it stimulates new branching that produces more harvestable foliage. A terrarium herb garden that is never harvested quickly outgrows its container and becomes a tangled mess.
Desert diorama with cacti and sand art
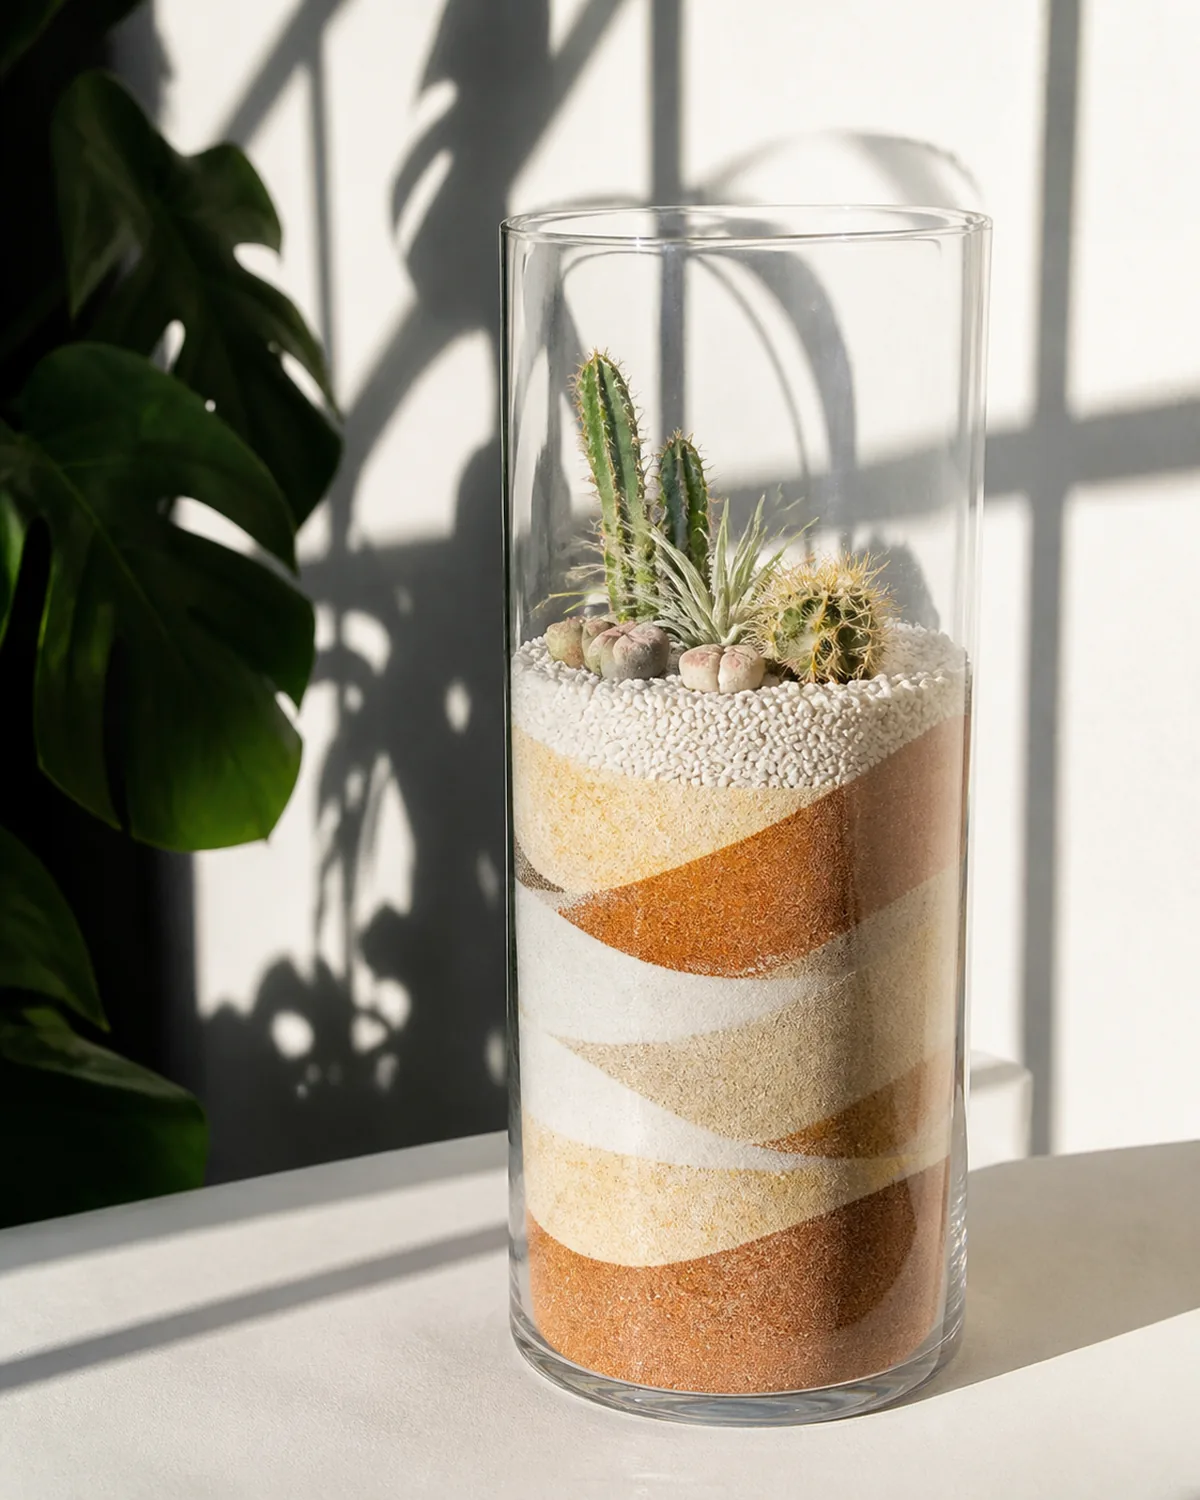
A desert diorama terrarium treats the substrate itself as the main visual element. Layers of colored sand — white, cream, terracotta, black — create visible wave patterns through the glass walls that are as much part of the design as the plants on top.
Use a tall clear cylinder or rectangular aquarium-style container so the sand layers are visible from multiple angles. Pour the sand in alternating colors, tilting the container slightly as you pour each layer to create angled, wave-like strata rather than flat horizontal lines. The pattern is permanent once the plants are added, so take your time with this step.
Plant small cacti — Mammillaria (the compact, spiny globe cacti) and Gymnocalycium (chin cactus, some with striking pink or red caps) — directly into the top sand layer. Add Lithops (living stones) between the cacti for a surreal, camouflaged accent.
A single Tillandsia air plant placed among the stones adds a soft organic contrast to the otherwise hard, angular composition.
Handle cacti during planting with folded newspaper or kitchen tongs — even small spines embed painfully in fingertips and are difficult to remove. Set each cactus into a pre-made hole in the sand, press the sand firmly around the base, and top-dress with a contrasting gravel color.
This terrarium needs full direct sunlight and the least water of any setup on this list — once a month or even less during winter. The decorative sand drains rapidly, which is what cacti prefer, but it also means overwatering damage happens fast because there is no organic material to buffer excess moisture.
Four terrarium mistakes that kill plants fast
- 1Sealing succulents in a closed containerSucculents and cacti need air circulation and dry conditions. A sealed jar traps humidity against their leaves and triggers rot within two weeks. Always use an open container for desert plants.
- 2Placing any terrarium in direct afternoon sunGlass amplifies heat. A sealed terrarium in direct sun becomes an oven — internal temperatures can exceed 120 degrees Fahrenheit on a sunny afternoon. Only open succulent and cactus terrariums tolerate direct light, and even those benefit from morning sun rather than harsh afternoon rays.
- 3Overwatering at setup instead of misting lightlyThe impulse is to water generously after planting, but terrariums have no drainage holes. Excess water pools in the gravel layer and creates anaerobic conditions that breed mold. Mist lightly at setup and add water gradually over the first week as you gauge how much the container retains.
- 4Skipping the charcoal layer then wondering about moldActivated charcoal absorbs the organic compounds that feed mold and bacteria. Without it, closed terrariums develop a sour smell and white fuzzy patches within weeks. The charcoal layer costs pennies and prevents the most common terrarium failure mode.
Save this list before you build →
Hanging glass orb with trailing plants
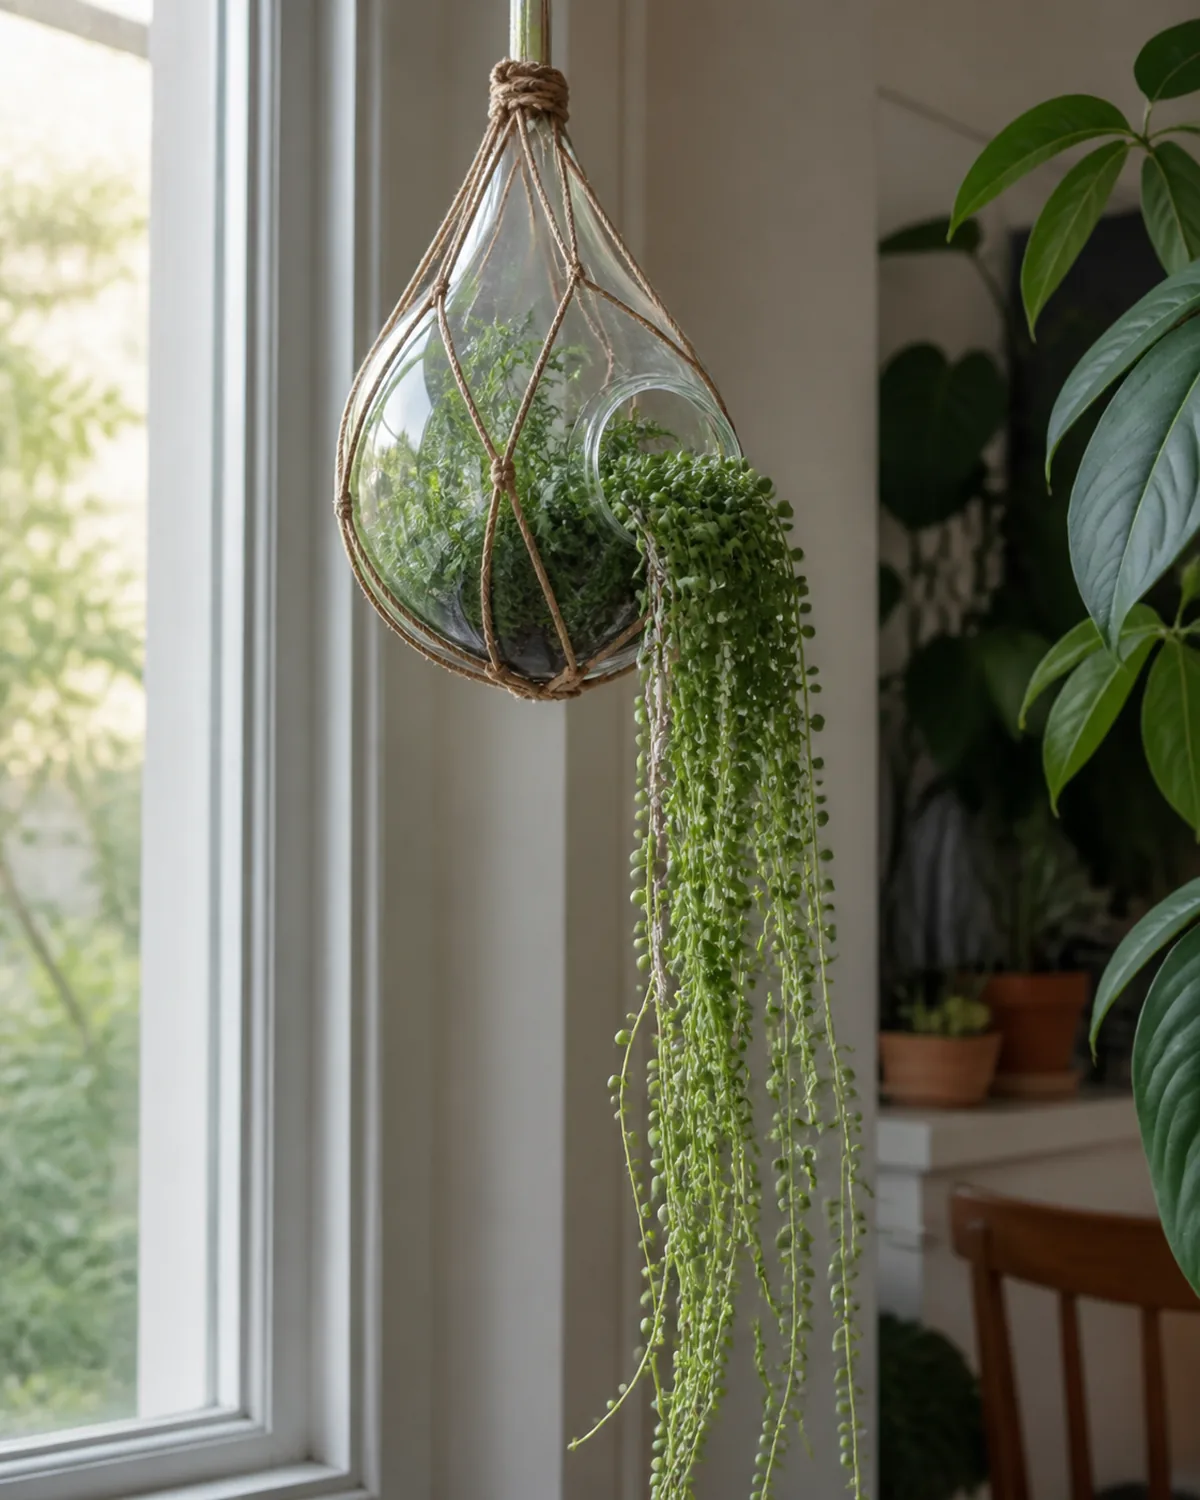
A hanging glass orb turns a terrarium into a suspended sculpture. The spherical or teardrop-shaped glass catches light from every angle, and the trailing plants that spill over the opening create a living pendant effect that no shelf display can replicate.
The container is a clear glass globe or teardrop with a side opening — not a top opening. The side opening lets trailing plants cascade downward naturally while keeping the soil and substrate inside. Hang it from a ceiling hook, a curtain rod bracket, or a macrame hanger positioned near a bright window.
Plant string of pearls (Curio rowleyanus) as the trailing element — its bead-shaped succulent leaves are the visual payoff when they cascade over the glass edge and dangle below the orb. Inside the globe, tuck Selaginella or small fittonia as a ground cover that fills the interior with green texture.
Water carefully with a squeeze bottle — there is no drainage in a hanging orb, and excess water will drip through the opening onto whatever is below. Add water slowly, a tablespoon at a time, until the substrate is damp but not saturated. Rotate the orb monthly so all sides receive even light; without rotation, the trailing side grows longer while the back side thins out.
This is one of the most photogenic terrarium setups — the light refracting through the glass sphere creates a natural spotlight on the plants inside, and the trailing strands add vertical dimension to a room the way no potted plant on a shelf can.
Bioactive self-cleaning ecosystem terrarium
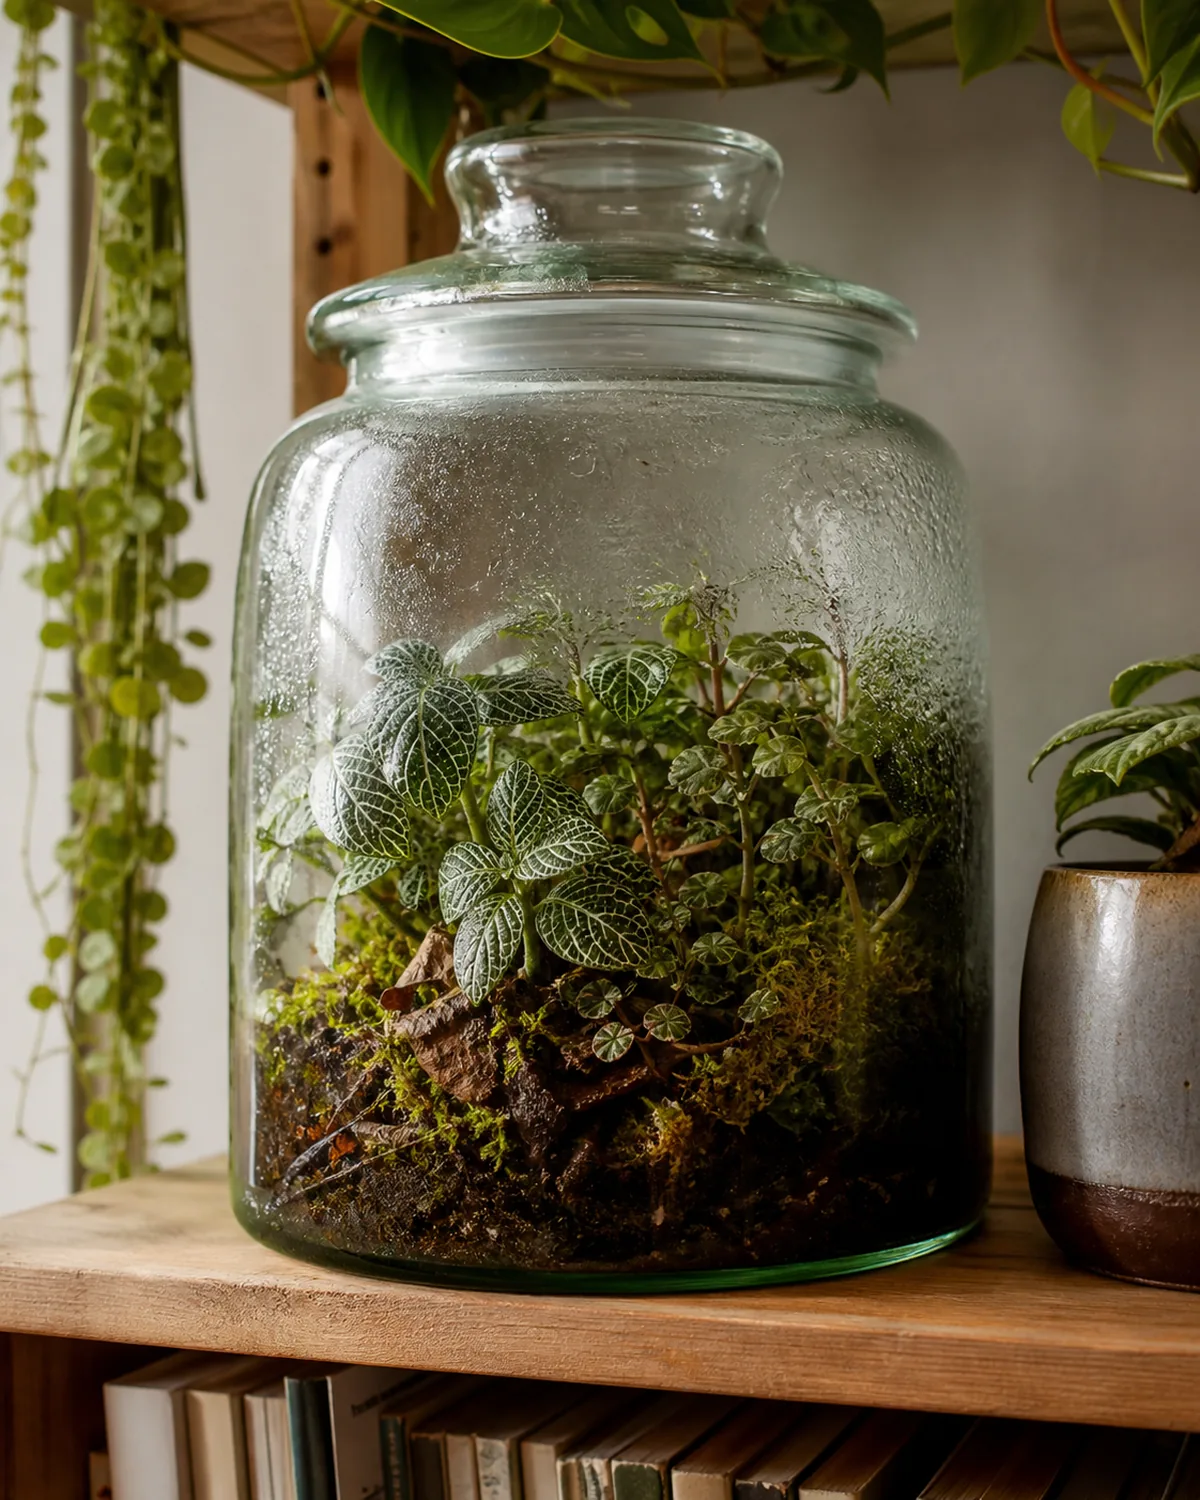
A bioactive terrarium adds a cleanup crew — springtails and isopods — to the standard closed-jar formula. These tiny arthropods eat dead plant material, mold, and fungal growth before it can decompose into the sour-smelling sludge that eventually kills most sealed terrariums.
Use a large sealed glass container — a vintage cookie jar, a purpose-built bioactive terrarium, or any clear jar with a tight-fitting lid. The container needs to be at least a gallon in volume to sustain the microfauna population alongside the plants.
Layer the substrate as normal: drainage pebbles, activated charcoal, sphagnum moss barrier, then a rich tropical soil mix. On top of the soil, add a scattering of dried leaf litter — oak or magnolia leaves are traditional because they decompose slowly and provide ongoing food for the springtails.
Plant Fittonia for color, Peperomia prostrata (string of turtles) for a trailing element that drapes over mossy mounds, and a thick carpet of tropical moss. Then introduce the microfauna: springtails are available as starter cultures from reptile supply shops, sold in small containers of charcoal that you simply sprinkle over the soil surface.
Once the ecosystem establishes — typically within two to four weeks — the terrarium genuinely maintains itself. Springtails reproduce to match their food supply, mold never gains a foothold, dead leaves decompose into nutrients that feed the plants, and the sealed water cycle keeps everything hydrated. Intervention drops to zero except for the occasional visual check through the glass.
This is the most advanced terrarium on this list — not because the plants are difficult, but because the microfauna adds a layer of biological complexity that rewards patience and punishes overcorrection. The temptation to open the lid and adjust something is the biggest threat to a bioactive setup. Leave it sealed.
How to build any terrarium step by step
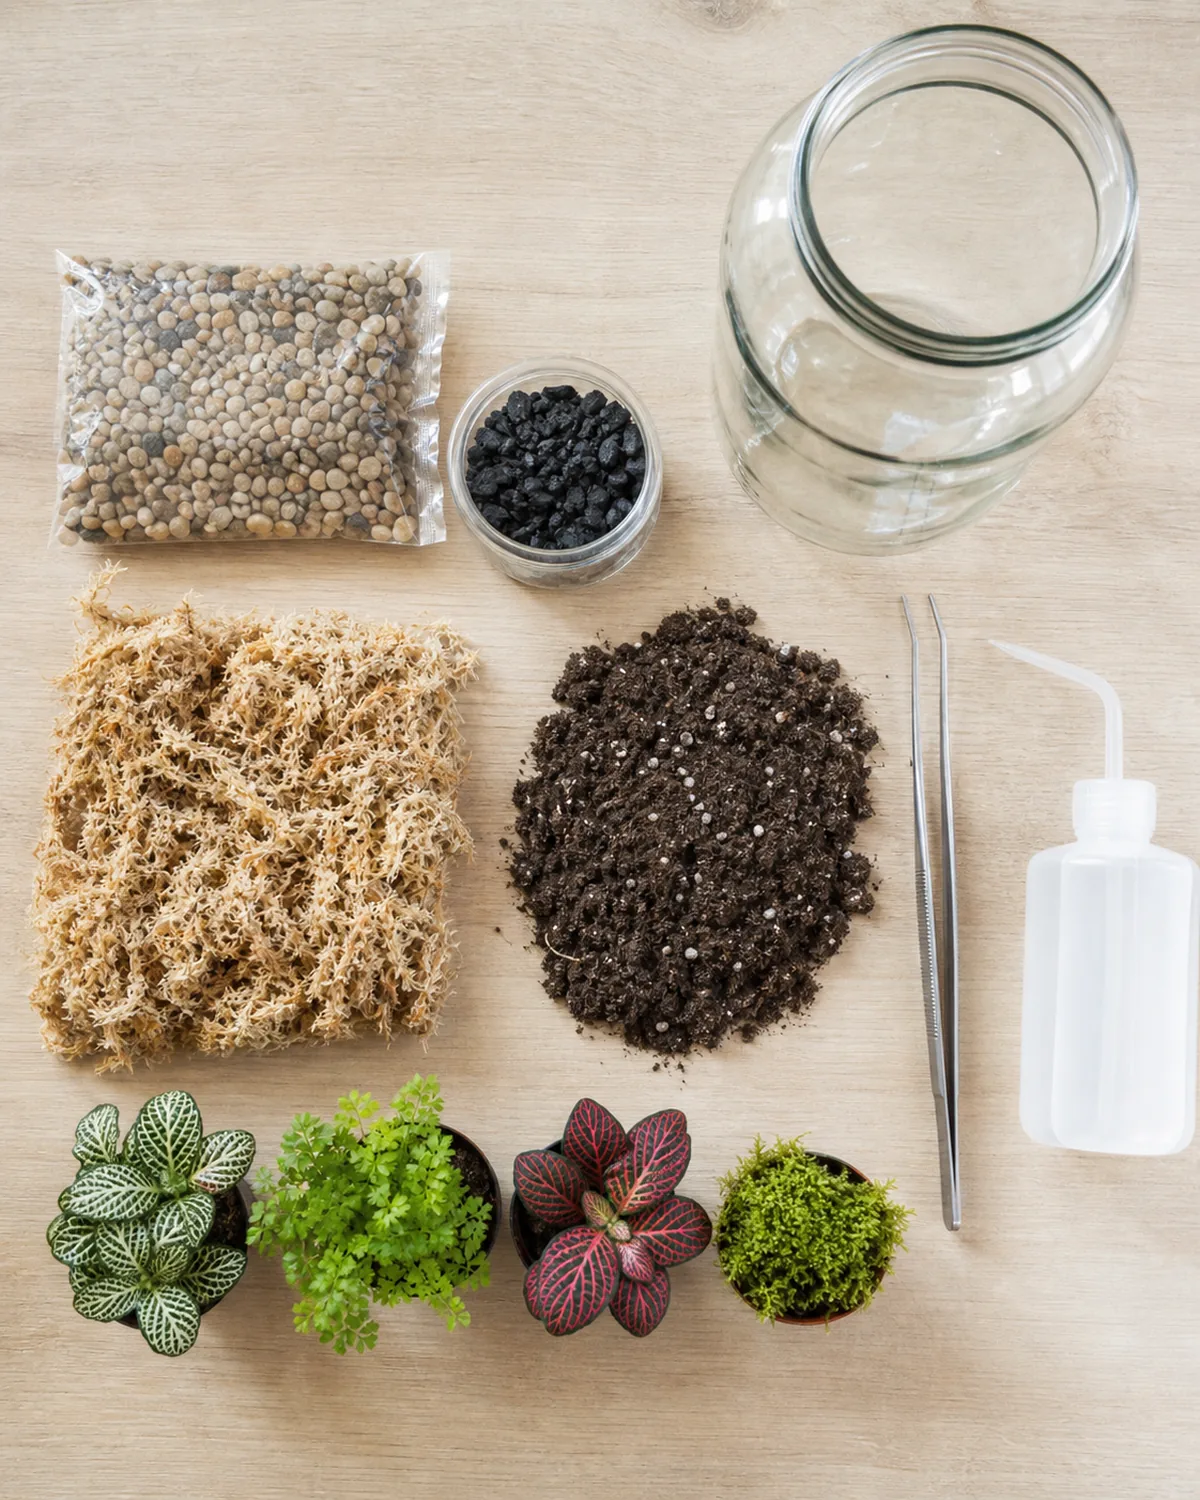
Every terrarium on this list uses the same five-layer foundation and the same basic toolkit. Once you understand the method, you can build any of the twelve setups above — or invent your own.
The five layers go in the same order every time. Drainage pebbles at the bottom (one inch minimum). Activated charcoal on top of the pebbles (a quarter inch). A sheet of sphagnum moss as a barrier between charcoal and soil.
Then the appropriate soil mix — tropical for closed setups, cactus mix for open succulent builds, peat for carnivorous plants. Finally, a decorative topping that finishes the surface and locks the soil in place.
The toolkit is small: long metal tweezers for positioning plants and removing dead foliage in deep containers, a narrow-spouted squeeze bottle for precise watering without disturbing the substrate, a small funnel for pouring gravel and charcoal without dirtying the glass walls, and a chopstick or dowel for making planting holes and pressing soil around roots.
Sealed vs. open is the first decision and it determines everything else. If your plants need humidity above sixty percent — ferns, fittonia, moss — seal the container. If your plants rot in humidity — succulents, cacti, herbs — leave it open.
Mixing sealed-container plants with open-container plants in the same terrarium is the most common failure. A succulent in a sealed jar rots. A fern in an open bowl dries out. Match the container to the plant.
Three mistakes to avoid at setup. First, do not overwater — mist lightly and let the terrarium settle for a few days before adding more. You can always add water; removing it from a sealed container is nearly impossible without dismantling the build.
Second, do not crowd the plants. They will grow — leave at least an inch of space between each plant and the glass walls. Third, clean the glass walls immediately after planting. Soil smudges become nearly impossible to remove once plants have rooted in.
Maintenance calendar. Closed terrariums: open the lid for thirty minutes monthly, remove dead foliage with tweezers, wipe condensation only if visibility is zero. Open terrariums: water weekly for tropicals, every two to three weeks for succulents, mist two to three times weekly for moss.
All terrariums: rotate a quarter turn weekly to prevent lopsided growth toward the light source.