They are barely visible, they multiply every three days, and by the time you notice the webbing the colony is already thousands strong.
Spider mites are the most destructive indoor plant pest because they work invisibly. They pierce leaf cells, drain chlorophyll, and leave stippled yellow foliage that looks like a watering issue until you hold the leaf to light.
This guide covers every step from early detection through treatment to long-term prevention — specific approaches that work at different infestation levels so you can match the response to the problem.
From identifying the first stippled leaf to building a humidity barrier that keeps them from coming back.
- 1 What spider mites actually are
- 2 Early signs you have spider mites
- 2 The white paper test
- 2 Why spider mites target indoor plants
- 2 Water spray as first response
- 2 Neem oil treatment
- 2 Insecticidal soap
- 2 Rubbing alcohol spot treatment
- 2 Predatory mites as biological control
- 2 When to use miticides
- 2 Quarantine protocol
- 2 Plants most vulnerable to spider mites
- 2 Humidity as your best prevention tool
- 2 Recovery after spider mite damage
- 2 Spider mites vs other common pests
What Spider Mites Actually Are
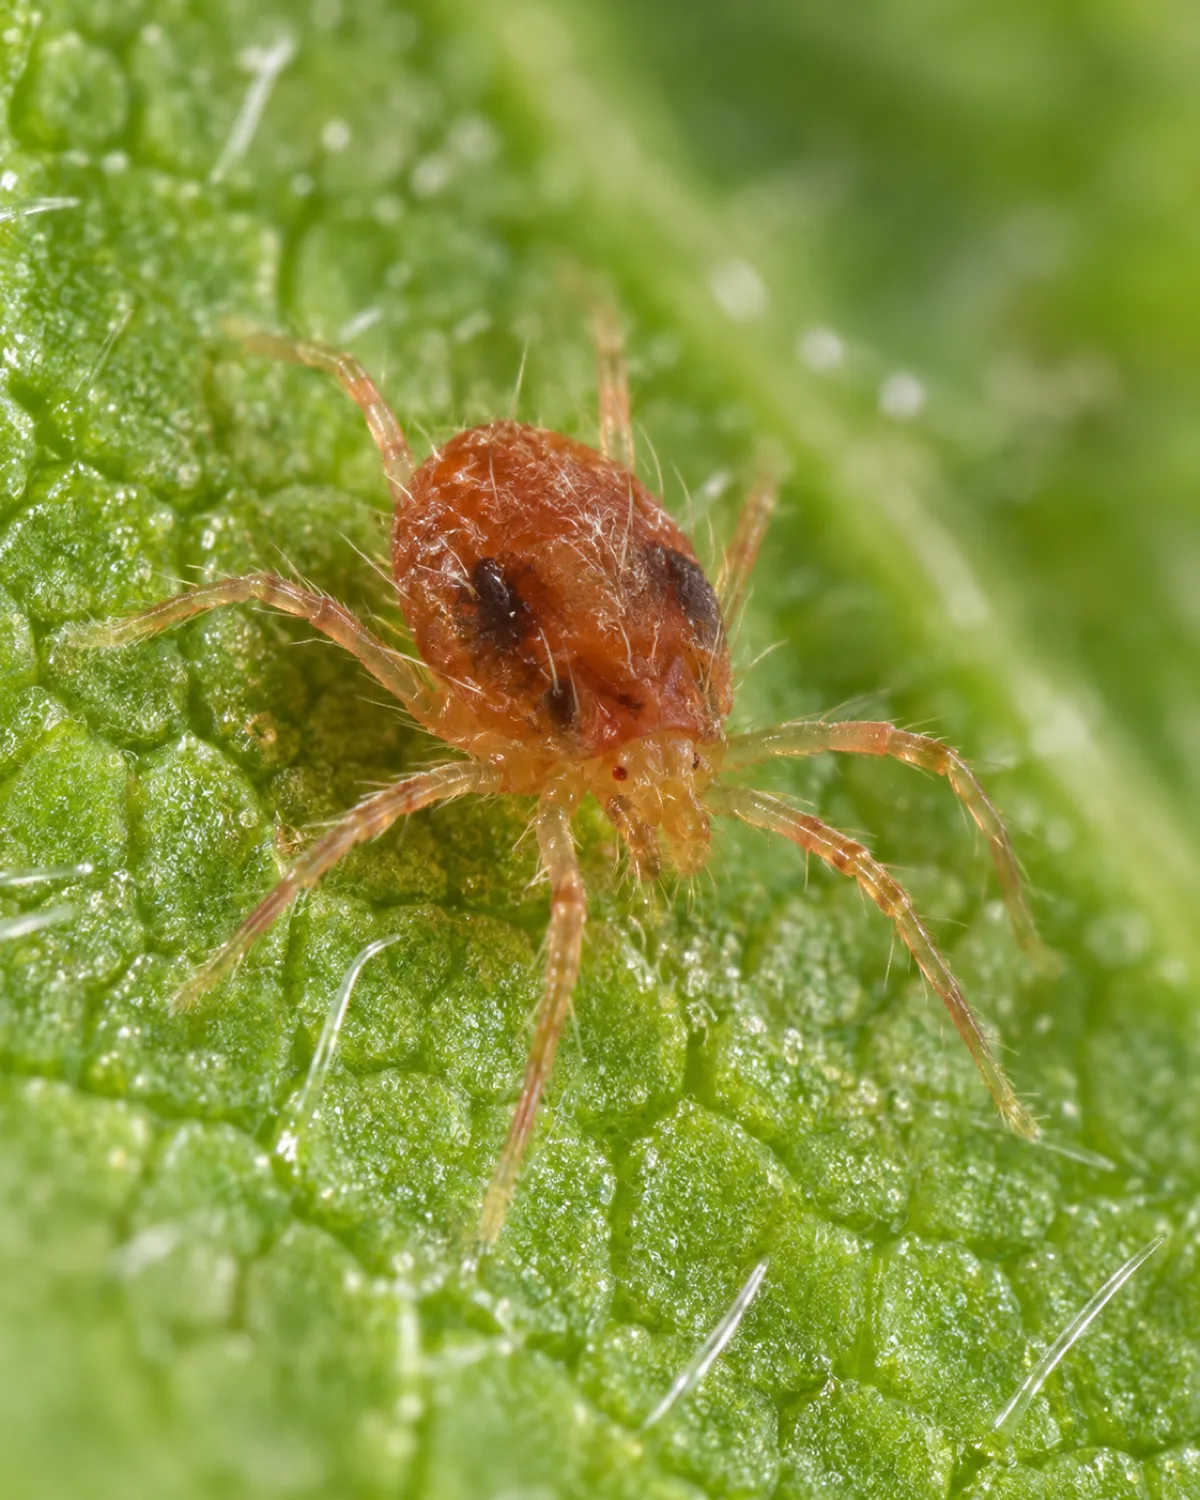
Spider mites are not insects. They belong to the Tetranychidae family of arachnids — relatives of spiders and ticks — and carry eight legs instead of six once they pass the larval stage.
The most common indoor species is the two-spotted spider mite (Tetranychus urticae), named for the two dark spots visible on its back under magnification. At roughly 0.5 mm long, a single mite is barely a speck to the naked eye.
- Feeding method: each mite pierces an individual plant cell with needle-like mouthparts and drains the chlorophyll and cell contents
- Host range: they feed on over 200 plant species, making almost every houseplant a potential target
- The "spider" name: they spin fine silk webbing that protects eggs and helps the colony spread between leaves
- Color variation: they range from pale green or yellow to red or brown depending on species, diet, and season — red mites are often overwintering females
A single mite does negligible damage. The problem is that a single mite is never alone for long.
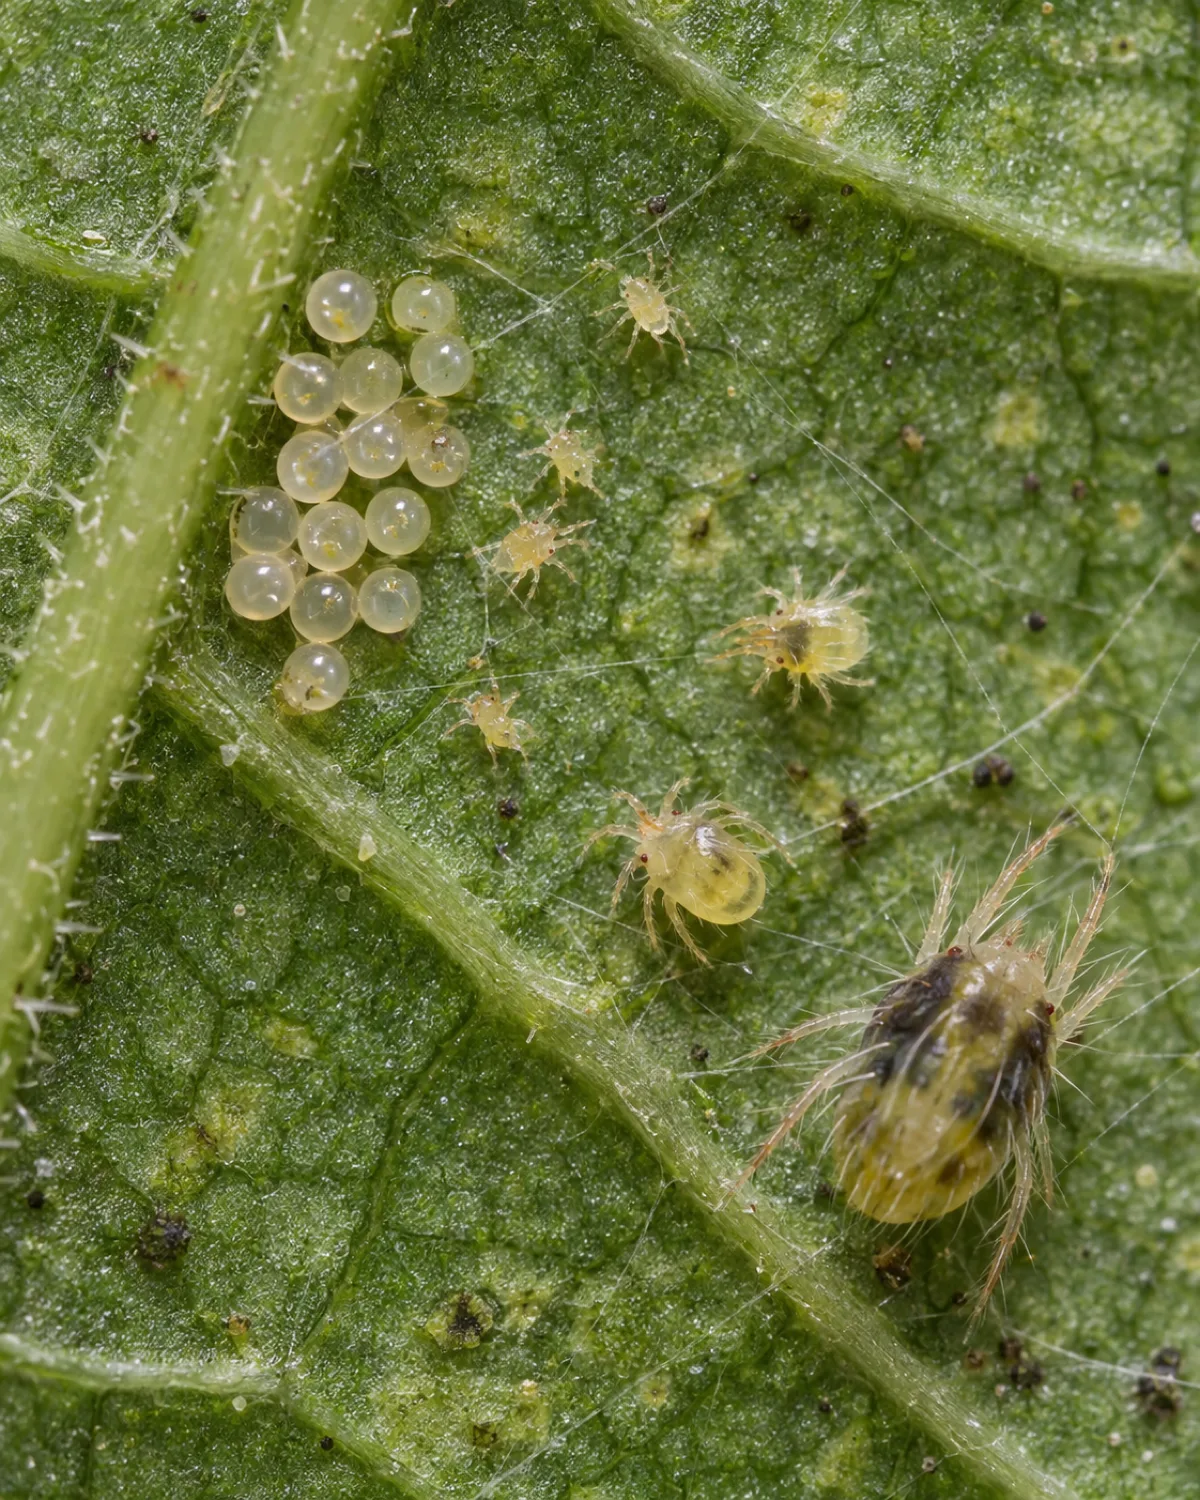
Spider mites go from egg to reproducing adult in five to seven days at typical room temperature. One female lays 100 to 200 eggs in her two-to-four-week lifespan. Those eggs hatch in about three days.
The population math is what makes them terrifying:
- Doubling time: the colony doubles roughly every three days in warm, dry conditions
- Five life stages: egg, six-legged larva, protonymph, deutonymph, eight-legged adult — and all stages can be present on the same leaf simultaneously
- No seasonal pause indoors: outdoors, cold weather slows reproduction; indoors, temperatures stay in their ideal range year-round
- Resistance builds fast: spider mites can develop pesticide resistance in as few as three to five generations, which at their reproduction speed means weeks
This is why a "wait and see" approach fails. By the time webbing is obvious, the colony has been doubling for weeks and the population is in the thousands. Early detection is the single most important factor in successful treatment.
Early Signs You Have Spider Mites
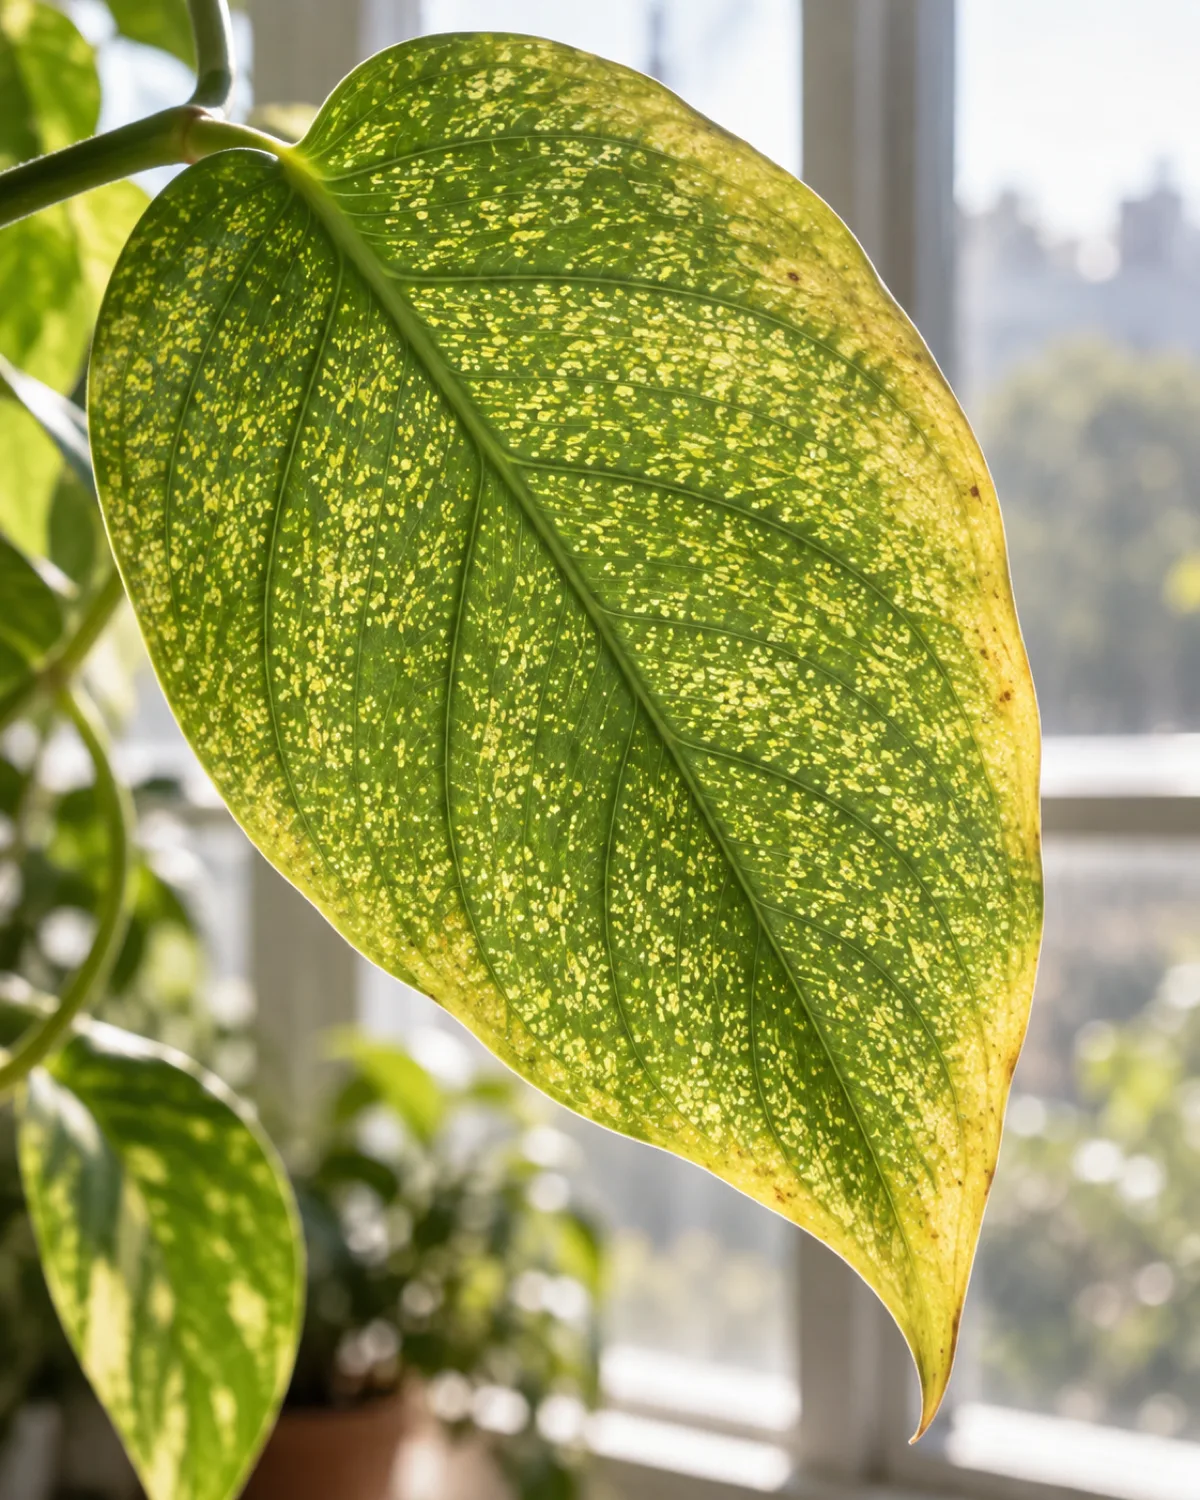
The damage always appears before the mites themselves are visible. Knowing what the early clues look like buys you weeks of response time.
Stippling is the signature sign. Hold a leaf up to bright light and look for dozens of tiny pale dots — each one is a cell that a mite emptied. From the front of the leaf the surface looks faintly speckled or dusty. From the back, you may see the mites themselves as moving specks.
Other early indicators:
- Yellowing that starts at leaf edges and works inward rather than starting from the center or base
- A gritty or dusty texture when you run a finger along the leaf underside
- Fine silk threads in the angles where stems meet or between closely spaced leaves — this appears later but is unmistakable
- Premature leaf drop — leaves falling while still partially green, not following a normal aging pattern
By the time you see dense webbing covering leaf surfaces, the infestation is severe. The goal is to catch things at the stippling stage, when treatment is fastest and most effective.
The White Paper Test for Spider Mites
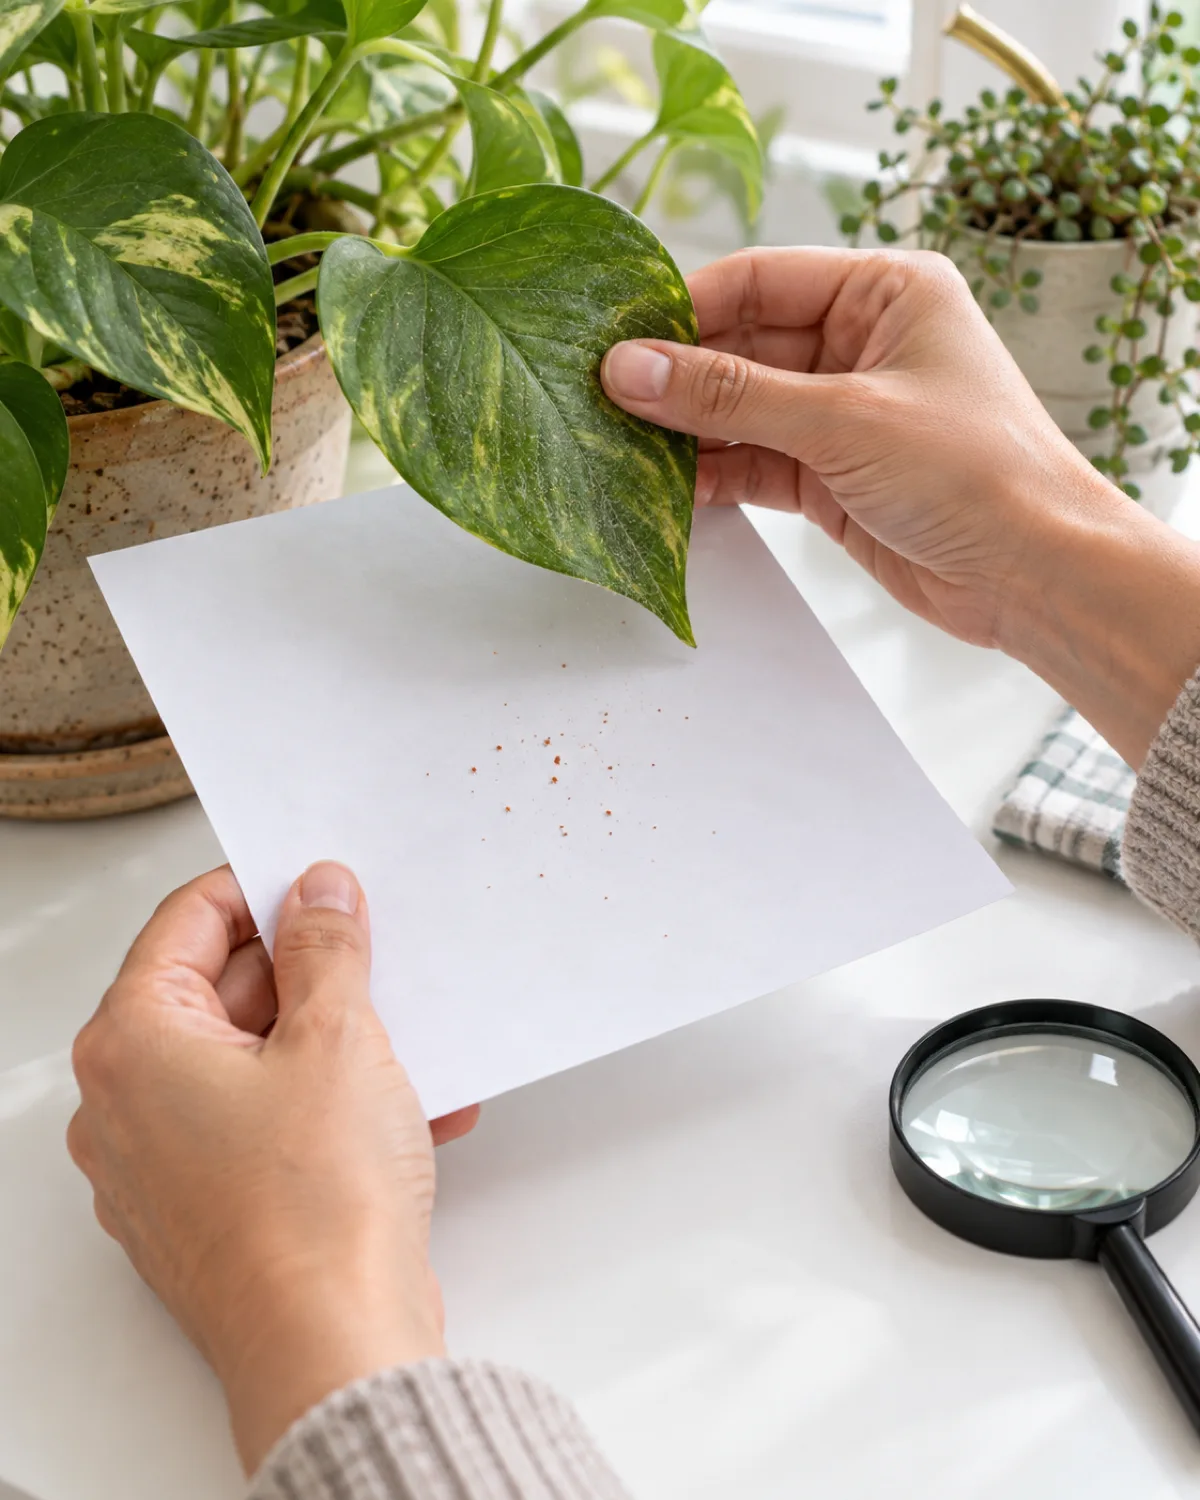
This takes thirty seconds and gives you a definitive answer.
Hold a sheet of white paper under a suspect leaf. Tap the leaf firmly several times. Wait a moment, then look at the paper.
- Moving dots: tiny specks that crawl slowly across the paper confirm live mites
- The streak test: gently squish a few dots with your fingertip — green or reddish-brown streaks mean mites (dust does not streak, and the green color is chlorophyll from their last meal)
- Static dust: if the specks don't move and don't streak, it's just debris
A phone camera in macro mode or a basic magnifying glass makes the test even more conclusive. You can clearly see the oval body shape and legs under magnification.
Run this test on every new plant that enters your home. A two-week quarantine with a paper test at day one and day fourteen catches hitchhikers before they reach your existing collection.
Why Spider Mites Target Indoor Plants
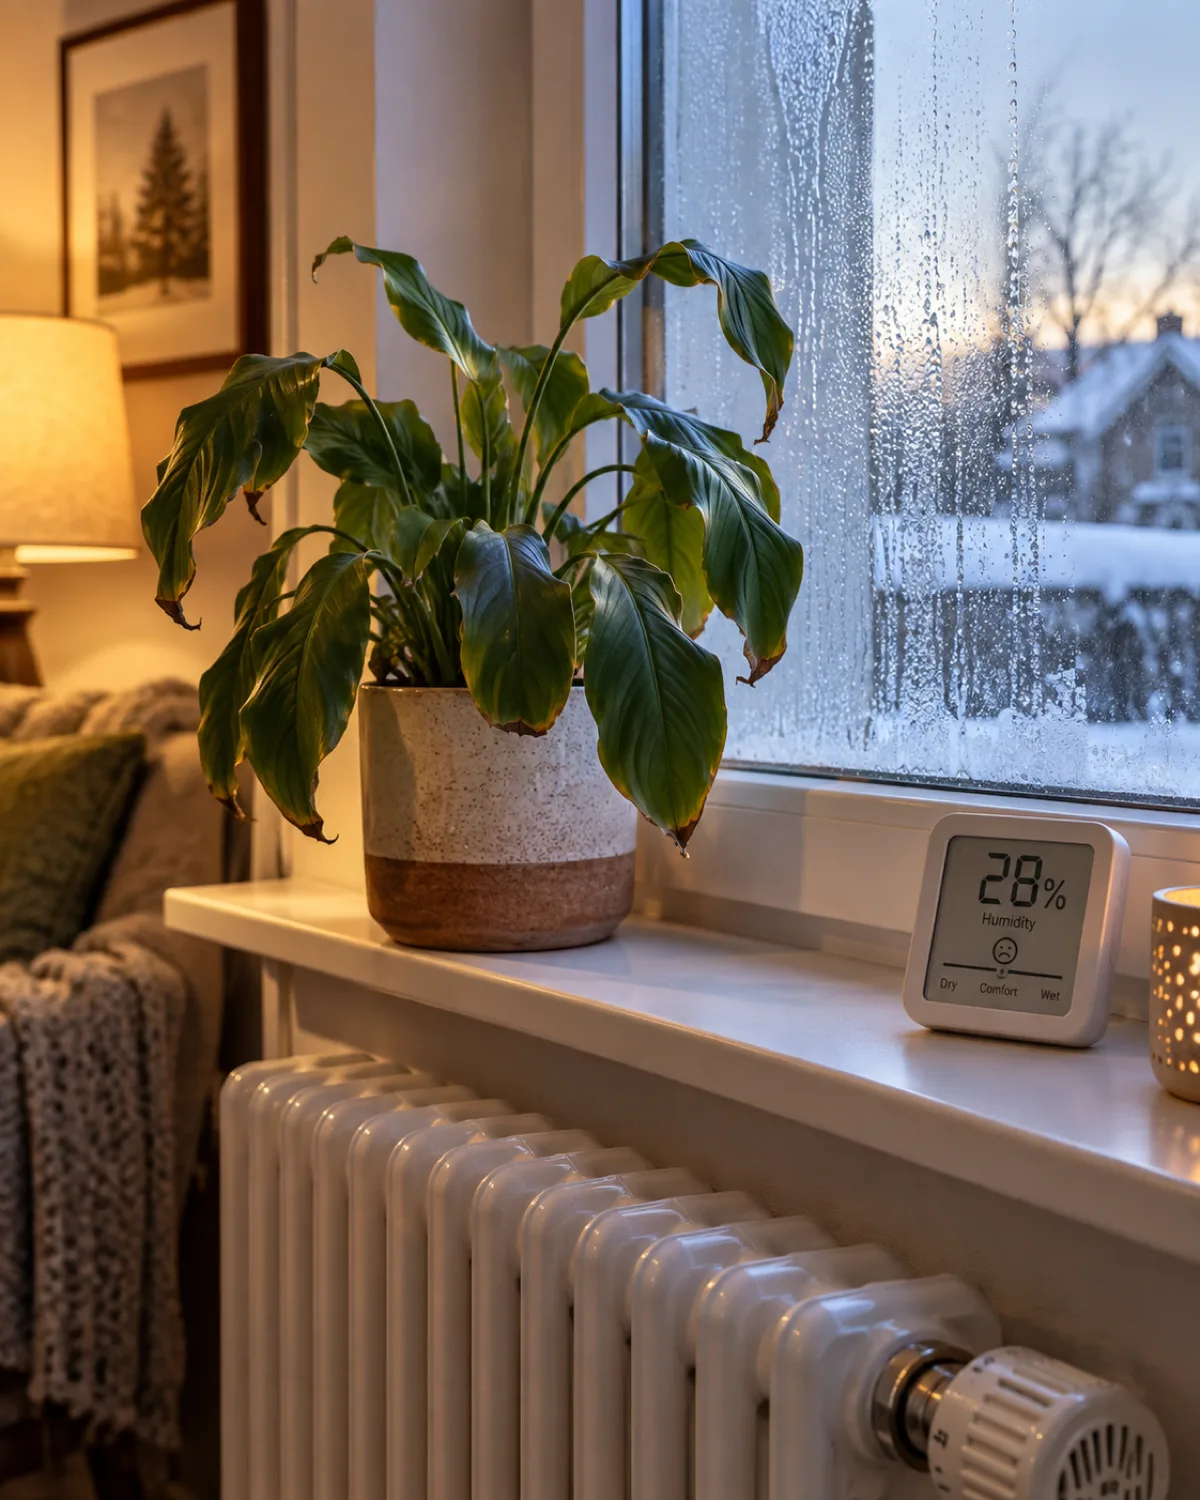
Indoor environments are close to ideal for spider mites, and the same conditions that make your home comfortable make their reproduction faster.
Dry air is their paradise. Spider mites thrive when relative humidity drops below 40 percent. Central heating in winter, air conditioning in summer, and the general lack of air movement indoors all push humidity down into their preferred range.
Other factors working in their favor:
- No natural predators indoors — outdoors, ladybugs, lacewings, and predatory mites keep populations in check; your living room has none of these
- Stressed plants are more vulnerable — underwatered, root-bound, or overfertilized plants have weaker cell walls that are easier for mites to pierce
- Constant warmth — temperatures between 70°F and 85°F (21°C–29°C) accelerate their reproductive cycle to its fastest speed
- Multiple entry points — they hitchhike on new plants from the nursery, drift in through open windows, and ride on clothing, pets, and even cut flowers
The houseplant pests and diseases guide covers the full spectrum of indoor pests, but spider mites are the ones most favored by the standard indoor climate.
Not every infestation needs the same response. Pick the scenario that matches what you see right now.
Water Spray as First Response

A strong stream of water physically knocks mites and eggs off the plant. It is the gentlest treatment, uses no chemicals, and is the right first move for mild infestations caught early.
Take the plant to the sink, shower, or outdoors and spray the undersides of every leaf with a firm stream. The underside is where mites concentrate because it protects them from rain and direct sunlight.
- Frequency: repeat every three to four days for at least two to three weeks — this breaks the lifecycle by dislodging new hatchlings before they mature and lay eggs
- Why it works: mites are poor swimmers and cannot survive being dislodged and waterlogged; the physical force removes eggs that chemical sprays sometimes miss
- Small plant trick: tip the pot upside down (hold the soil in with your palm) and swish the foliage through a basin of water for a thorough rinse
- Protect the soil: cover the pot surface with plastic wrap or a shower cap to prevent the extra water from oversaturating the root zone
Water spraying alone resolves the majority of early-stage infestations. The key is consistency — skipping a session lets surviving eggs hatch and rebuild the population.
Neem Oil Treatment
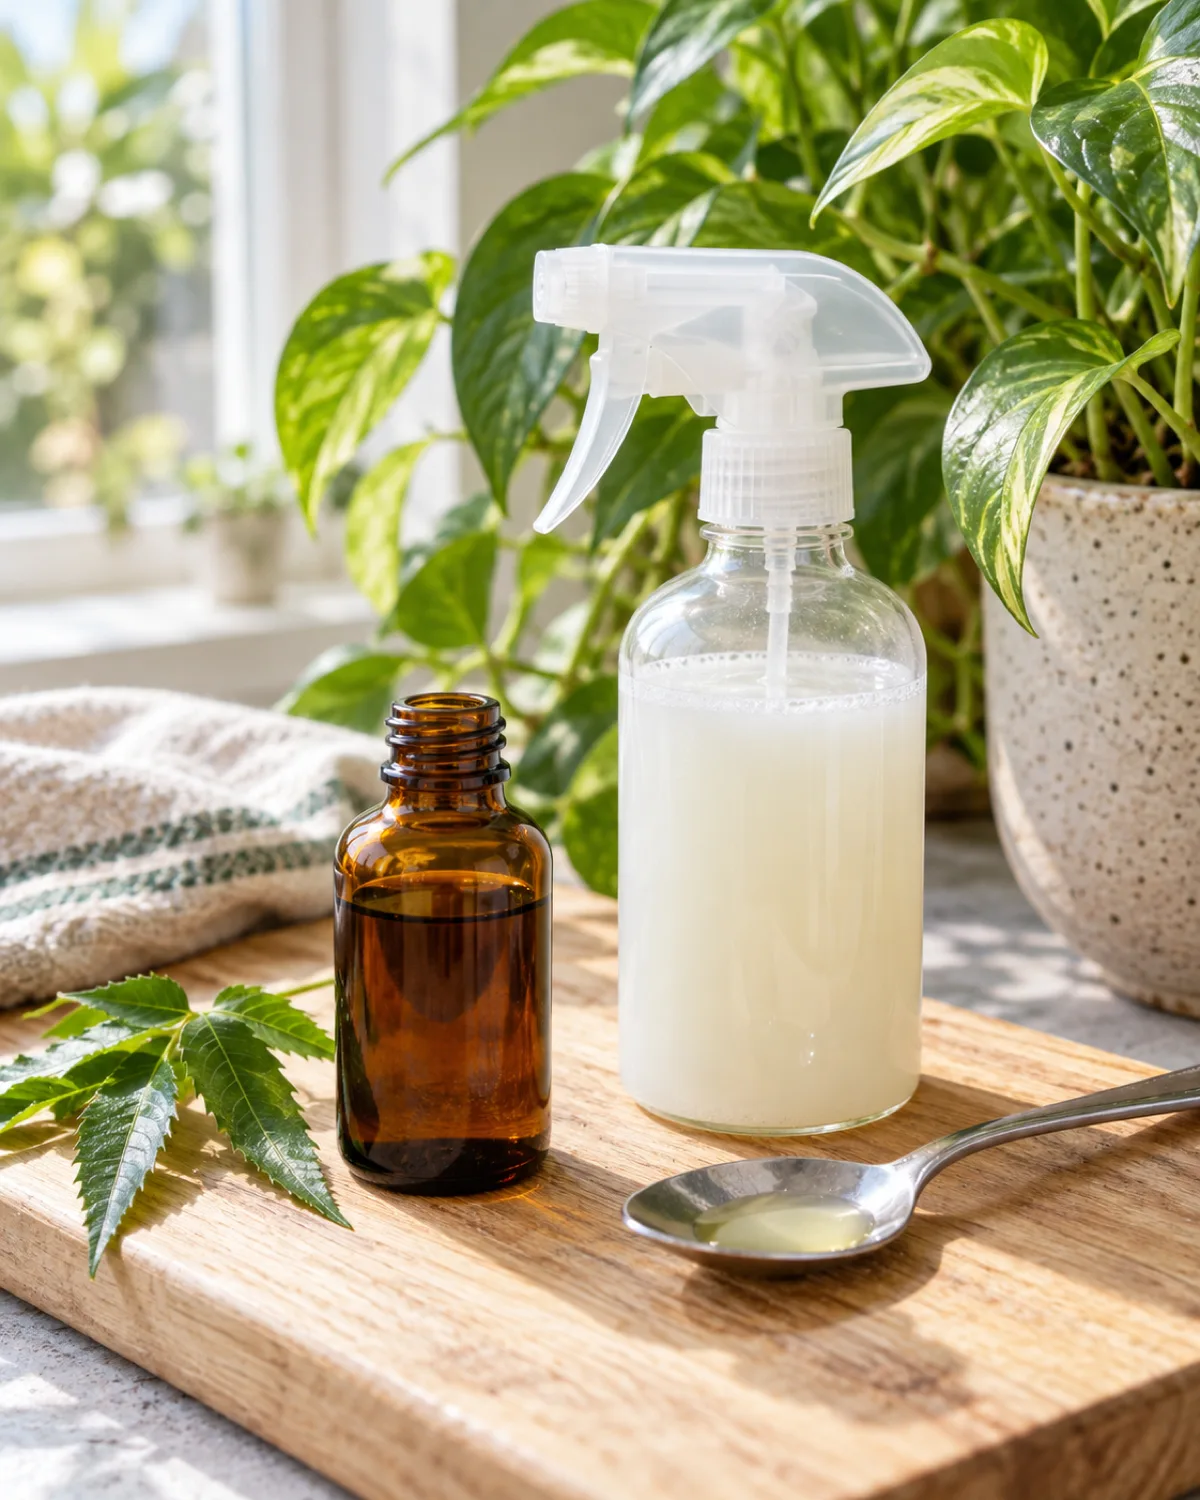
Cold-pressed neem oil contains azadirachtin, a compound that disrupts mite feeding, reproduction, and development. It works as both a contact killer and a systemic deterrent.
The standard mix is two teaspoons of cold-pressed neem oil plus one teaspoon of liquid castile soap per liter of warm water. Shake vigorously before and during application — neem separates quickly.
Application rules:
- Spray at dusk or indoors — azadirachtin breaks down rapidly in direct sunlight
- Saturate the leaf undersides where mites concentrate, not just the tops
- Repeat every seven days for a minimum of three applications to catch each generation
- Test on one leaf first — a few plants (some palms, young seedlings) are sensitive to neem at full concentration
Neem is organic and considered safe for pets once dry. It leaves a slight oily residue that deters new mites from settling for several days after application. The castile soap in the mix serves as both an emulsifier (keeping the oil mixed in water) and a mild contact killer on its own.
For heavy infestations, alternate neem oil applications with insecticidal soap on different days to hit mites through two different mechanisms simultaneously.
Insecticidal Soap
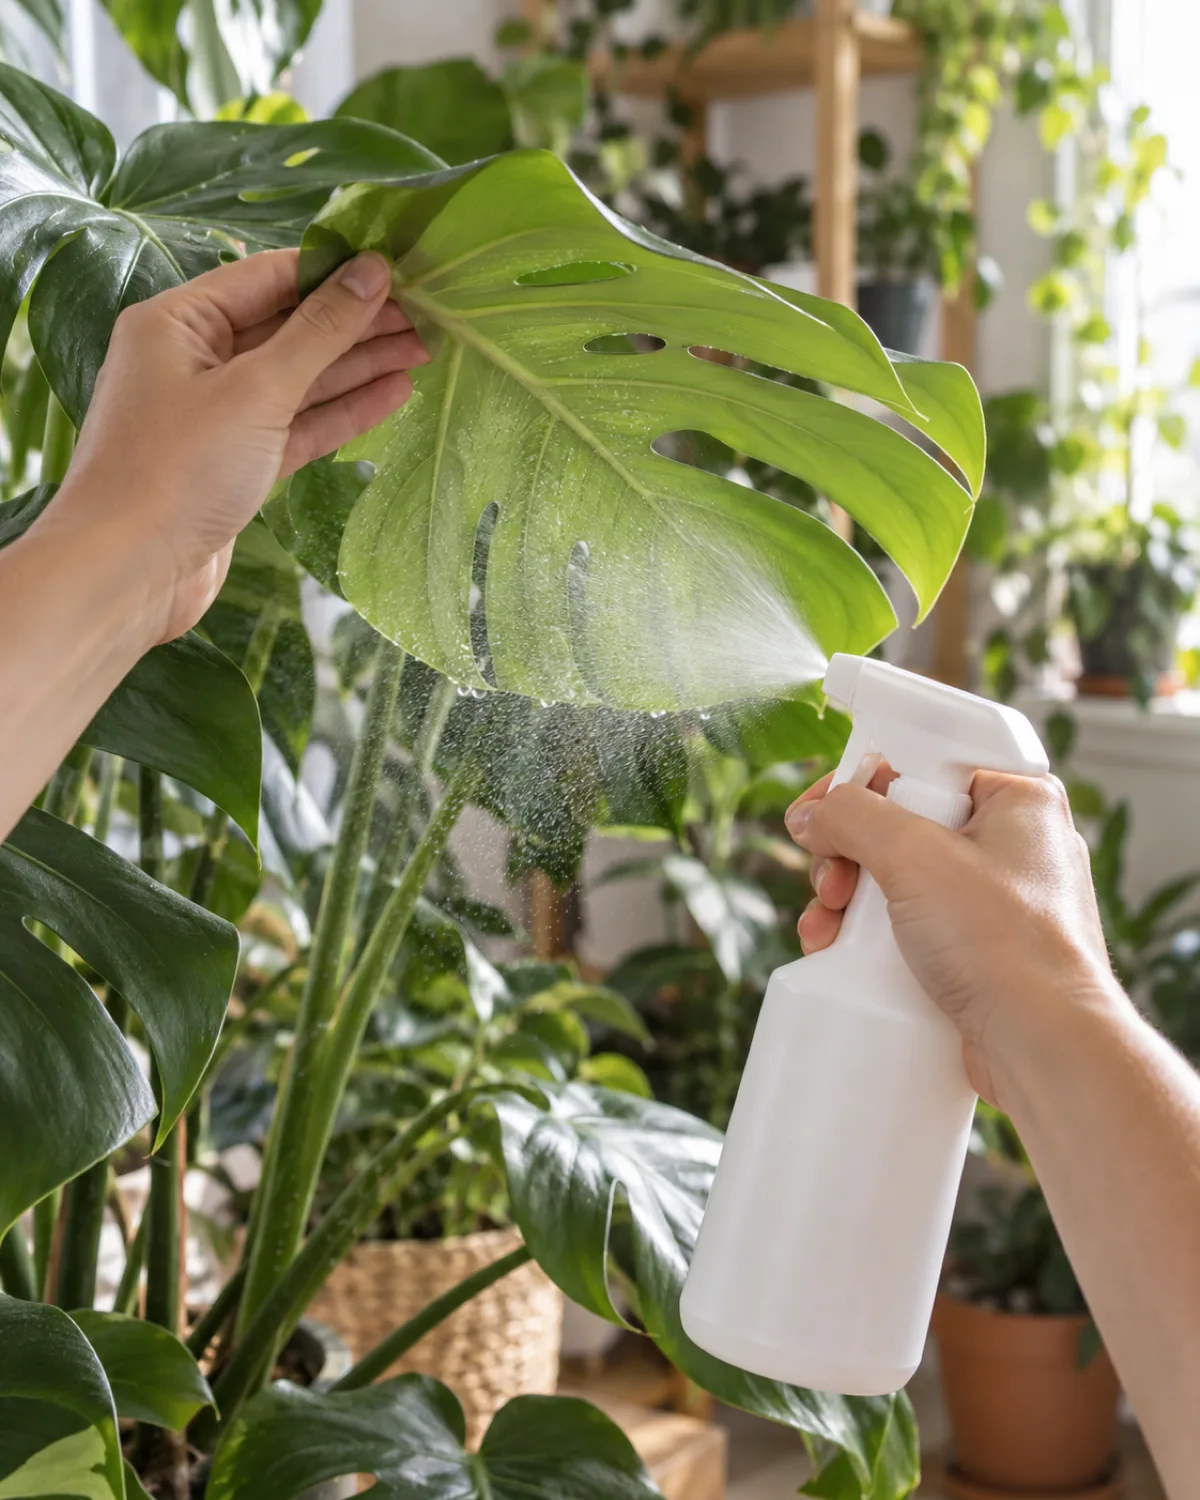
Insecticidal soap uses potassium salts of fatty acids to dissolve the mite's protective outer layer on contact. The mite dehydrates and dies within hours.
The critical word is "contact." Insecticidal soap has no residual effect — it only kills mites it physically touches while still wet. Once it dries on the leaf, it has zero killing power. This means coverage matters more than concentration.
- Spray every surface of every leaf, concentrating on undersides, stem joints, and the tight spaces where leaves emerge from stems
- Reapply every five to seven days for at least three rounds
- Avoid direct sun and temperatures above 90°F (32°C) during application — both increase the risk of leaf burn
- Safe for most plants but test first on sensitive species — some ferns, succulents with powdery coatings (farina), and certain orchids can react to the fatty acids
Dish soap is not insecticidal soap. Commercial dish detergent contains surfactants, fragrances, and additives that can strip protective waxes from leaves and cause cumulative damage. Purpose-made insecticidal soap is formulated to kill pests without harming plant tissue at the recommended dilution.
The lack of residual activity is actually an advantage — it means you can use insecticidal soap alongside biological controls like predatory mites without harming them after the spray dries.
Rubbing Alcohol Spot Treatment
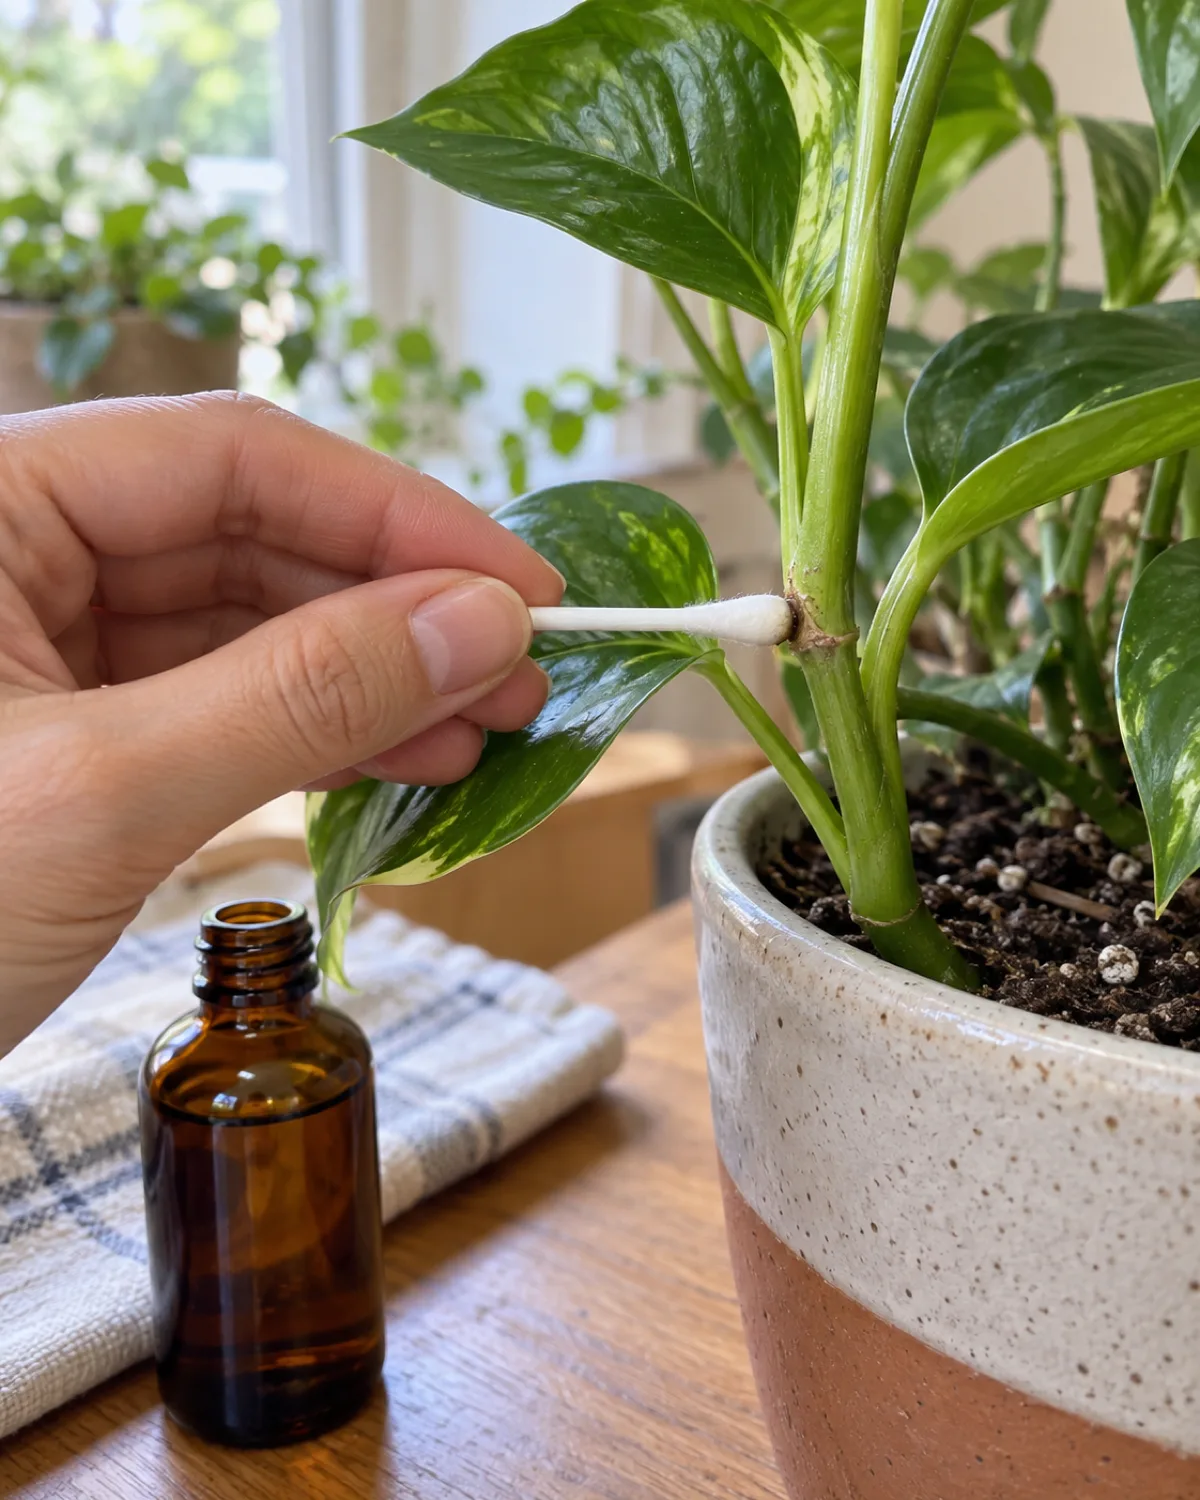
Isopropyl alcohol kills spider mites on contact through rapid desiccation. It is best suited to targeted spot treatments rather than whole-plant spraying.
Use 70 percent isopropyl alcohol on a cotton swab to wipe mites from leaf axils, stem joints, and the undersides of heavily affected leaves. For broader coverage, dilute one part 70 percent alcohol with one part water in a spray bottle.
- Kills on contact by dissolving the mite's waxy coating and evaporating the moisture from its body
- Evaporates completely — no residue, no buildup, no residual killing power
- Reaches tight spots that sprays miss, like the crease where a leaf attaches to the stem
- Test first on a small area — plants with farina (powdery coating like some succulents and calathea) can be damaged because the alcohol strips the coating permanently
Alcohol works best as a supplement to a broader treatment plan rather than a standalone method. It is excellent for the first emergency wipedown while you prepare a neem or soap spray, and for targeting stubborn spots that keep reinfesting during an ongoing treatment program.
Biological Control With Predatory Mites
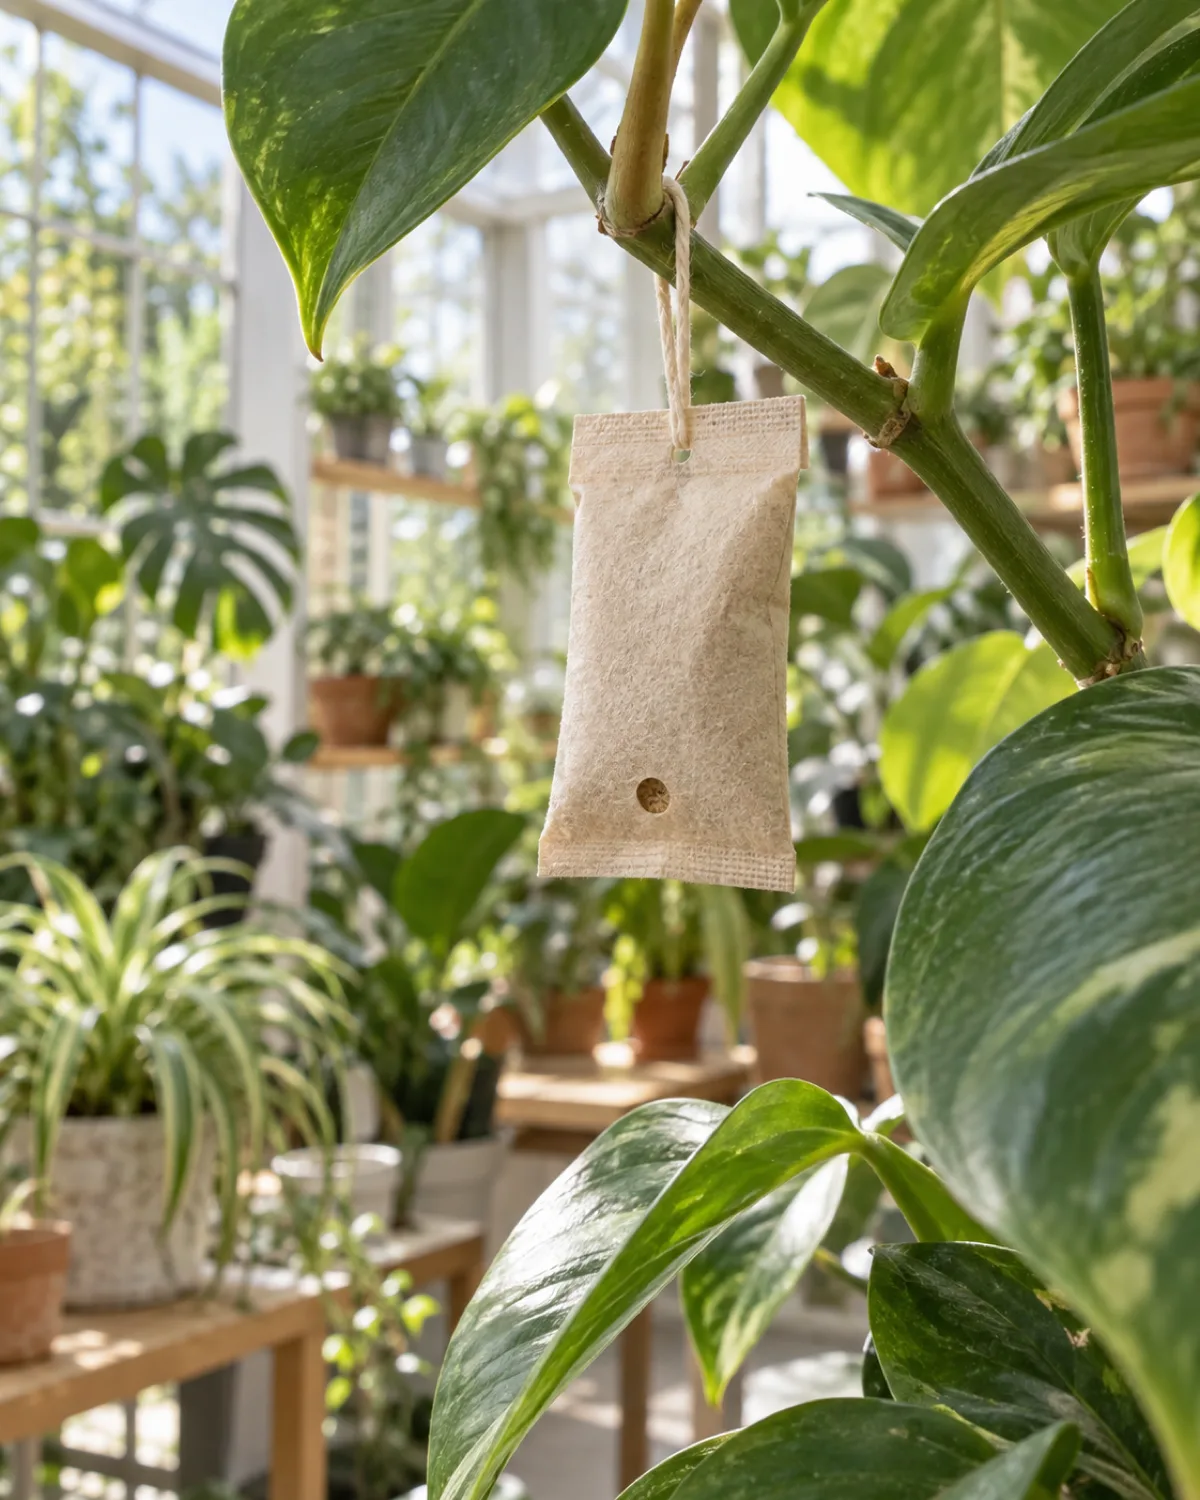
Predatory mites eat spider mites. Introducing them is the closest you can get to recreating the natural pest control that exists outdoors.
Two species are commonly available:
- Phytoseiulus persimilis — the specialist; it eats only spider mites and pursues them aggressively, consuming five to seven per day; it dies out once spider mites are gone, so it self-regulates
- Neoseiulus californicus — the generalist; it eats spider mites plus pollen and other small insects, which means it can survive on a plant even when spider mite numbers are low, providing ongoing preventive control
Release methods include sprinkling directly onto affected leaves or hanging slow-release sachets that dispense predators over several weeks. The sachets work well for plant rooms and collections where continuous protection is the goal.
- Humidity requirement: predatory mites need 60 percent or higher relative humidity to thrive — if your air is drier, they dehydrate before they can work
- No chemical mixing: do not apply neem oil, insecticidal soap, or miticides within a week of releasing predatory mites — the chemicals kill both predator and prey
- Temperature range: most effective between 65°F and 85°F (18°C–29°C)
Biological control works best as prevention in large collections or as the final stage after chemical treatments have knocked the population down.
Every method in this guide works — if you follow these three non-negotiables. Skip any one and the mites come back.
When to Use Miticides
Miticides are chemical treatments specifically formulated to kill mites. They are the last resort when organic methods have failed, not the starting point.
The reason to delay reaching for miticides is resistance. Spider mites develop chemical resistance faster than almost any other pest — sometimes in as few as three to five generations, which at their reproduction speed translates to a few weeks.
If you do need miticides:
- Rotate active ingredients between applications — use abamectin one round, spiromesifen the next, bifenazate after that; hitting them with the same chemical repeatedly is how resistance builds
- Follow label dilution rates exactly — stronger is not better and often burns plant tissue while still failing to kill resistant survivors
- Isolate treated plants in a well-ventilated area away from pets, children, and your food preparation spaces
- Continue monitoring after the treatment cycle ends — resistance means some survivors may carry on
Miticides kill indiscriminately, including beneficial organisms. If you plan to use predatory mites later for prevention, wait at least two weeks after the last miticide application before introducing them.
Quarantine Protocol for Infested Plants
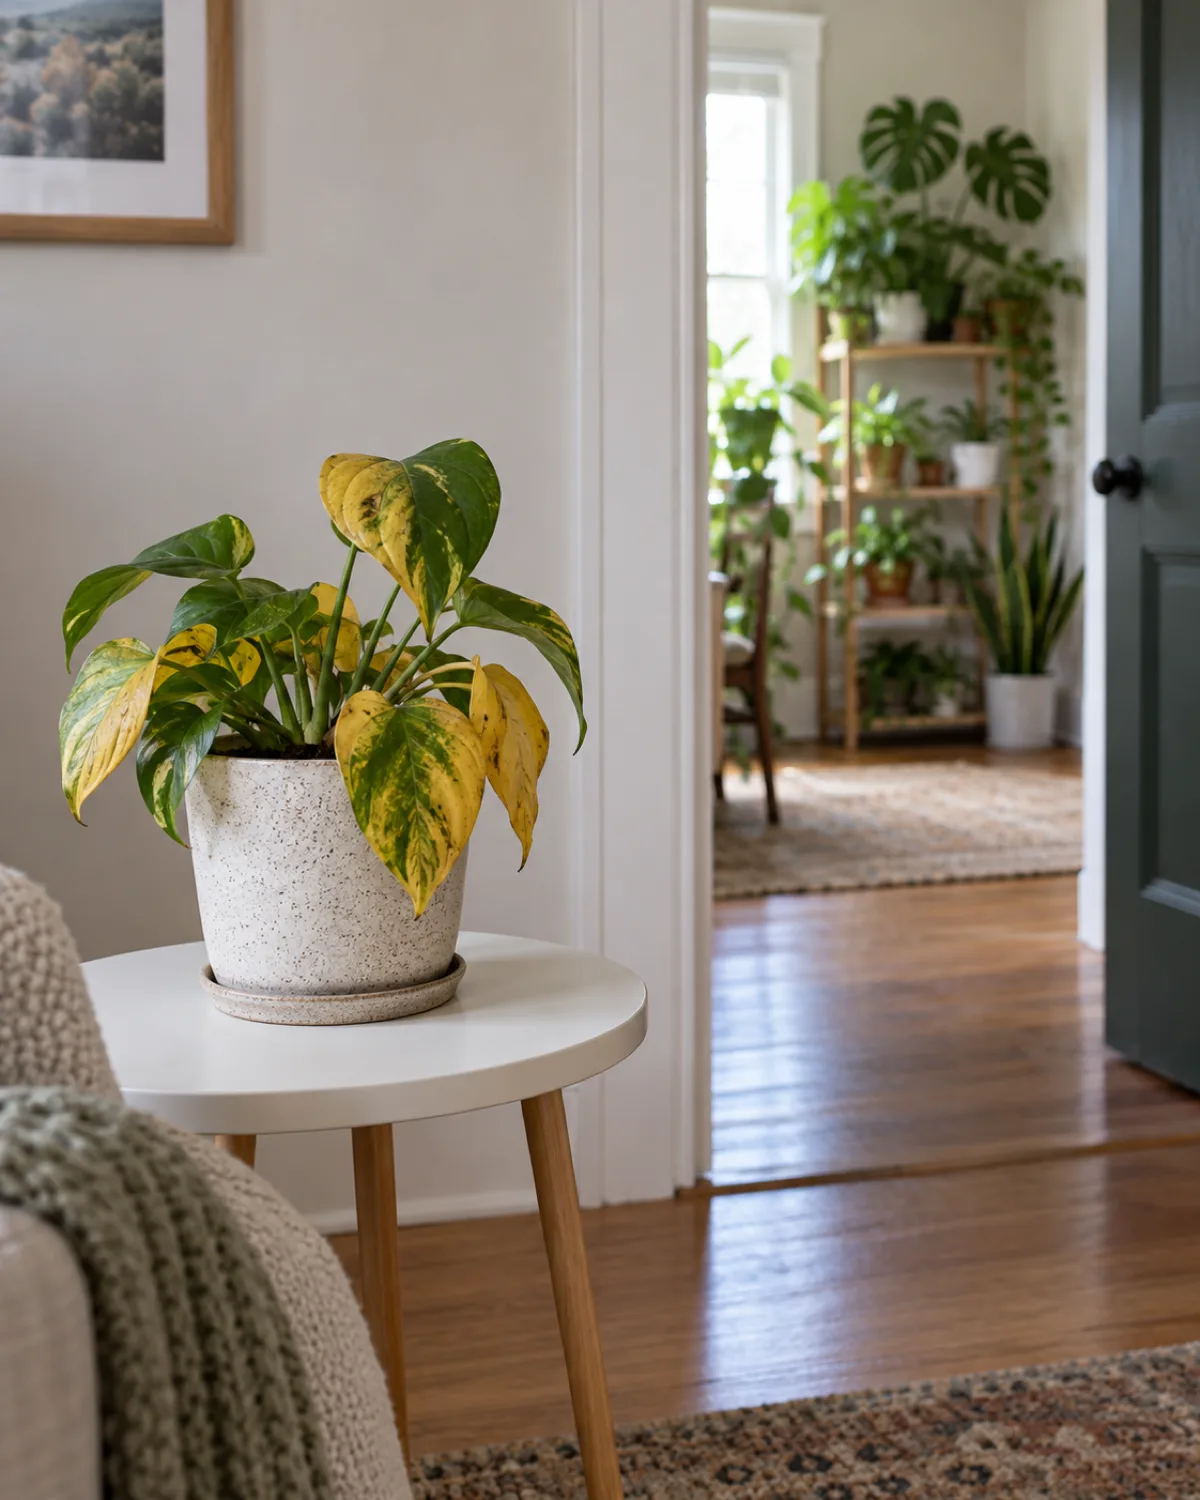
The moment you confirm spider mites on one plant, assume the immediate area is compromised.
Move the infested plant at least six feet from any other plant — ideally to a different room entirely. Spider mites disperse through silk threads that catch air currents, which means they can float from one plant to the next across a shelf without any physical contact.
Quarantine steps:
- Inspect every plant within six feet of the infested one using the white paper test, even plants that look perfectly healthy — mites may be present at levels too low to cause visible damage yet
- Treat all plants in the same area with at least a water spray as a preventive measure, not just the visibly infested one
- Dedicate tools — use separate watering cans, pruners, and gloves for quarantined plants; mites ride on equipment and hands
- Quarantine new purchases for two weeks minimum before placing them near your existing collection
Two weeks of isolation with regular paper tests catches the vast majority of infestations before they spread. The mild inconvenience of quarantine is nothing compared to treating twenty plants at once.
Plants Most Vulnerable to Spider Mites
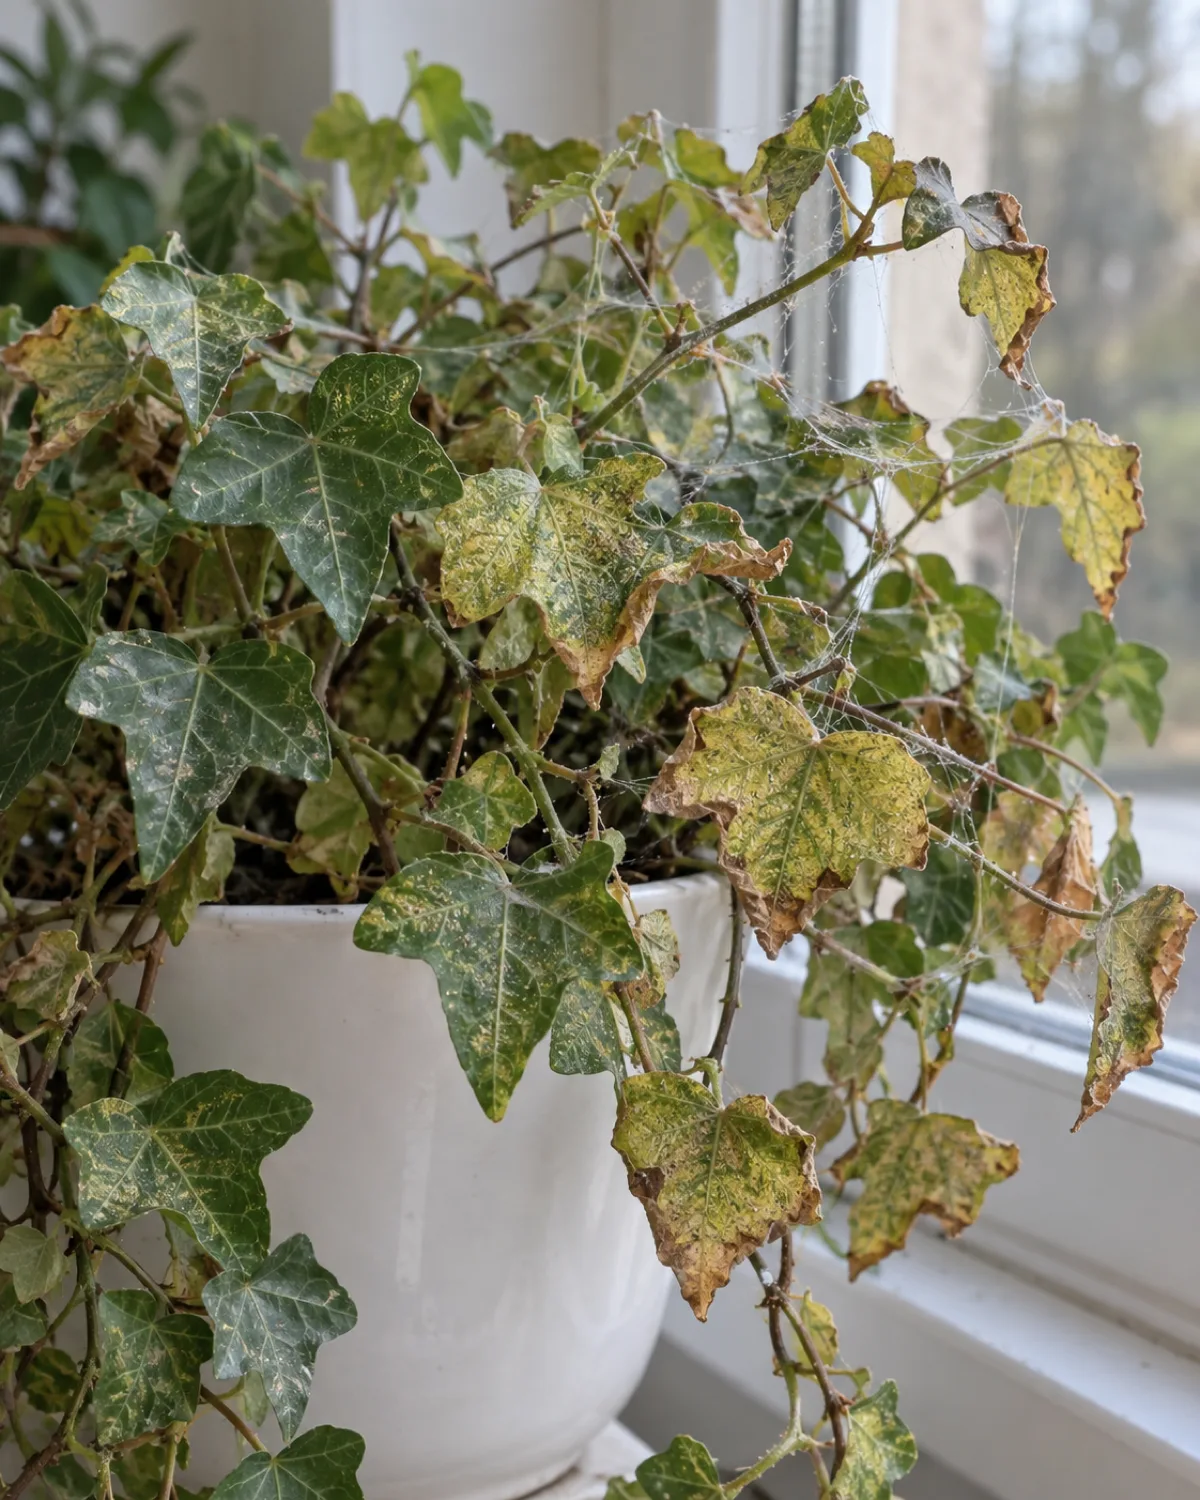
Spider mites can infest nearly any houseplant, but some species are targeted more consistently than others. Knowing which plants in your collection are high-risk helps you focus your monitoring.
The top targets:
- English ivy — the single most spider-mite-prone houseplant; its dense growth and small leaves create the sheltered microclimate mites prefer
- Indoor roses — miniature roses on windowsills are spider mite magnets, especially in dry heated rooms
- Palms — areca palms, majesty palms, and parlor palms are frequently hit because their thin fronds dry out easily in low humidity
- Calathea and Maranta — these plants demand high humidity to stay healthy, and when the air dries out the stressed plant and the mite-friendly environment appear simultaneously
- Alocasia — large thin leaves provide extensive feeding surface with minimal hiding difficulty
- Indoor citrus and fig trees — especially during winter when indoor air is driest
- Herbs on windowsills — basil, mint, and rosemary in dry kitchens
The common thread is thin leaves and sensitivity to dry air. Thick-leaved succulents and cacti are hit less often because their waxy coating and dense cell structure make feeding harder for the mites.
Humidity as Your Best Prevention Tool
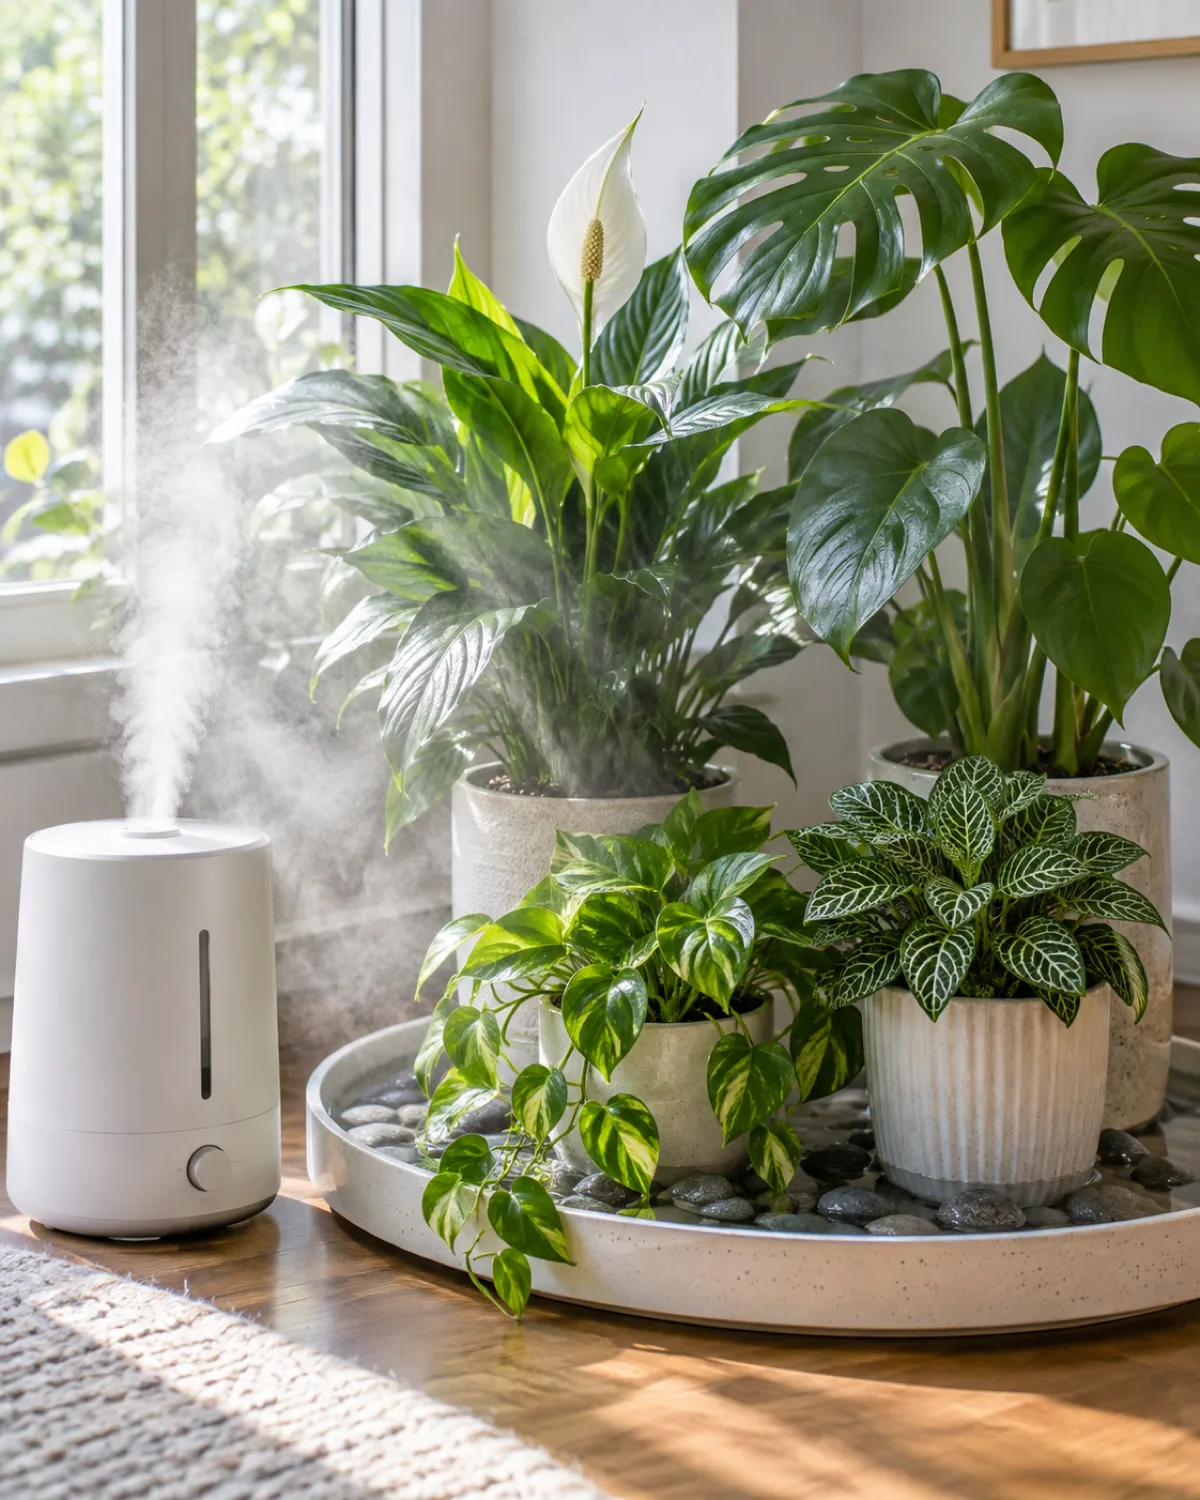
Raising indoor humidity from below 40 percent to the 50–60 percent range slows spider mite reproduction dramatically. It does not eliminate them entirely, but it shifts the environment from ideal for mites to manageable for plants.
Effective humidity strategies:
- Group your plants — clustered plants transpire together and create a local humidity pocket that benefits every plant in the group (see houseplant light requirements for grouping that also manages light)
- Pebble trays — shallow trays filled with water and stones placed under or between pots; as the water evaporates it raises the humidity immediately around the foliage
- Room humidifiers — the most effective option for dry climates and winter heating; place it within a few feet of your plants
- Bathroom and kitchen placement — these rooms naturally have higher humidity from cooking and bathing; move high-risk plants there during winter
Regular leaf misting is a debated practice. Brief misting raises humidity for only minutes, not hours, so the benefit is limited unless you mist multiple times daily. What misting does accomplish is physically wetting the leaf undersides, which disrupts mites in the short term — think of it more as a mini water-spray treatment than a humidity strategy.
The long-term solution is addressing room-level humidity rather than spraying individual leaves. A hygrometer near your plant collection gives you a number to manage rather than a guess.
Recovery After Spider Mite Damage
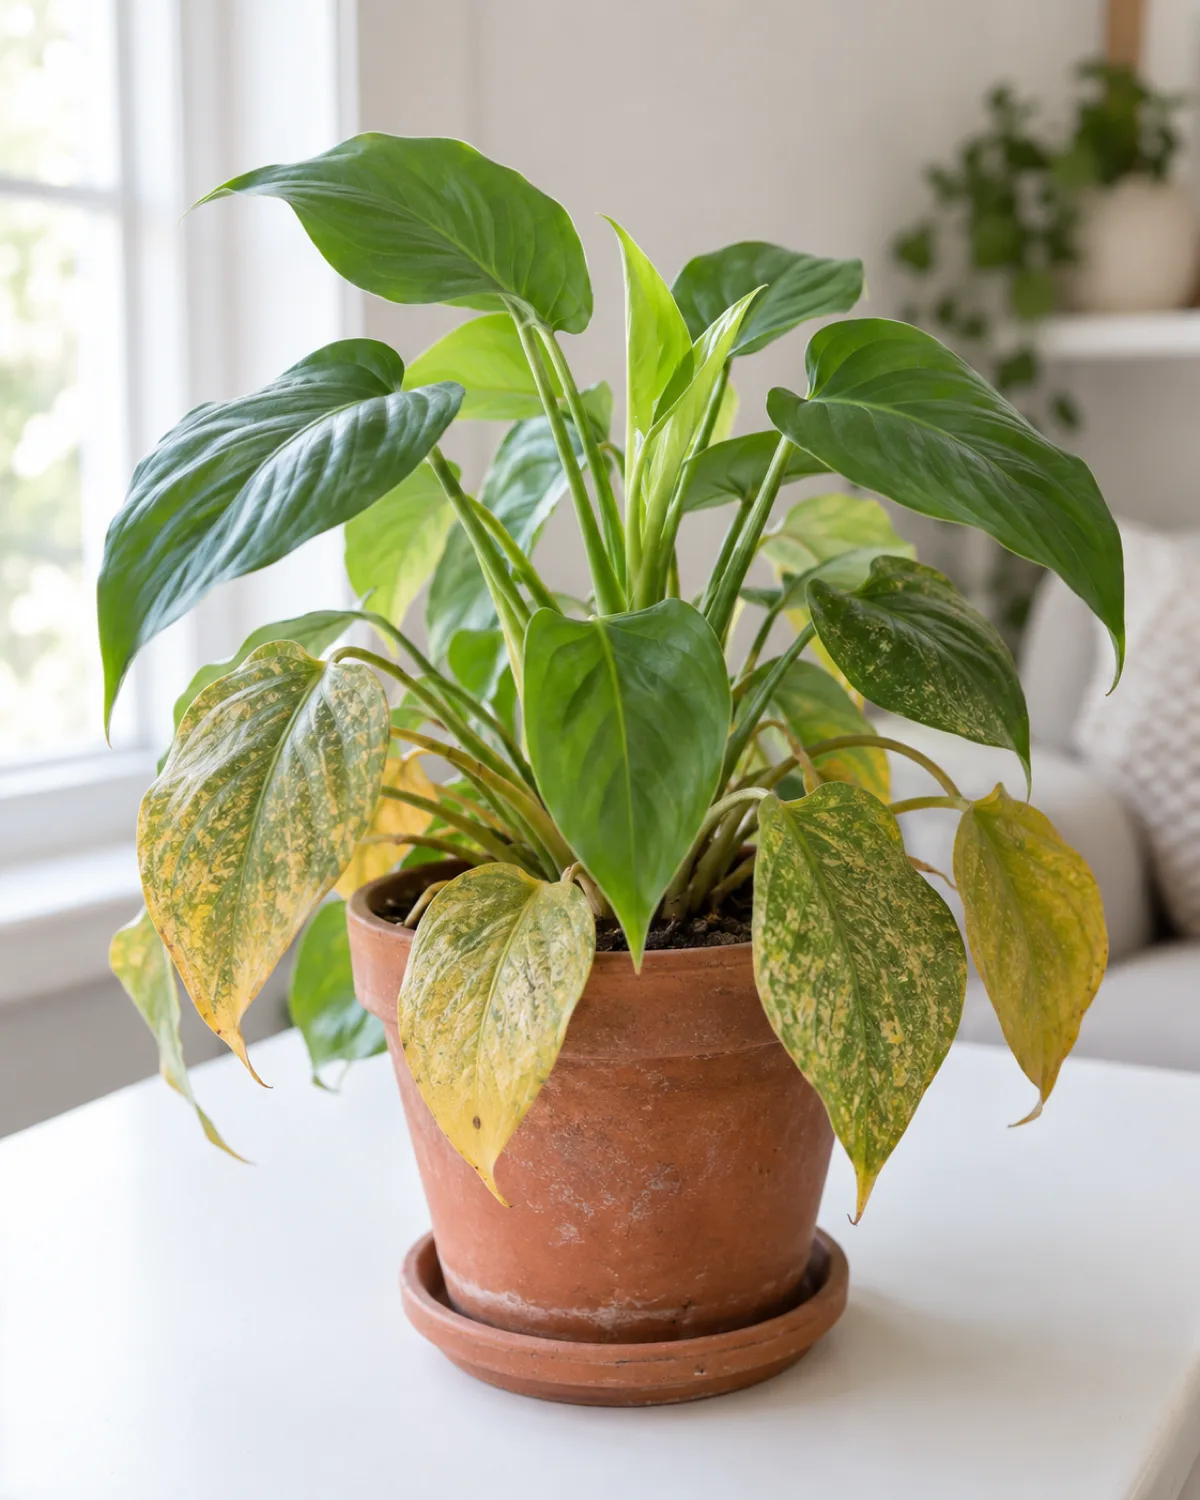
Stippled leaves do not heal. Each pale dot is a permanently emptied cell, and no treatment restores it. Recovery means new growth — fresh leaves that emerge healthy after the infestation is eliminated.
What to expect:
- New growth is the indicator — when you see undamaged new leaves or fronds unfurling from the growing point, the plant is recovering
- Timeline: depending on the species and severity, expect four to eight weeks before the plant looks visibly healthier
- Prune the worst-hit leaves — heavily stippled, yellowed, or webbed leaves will not recover and are draining the plant's energy; removing them redirects resources toward new growth
- Resume regular feeding — a balanced liquid fertilizer at half strength supports new leaf production (fertilizing guide)
Continue preventive measures even after the infestation appears gone. Spider mites are notoriously persistent, and a small surviving population below detection threshold can rebuild in weeks. Monthly preventive sprays with neem or soap for at least two months after the last visible mite provide a safety margin.
If yellow leaves continue appearing on new growth after treatment, the issue may not be residual mites — check for root rot or other stress factors that developed during the infestation itself.
Spider Mites vs Other Common Pests
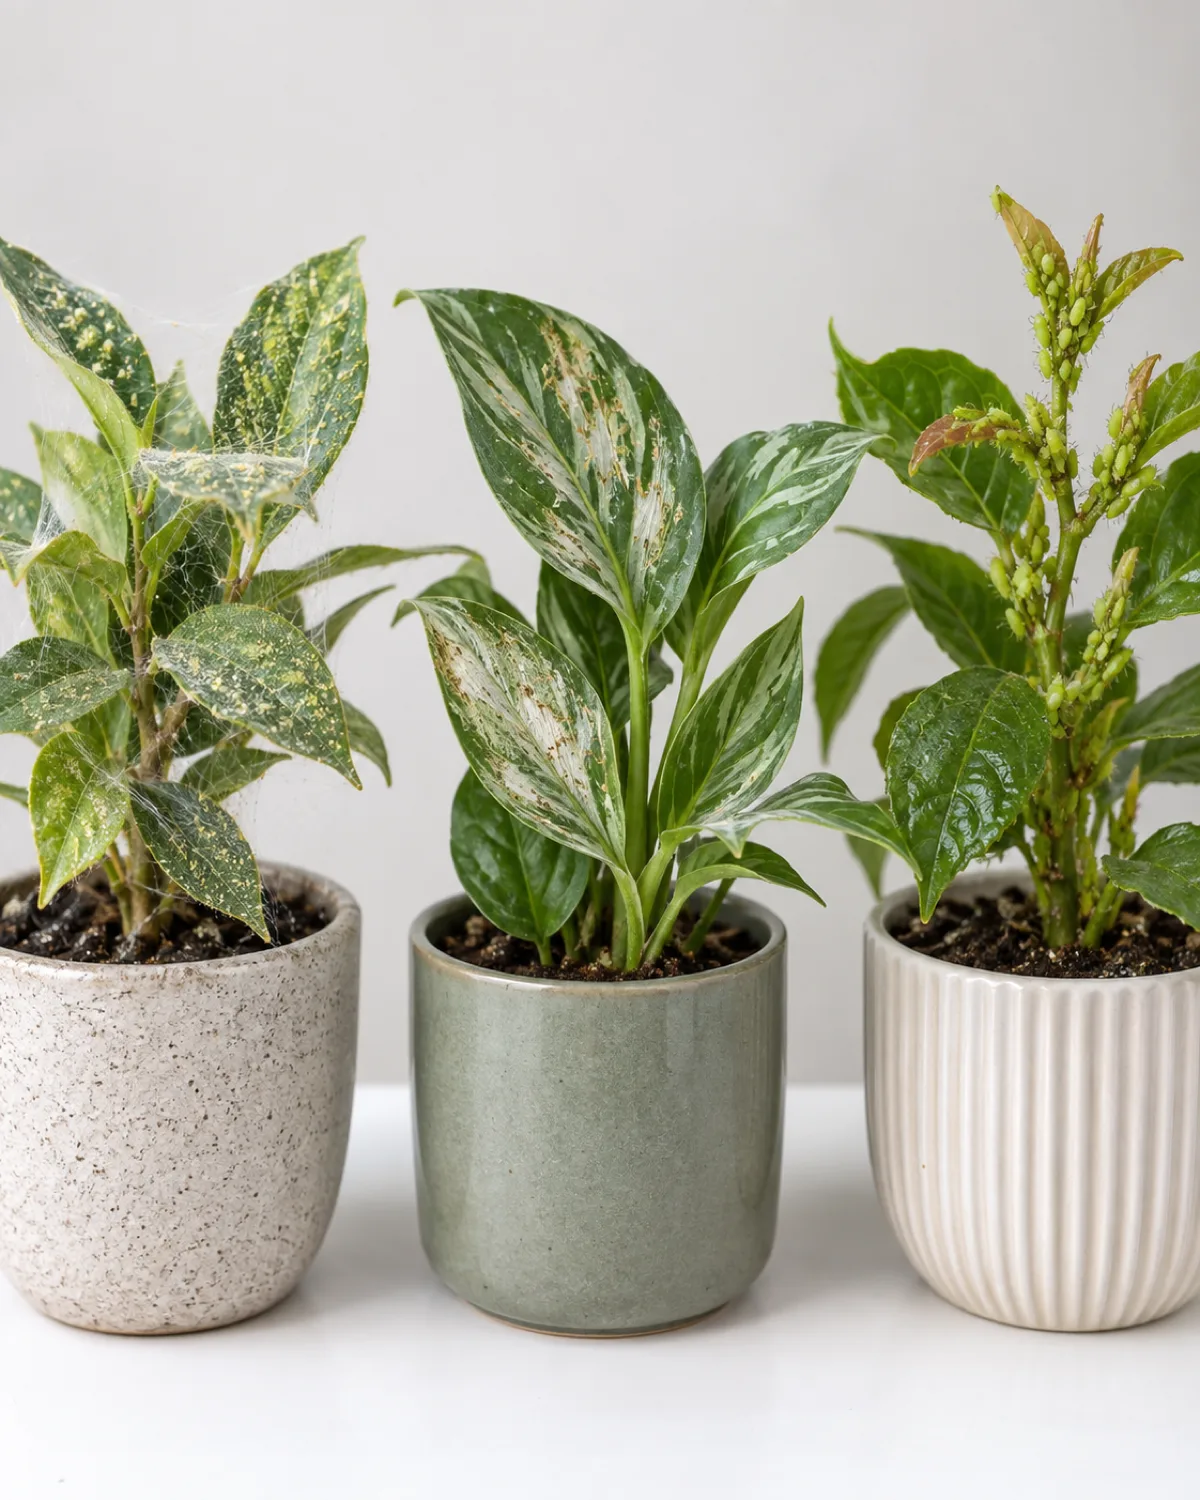
Misidentifying the pest wastes treatment time. Here is how spider mite damage differs from the other usual suspects.
Spider mites vs thrips:
- Thrips leave elongated silvery streaks; spider mites leave round stipple dots
- Thrips are visible as tiny cigar-shaped insects; spider mites are round dots
- Thrips leave black frass (droppings); spider mites leave silk webbing
Spider mites vs aphids:
- Aphids cluster visibly on stem tips and new growth; spider mites hide on leaf undersides
- Aphids excrete sticky honeydew that makes surfaces tacky; spider mites produce dry silk webbing
- Aphids are large enough to identify without magnification; spider mites usually are not
Spider mites vs fungus gnats:
- Fungus gnats are soil-dwelling insects whose larvae feed on roots and organic matter; spider mites live entirely on foliage
- Fungus gnats are flying insects visible around the soil surface; spider mites do not fly
- Fungus gnat damage shows as wilting from root damage; spider mite damage shows as leaf stippling
Spider mites vs scale insects:
- Scale appears as immobile brown or white bumps attached to stems and leaf undersides; spider mites are mobile dots
- Scale can be scraped off with a fingernail and leaves a sticky residue; spider mites scatter when disturbed
Spider mites vs mealybugs:
- Mealybugs leave white cottony masses at leaf joints; spider mites produce fine translucent webbing
- Mealybugs are individually visible as white fuzzy insects; spider mites require magnification to identify individually
How to Spot, Treat, and Prevent Spider Mites on Plants
- 1Learn what spider mites are and their life cycleTiny arachnids that drain chlorophyll, egg to adult in 5–7 days, doubling every 3 days.
- 2Spot early stippling damageTiny pale dots on leaves when held to light — the first sign before webbing appears.
- 2Run the white paper testTap a leaf over white paper, watch for moving dots, squish for green-red streaks.
- 2Know why indoor plants attract mitesDry heated air below 40% humidity plus no natural predators creates a mite paradise.
- 2Start with water sprayStrong shower on leaf undersides every 3–4 days for 2–3 weeks breaks early infestations.
- 2Apply neem oilCold-pressed neem disrupts feeding and reproduction — spray at dusk, repeat weekly.
- 2Use insecticidal soapPotassium fatty acid salts dissolve the mite's outer layer on contact — must hit to kill.
- 2Spot-treat with rubbing alcohol70% isopropyl on a cotton swab for targeted kills in leaf axils and stem joints.
- 2Release predatory mitesPhytoseiulus persimilis eats 5–7 spider mites daily; needs 60%+ humidity to work.
- 2Use miticides as a last resortRotate active ingredients to prevent resistance; follow label rates exactly.
- 2Quarantine infested plantsIsolate 6+ feet away, inspect all neighbors, dedicate separate tools.
- 2Monitor high-risk plantsEnglish ivy, roses, palms, and calathea are the most frequent spider mite targets.
- 2Raise humidity to 50–60%Group plants, use pebble trays and humidifiers to slow mite reproduction.
- 2Support recovery with patienceStippled leaves won't heal — prune the worst, feed lightly, wait for clean new growth.
- 2Tell mites from other pestsStipple dots + webbing = mites. Silver streaks = thrips. Sticky honeydew = aphids.
kultivy.com

Mara writes about houseplant care, propagation, and indoor styling at Kultivy. She believes every windowsill deserves at least one plant that earns its spot.
Frequently Asked Questions
Can spider mites spread to humans?
No. Spider mites are obligate plant feeders:
- They cannot bite humans, live on skin, or infest clothing
- The itchy sensation some people report when handling heavily infested plants is typically skin irritation from the webbing, not actual bites
Do spider mites live in the soil?
Spider mites live exclusively on plant foliage. What you might see on or near soil are different organisms:
- Soil mites on the surface — a different group that feeds on decaying organic matter and is generally harmless or beneficial
- Fungus gnats flying near soil — tiny flies whose larvae live in damp potting mix, unrelated to spider mites
Can I use dish soap to kill spider mites?
It is not recommended. Commercial dish detergent differs from insecticidal soap in several ways:
- Degreasers and fragrances strip protective waxes from leaves
- Surfactant concentrations are formulated for dishes, not plant tissue
- Repeated use causes progressive leaf damage
Purpose-made insecticidal soap is formulated at concentrations that kill pests without harming plants.
How long does it take to get rid of spider mites?
A minimum of three to four weeks of consistent treatment because the egg-to-adult cycle runs five to seven days:
- Three treatment rounds minimum — spaced across the lifecycle to catch each hatching wave
- Six to eight weeks for severe cases — especially where resistance is present or the colony has spread to multiple plants
Are spider mites visible to the naked eye?
Barely. At 0.5 mm they appear as tiny moving dots, especially on light-colored surfaces. The silk webbing they produce is usually more visible than the individual mites. A phone camera in macro mode or a 10x magnifying lens reveals them clearly, and the white paper test makes detection reliable without any equipment.