Crotons trade subtlety for spectacle. Every leaf carries a different mix of red, orange, yellow, and green, and the same branch can display all four simultaneously.
The common name covers dozens of cultivars of Codiaeum variegatum. They share one trait: no two leaves look alike.
Keeping a croton alive is straightforward. Keeping it colorful is the challenge. Anything less than strong light drains the reds and oranges to plain green, and moving it to a new spot can trigger dramatic leaf drop.
Codiaeum variegatum is the most colorful foliage plant you can grow indoors — here is everything it needs to hold those colors.
Why every leaf on a croton looks different
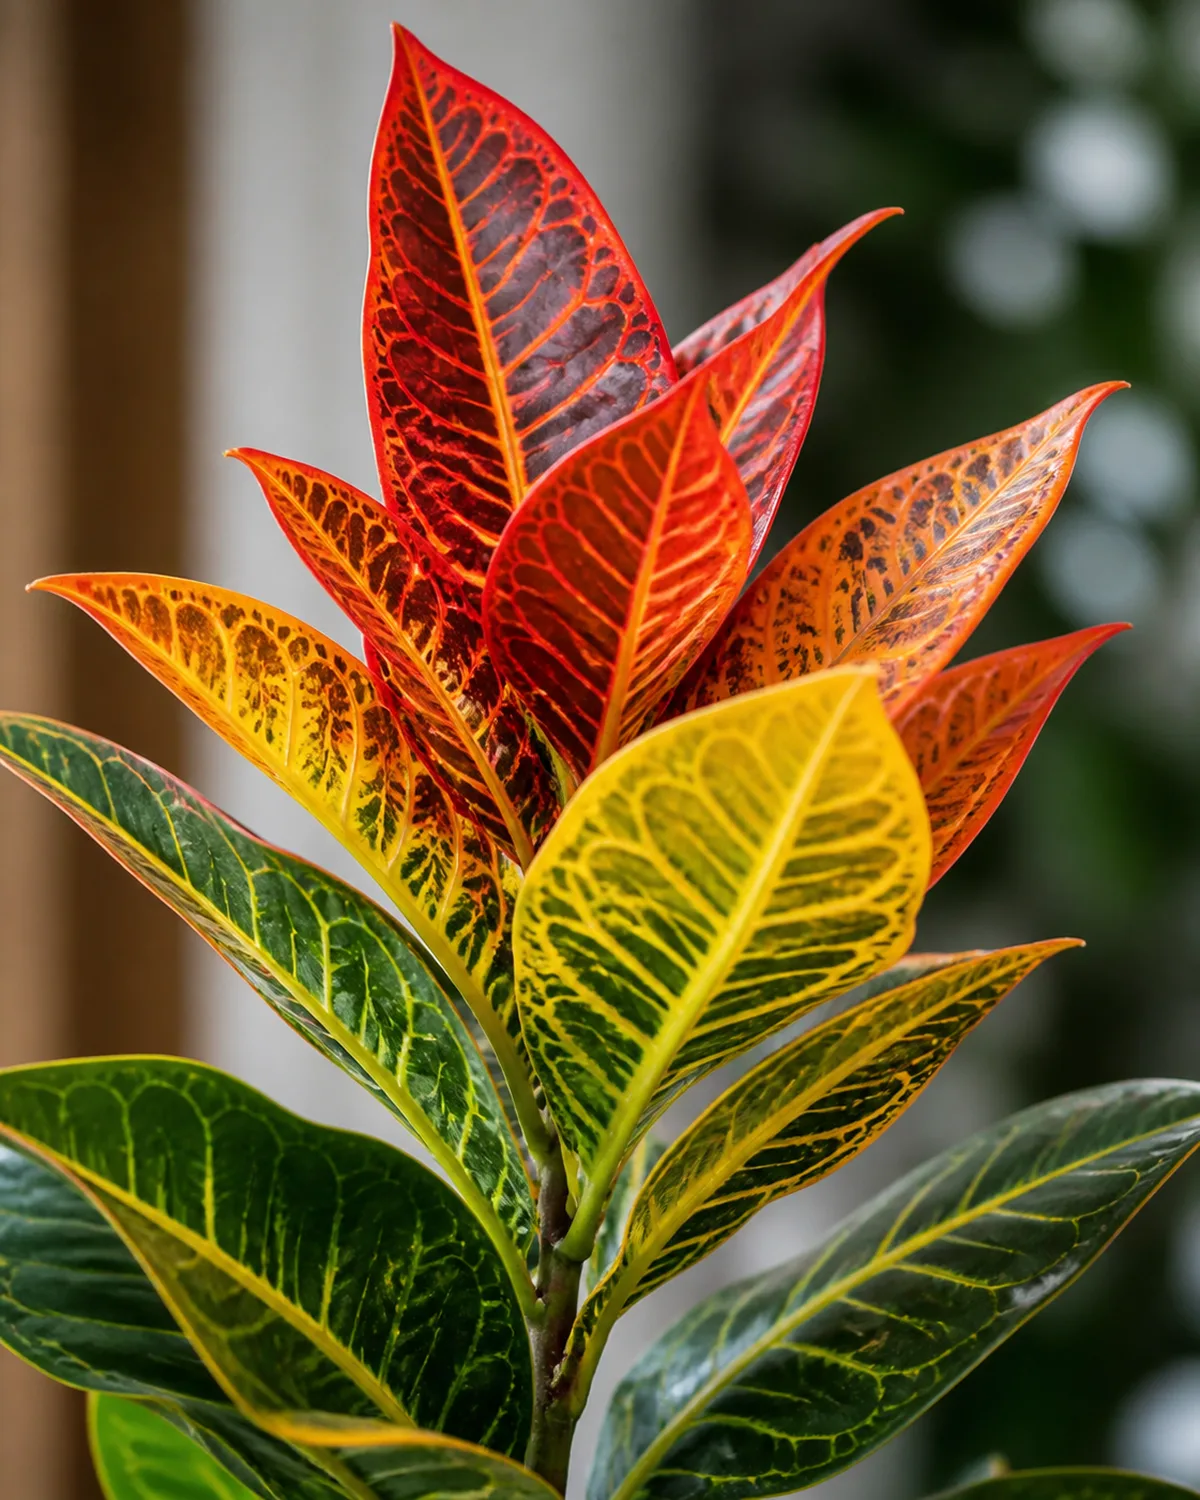
Codiaeum variegatum belongs to Euphorbiaceae — the spurge family, the same group that includes poinsettias. It is native to Indonesia, Malaysia, and the western Pacific islands, where it grows as an understory shrub in bright tropical conditions.
What makes croton unique among indoor plants is the sheer breadth of its color spectrum. A single mature specimen can carry leaves in green, yellow, gold, orange, red, burgundy, pink, and near-black — often on the same branch at the same time.
No other common houseplant matches this range. Chinese evergreen offers pink and silver; tradescantia delivers purple. Croton does all of it simultaneously.
The colors come from pigments that respond to light exposure and leaf age. Young leaves typically emerge green or yellow-green and deepen in color as they mature. The transition is not random — it follows genetic instructions specific to each cultivar.
Petra develops red and orange veins on yellow-green leaves. Gold Dust scatters yellow speckles across deep green. Mammy twists its leaves into corkscrews of red, orange, and green.
The variation between leaves on the same plant happens because each leaf experiences slightly different light exposure and ages at a different rate. An interior leaf shaded by its neighbors stays greener, while an outer leaf bathed in direct light develops the full chromatic range the genetics allow.
This is the plant's defining trait — and the reason its care revolves around one factor above all others: light. Every other requirement (water, humidity, soil, temperature) serves the goal of keeping the plant healthy enough to express its full color potential. Take away the light and you take away the reason to grow a croton.
Croton rewards commitment to bright light and consistent conditions — but punishes neglect more visibly than most houseplants.
Five croton varieties worth growing indoors
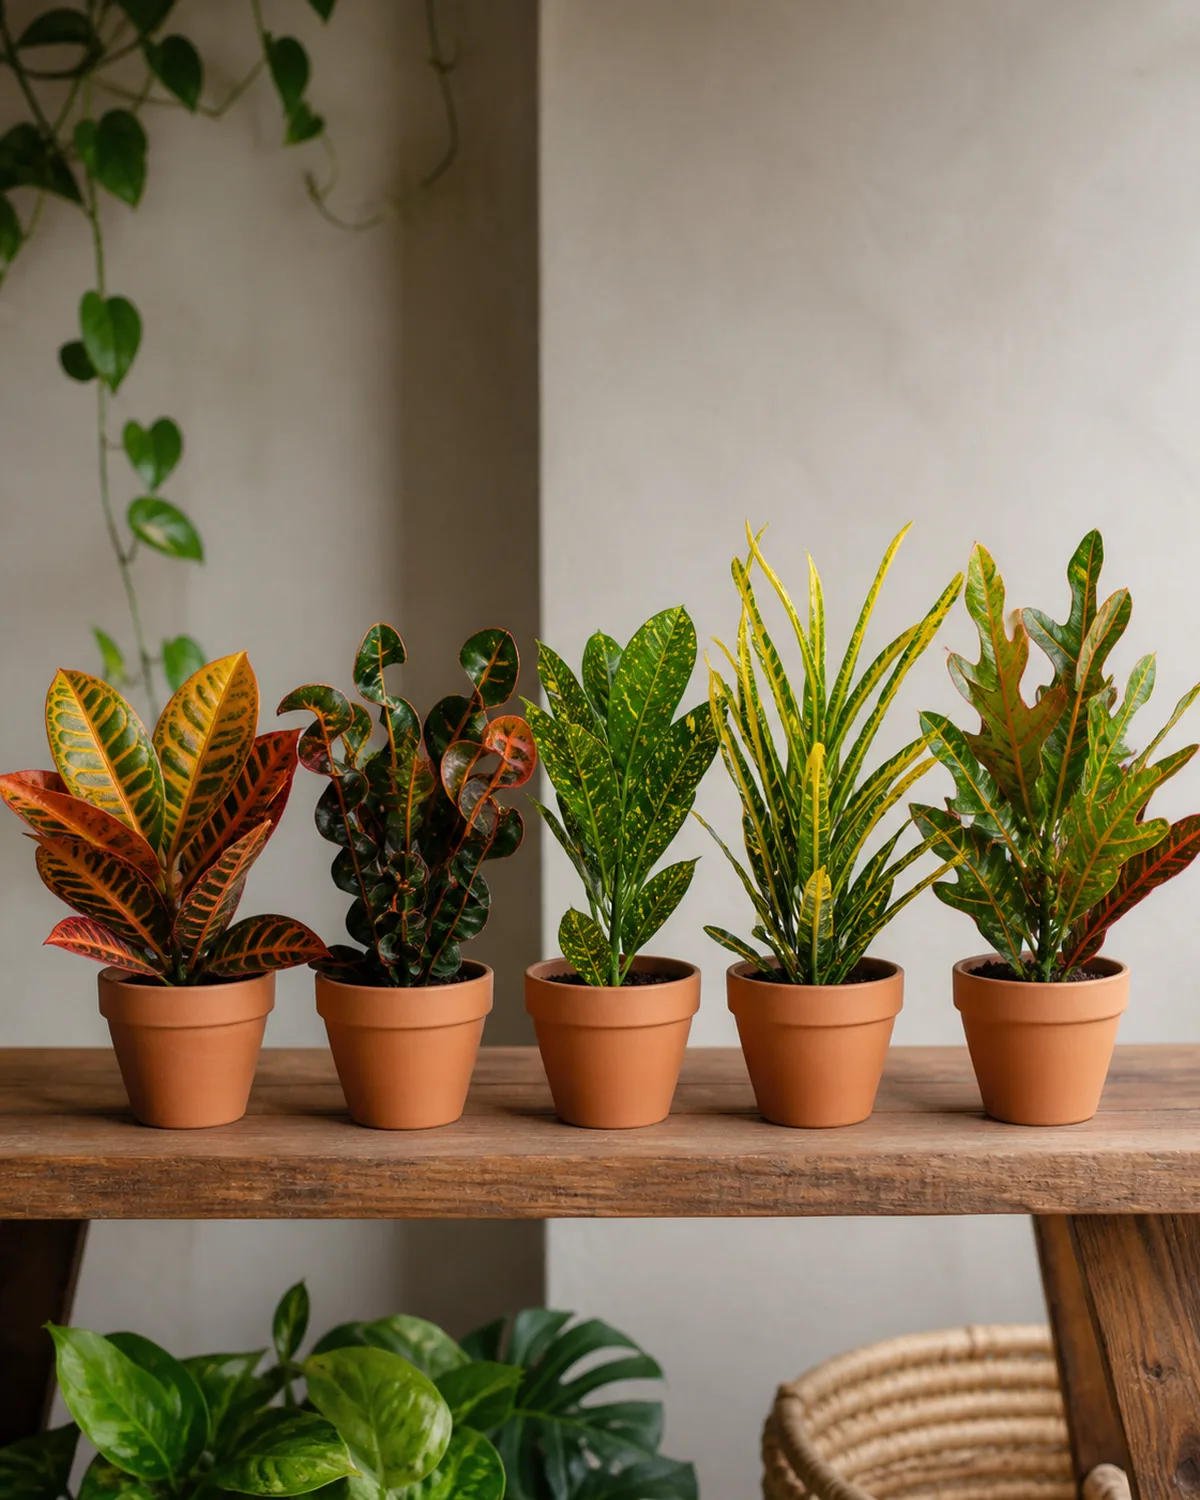
The species Codiaeum variegatum has produced hundreds of named cultivars, but a handful dominate the indoor market because they hold their colors best under typical home conditions.
Petra is the standard — broad oval leaves with prominent yellow, orange, and red veins on a deep green base. It is the variety stocked by most garden centers and grocery stores, and for good reason: Petra is the most forgiving croton indoors, tolerating slightly lower light than its more exotic siblings before losing color. This is the one to start with.
Mammy (also sold as Mamey) stands apart visually. Its leaves twist and curl into tight corkscrews of red, orange, and deep green, creating a three-dimensional texture that no flat-leafed variety can match. It grows more vertically compact than Petra, making it suitable for narrower spaces.
Gold Dust takes a completely different approach — dark green leaves splashed with bright yellow speckles, as if someone flicked a paint-loaded brush across each leaf. It is smaller than Petra, staying compact and bushy, which makes it a better desk or shelf plant. The speckled pattern holds up in moderate light better than the veined patterns of Petra or Mammy.
Zanzibar breaks the broad-leaf mold entirely. Its leaves are long, narrow, and grass-like — almost resembling a dracaena — in shades of red, orange, yellow, and green. The narrow foliage gives it an airy, architectural quality that works where a traditional bushy croton would look too heavy.
Eleanor Roosevelt carries slender oak-shaped leaves in shades of burgundy to green with golden yellow speckles. It is more delicate in appearance than Petra but surprisingly tough, and the narrow leaves shed water efficiently, reducing the risk of fungal issues in humid rooms.
Light: the single biggest factor in croton color
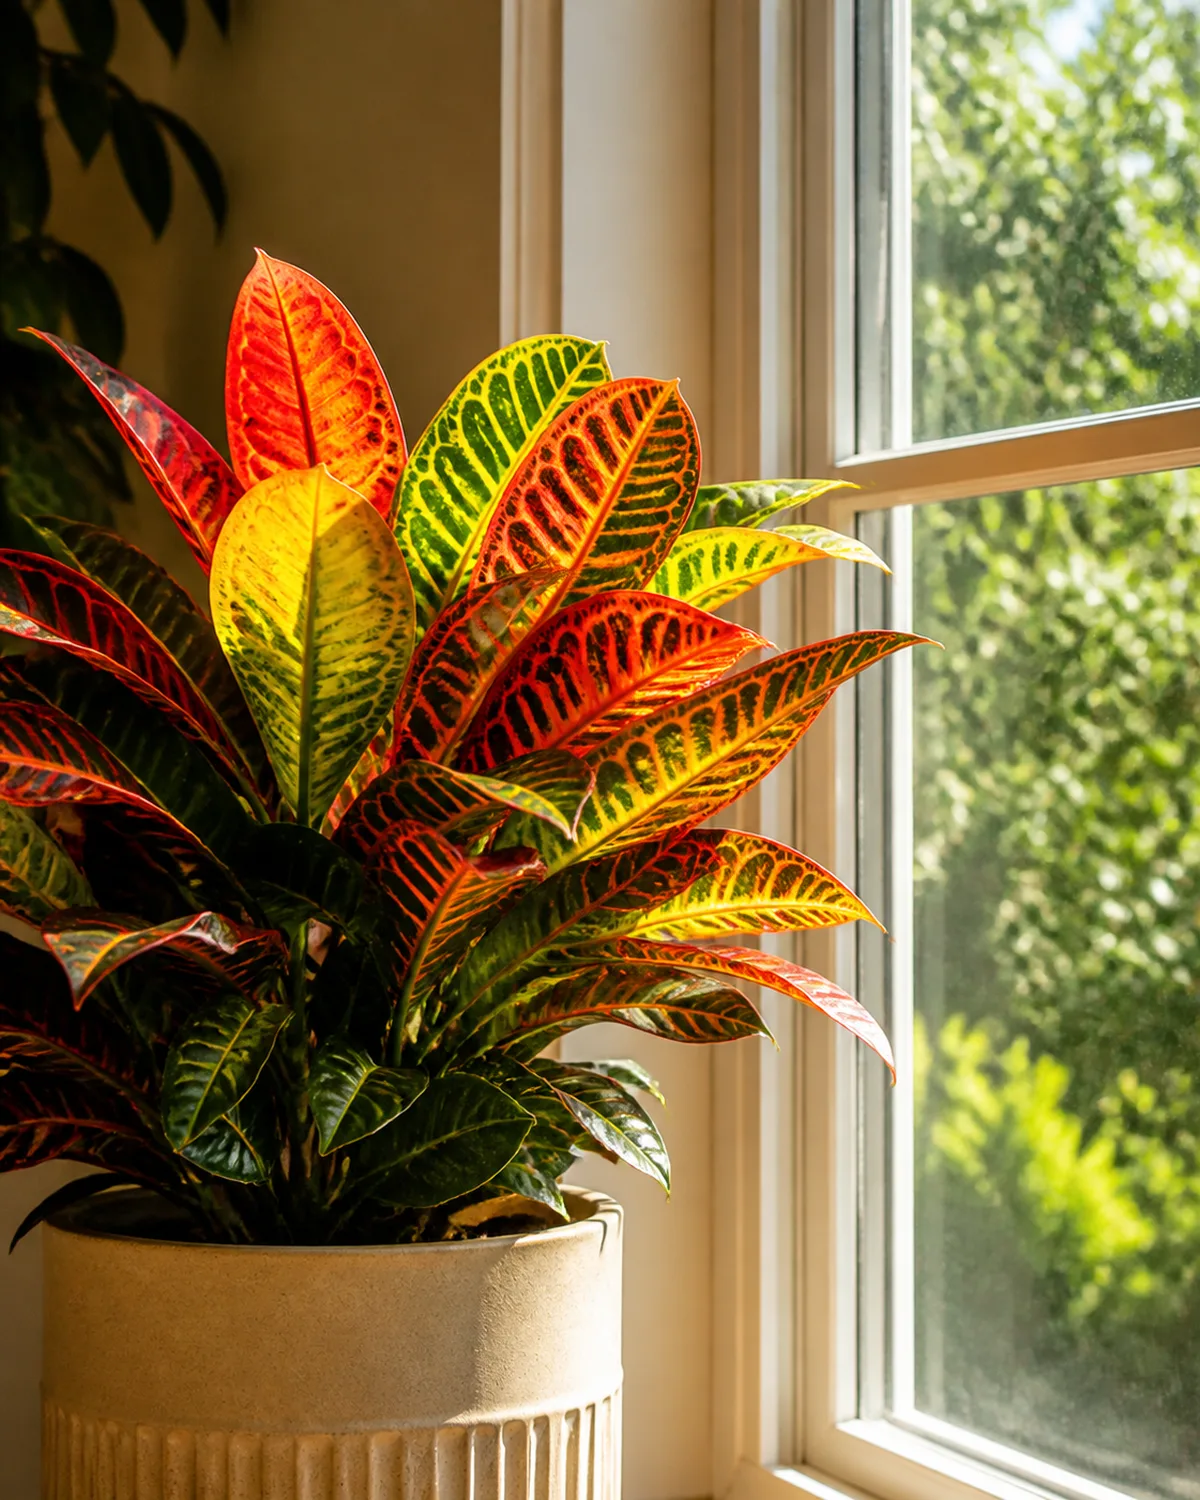
Croton has the simplest light-color relationship of any common houseplant: more light equals more color. This is the direct opposite of the Chinese evergreen rule, where darker-leafed varieties tolerate lower light. With croton, every variety wants as much brightness as you can provide.
Six or more hours of bright light daily is the target, and croton is one of the few houseplants that genuinely benefits from some direct sun exposure. A south-facing window is ideal. A west-facing window works well for afternoon light. An east window provides enough for maintenance but may not push the most vivid color development.
When a croton receives insufficient light, the response is unmistakable. The reds fade first, followed by the oranges, then the yellows. Over weeks, the leaves transition to a uniform green.
The plant is increasing chlorophyll production to compensate for reduced photosynthesis. This is not damage — the plant is surviving. But it has abandoned its signature coloring to stay alive.
The green does not reverse on existing leaves. Once a leaf has lost its color to low light, that specific leaf stays green even if you move the plant back into bright conditions. Only new growth will develop the full color range. This means recovery from a low-light period takes months — the plant has to grow entirely new foliage to restore its appearance.
Direct afternoon sun through a south or west window is fine once the plant is acclimated. If you move a croton from moderate light to a sunny window, introduce the direct light gradually over two weeks — an hour more each day — to prevent leaf scorch. Scorched leaves develop dry, papery brown patches that do not heal.
In winter, when natural light drops, the color will dull even in a south window. A supplemental grow light positioned above the plant for 4-6 hours can maintain the color intensity through the darker months. Full-spectrum LED panels work best — they deliver the red and blue wavelengths that drive both photosynthesis and pigment production.
The narrow moisture window: not too wet, not too dry
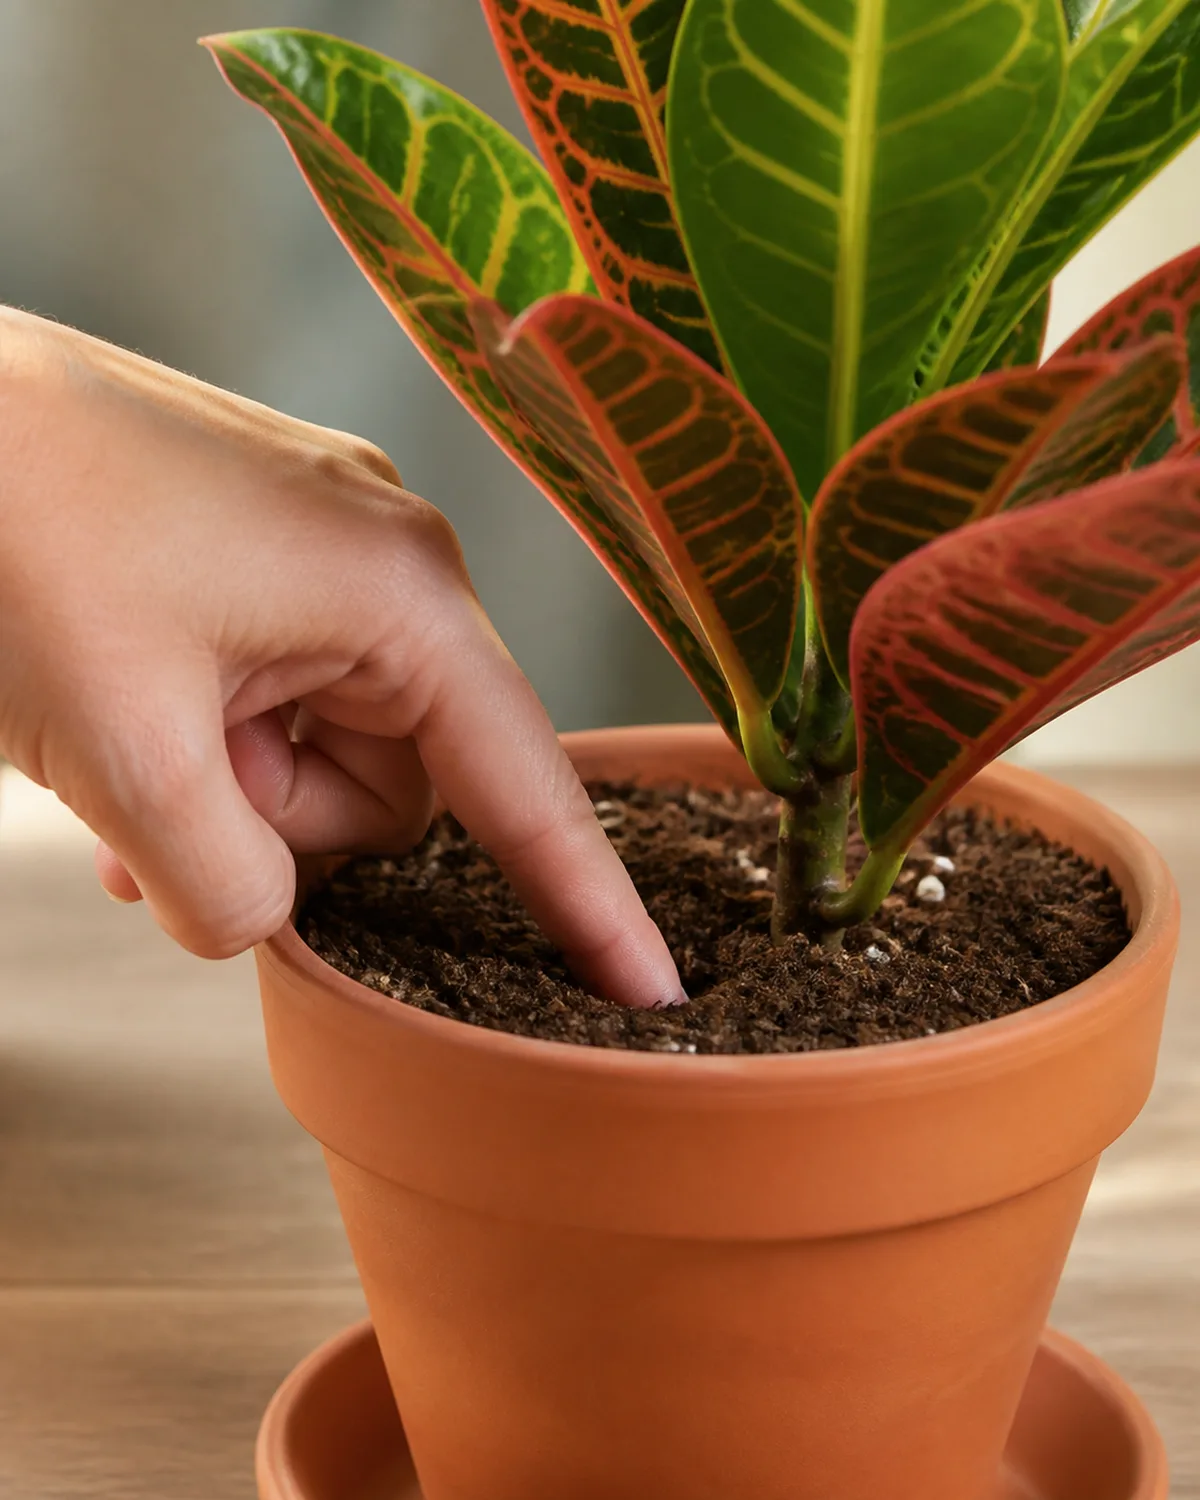
Croton occupies the narrowest watering margin of any mainstream houseplant. A snake plant survives weeks of drought. A peace lily broadcasts its thirst with a theatrical droop.
Croton does neither — it punishes both overwatering and underwatering with the same symptom (leaf drop), gives almost no advance warning, and the window between "too dry" and "too wet" is measured in days rather than weeks.
The reliable method is weight-based: lift the pot after a thorough watering and register how heavy it feels. Check daily. When the pot feels noticeably lighter — roughly half the saturated weight — water again. This captures the entire root zone, not just the surface inch, and accounts for pot size, soil density, and ambient humidity simultaneously.
If you prefer a tactile check, push a wooden chopstick or bamboo skewer to the bottom of the pot and leave it for 60 seconds. Pull it out: dark, damp wood means the lower soil is still wet enough. Dry, clean wood means it is time to water.
This is more informative than the standard finger-depth test because croton's root system extends to the bottom of the pot. The surface can dry while the lower third stays saturated — a condition that leads to root rot in the zone you cannot see.
Croton's stress signal for underwatering is subtle: the leaves lose their high-gloss finish and develop a matte, slightly papery texture before they curl inward along the midrib. By the time full curling is visible, some leaf drop is already inevitable. This is why proactive checking beats reactive watering — the plant does not scream for water the way a wilting pothos does.
Overwatering kills more crotons than any other mistake. Waterlogged soil suffocates the roots, and the first visible symptom — yellow lower leaves falling one at a time — is identical to natural aging or low-light stress.
The diagnostic distinction: overwatered leaves feel limp and mushy, while light-deprived or aging leaves feel papery and dry. If the soil smells sour or the base of the stem gives slightly when squeezed, root rot is already advanced.
Terracotta pots provide a meaningful safety margin. The porous clay draws moisture through its walls by capillary action, accelerating the dry-down cycle and reducing the time the root zone stays saturated. Plastic and glazed ceramic hold moisture longer, which is fine if you consistently underwater but dangerous if your instinct is to water on a fixed schedule.
In winter, the watering cadence drops to roughly once every 7-10 days — but the method stays the same (weight or chopstick, not calendar). Room-temperature water only: cold tap water shocks the tropical root system and can trigger the same leaf-drop cascade as a cold draft from a window.
Humidity: a tropical baseline
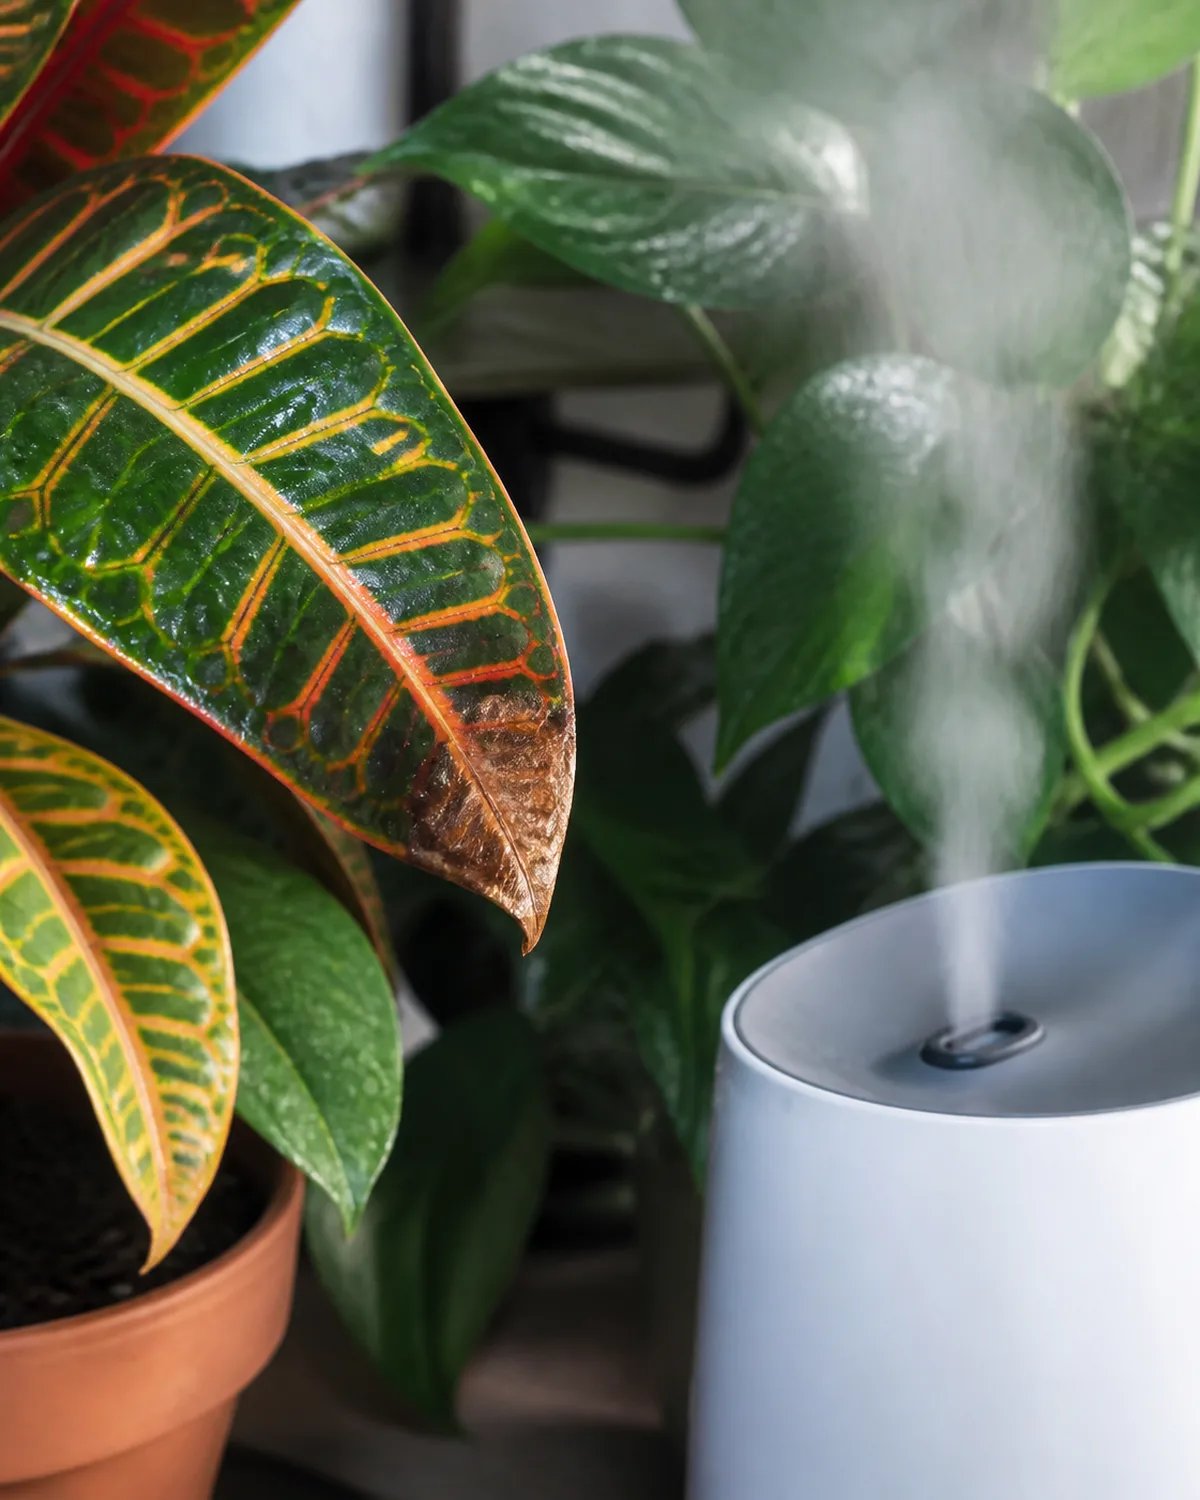
Croton evolved in tropical maritime climates where ambient humidity rarely drops below 60 percent. Indoors, especially in heated or air-conditioned rooms, humidity regularly falls to 30-40 percent — well below what croton considers comfortable.
The target is 50-60 percent relative humidity around the plant. Below 40 percent, you will see the signs: brown, crispy leaf tips and margins, starting at the thin outer edges where moisture evaporates fastest. The damage is cosmetic but permanent on affected leaves — once the tissue dries and browns, it does not regenerate.
A humidifier is the only intervention that reliably raises humidity enough to matter. Misting is a common recommendation that does almost nothing — the fine water droplets evaporate within minutes, creating a brief spike that the plant barely registers. Pebble trays (a tray of water beneath the pot) help marginally in the immediate vicinity but cannot meaningfully shift the humidity of a room.
Grouping tropical plants together creates a microclimate that raises local humidity through collective transpiration. If you have a croton alongside a fern, a calathea, and a few other moisture-loving plants, the zone between them can register 5-10 percentage points higher than the room average.
Bathrooms and kitchens often provide naturally elevated humidity from showers and cooking — but only if they also have sufficient light. A humid, dim bathroom will keep the leaves plump but drain the color, which defeats the purpose of growing a croton.
Soil and potting: drainage-first mix
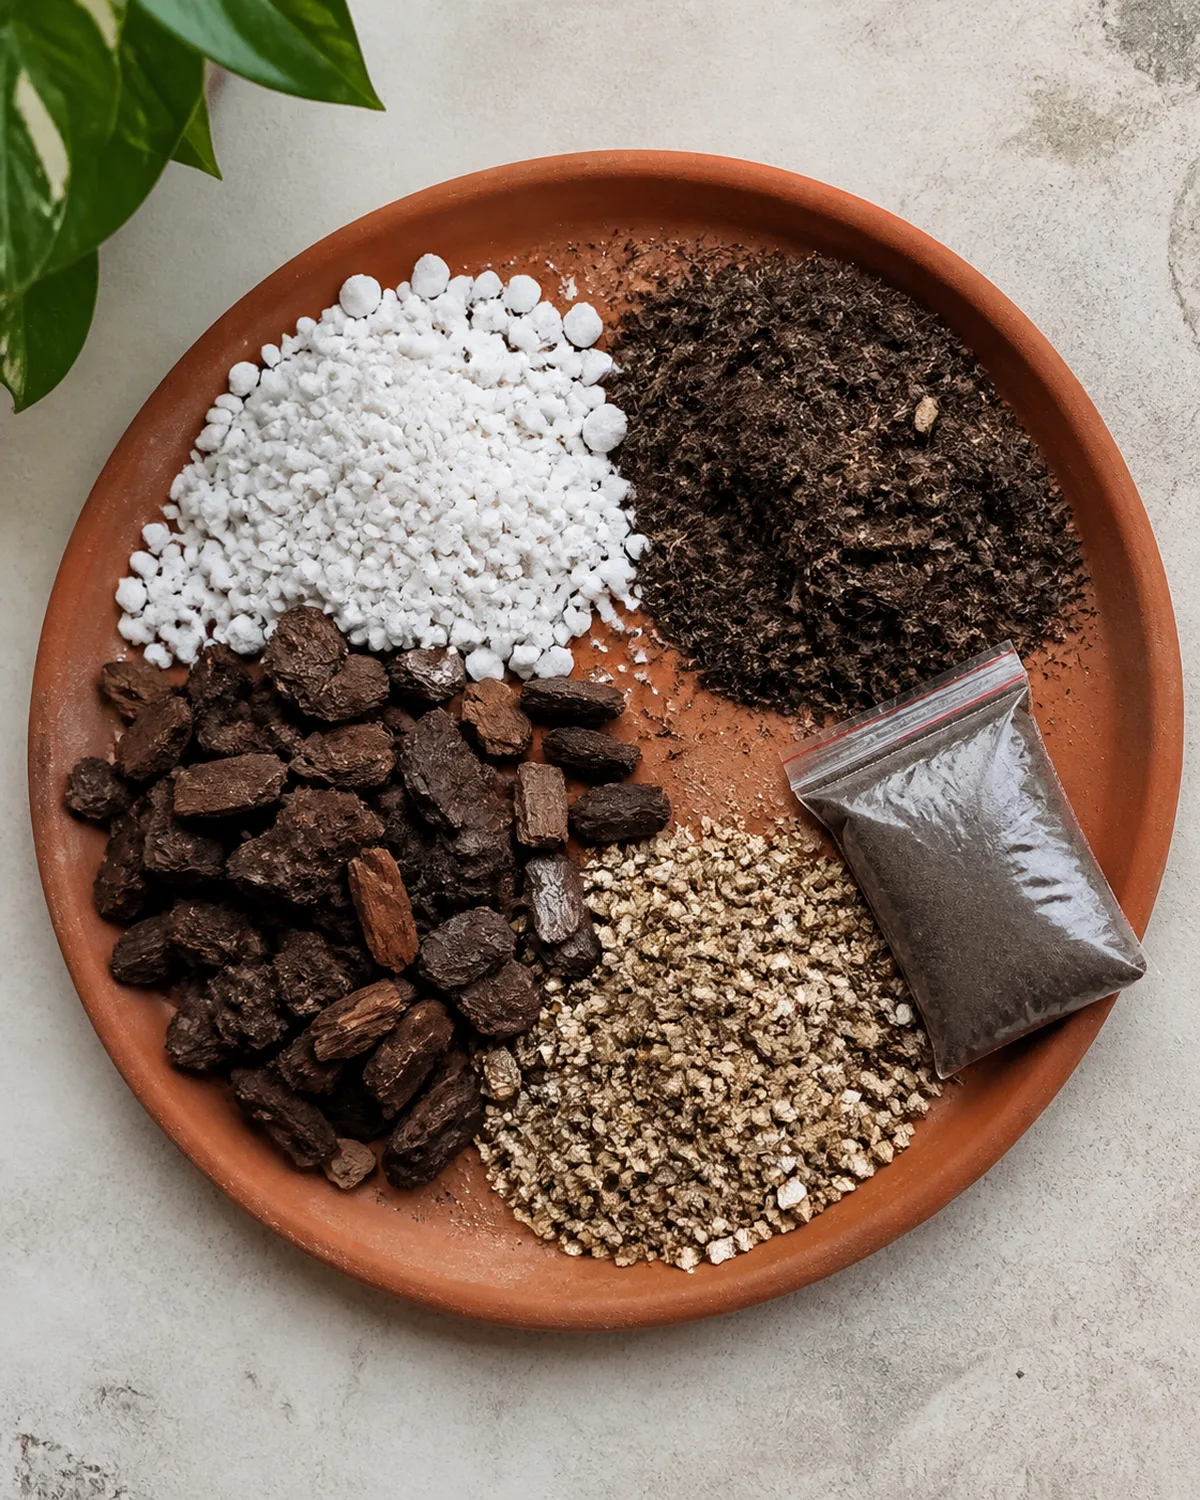
Croton needs soil that holds moisture without staying waterlogged — the same "moist but airy" balance that most tropical houseplants require.
A standard tropical potting mix amended with extra perlite works well. Start with two parts peat-based potting soil, add one part perlite for drainage, and optionally mix in a handful of orchid bark for additional aeration. The result should hold water long enough that you are not watering every day, but drain fast enough that the bottom of the pot is never sitting in saturated soil.
Croton prefers slightly acidic soil, ideally pH 4.5 to 6.5. Most peat-based mixes naturally fall in this range without amendment. If you use a coco coir-based mix (which tends toward neutral pH 6.0-7.0), it still works fine — croton is not as pH-sensitive as azaleas or blueberries, and the slight acidity preference is more of an optimum than a hard requirement.
Repot every two to three years, or when roots circle the inside of the pot or emerge from the drainage holes. Go up one pot size — no more. An oversized pot holds more soil moisture than the root system can absorb, keeping the root zone wet for too long and inviting rot.
Spring is the ideal repotting window, when the plant is entering its active growth period and can recover from root disturbance quickly. Avoid repotting in winter or right after a relocation — stacking stressors compounds the risk of leaf drop.
The relocation shock problem
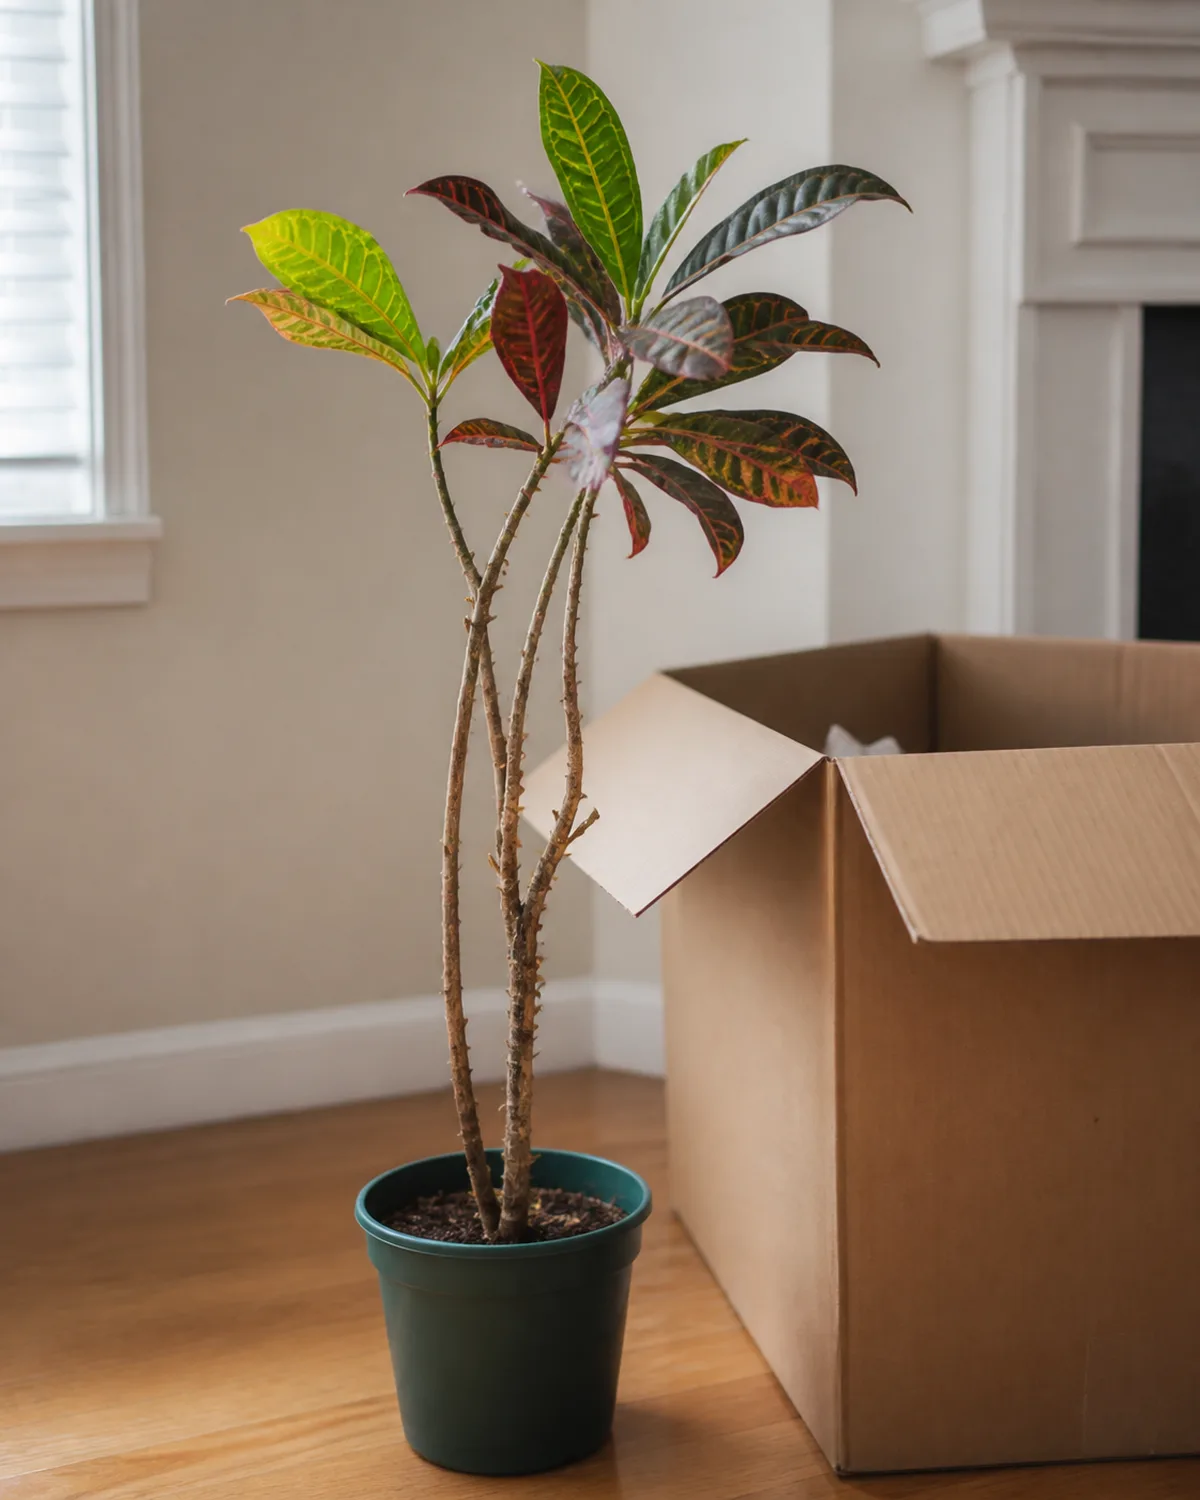
Croton is the most environmentally sensitive common houseplant when it comes to changes in position. Move it from one room to another, rotate it 90 degrees, bring it home from the nursery, or shift it a few feet closer to a window — and it may respond by dropping a significant portion of its leaves.
This is not a disease or a care failure. It is a stress response hard-wired into the species. The plant has calibrated its leaf angles, light absorption, and transpiration rate to its current environment.
When that environment changes — even subtly — the existing leaves are no longer optimized, and the plant discards them. New leaves will grow in calibrated to the new conditions.
The leaf drop typically begins three to seven days after the move and can continue for two to three weeks. The plant may lose 30 to 70 percent of its leaves, which looks alarming but is recoverable. The stems remain alive and will push new growth from dormant buds once the plant stabilizes.
Minimizing relocation shock requires a gradual transition. If you must move a croton:
Move it a few feet at a time over several days rather than one dramatic relocation. Keep the temperature, humidity, and light level as close to the original conditions as possible. Avoid moving it during winter, when the plant has fewer energy reserves to support recovery. Do not compensate by overwatering — wet soil plus stress equals root rot.
The most common shock scenario is bringing a new croton home from a garden center. Nurseries grow croton in greenhouse conditions with high light, high humidity, and controlled temperature — radically different from a typical living room. Some leaf drop after purchase is nearly universal.
Place the new plant in your brightest window immediately, maintain humidity, and give it four to six weeks to stabilize before judging its health. If the fiddle leaf fig is famously dramatic about relocation, the croton is worse — it just gets less press for it.
Cutting back a bare-stemmed croton (and handling the latex)
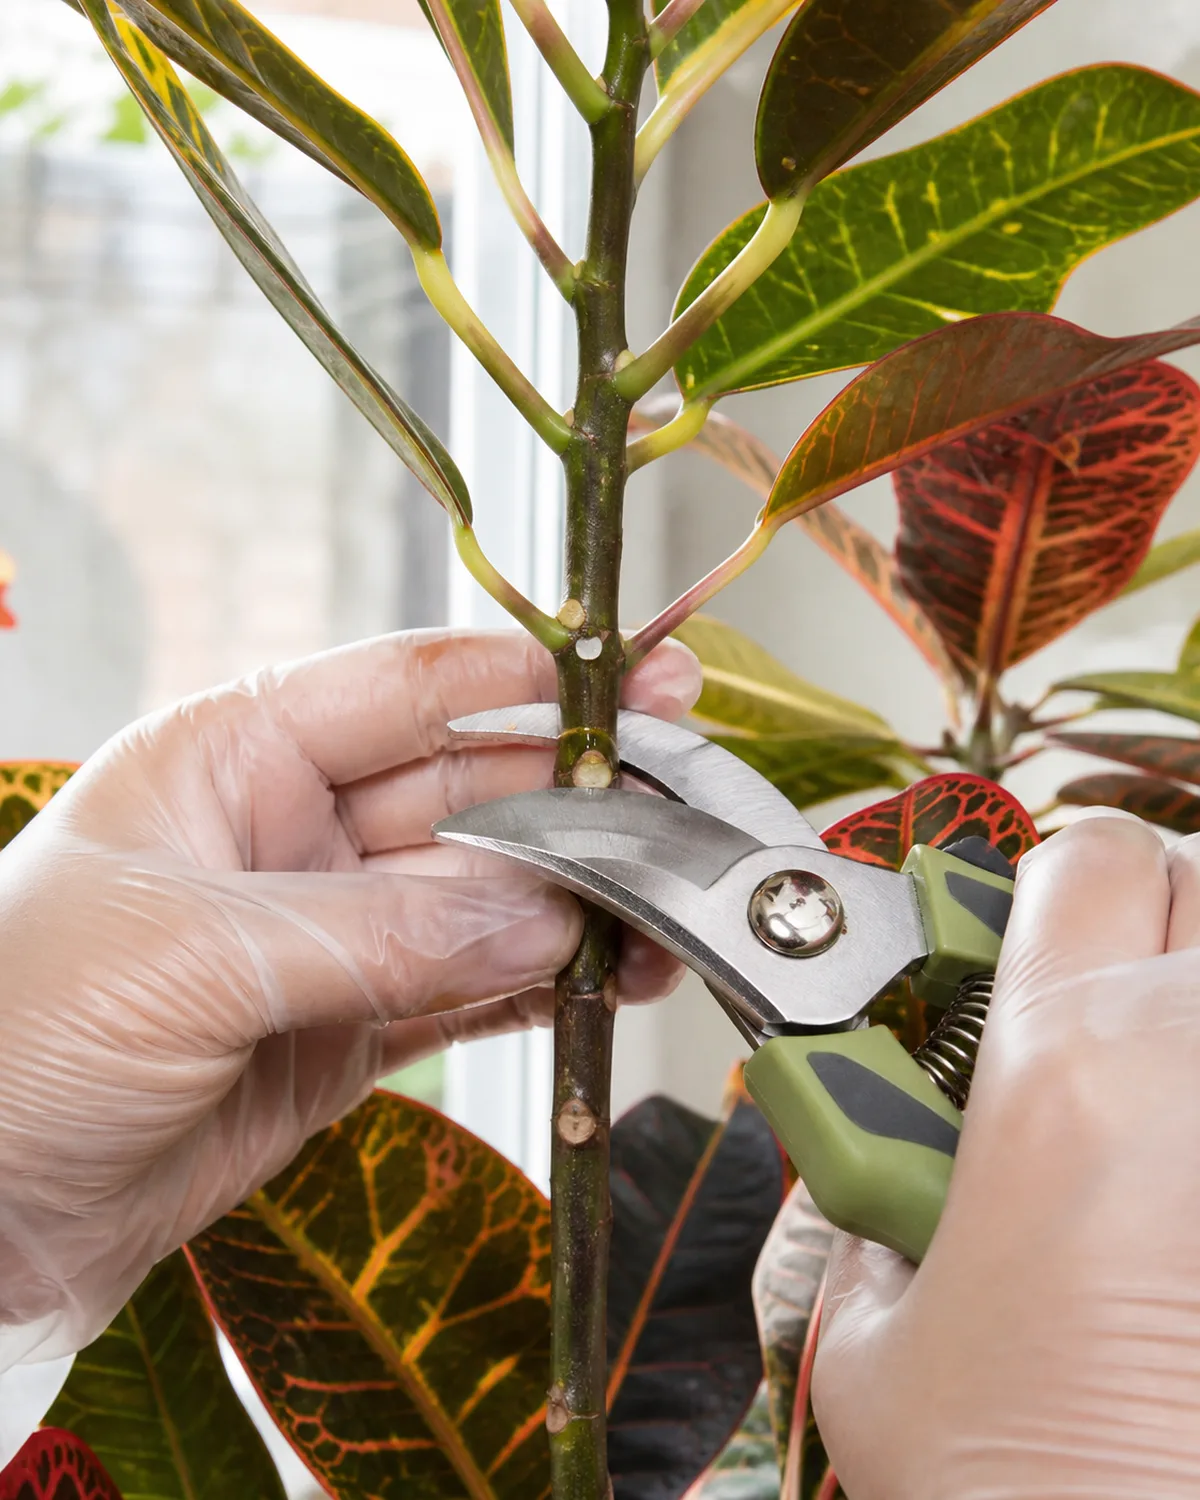
Croton develops woody, bark-covered stems as it matures — structurally closer to a small shrub than to the soft herbaceous vines of the aroid family. Indoor specimens can reach four to six feet over several years, but the common pattern is a tall bare trunk crowned by a rosette of colorful leaves.
That bare-trunk silhouette results from cumulative leaf loss — relocation shock, low-light seasons, pest episodes — and the plant does not spontaneously regrow lower foliage on old wood.
The recovery strategy is a hard cut. In early spring, shorten the main stem by up to a third of its total height, cutting just above a dormant bud eye — a slight swelling in the bark, usually near where an old leaf scar is visible.
Croton is one of the most vigorous resprouters among common houseplants. Within three to four weeks of a spring cut, two or three side shoots will emerge below the wound, rebuilding the canopy from a lower, fuller baseline.
The signature complication is the latex. Croton belongs to Euphorbiaceae (the spurge family), and every cut releases copious milky-white sap — far more than the trace amounts from a ficus or rubber plant.
This latex is a genuine skin irritant: contact causes redness, itching, and a rash that can persist for days. The milky fluid stains fabric permanently once it oxidizes to brown.
Always wear nitrile or latex gloves when cutting. Lay newspaper or a drop cloth beneath the plant because the sap drips freely for two to three minutes before clotting. If sap reaches skin, wash immediately with soap and warm water — do not rub your eyes or face until your hands are clean. The sap seals naturally; no wound paste or cinnamon is necessary.
Avoid pruning in winter. Croton's growth stalls in short days, and a cut made during dormancy may not produce side shoots for months — leaving you with a shorter bare stump instead of a recovering bush. If relocation shock stripped leaves in autumn, wait until March or April to cut back, even though the plant looks stark in the interim.
Propagation: stem cuttings with patience
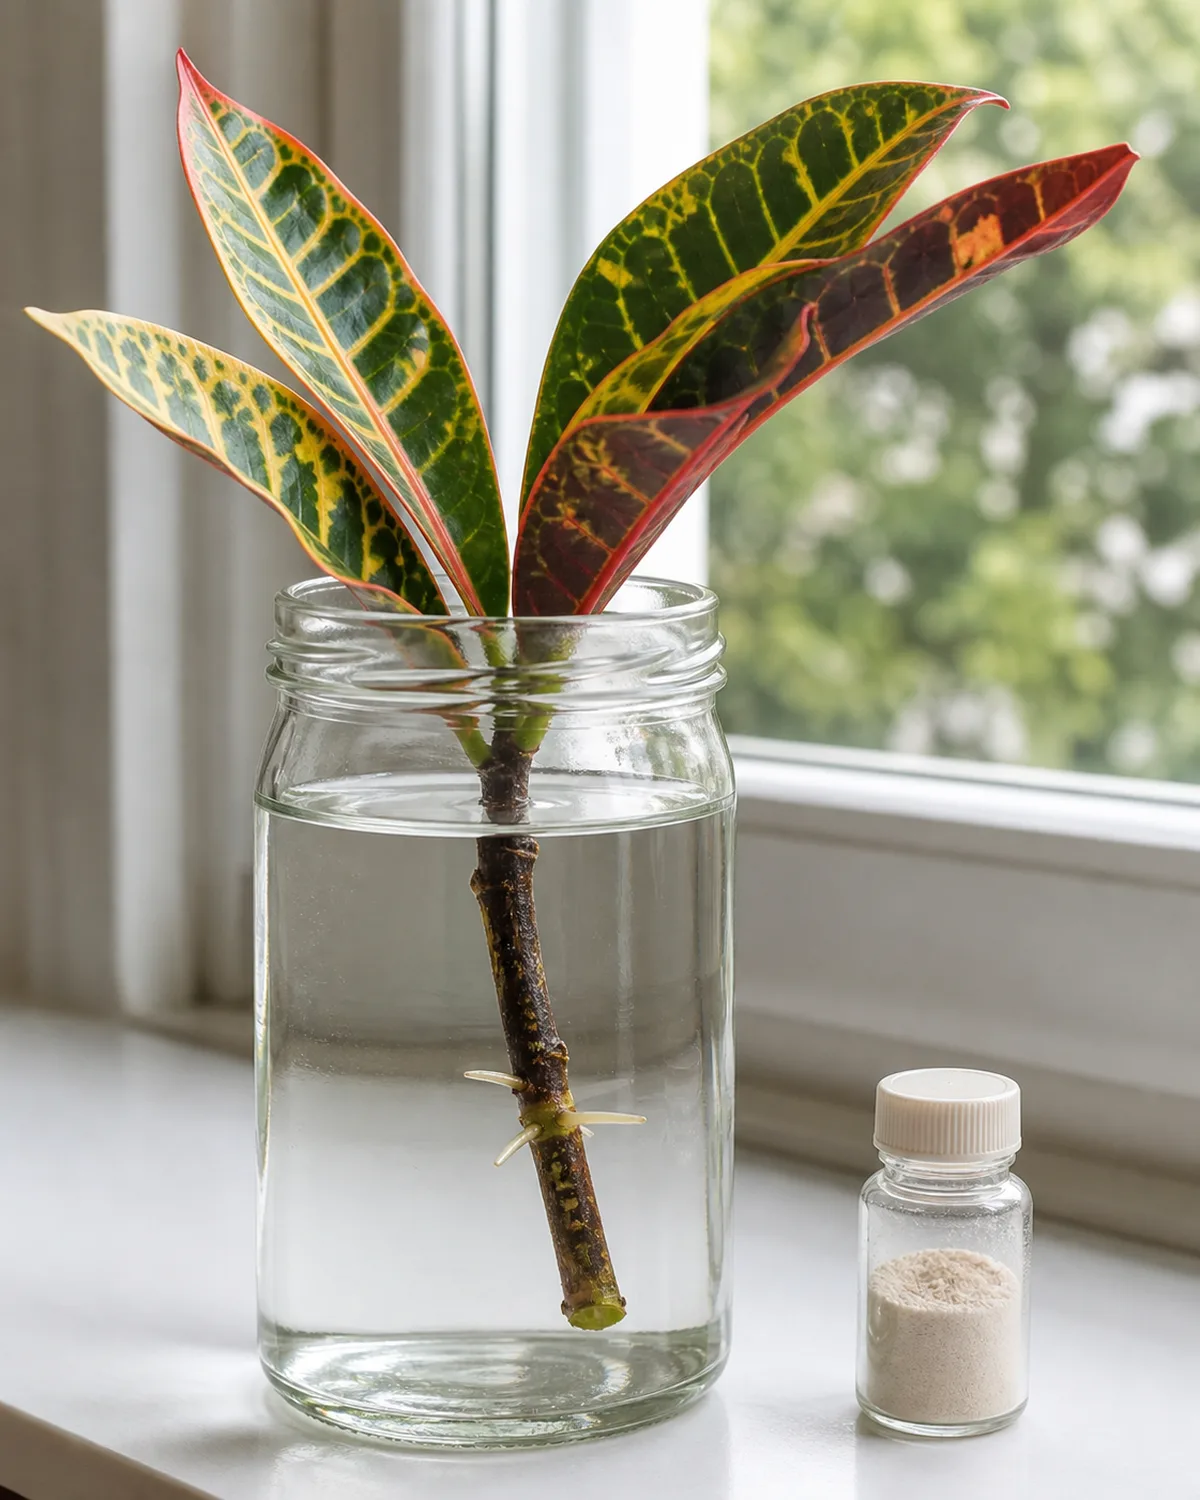
Croton propagation works reliably through stem cuttings, but it is slower than most common houseplants. Where pothos roots in water within a week and syngonium in one to two weeks, croton typically takes four to eight weeks to develop usable roots.
Take a cutting four to six inches long with at least three to four leaves. Cut just below a node using clean, sharp shears. Remove the bottom one or two leaves to expose the nodes that will produce roots. The cut will leak milky latex sap — let it dry for an hour before placing the cutting in rooting medium.
Rooting hormone is not strictly necessary but measurably improves success rates with croton. The waxy stem and latex sap create a barrier that slows root initiation, and rooting hormone helps overcome that resistance. Dip the cut end in powdered rooting hormone, tap off the excess, and insert into the medium.
Water rooting works but is less reliable than soil rooting for croton. The stem tends to rot in standing water before roots develop, especially if the water is not changed frequently. If you prefer the water method, change the water every three days and keep the jar in bright indirect light — not direct sun, which heats the water and accelerates bacterial growth.
Soil rooting is more dependable. Use a mix of perlite and peat (50/50) in a small pot, moisten it, insert the cutting to the depth of two nodes, and cover the pot with a clear plastic bag to maintain humidity.
Place in bright indirect light, vent the bag daily to prevent mold, and keep the mix consistently moist. Roots should appear in four to six weeks — you will know because the cutting begins producing a small new leaf, which means the root system is functional enough to support growth.
Air layering is another option for mature, thick-stemmed crotons that resist cutting. Make a small upward-angled cut in the stem, wedge it open with a toothpick, wrap the wound in damp sphagnum moss, and seal with plastic wrap. Roots grow into the moss over four to eight weeks, at which point you cut below the rooted section and pot it up.
Croton Care: The Quick Reference
- 1Every leaf carries a different color mixReds, oranges, yellows, greens on one branch simultaneously. No other common houseplant matches this color range. Color depends entirely on light intensity.
- 2Petra, Mammy, Gold Dust, Zanzibar, Eleanor RooseveltPetra (classic multi-color) for beginners. Mammy (corkscrew leaves). Gold Dust (speckled). Zanzibar (narrow grass-like). Eleanor Roosevelt (slender oakleaf).
- 3More light = more color, no exceptions6+ hours bright light. South or west window. Direct sun welcome with acclimation. Low light drains all color to green permanently on existing leaves.
- 4Narrow moisture window — not too wet, not too dryTop inch dry then thorough soak. Terracotta helps. Room-temperature water only. Reduce in winter but never bone-dry. Overwatering = root rot before you see it.
- 550-60% humidity minimumBelow 40% causes crispy brown leaf margins. Humidifier is the only reliable fix. Misting does almost nothing. Group with other tropicals.
- 6Well-draining, slightly acidic soilTwo parts potting mix + one part perlite. pH 4.5-6.5. Repot every 2-3 years, one size up. Spring only. Never oversized pots.
- 7Relocation shock drops leaves — expect itMoving the plant causes 30-70% leaf loss. Move gradually over days. Avoid moving in winter. New leaves will grow calibrated to the new spot.
- 8Cut back in spring, wear gloves for the latexCut above a node. Milky sap is an irritant — wear gloves. Up to one-third of height per session. Each cut stimulates 2-3 new branches.
- 9Stem cuttings root in 4-8 weeksSlower than most houseplants. Rooting hormone helps. Soil rooting more reliable than water. Air layering works for thick mature stems.
- 10Balanced fertilizer monthly in growing seasonApril through September. Iron supplement deepens reds. Stop in winter. Dilute to half strength to avoid salt buildup and leaf burn.
- 11Spider mites love dry croton leavesCheck leaf undersides weekly. Fine webbing between veins = infestation. Neem oil every 7 days for 3 weeks. Scale hides on woody stems. Isolate infested plants.
- 12Milky sap is toxic and irritatingEuphorbiaceae family toxin. Latex sap causes skin rash, oral irritation if ingested. ASPCA toxic to cats and dogs. Wear gloves when handling.
kultivy.com
Fertilizing for maximum color
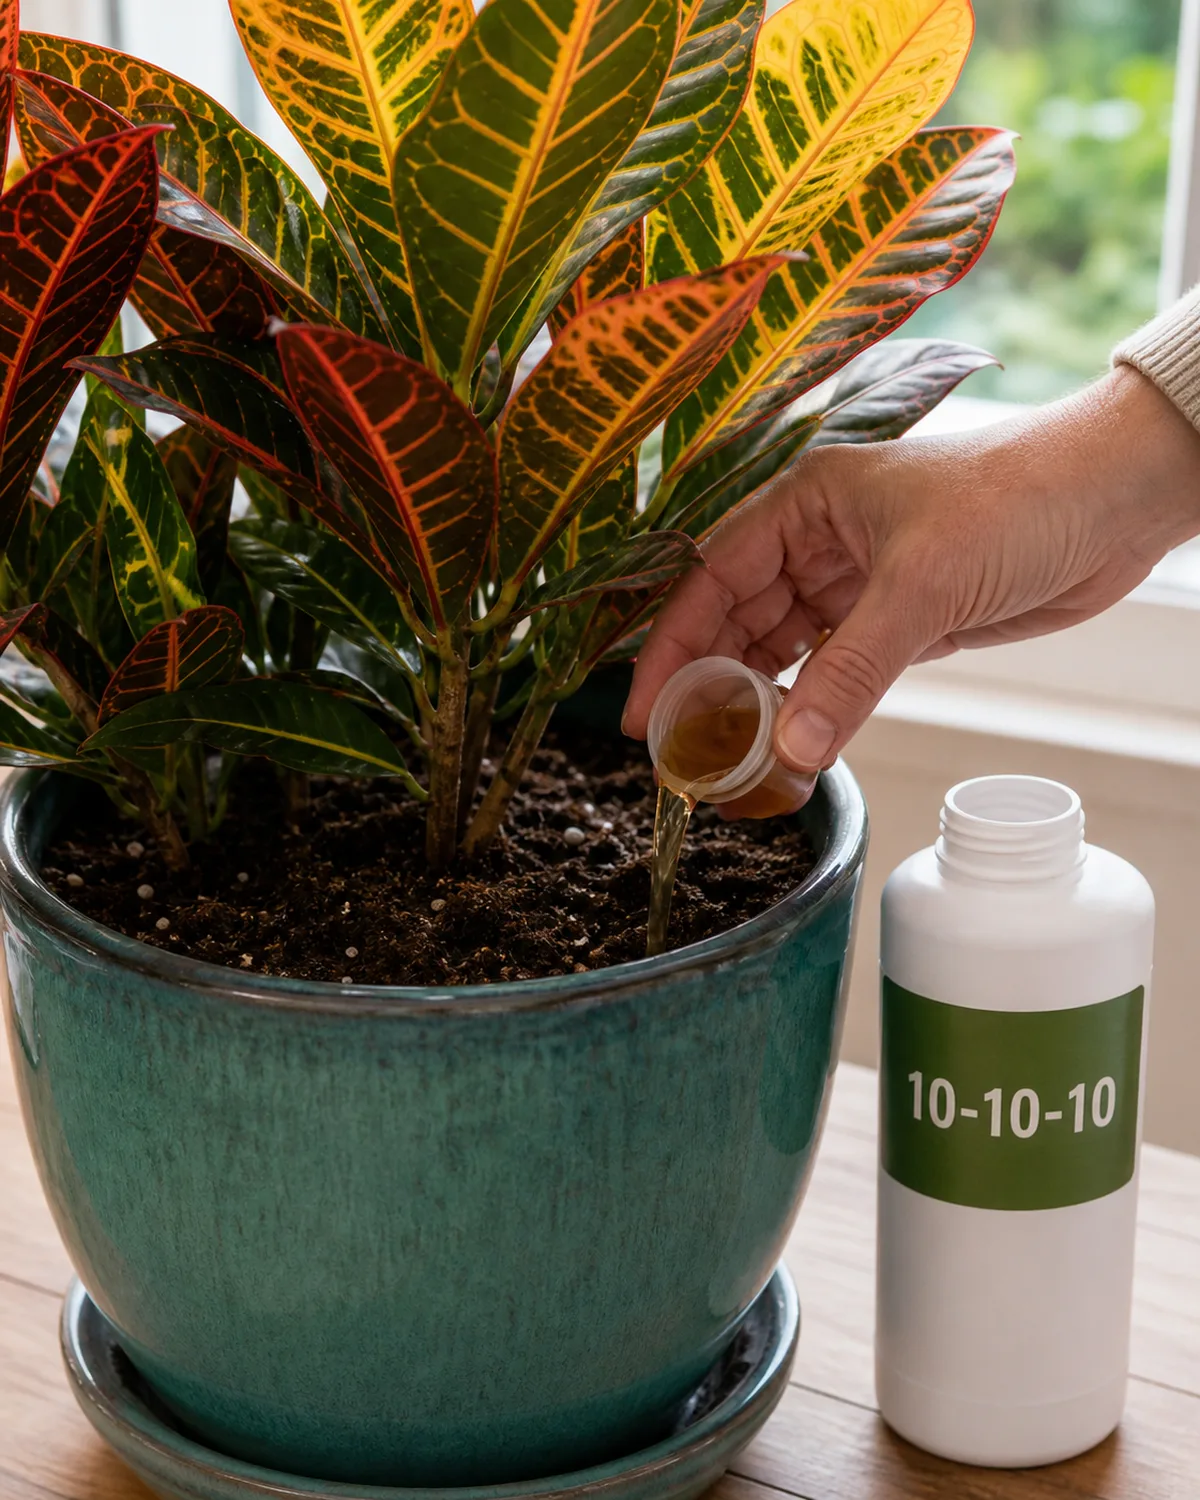
Croton is a moderate feeder that benefits from regular fertilization during the growing season but does not require the heavy feeding that some fast growers demand.
Apply a balanced liquid fertilizer (10-10-10 or 20-20-20 diluted to half the label rate) once a month from April through September. Balanced means equal parts nitrogen, phosphorus, and potassium — croton does not need a specialized bloom formula because you are feeding for foliage, not flowers.
Iron plays a specific role in croton color development. It is essential for the production of anthocyanins — the pigments responsible for red, purple, and burgundy tones in the leaves.
If your croton produces healthy green and yellow leaves but the reds seem muted, an occasional iron supplement (chelated iron in liquid form) can deepen those warm tones. This is most noticeable on Petra and Mammy, which rely heavily on red pigments.
Stop all fertilization in winter. The plant's growth slows dramatically in shorter days and cooler temperatures, and it cannot use the nutrients efficiently. Fertilizer sitting in slow-drying soil breaks down into salts that accumulate around the roots, potentially burning the fine root hairs and causing the very leaf drop you are trying to prevent.
Salt buildup from months of fertilizing is a real concern with croton. Every two to three months during the growing season, flush the soil by running plain water through the pot for several minutes — twice the pot's volume — to dissolve and wash out accumulated mineral salts.
You will see the runoff go from slightly cloudy to clear. This simple step prevents the gradual toxicity that causes brown leaf tips and margins that look like humidity damage but resist humidity fixes.
Spider mites, scale, and the pests that target crotons
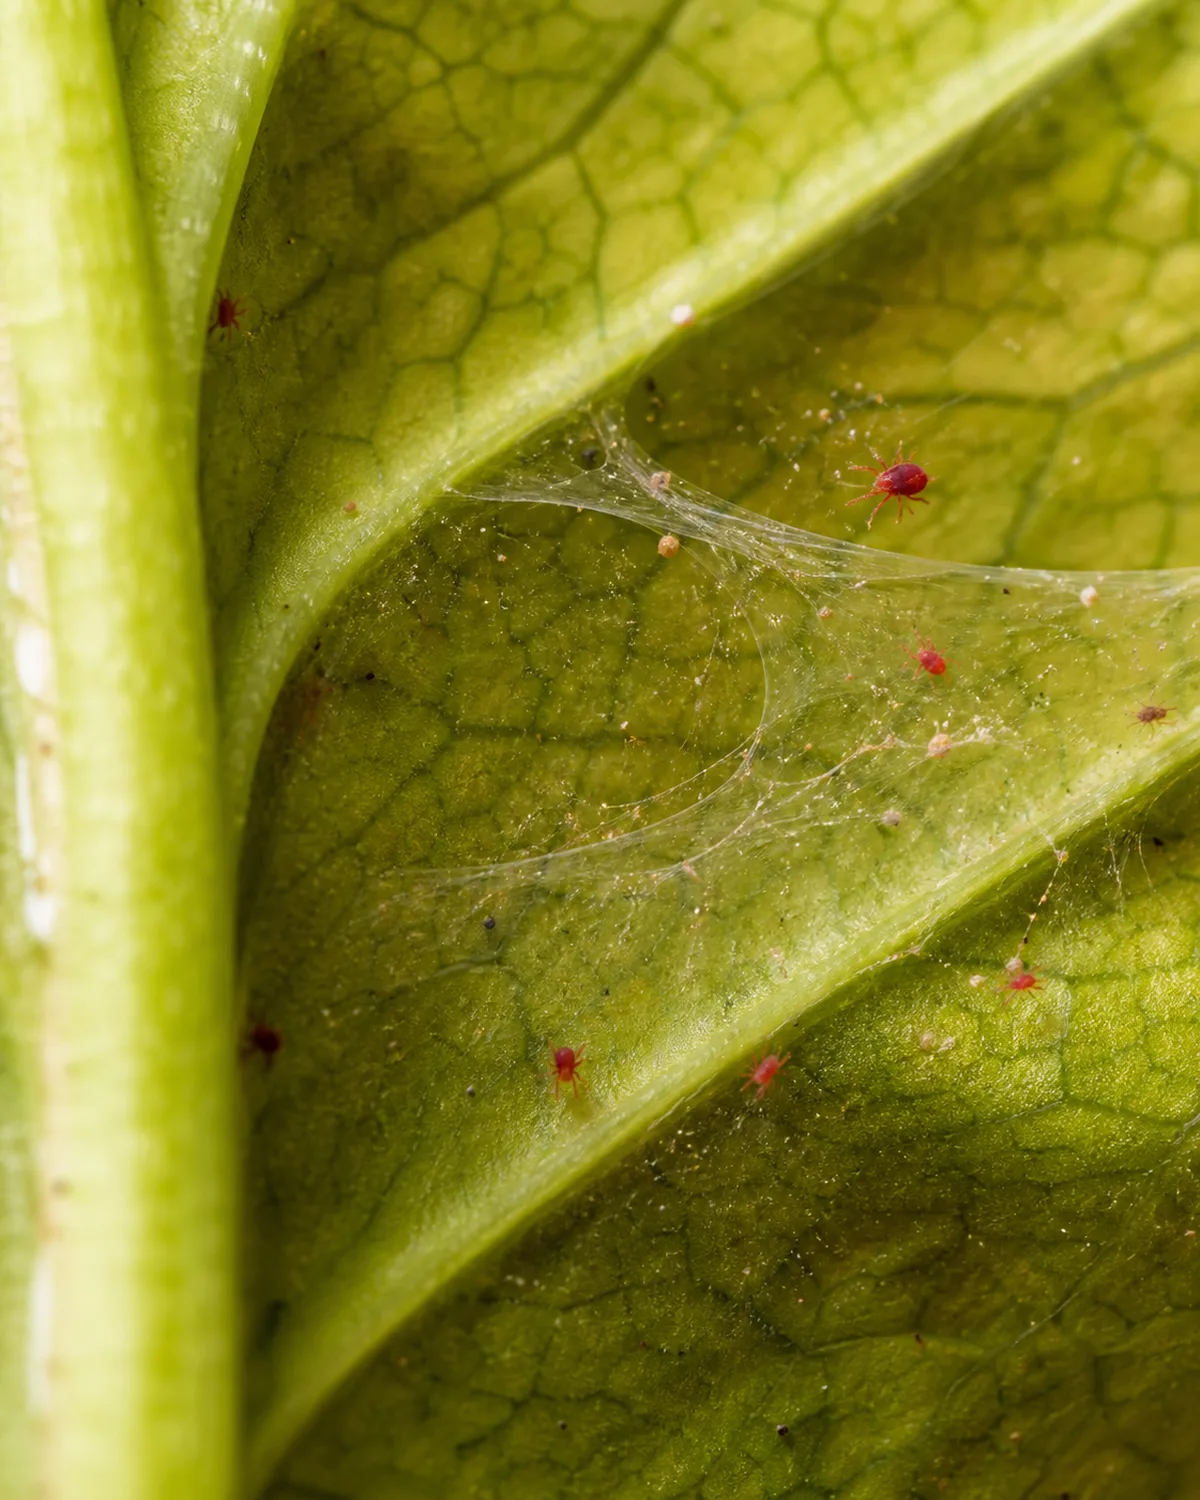
Croton attracts a predictable cast of pests, and spider mites are the headliner.
Spider mites thrive in the warm, dry conditions that croton often lives in — heated rooms with humidity below 40 percent. They colonize the undersides of leaves first, feeding on cell contents and leaving behind tiny yellow stipple marks on the upper surface.
The classic diagnostic sign is fine webbing stretched between leaf veins or between a leaf and its stem. By the time you see webbing, the colony is well established.
Treatment follows the standard three-week protocol: spray all leaf surfaces (top and bottom) with neem oil or insecticidal soap every seven days for three consecutive weeks.
The lifecycle of spider mites is about a week at room temperature, so three treatments catch newly hatched mites before they can reproduce. One treatment is never enough — it kills the adults but not the eggs, which hatch within days and restart the cycle.
Scale insects are the second most common pest on croton, particularly on older woody stems. They look like small brown or tan bumps that do not move — easy to mistake for a natural stem feature until you try to scrape one off with a fingernail.
Treat with rubbing alcohol on a cotton swab applied directly to each scale, or spray with horticultural oil which suffocates them.
Mealybugs appear as white, cottony clusters in leaf axils — the joints where leaves meet stems. They are easier to spot than spider mites but equally persistent.
Remove visible clusters with a cotton swab dipped in rubbing alcohol, then follow with neem oil sprays weekly for three weeks. For details on the full pest treatment protocol, see the dedicated guide.
Distinguishing pest damage from other leaf problems matters: spider mite damage creates fine stippling (tiny dots) on the upper leaf surface, while humidity damage causes even, crispy browning at the leaf margins. Leaf drop from pests tends to be scattered (random leaves, not bottom-up), while leaf drop from relocation shock or overwatering progresses from the bottom of the plant upward.
Is croton toxic? Yes — handle with gloves
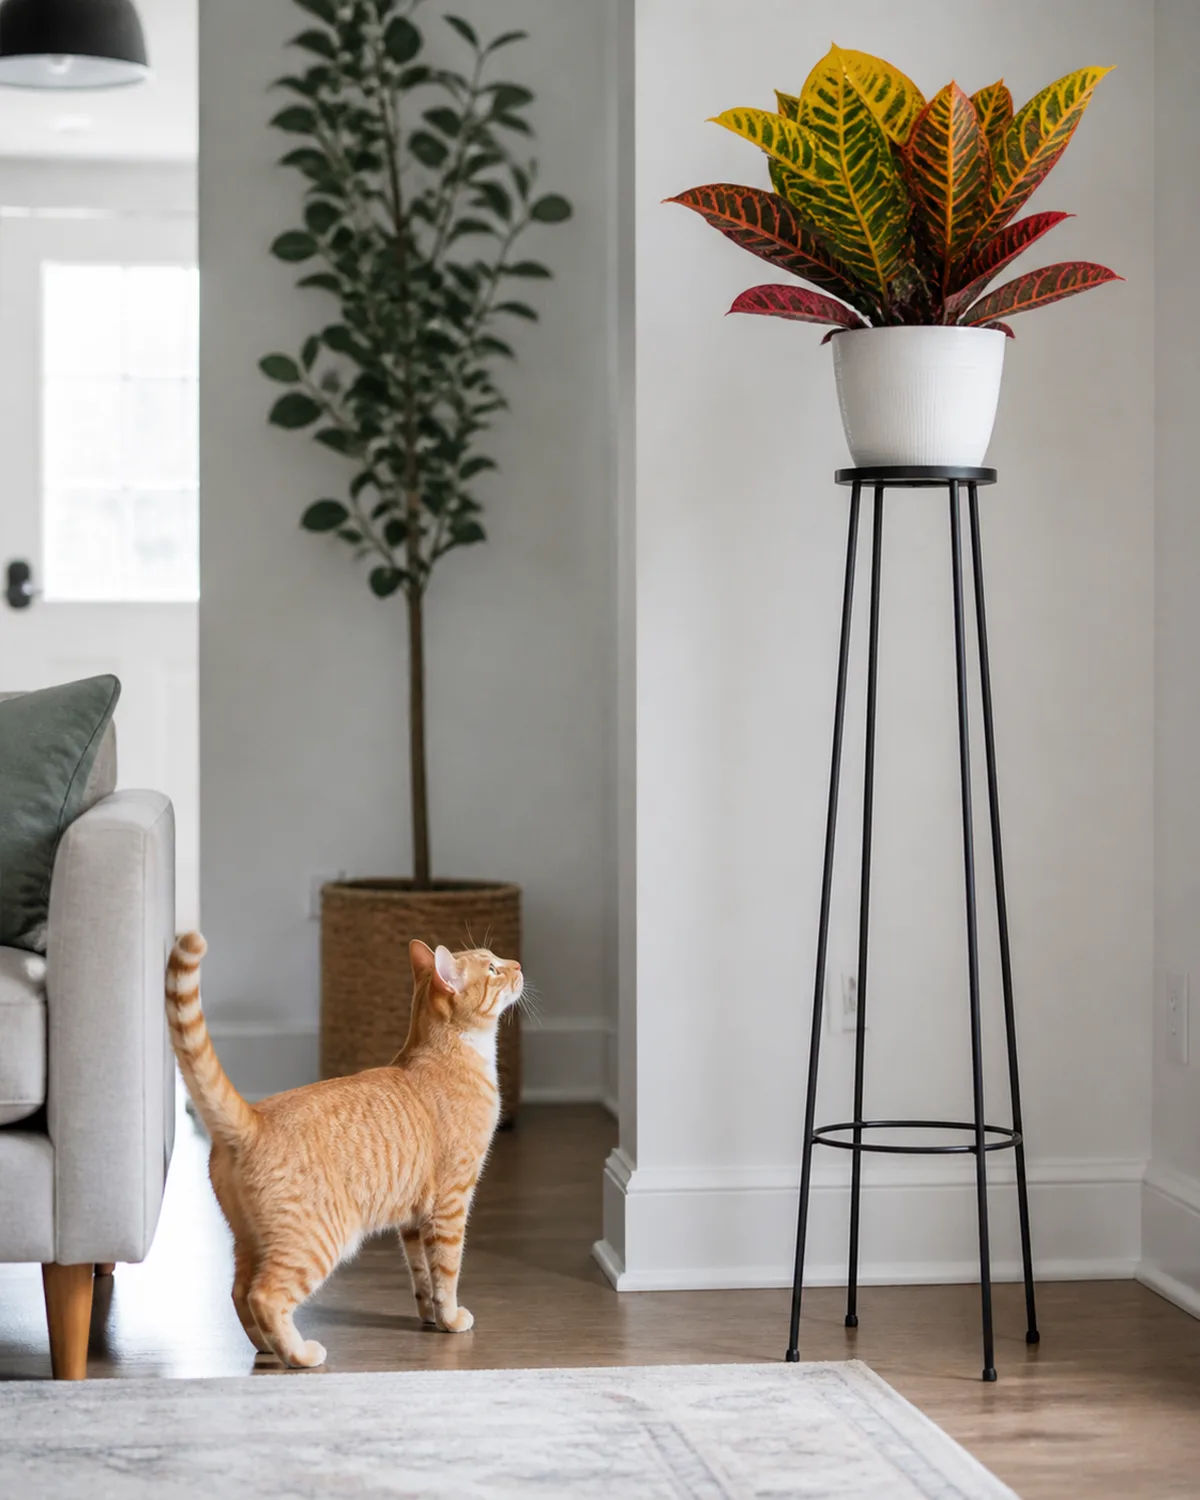
Croton belongs to Euphorbiaceae, the same family as poinsettia and rubber tree. The entire plant — leaves, stems, bark, and roots — contains a milky white latex sap that is both an irritant and a toxin.
The sap causes contact dermatitis on human skin: redness, itching, and a mild rash that can last several days, especially on sensitive skin or around the eyes. This is the most common exposure — it happens during pruning, propagation, or even when a leaf tears during routine handling. The solution is simple: wear gloves whenever you are cutting, repotting, or otherwise breaking the plant's tissue.
The ASPCA classifies croton as toxic to both cats and dogs. The primary concern is the latex sap and the diterpene esters it contains, which cause oral irritation, excessive drooling, vomiting, and diarrhea if ingested.
The burning sensation from chewing the leaves is usually intense enough that animals stop quickly — most exposures are minor because the taste and oral pain are immediate deterrents.
Serious poisoning from croton ingestion is rare but not impossible, particularly in small animals or persistent chewers. If you observe your pet chewing croton leaves, remove any remaining plant material from their mouth, offer water, and contact your veterinarian.
Most cases resolve with supportive care, but veterinary guidance is important to rule out complications.
The practical approach: place croton on high shelves, tall plant stands, or in rooms that pets do not access. Croton's preference for bright direct light means it often lives in windows — which are typically out of reach for most cats and dogs. If you have climbing cats, a wall-mounted shelf or a high windowsill that the cat cannot reach is the safest placement.
The sap also stains fabric and surfaces, so handle pruned stems over newspaper or a drop cloth. The white latex turns brown as it dries and can be difficult to remove from clothing, carpets, and furniture once set.

Mara Quinn edits Kultivy, where she shares houseplant care, propagation, beginner-friendly plant picks, and plant-styling ideas for anyone who wants their indoor plants to actually thrive. Every guide is image-led and reviewed for clarity, usefulness, image accuracy, and Pinterest-to-page alignment before it goes live. Visit the About page.