Aloe vera is the rare houseplant that earns its shelf space twice — as a sculptural succulent and a medicine cabinet staple.
Standard succulent care works here, but aloe vera has its own quirks. Gel-filled leaves hide a bitter latex layer beneath the rind. Pups replace leaf cuttings. And the plant that craves direct light will bleach white if you move it too fast.
Aloe vera stores water and medicine in the same leaf. These thirteen sections cover the gel anatomy that makes it unique, the light balance that prevents sunburn, the watering rhythm that prevents rot, and the pup propagation method that actually works for this species.
What makes aloe vera different from other succulents
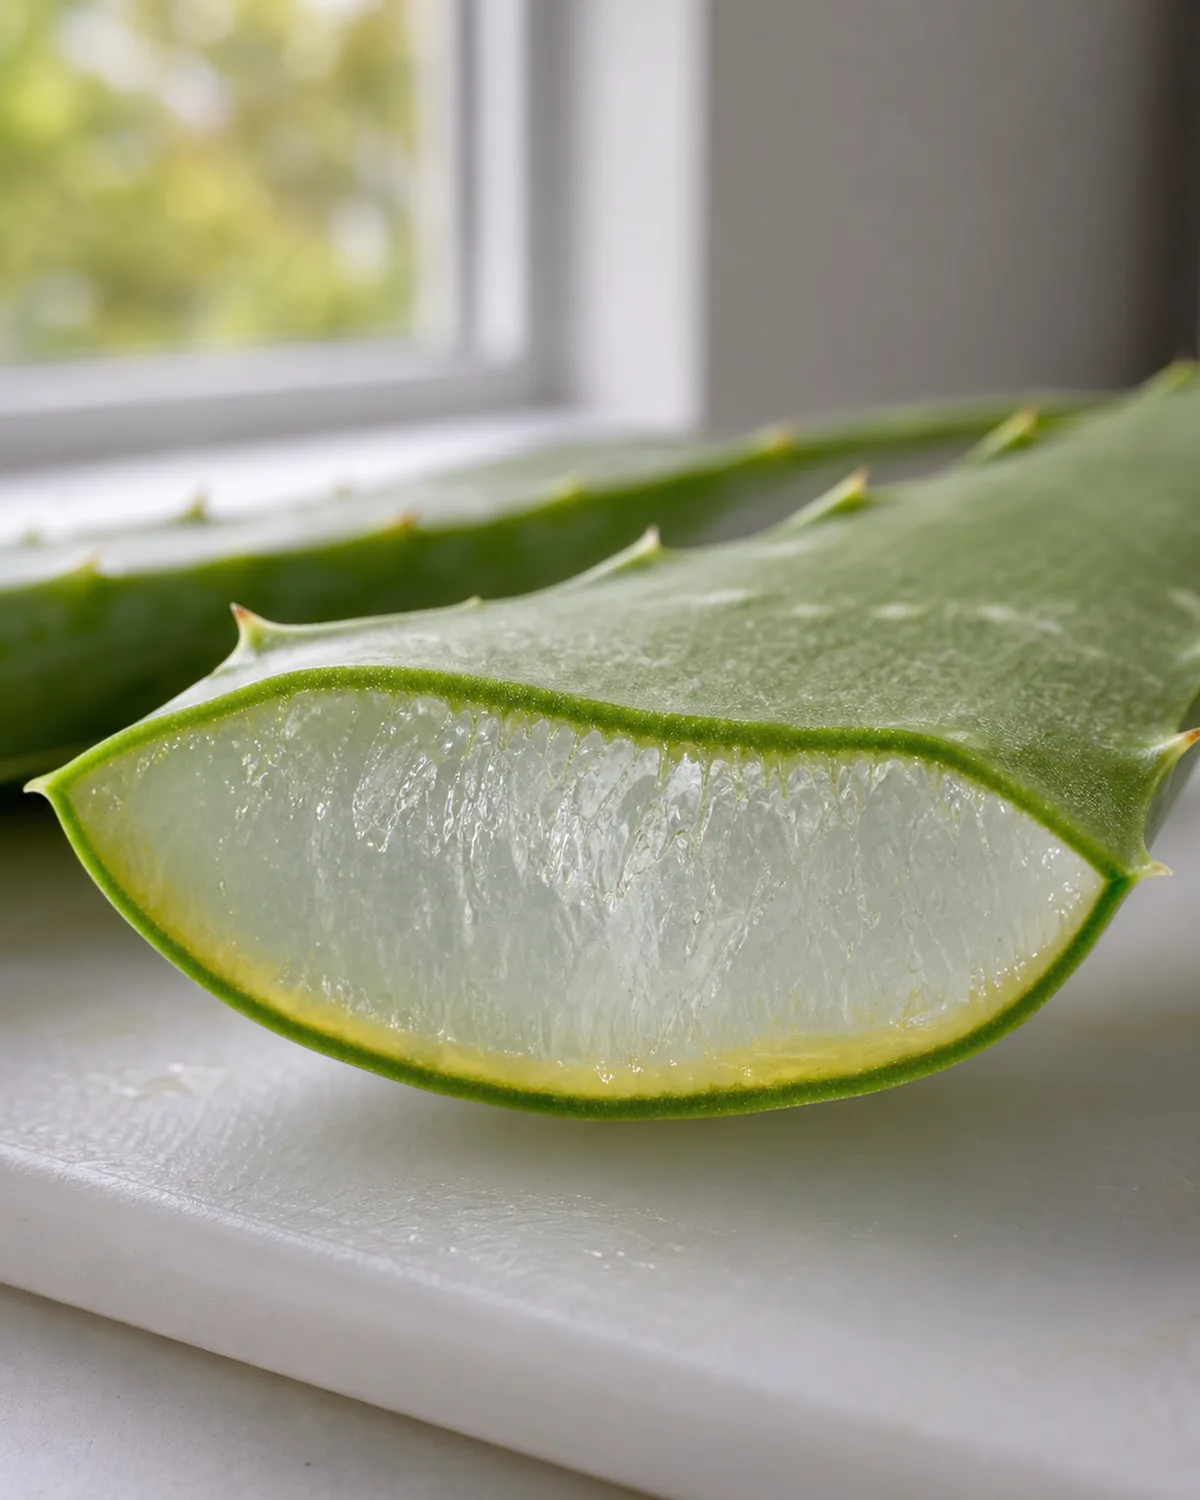
Cut an aloe vera leaf in half and you see three distinct layers. The outer green rind is tough and fibrous. Just beneath it sits a thin band of yellow liquid called aloin — a bitter latex compound that acts as the plant's chemical defense against herbivores. Inside that is the clear, mucilaginous gel that has been used on burns and skin irritations for thousands of years.
This three-layer anatomy is what separates aloe vera from most other common succulents. An echeveria stores water throughout its fleshy leaves. A jade plant distributes moisture evenly in thick, rounded foliage. Aloe vera concentrates its water and medicinal compounds in a distinct gel core surrounded by a protective rind — more like a fruit than a typical leaf.
The rosette growth pattern is another distinguishing feature. Aloe vera produces no true stem in its first years. Thick, lance-shaped leaves spiral directly from a short central base, creating a fountain-like form. Older plants may develop a short woody trunk as lower leaves are harvested or die back, but the rosette architecture remains.
Unlike cacti, which rely exclusively on CAM photosynthesis, aloe vera switches between CAM and conventional photosynthesis depending on water availability. When well-watered, it opens stomata during the day like most plants. Under drought stress, it shifts to nighttime gas exchange.
This metabolic flexibility makes it more forgiving than a cactus in inconsistent watering schedules — though overwatering still kills it faster than anything else.
Aloe vera is one of the most forgiving houseplants you can own — but it does have one hard requirement that makes or breaks success.
Light: bright and direct, but introduce it gradually
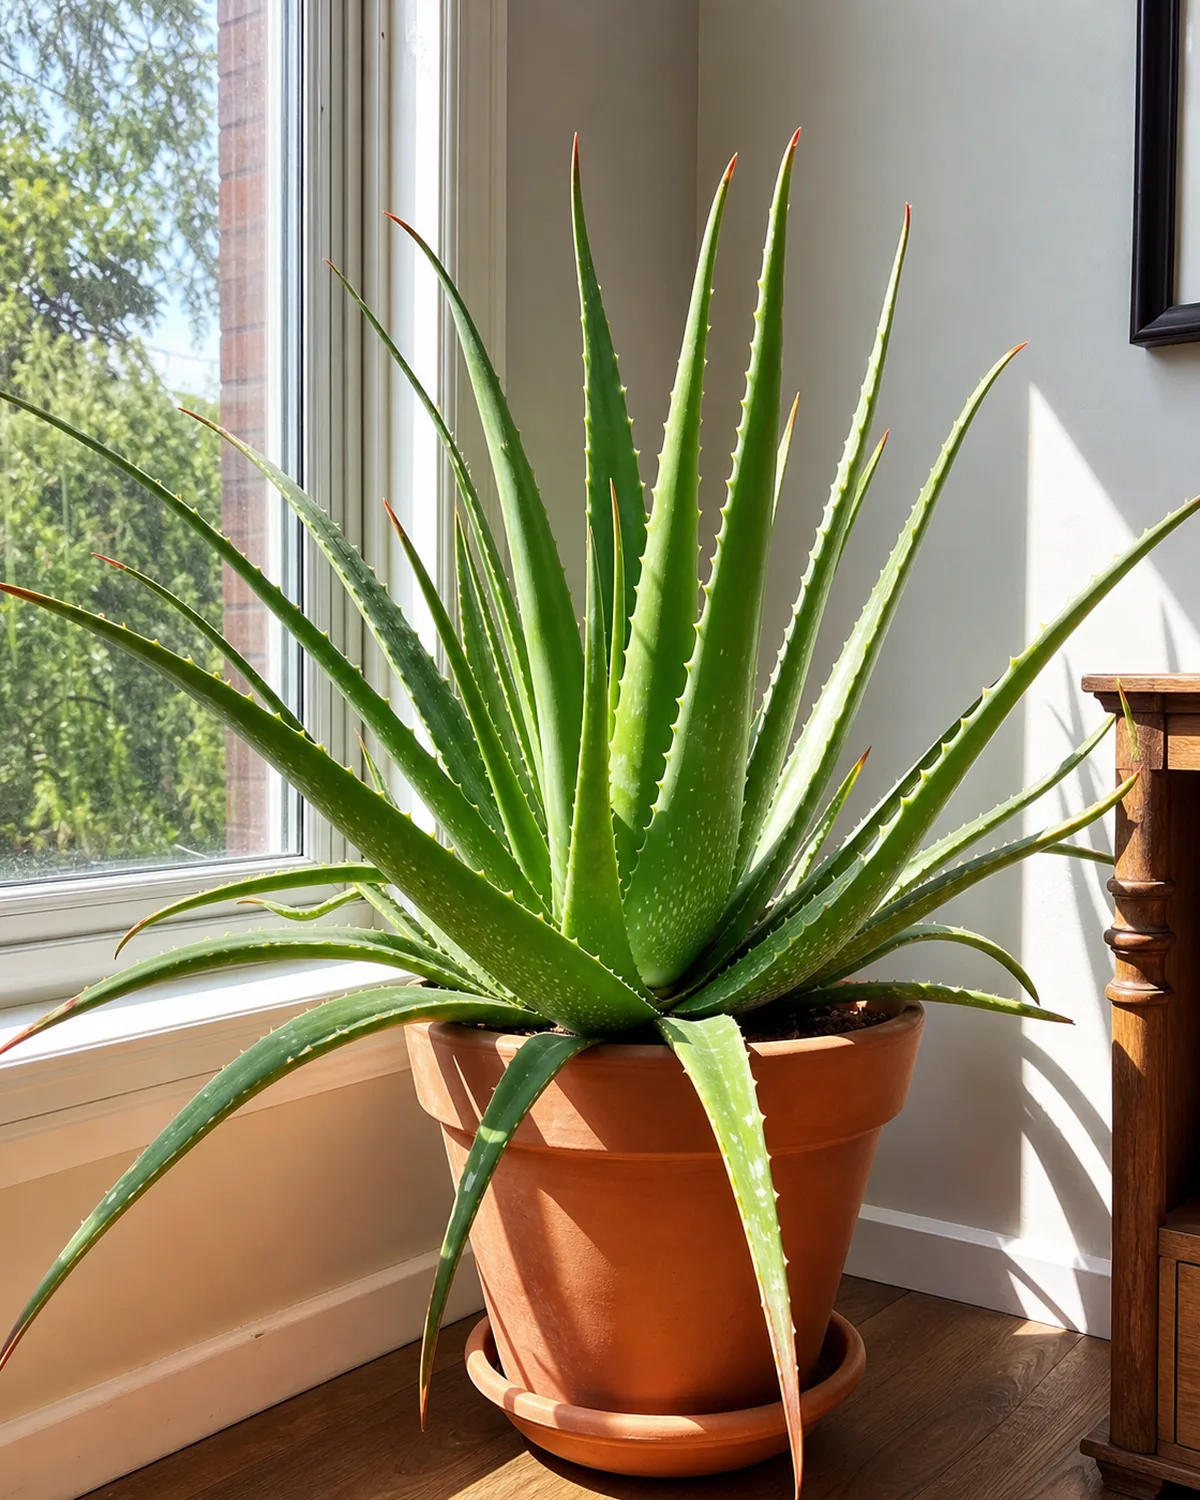
Aloe vera wants as much bright light as you can give it. A south-facing window with four to six hours of direct sun daily produces the sturdiest, most compact rosettes with the thickest leaves. West-facing windows deliver strong afternoon light that works nearly as well.
The paradox: aloe vera craves direct sun but will sunburn if you move it from a dim store shelf into a south window overnight. Sunburn shows as white or pale brown patches on the leaf surface — bleached, papery areas where the cells have been damaged by UV exposure they were not acclimated to handle. The damage is cosmetic and permanent. The leaf does not recolor.
The fix is gradual acclimation. Start the plant in bright indirect light for two weeks. Then move it into a spot that gets one to two hours of direct morning sun. Over the next two to three weeks, shift it into its permanent position with full afternoon sun. This slow transition lets the leaf cells build protective pigments.
Once acclimated, aloe vera handles full direct sun without issue. Plants that have lived in a sunny window for months can even tolerate brief periods outdoors in summer.
Without enough light, aloe vera etiolates — the rosette stretches upward, leaves become thin and pale, and the plant leans dramatically toward the nearest light source. If your aloe is leaning, it needs a brighter spot, not rotation. Rotation distributes the lean but does not fix the underlying light deficit.
For a deeper look at reading light signals across species, see the houseplant light requirements guide.
Watering: the soak-and-dry method, succulent edition
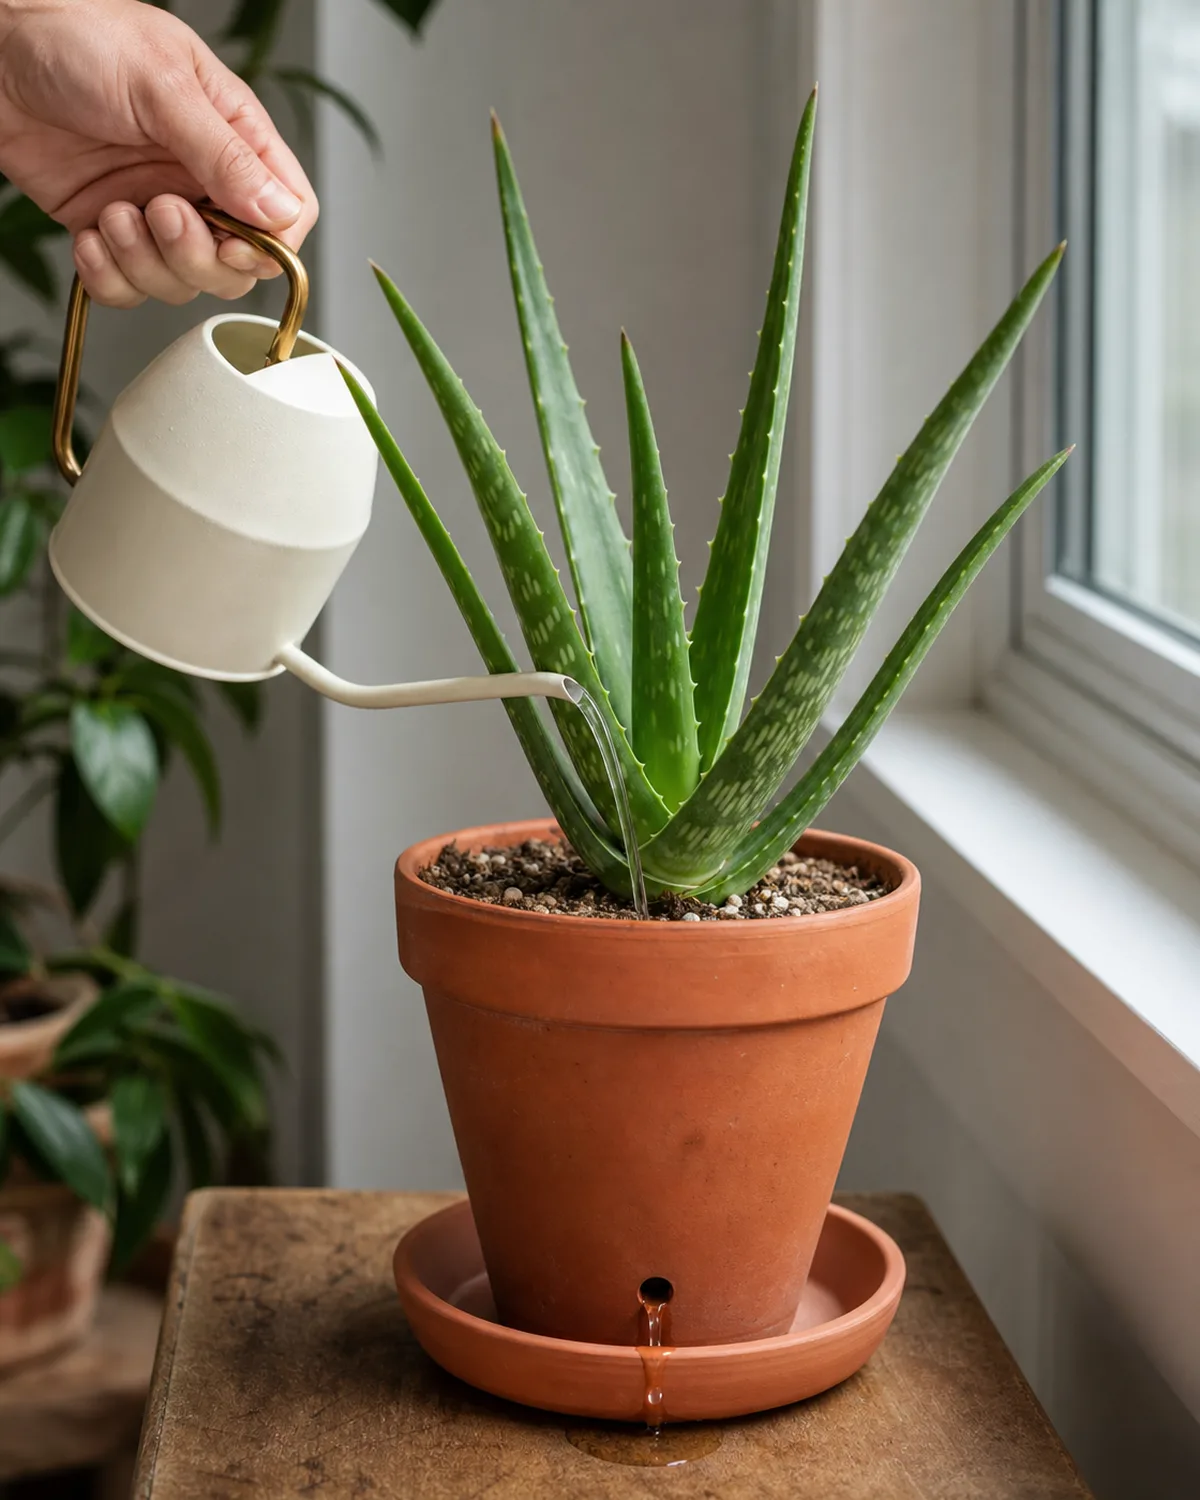
Aloe vera follows the soak-and-dry method that works across the succulent family, but with a tighter margin for error than most. The gel-filled leaves hold so much moisture that the plant can go weeks without water. Sitting in wet soil for even a few days starts the rot process.
The rhythm: stick your finger two inches into the soil. If it feels damp at all — even slightly cool — wait. When the soil is completely dry through the entire pot, drench it until water flows freely from the drainage hole. Then do not water again until the soil is bone dry throughout.
In the growing season — spring through early fall — this usually means watering every two to three weeks in a terracotta pot with gritty mix. In winter, once a month or even less. The plant's growth slows dramatically in short-day months, and its water needs drop in proportion.
Water at the soil line, not over the rosette. Water pooling in the center where leaves overlap creates a humid pocket that invites rot at the base. A narrow-spout watering can or a squeeze bottle makes targeted soil-line watering easier.
The single most important watering rule: when in doubt, wait. A slightly underwatered aloe vera shows thin, slightly curled leaves with fine wrinkles — cosmetic signs that reverse within days after a good soak. An overwatered aloe vera turns translucent and mushy at the base, and that damage is usually fatal.
Soil: a gritty mix that drains in seconds
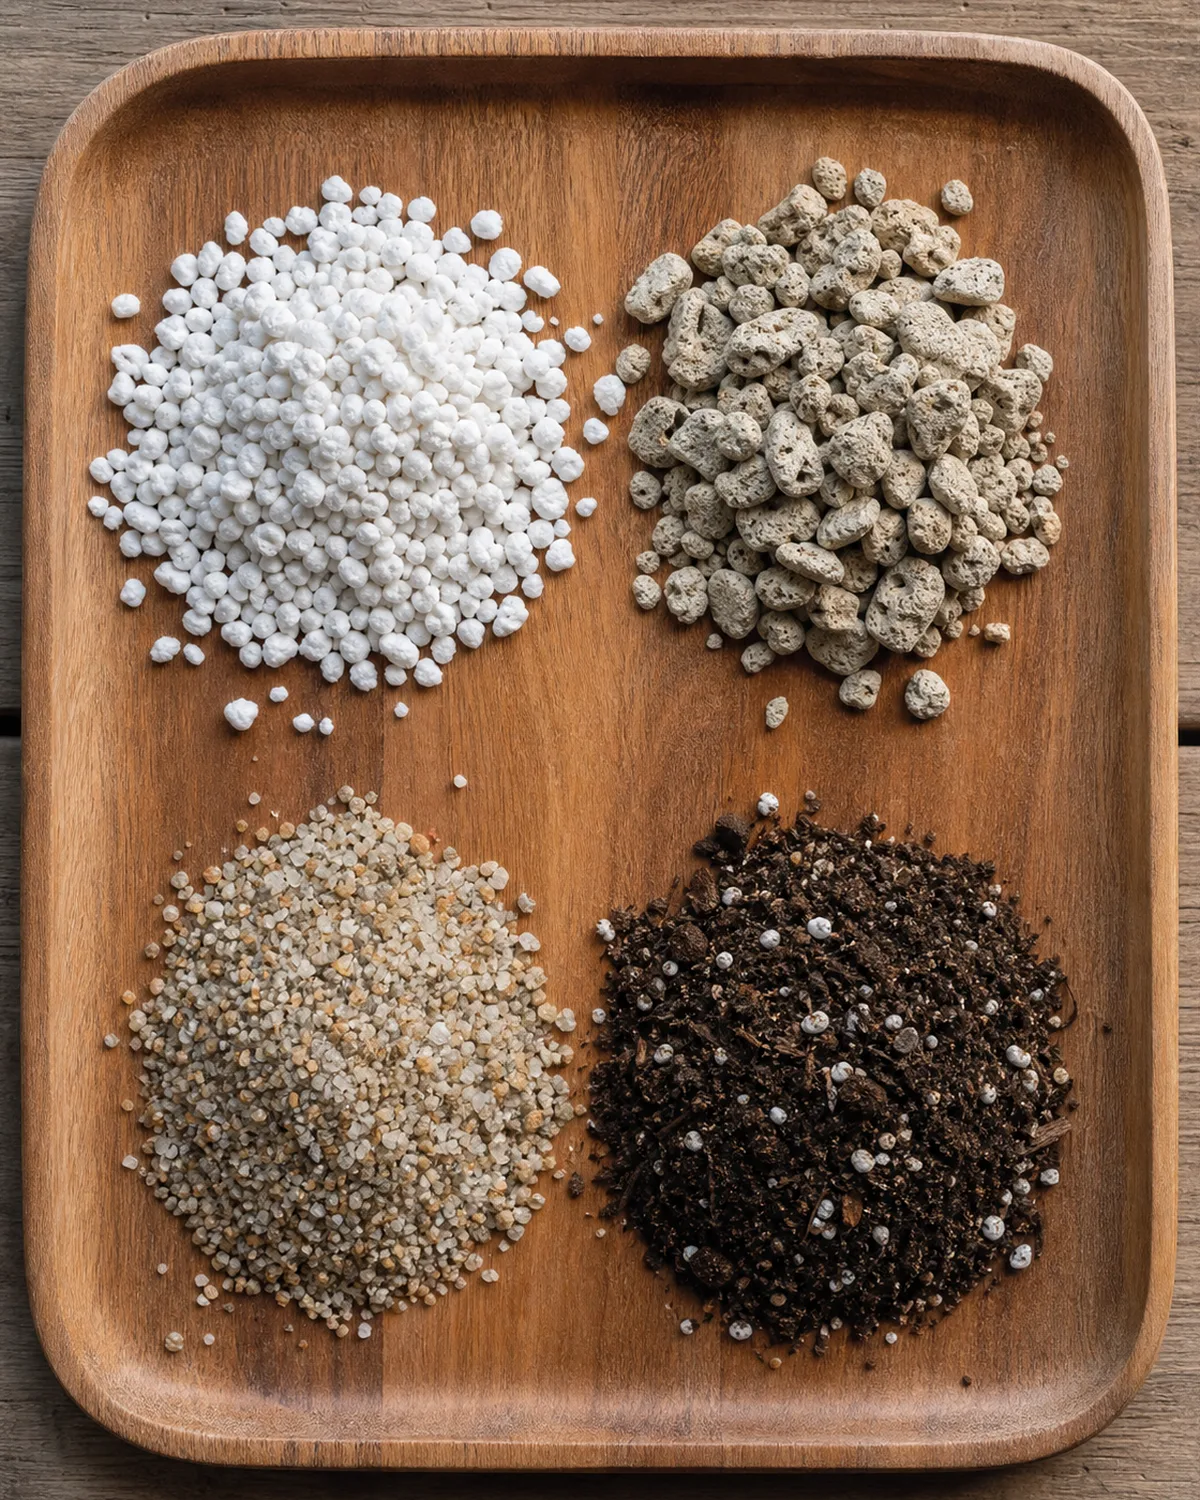
Mix one part commercial succulent or cactus soil with one part coarse perlite or pumice. This fifty-fifty ratio creates a medium that drains almost immediately after watering and dries completely within two to three days.
The standard potting soil sold at garden centers retains far too much moisture for aloe vera. Even bagged "cactus and succulent mix" from major brands is often too peat-heavy — it stays damp for five or more days, which is long enough to start root problems.
The perlite or pumice serves as the drainage backbone. These lightweight volcanic materials create air pockets throughout the soil that allow water to pass through quickly and oxygen to reach the roots between waterings. Coarse sand is a workable substitute but adds weight. Vermiculite is not a substitute — it absorbs and holds moisture, which is the opposite of what you want.
Terracotta pots are the ideal companion for this gritty mix. The unglazed clay wicks moisture from the soil through the pot wall, drying the root zone faster than plastic or glazed ceramic. This evaporation buffer is especially valuable in winter when you water less and any remaining moisture sits longer.
A drainage hole is mandatory. No amount of gravel at the bottom of a hole-free pot creates real drainage — it just raises the water table closer to the roots. If you love a decorative pot without drainage, keep the aloe in a plain terracotta nursery pot inside the decorative one, and lift it out to water.
For a broader guide to repotting mix and pot selection across species, see the repotting indoor plants guide.
Temperature and humidity: desert plant, desert rules
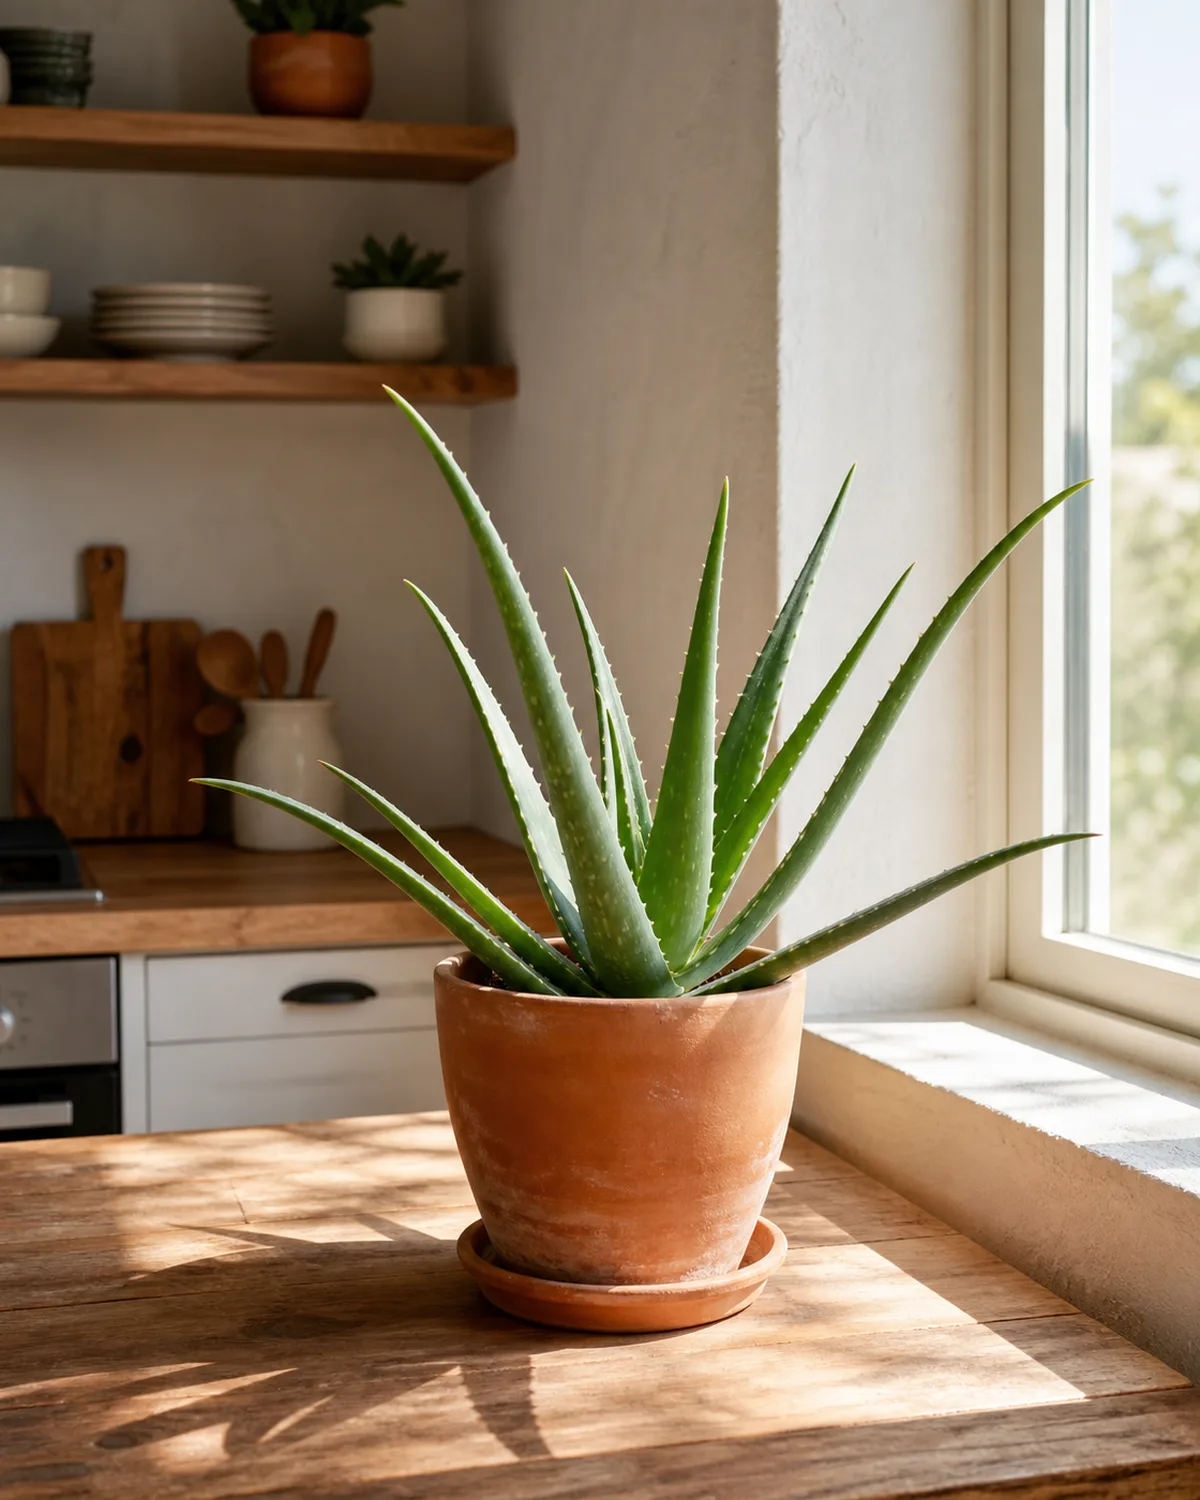
Aloe vera is comfortable in the fifty-five to eighty degree Fahrenheit range that most homes maintain year-round. It does not need the cool winter rest that cacti require to trigger flowering — aloe vera blooms are rare indoors regardless of temperature manipulation, and blooming is not the primary appeal of this plant.
Low humidity is not a problem. Aloe vera evolved in the arid scrublands of the Arabian Peninsula and North Africa, where humidity regularly drops below twenty percent. The average indoor humidity of thirty to fifty percent is more than adequate.
High humidity, however, can be. Bathrooms with poor ventilation and consistently high moisture levels slow soil drying and create conditions where fungal problems and rot develop faster. A kitchen windowsill — bright, warm, and dry from cooking heat — is a far better placement than a humid bathroom shelf.
Cold drafts are the real temperature danger. Aloe vera tolerates brief dips to fifty degrees Fahrenheit but sustained exposure below that causes cellular damage. The water-filled gel inside the leaves is vulnerable to cold in the same way a water bottle is — the tissue does not freeze at exactly thirty-two degrees, but prolonged cold causes the cells to lose turgor and collapse.
Keep aloe vera away from windows that leak cold air in winter, exterior doors that open frequently, and air conditioning vents that blow cold air directly onto the plant. Heating vents are less dangerous but can desiccate leaf tips if the plant sits directly in the airflow.
How to harvest aloe vera gel safely
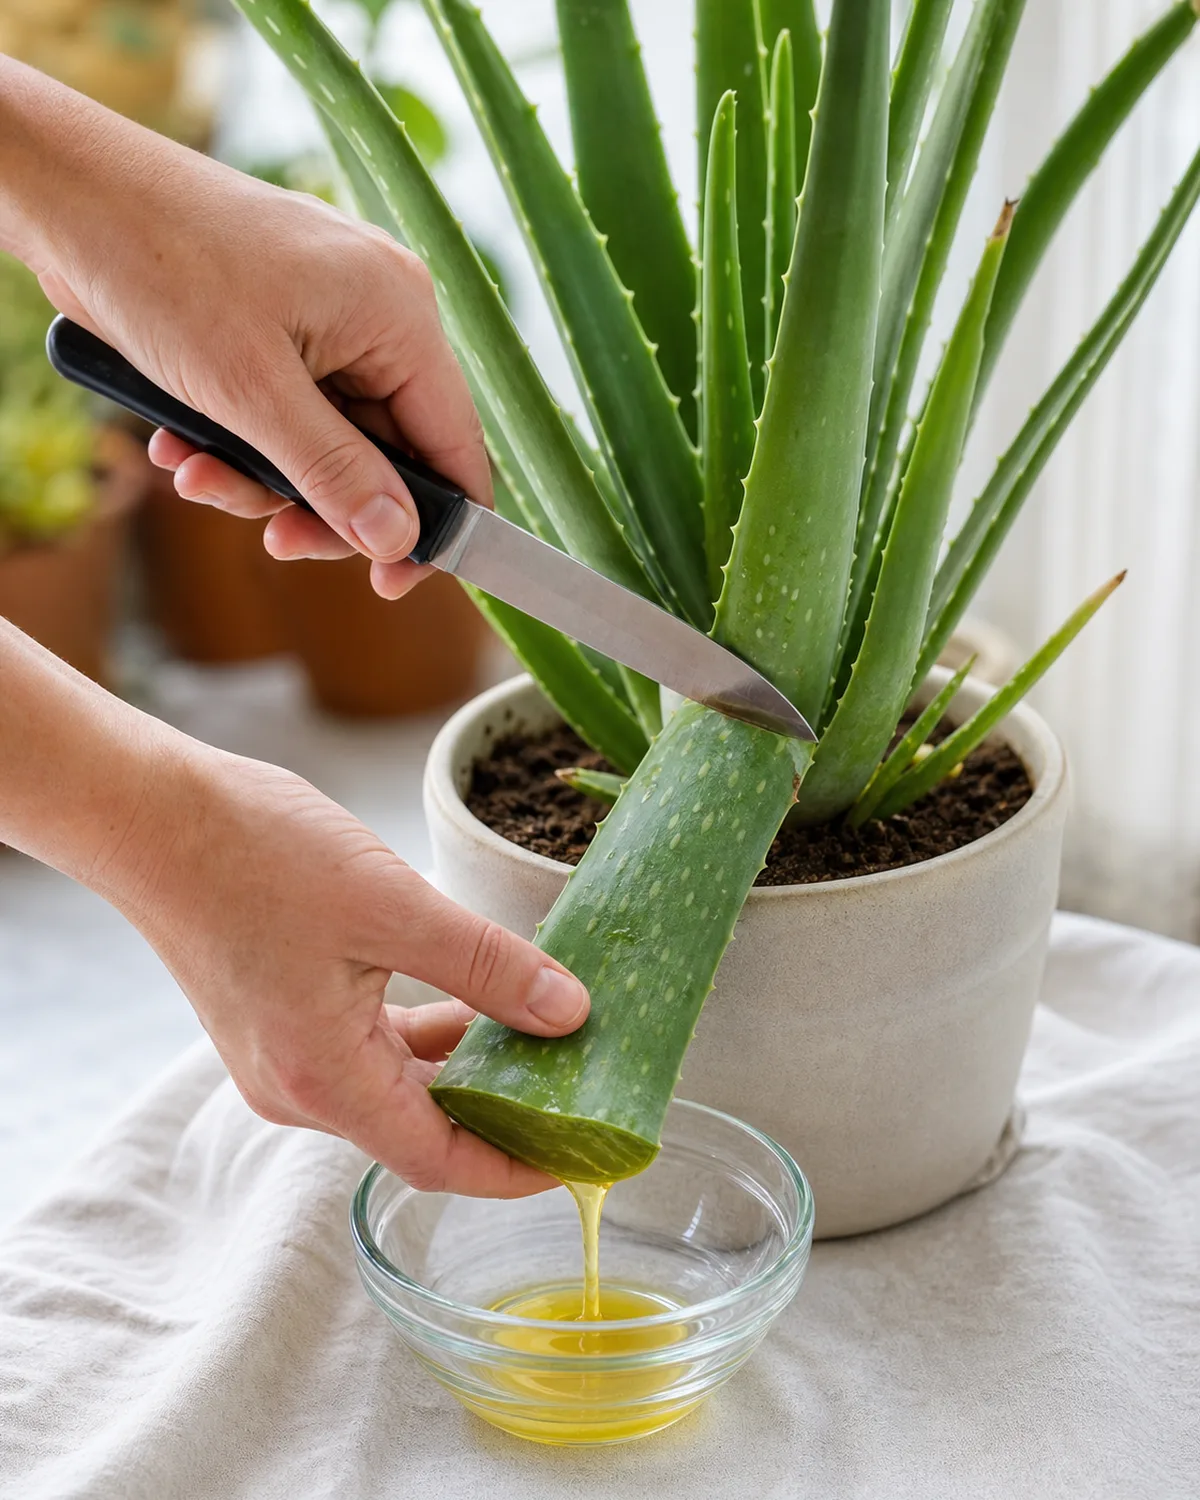
This is the section that separates aloe vera from every other plant on this site. No other common houseplant doubles as a topical medicine you can harvest at home.
Choose the right leaf. Select a thick, mature outer leaf from the lowest ring of the rosette. Outer leaves are the oldest and contain the most gel. Never harvest from the center — those young inner leaves are actively growing and the plant needs them.
Cut cleanly. Use a sharp, clean knife to slice the leaf as close to the base as possible. A clean cut heals faster and reduces the entry point for infection. The wound on the mother plant will callous over within a day or two.
Drain the aloin. This is the step most people skip. Stand the cut leaf upright in a glass, cut side down, for ten to fifteen minutes. The yellow-orange liquid that drains out is aloin — a bitter latex compound that sits between the rind and the gel.
Aloin is a strong laxative and can irritate skin in concentrated amounts. Draining it before scooping the gel removes the primary irritant.
Scoop the gel. Lay the drained leaf flat on a cutting board. Slice off the serrated edges with a knife, then carefully fillet the leaf — slide the knife between the gel and the green rind on each side. The clear gel lifts out in a slab. Dice it or leave it whole.
Storage. Fresh aloe gel keeps in the refrigerator for up to one week in a sealed container. For longer storage, freeze gel cubes in an ice cube tray — they keep for several months and can be applied directly to minor burns or skin irritation as a cold, soothing compress.
What not to harvest. Do not use leaves from a plant smaller than eight inches across — it is too young and needs every leaf for growth. Do not harvest more than one or two outer leaves at a time from a single plant. Do not apply gel that still has yellow aloin residue — it can cause skin redness rather than soothing it.
How to harvest aloe vera gel at a glance
- 1Pick a thick outer leaf from the bottom ringMature leaves have the most gel. Leave the center alone — the plant is still growing those.
- 2Cut at the base with a clean knifeSlice as close to the stem as possible. The wound callouses in one to two days.
- 3Drain the aloin for ten to fifteen minutesStand the leaf cut-side down in a glass. The yellow latex that drips out is a skin irritant — drain it before scooping gel.
- 4Fillet the gel from the rindTrim serrated edges, then slide a knife between gel and rind on each side. The clear slab lifts out cleanly.
- 5Refrigerate up to one week or freeze for monthsSealed container in the fridge for fresh use. Ice cube tray in the freezer for long-term storage and cold compresses.
Popular aloe varieties for indoors
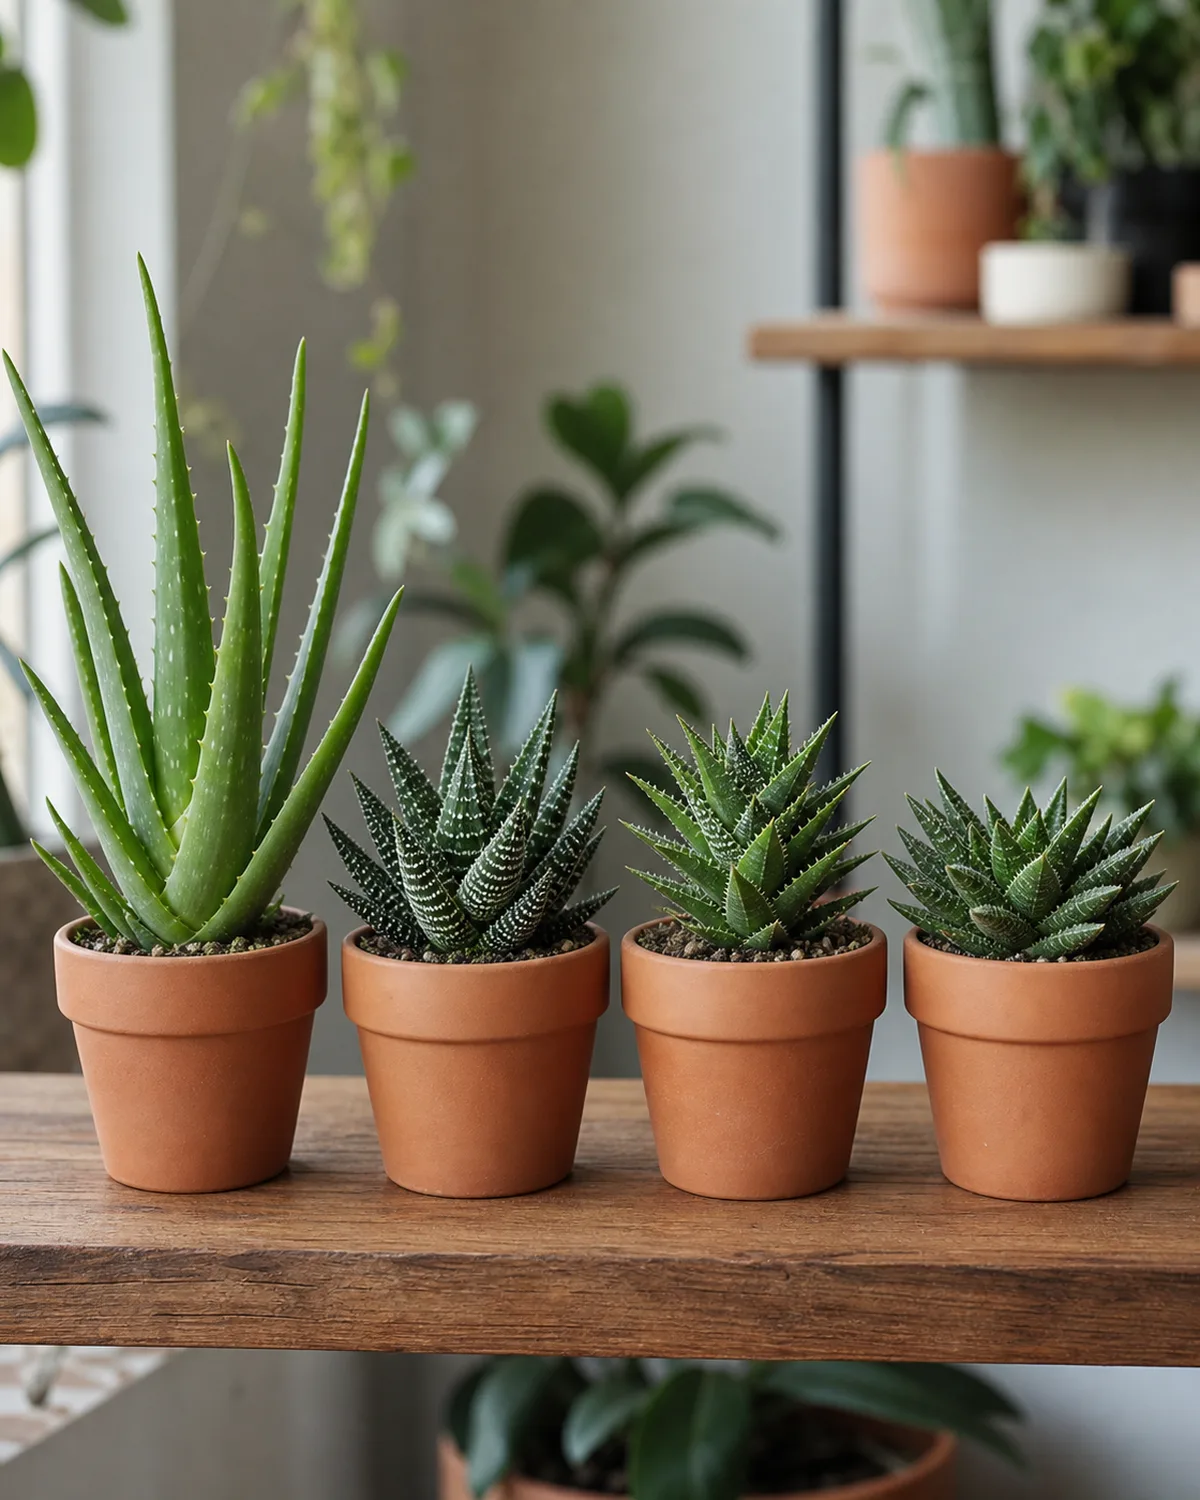
Aloe vera (Aloe barbadensis miller) is the species most people know, but the Aloe genus contains over five hundred species, and several make excellent houseplants with distinct visual appeal.
Lace aloe (Aloe aristata) is the low-light champion of the genus. Its compact rosette of dark green leaves covered in white bumps and spots tolerates conditions that would stretch a standard aloe vera into an ugly lean. It stays small — usually under six inches — and produces orange tubular flowers more readily indoors than most other aloe species.
Tiger tooth aloe (Aloe juvenna) forms stacking columns of small, triangular, toothed leaves that look nothing like the classic aloe silhouette. The teeth along the leaf margins give it a spiky, architectural quality. It stays compact and handles bright windowsills well.
Short-leaf aloe (Aloe brevifolia) lives up to its name — a tight, low rosette of thick blue-green leaves under six inches tall. It produces offsets generously and forms attractive clusters in wide, shallow pots.
Spiral aloe (Aloe polyphylla) is the collector's plant of the genus. Its leaves spiral in a precise mathematical pattern that makes it one of the most visually striking succulents in existence. It is also significantly harder to grow indoors — it prefers cool temperatures, excellent drainage, and dislikes heat. Not recommended for beginners.
Aloe vera itself comes in several cultivars. Some produce leaves with pronounced white spots (often confused with Aloe maculata, the soap aloe). Others stay compact while maintaining the gel-producing capacity of the standard form.
The critical practical difference: only Aloe barbadensis miller (standard aloe vera) produces the thick, gel-rich leaves used for skin care. Other aloe species are ornamental — their leaves may contain gel, but not in the quantity or quality that makes aloe vera medicinally useful.
Feeding an aloe that already stores its own nutrients
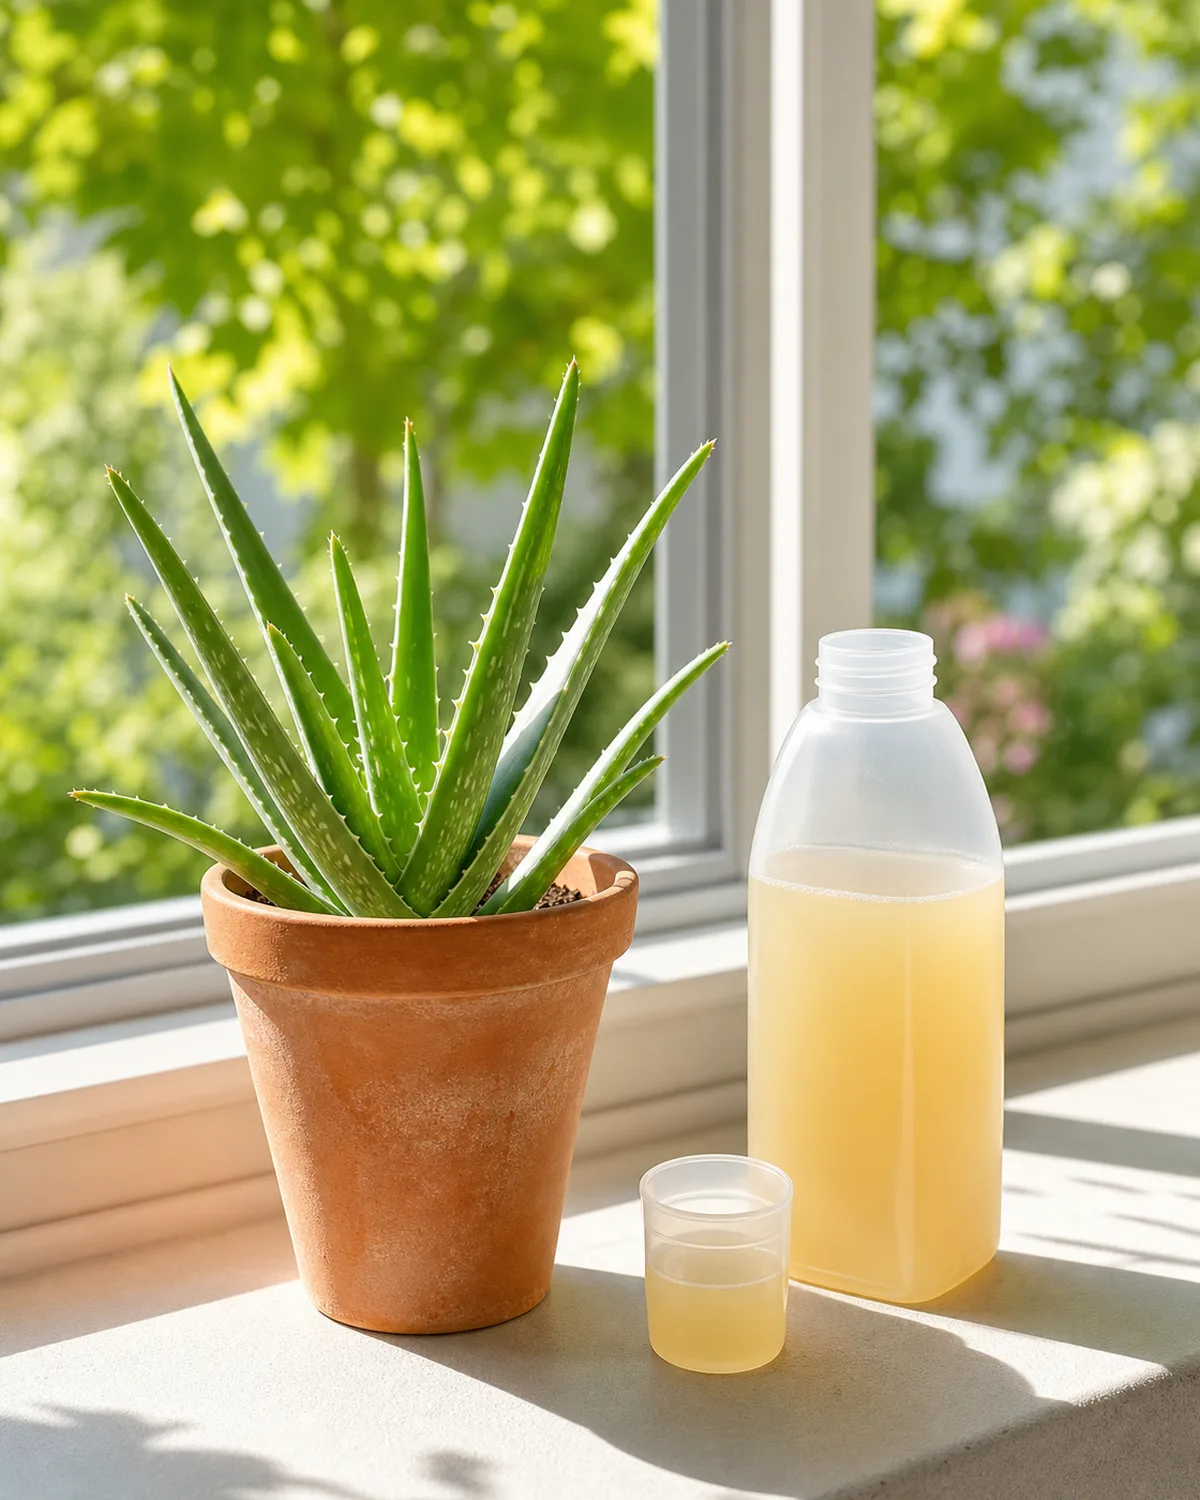
Aloe vera stores water and nutrients in its gel-filled leaves, which means it arrives at each growing season with reserves most houseplants lack. Two feedings a year — once in early spring when new growth begins and once in midsummer at peak growth — with a balanced liquid fertilizer diluted to half strength is the ceiling, not the floor.
The shallow root system is especially salt-sensitive. Excess fertilizer crystallizes in the top inch of gritty soil as water evaporates, concentrating mineral salts right where the finest feeder roots sit. The result is brown, crispy leaf tips that never heal and, in severe cases, root tissue that dies back from chemical burn.
Flush the pot with plain water once every three to four months to dissolve accumulated salts. Water slowly and thoroughly until liquid runs from the drainage hole for several minutes. This simple maintenance step prevents the gradual salt buildup that a twice-yearly feeding schedule would otherwise create.
Never fertilize in fall or winter. The plant stops growing during short-day months, and feeding during dormancy pushes weak, etiolated growth that stretches the rosette out of its compact form. The new leaves produced under low-light winter conditions with artificial nutrient stimulation are thin, pale, and structurally weak — they drag the rosette open instead of holding it upright.
A balanced formula — equal parts nitrogen, phosphorus, and potassium — works better than high-nitrogen formulas designed for leafy tropical plants. Aloe vera's growth rate is naturally slow. Pushing it faster with nitrogen creates soft tissue that is more vulnerable to rot and pest damage.
Propagation: pups, not leaves
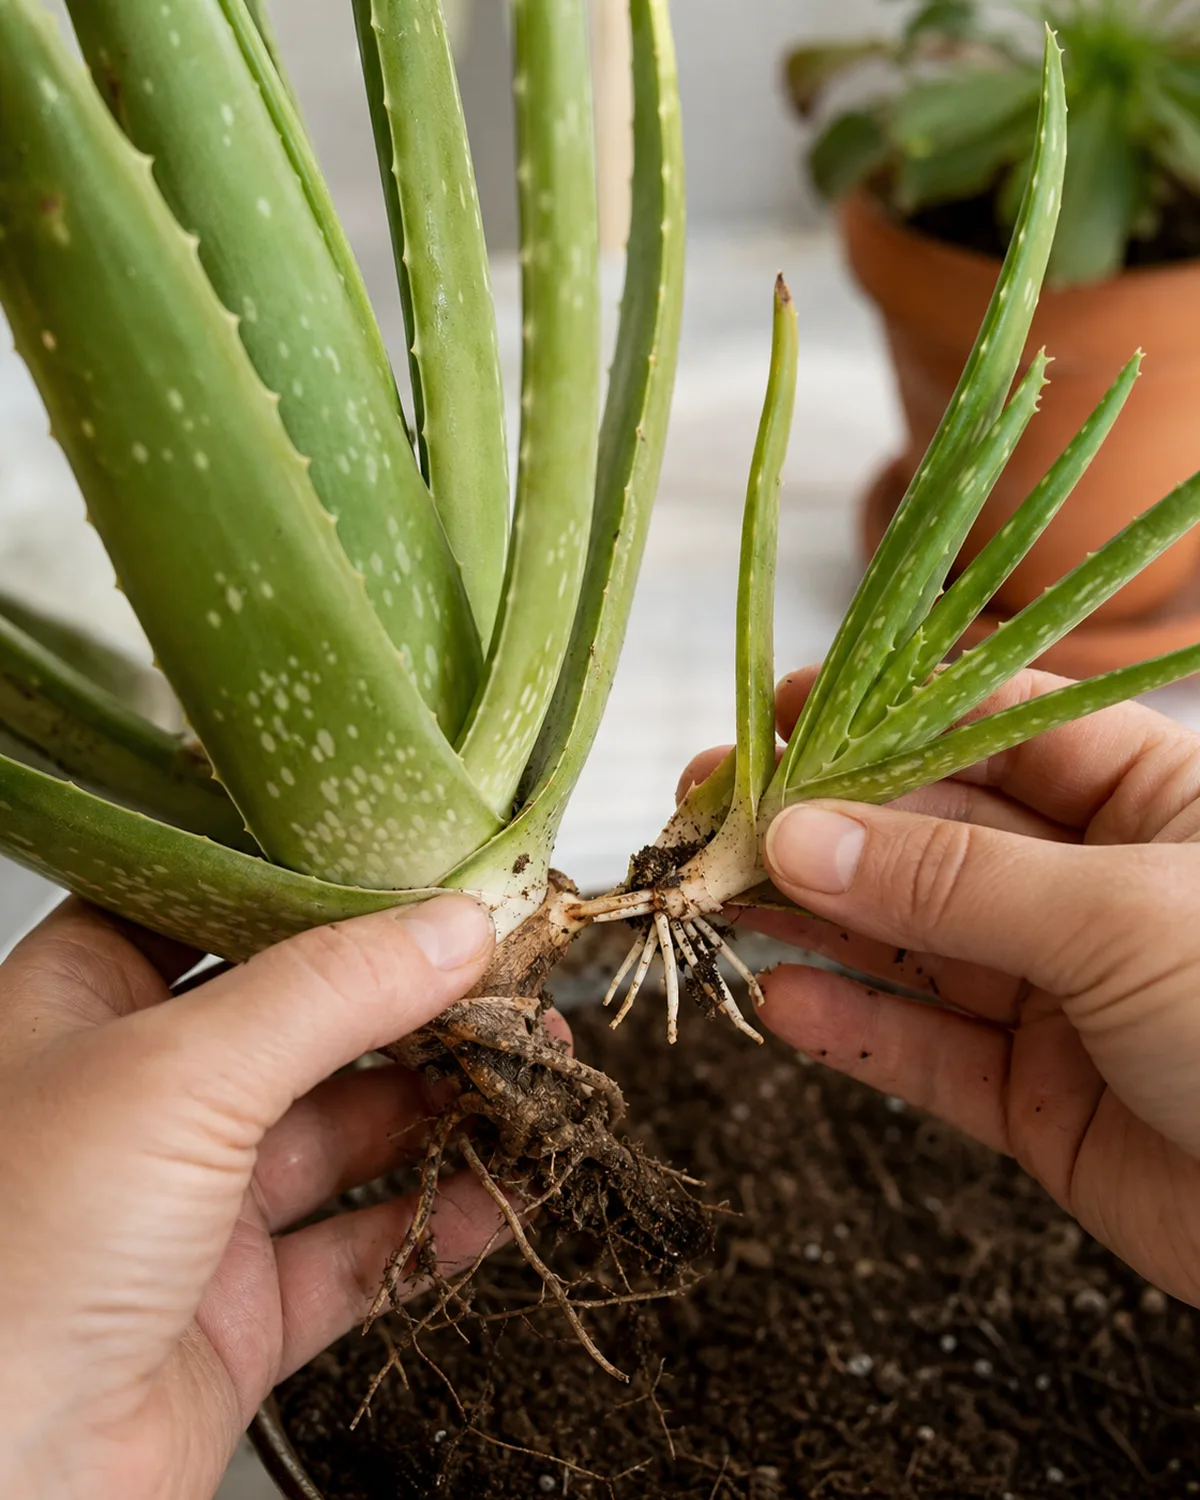
Aloe vera reproduces through offsets — small rosettes called pups that emerge from the base of the mother plant's root system. A healthy, mature aloe vera in good light produces pups reliably, sometimes so many that they crowd the pot within a year.
When to separate. Wait until a pup has at least three to four leaves of its own and stands two to three inches tall. At this size, the pup has developed its own root system and can survive independently. Separating a pup too early — when it has only one or two tiny leaves — often results in failure because the root system is too underdeveloped to sustain the plant through transplant shock.
How to separate. Unpot the mother plant gently. Brush away soil to expose the connection between the mother's root system and the pup's. In most cases, the pup's roots are loosely attached and you can pull it away with a gentle twist. If the connection is thick, use a clean, sharp knife to sever it. Leave at least a small section of root on the pup.
After separation. Let the pup sit in open air for one to two days so any cut surfaces callous over. Then plant it in dry succulent mix in a small pot — a three to four inch terracotta pot is ideal. Do not water for the first week. The callous needs time to seal before moisture reaches the wound, or rot sets in.
Why leaf cuttings fail. Unlike jade plants and many echeverias that propagate easily from individual leaves, aloe vera leaf cuttings almost never root. The leaf contains so much water and gel that it rots before callusing properly. The few success stories typically involve very thin leaf slices that dry quickly — not practical for most growers. Stick with pups.
Common problems: translucent leaves, brown tips, and leaning
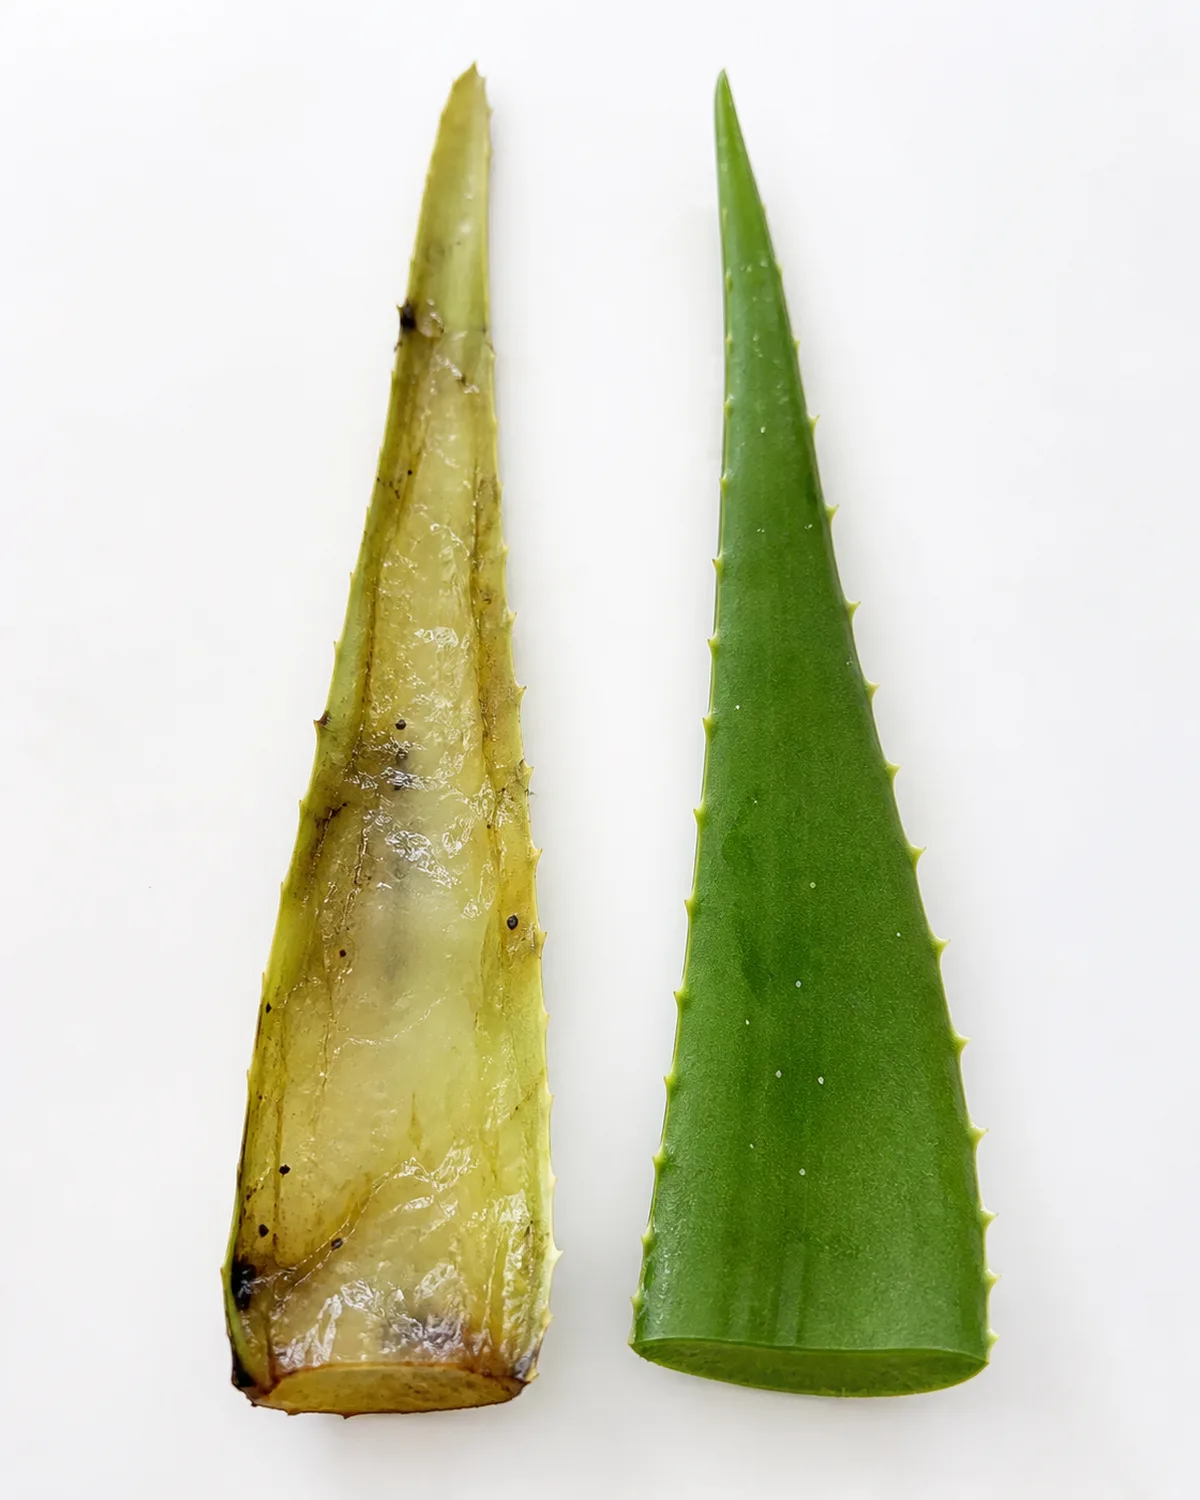
Translucent, mushy leaves are the classic sign of overwatering. The gel-filled cells absorb excess water until they burst, turning the leaf tissue from opaque green to translucent and soft.
If the damage is limited to one or two outer leaves, remove them at the base, stop watering, and let the soil dry completely. If the base of the rosette feels soft, root rot has likely set in — unpot, cut away all soft tissue, let the healthy portion callous for a week, and replant in dry mix.
Thin, wrinkled leaves that curl inward along the edges signal underwatering. This is the opposite problem and far easier to fix. Give the plant a thorough soak, and within two to three days the leaves should plump back to their normal thickness. Wrinkled leaves are the plant asking for water the way it knows how — a clear signal that you can wait for rather than anticipating.
Brown, crispy leaf tips usually point to one of three causes: salt buildup from fertilizer (flush the soil), fluoride or chlorine in tap water (switch to filtered water or let tap water sit overnight), or direct airflow from a heating vent drying out the exposed leaf tips.
Dramatic leaning toward a window means insufficient light. The plant is phototroping — bending its growth toward the strongest light source. Moving the plant to a brighter spot fixes the underlying cause. Rotation distributes the lean cosmetically but does not solve the light deficit.
Red or brown coloring on leaf tips is sun stress, not disease. Aloe vera produces protective pigments when exposed to intense direct light. Mild sun stress coloring is normal and even desirable — it indicates the plant is getting strong light. Severe bleaching or white papery patches indicate sunburn from too-rapid light transition.
Lower leaves drying and flattening is natural senescence. The plant absorbs resources from its oldest outer leaves as it grows new ones from the center. Remove dried leaves cleanly at the base — they will not recover.
Pests: mealybugs in the rosette center and scale on leaves
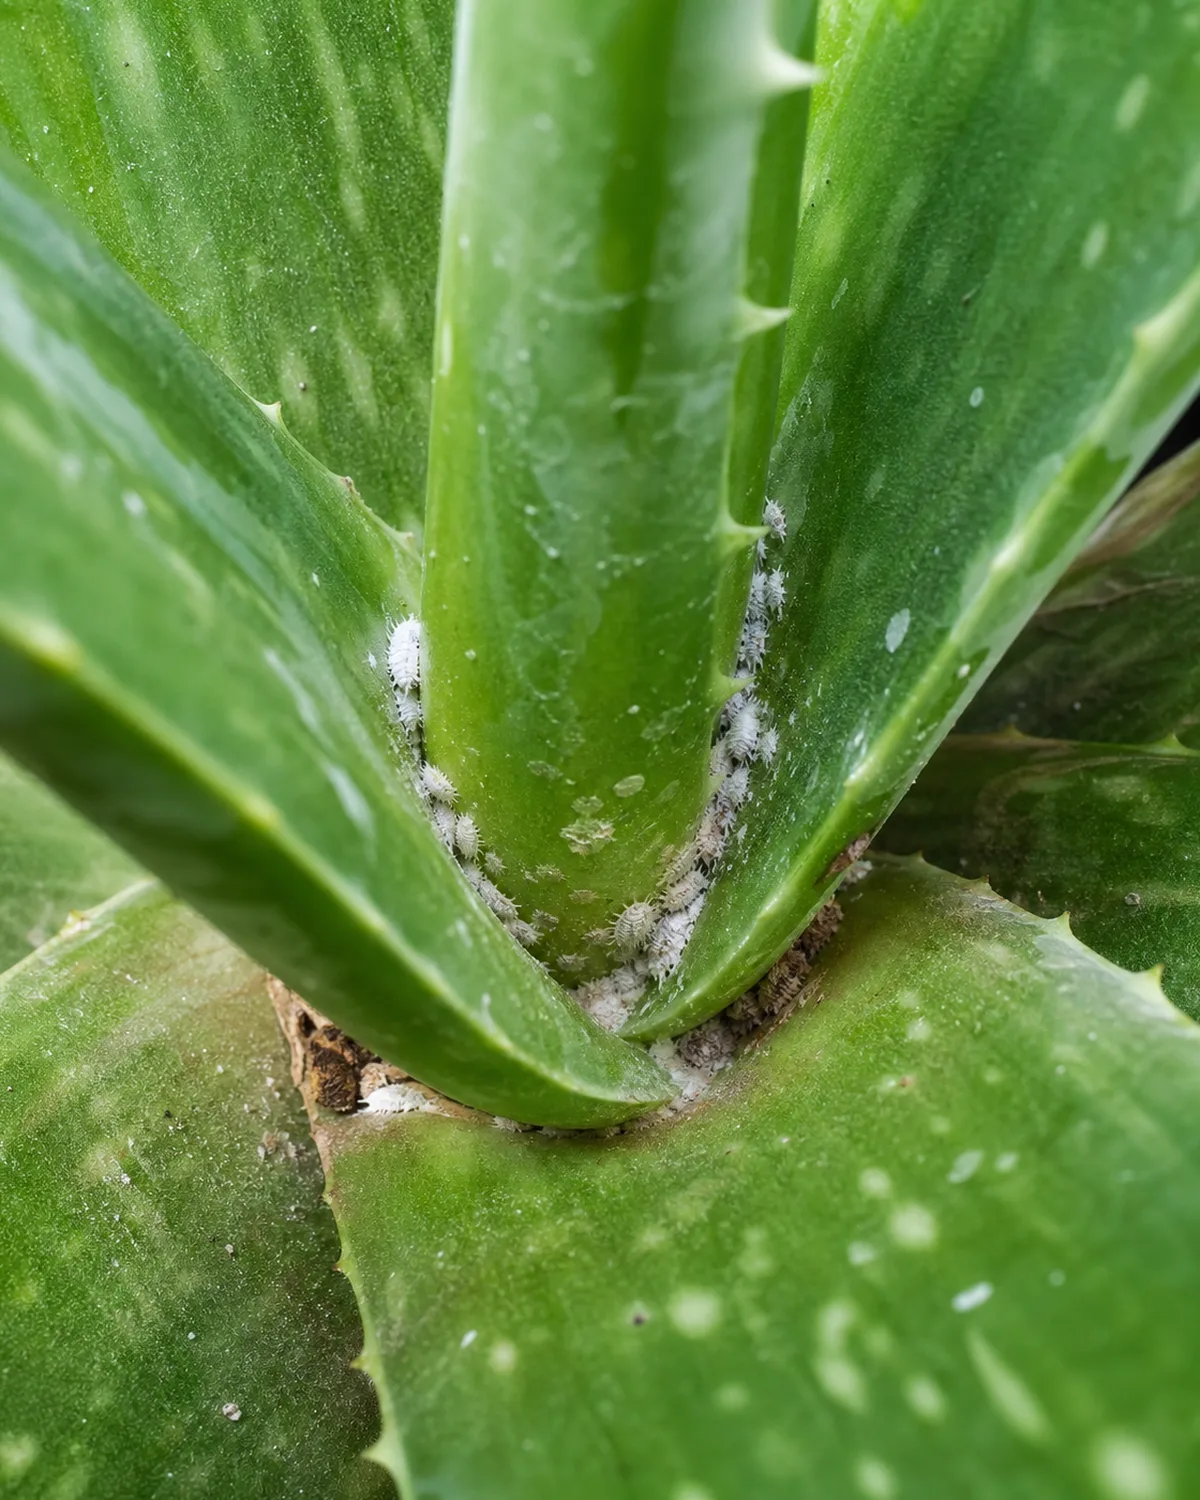
Aloe vera is relatively pest-resistant compared to tropical houseplants, but two insects find it irresistible.
Mealybugs are the primary threat. They hide in the tight crevice where leaves overlap at the rosette center — a spot that is difficult to inspect without pulling leaves apart and nearly impossible to reach with a spray bottle. The white, cottony masses are visible once you look closely, but their preferred hiding spot means infestations often go unnoticed until the population is large.
Treatment: dip a cotton swab in seventy percent isopropyl alcohol and push it into the leaf crevices to contact each visible cluster. The alcohol dissolves the waxy coating that protects the insects. Repeat weekly for three consecutive weeks — the first pass kills adults, subsequent passes catch newly hatched nymphs from eggs that survived.
Scale insects attach to the flat leaf surfaces as small brown or tan bumps. On aloe vera's smooth, thick leaves, they are easier to spot than on plants with complex leaf textures. Scrape them off with a fingernail or wooden stick, then dab the attachment point with alcohol.
For heavy infestations of either pest, a thorough neem oil drench works better than spot treatment. Mix neem oil according to label directions, drench the soil (systemic uptake) and spray the entire plant surface. Apply in the evening — neem oil on wet leaves in direct sun can cause burn spots.
Fungus gnats are a secondary nuisance that indicates the soil is staying too moist. They do not harm the aloe vera directly, but their presence is a warning sign that watering frequency or soil drainage needs adjustment. Let the soil dry more thoroughly between waterings and they will decline on their own.
For a comprehensive guide to pest identification and treatment across species, see the houseplant pests and diseases guide.
Repotting: when the pups take over the pot
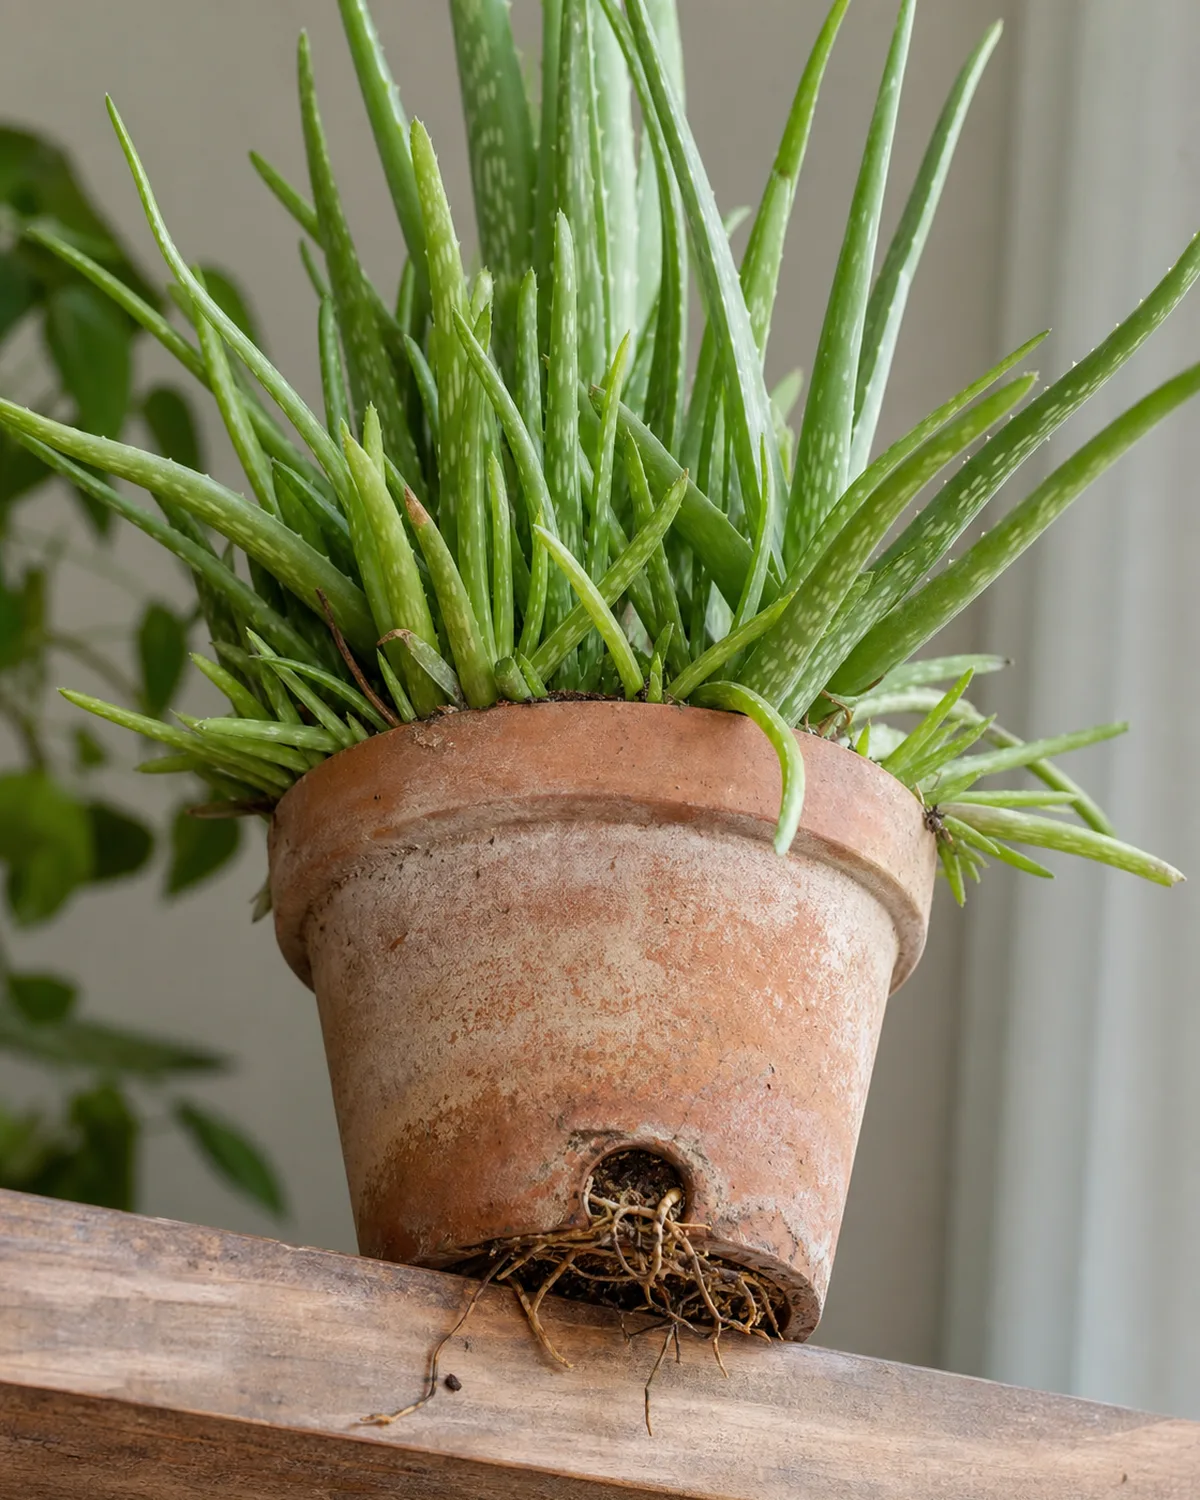
Three signs tell you it is time to repot. First: pups are crowding the pot so tightly that the mother plant's leaves are being pushed aside or compressed. Second: roots are growing out of the drainage holes or circling the bottom of the pot. Third: the plant has become top-heavy and tips over easily — the root system is no longer heavy enough to anchor the above-ground mass.
Pot sizing. Go up only one to two inches in diameter from the current pot. A pot that is too large holds excess soil moisture that the root system cannot absorb before fungal problems start. Aloe vera has a shallow, spreading root system — a wide, shallow pot suits it better than a deep, narrow one.
Terracotta remains the best material. The porous clay breathes, wicking moisture from the soil through the pot wall. This drying action gives aloe vera the fast-draining environment it prefers. Plastic and glazed ceramic hold moisture longer, which increases the risk of root rot especially in winter when growth stops and water use drops.
The process. Remove the plant from its old pot and gently shake off old soil. This is the natural time to separate pups if there are any. Inspect the roots — trim any that are brown, soft, or mushy with clean scissors. Let any cut surfaces dry for a day before replanting.
Place the plant in the new pot at the same depth it was growing before, fill with fresh gritty mix, and do not water for five to seven days. The pause lets damaged roots callous before moisture reaches them.
Timing. Spring is ideal because the plant is entering its active growth phase and will establish in new soil quickly. Avoid repotting in winter when growth has stopped — the root system will sit in unfamiliar soil without actively growing into it, increasing rot risk.
Displaying aloe vera indoors
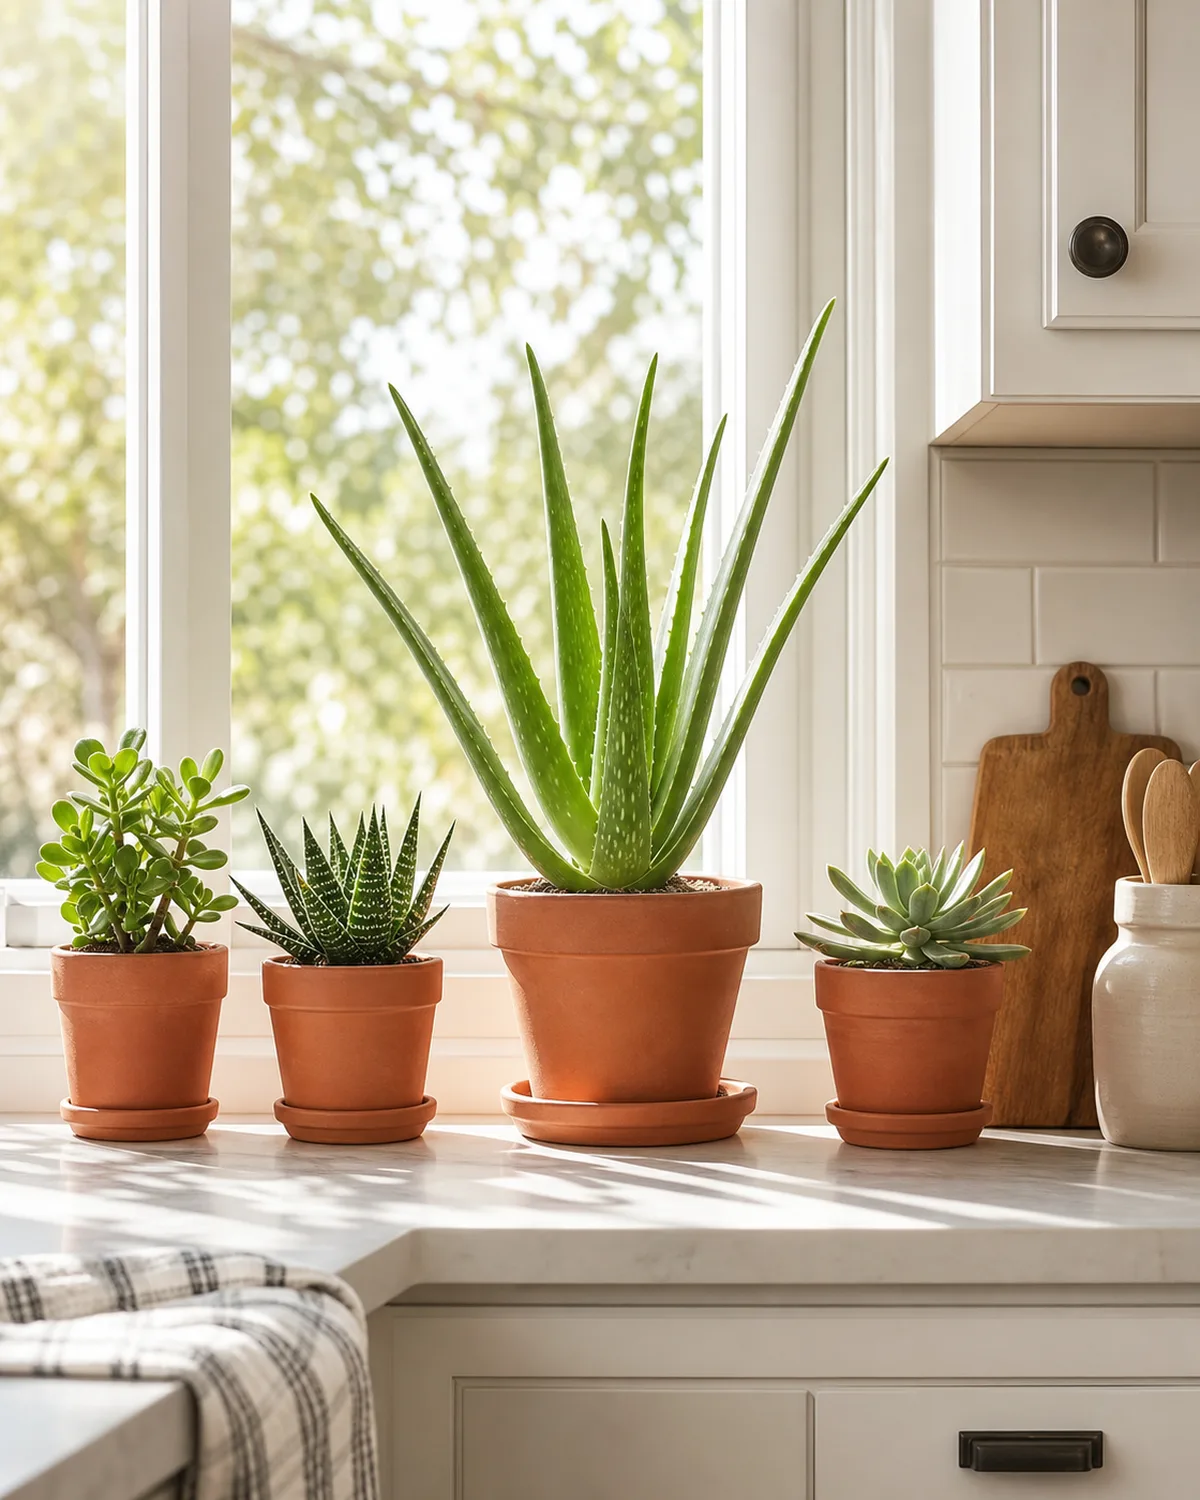
The kitchen windowsill is the classic aloe vera spot, and for good reason. The kitchen typically has the sunniest window in the house, the warm dry air from cooking keeps humidity low, and proximity means you can harvest a leaf for a burn or cut without walking across the house.
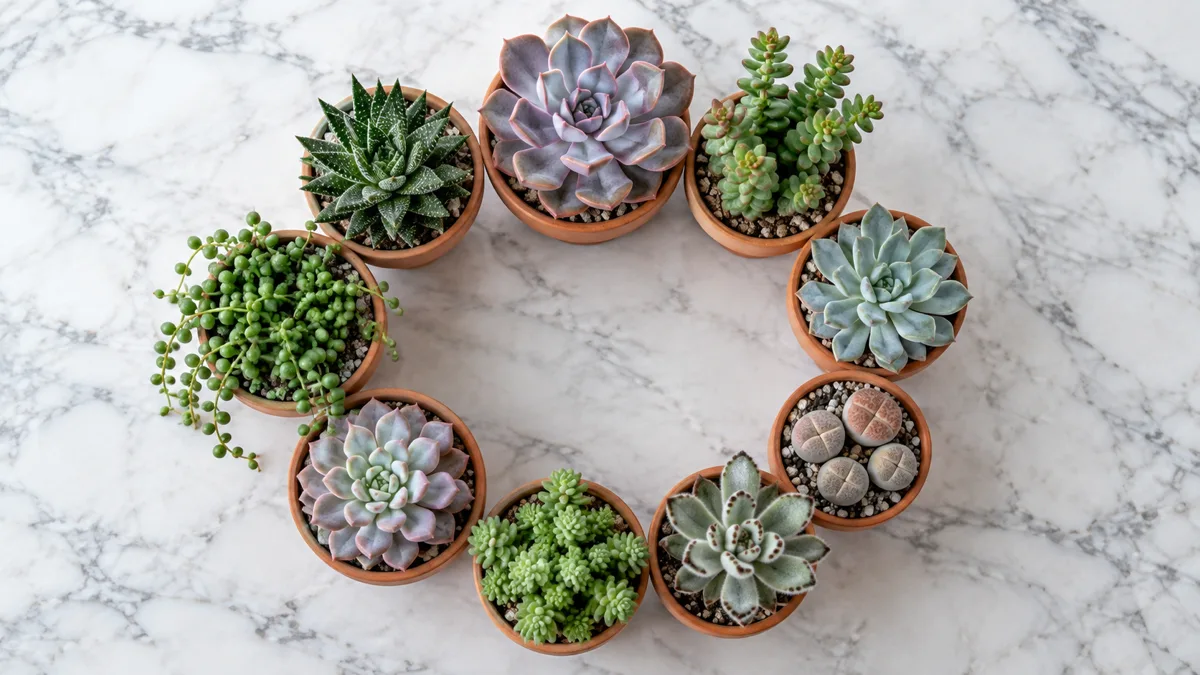
Group aloe with other succulents in matching terracotta pots for a cohesive desert shelf. Mix rosette shapes (aloe, echeveria) with trailing forms (string of pearls) and upright columns (tiger tooth aloe) to create visual variety within a unified material palette.
Pet safety is a real constraint. Aloe vera contains saponins and anthraquinones that are toxic to cats and dogs. Ingestion causes vomiting, diarrhea, lethargy, and in severe cases, tremors. The bitter taste of aloin typically deters pets after a single bite, but that single bite is enough to cause gastrointestinal distress.
Place aloe vera on high shelves, elevated plant stands, or windowsills that pets cannot reach. A wall-mounted shelf near a sunny window solves both the light and safety problem simultaneously. If you have persistent climbers among your pets, consider keeping aloe in a room that can be closed off.
The rosette form of aloe vera makes it a natural focal point in a succulent arrangement. Place the largest aloe at the center or back of a grouping, with smaller specimens and other compact succulents radiating outward. The thick, smooth leaves contrast well with the fuzzy texture of echeveria or the spiny geometry of smaller cacti.
For more ideas on arranging plants by room, see the living room plants guide or bedroom plants guide.

Mara Quinn edits Kultivy, where she shares houseplant care, propagation, beginner-friendly plant picks, and plant-styling ideas for anyone who wants their indoor plants to actually thrive. Every guide is image-led and reviewed for clarity, usefulness, image accuracy, and Pinterest-to-page alignment before it goes live. Visit the About page.