An alocasia is the houseplant that stops people mid-scroll. Arrow-shaped leaves the size of dinner plates, held upright on rigid petioles, with veins so pronounced they look sculpted. Nothing else indoors has that silhouette.
But the drama comes at a cost. Alocasia needs more humidity, brighter light, and more careful watering than most of the plants covered on this site. It goes dormant in winter, sometimes dropping every leaf. And spider mites treat it like a buffet.
This guide covers identification, light, watering, drooping, humidity, dormancy, soil, fertilizing, propagation by corm division, repotting, spider mites, pet toxicity, and popular varieties.
Alocasia rewards the extra attention with some of the most dramatic foliage in indoor gardening. The thirteen sections below cover identification, light, watering, and everything else that keeps one thriving indoors.
What an alocasia actually looks like
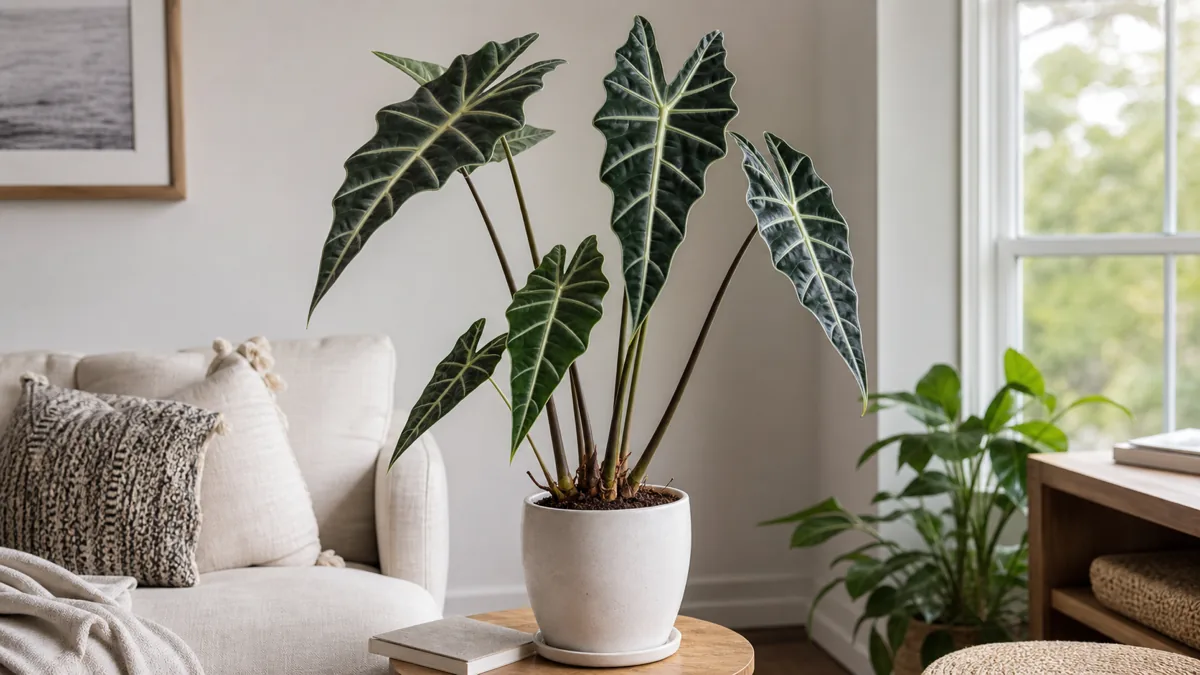
An alocasia grows large, arrow-shaped or shield-shaped leaves held upright on long, rigid petioles that emerge directly from a central corm at soil level. The leaves point upward or outward — never trailing, never drooping when healthy — and the prominent raised veins give each leaf a sculptural, almost metallic quality.
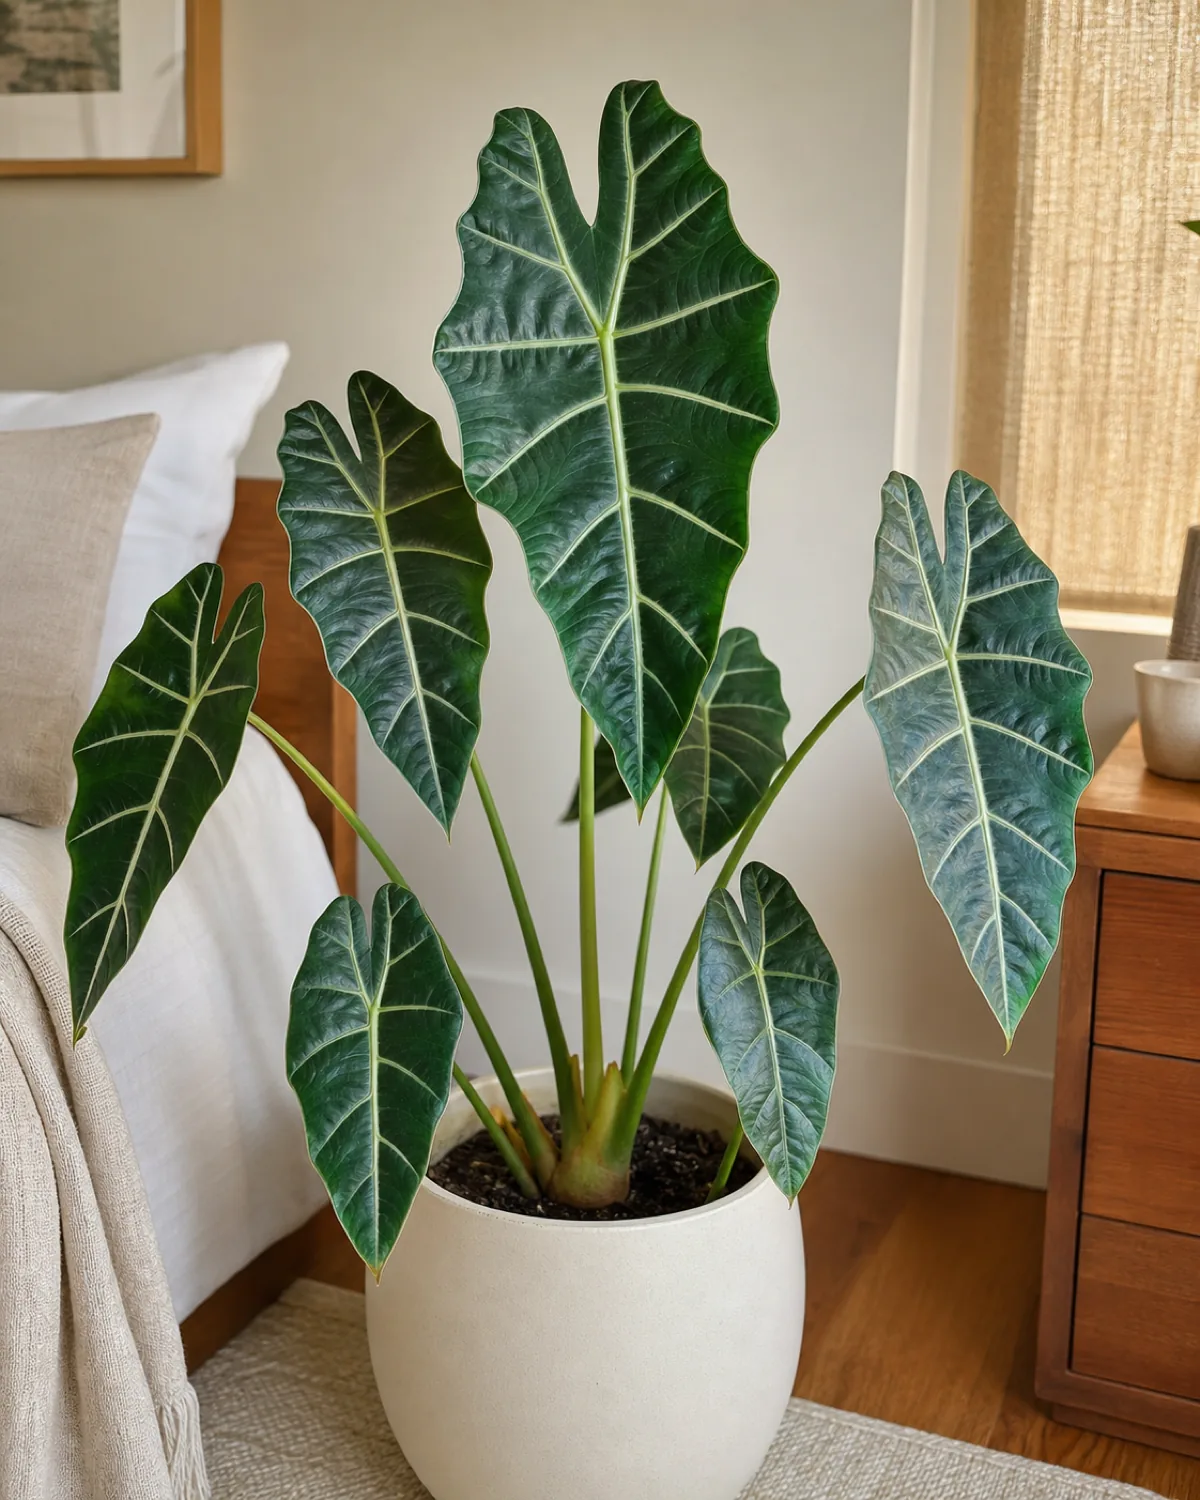
The genus ranges from compact tabletop plants like Alocasia 'Polly' to massive floor specimens like Alocasia macrorrhizos with leaves over three feet long. All share that unmistakable arrowhead silhouette that no other houseplant genus replicates.
- Large, arrow-shaped or shield-shaped leaves held upright on long rigid petioles.
- Prominent raised veins create a sculptural, almost metallic texture on each leaf.
- From tabletop (Polly) to floor-sized (macrorrhizos) — all share the upright arrowhead silhouette.
Light: bright indirect and nothing less
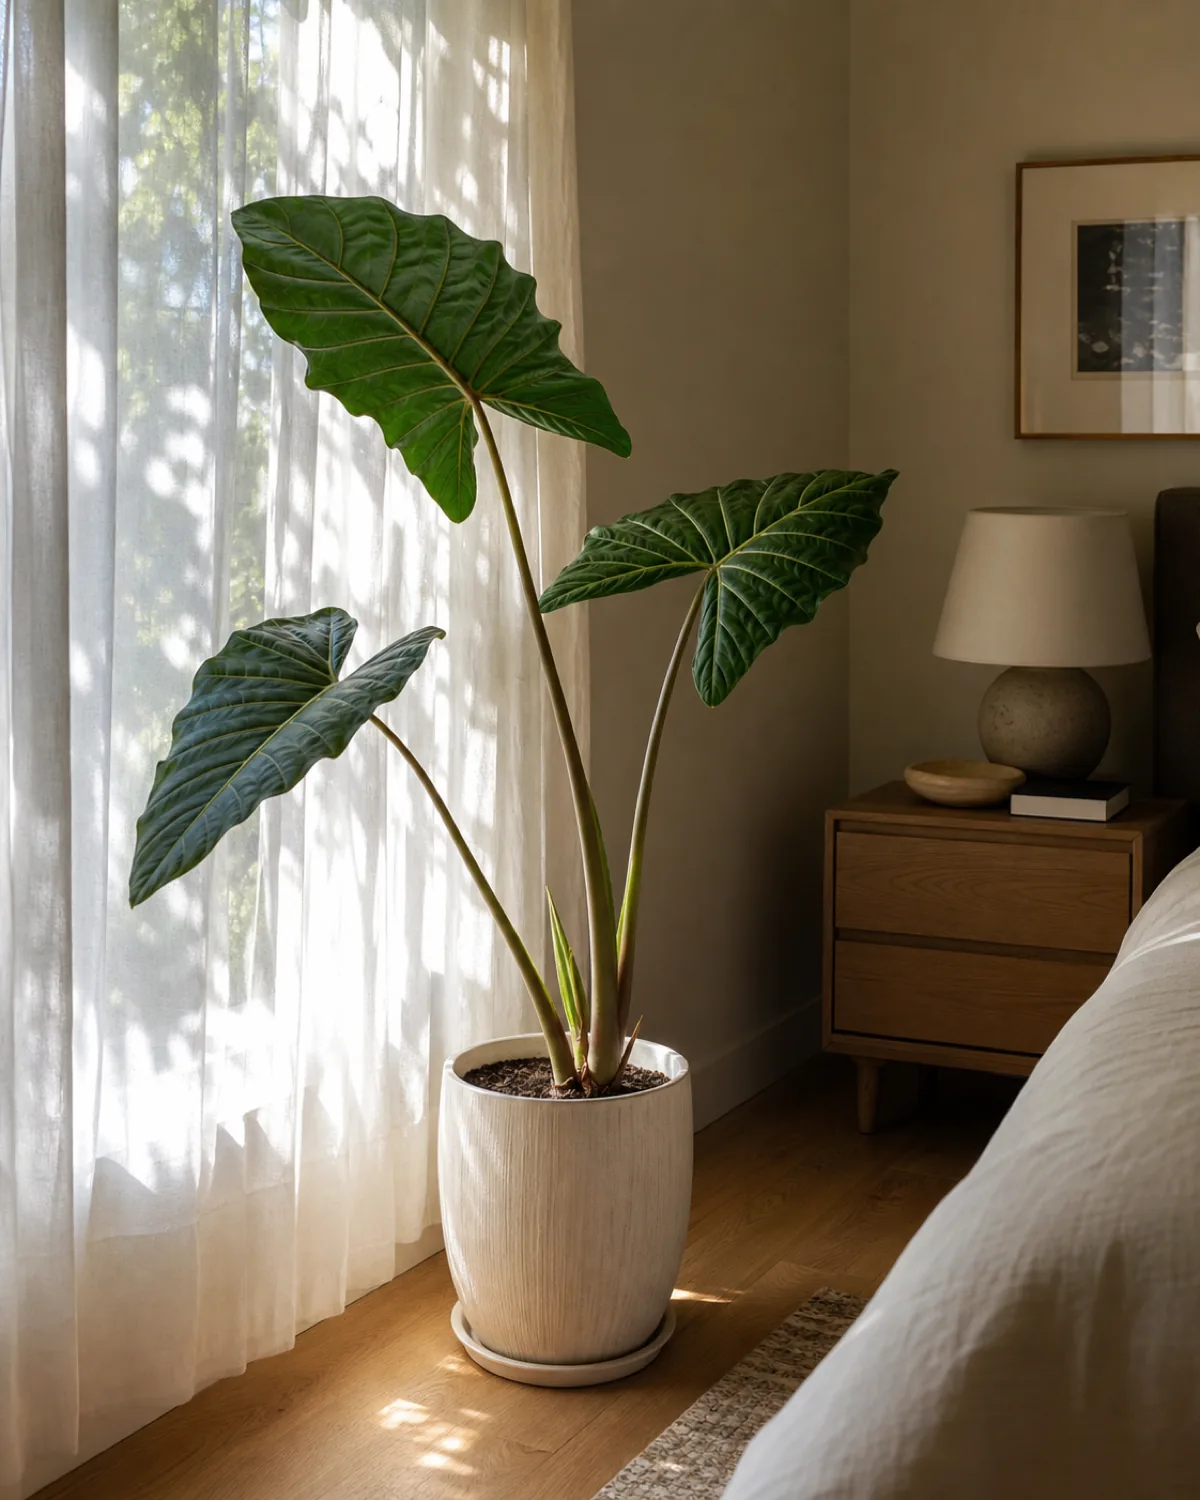
Alocasia evolved on tropical forest floors where dappled canopy light is strong but never direct. Indoors, they need the brightest spot you have that doesn't get direct sun rays — an east-facing window or a few feet from a south or west window with a sheer curtain is ideal.
Too little light and an alocasia drops leaves fast, often down to one or two struggling survivors. Direct midday sun scorches the leaves, leaving brown papery burn marks. The sweet spot is narrow compared to more forgiving plants like pothos or snake plant.
- Bright indirect light is non-negotiable — more light-demanding than most houseplants on this site.
- East-facing window or filtered south/west light is the sweet spot.
- Too little light = rapid leaf loss; direct sun = scorched leaves.
How to water an alocasia without overwatering
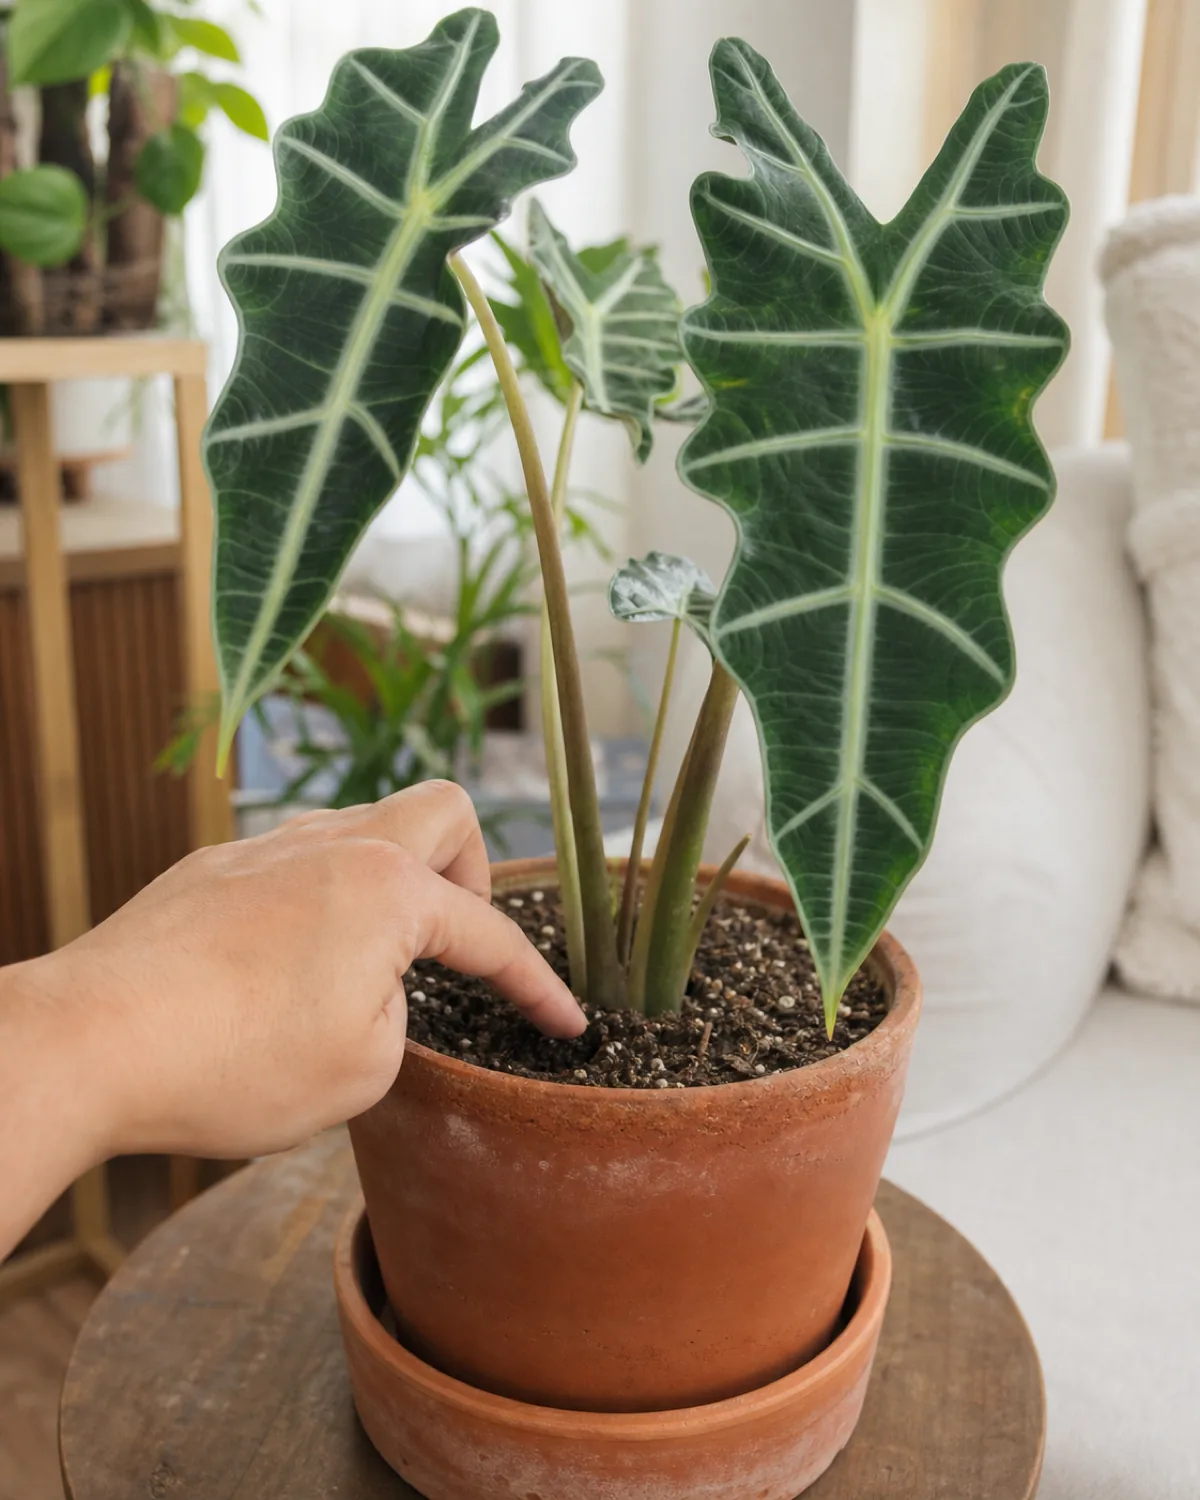
Keep the soil consistently moist but never soggy. Let the top inch dry between waterings in spring and summer, the top two inches in winter when growth slows.
Alocasia corms sit in the soil and rot quickly in standing water — overwatering is the number-one killer. Use a pot with drainage holes and never let the saucer collect water for more than a few minutes after a watering.
The balance is tighter than with drought-tolerant plants. A ZZ plant forgives weeks of neglect; an alocasia wants attention on a regular cycle.
- Consistently moist, never soggy — let the top inch dry between waterings.
- Corms rot quickly in standing water — drainage holes and empty saucers are essential.
- Tighter watering window than drought-tolerant plants like ZZ or snake plant.
Why your alocasia is drooping (and what to do)
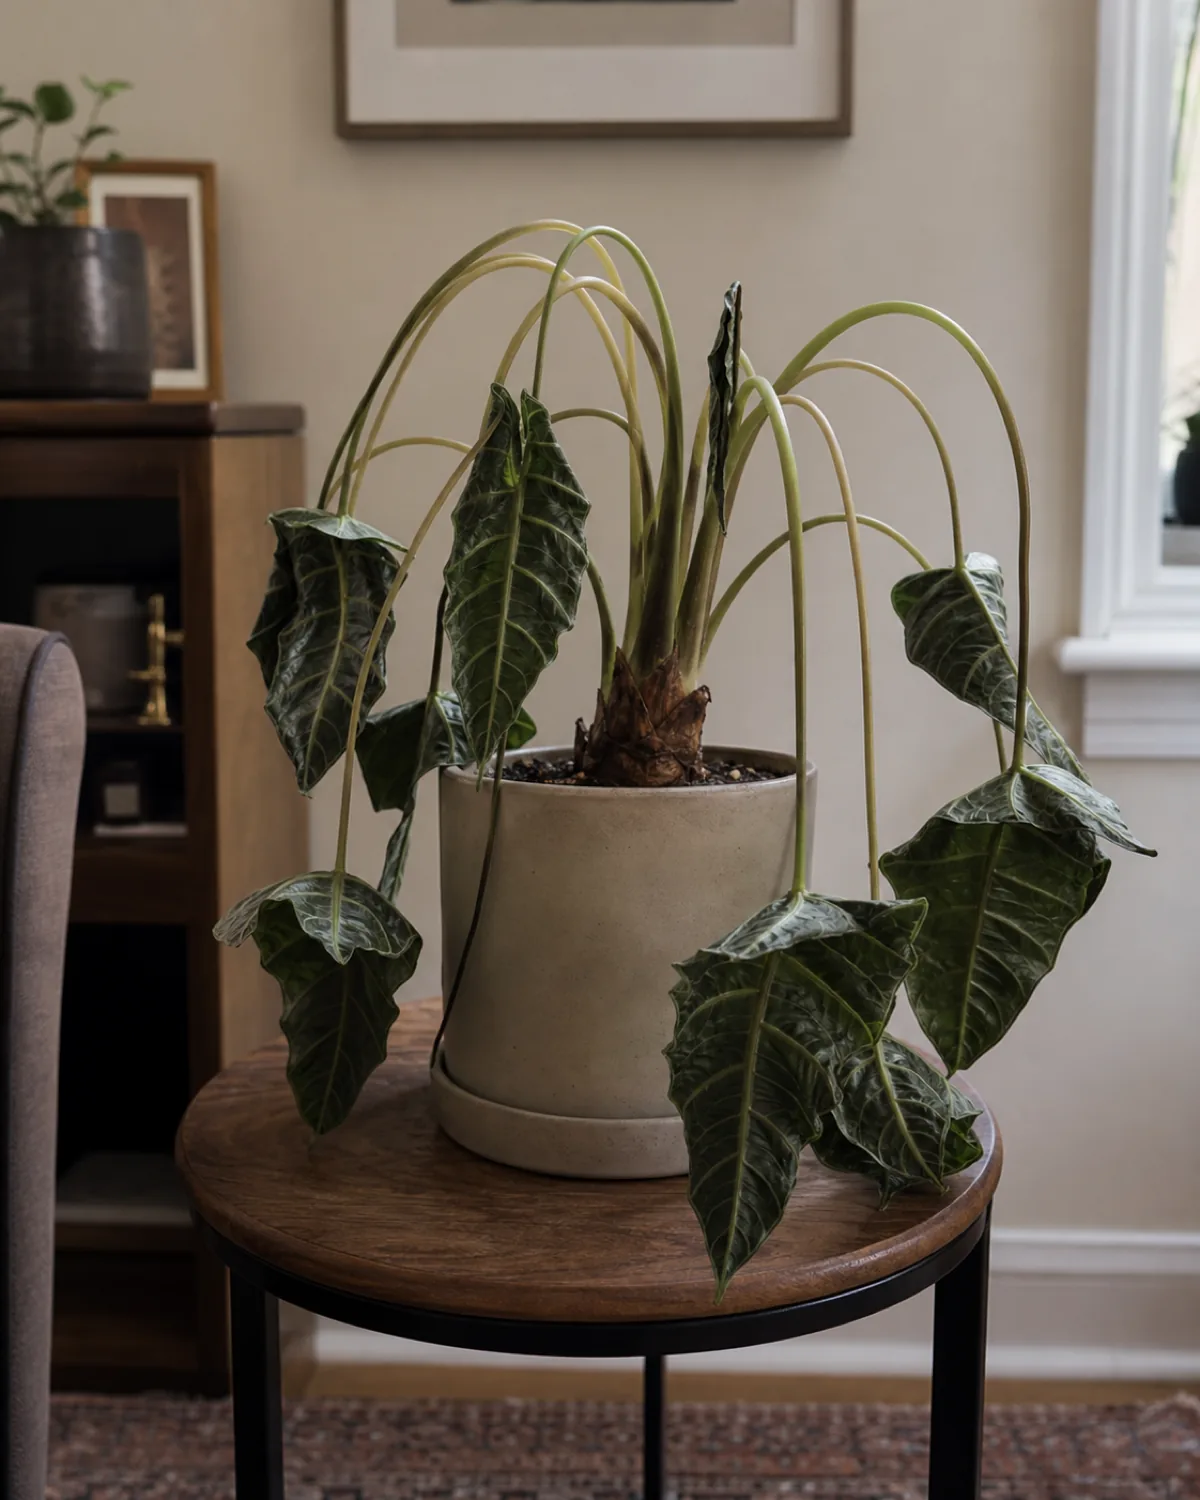
Drooping leaves that were rigidly upright yesterday almost always mean the soil went too dry or too wet. Check the soil: bone dry means a deep soak is overdue; soggy means roots may already be rotting and you need to unpot and inspect.
Cold drafts and sudden temperature drops can also cause overnight drooping — an alocasia near a door that gets opened to winter air will droop even if watering is perfect.
A single older leaf drooping and yellowing while new leaves still emerge is normal leaf cycling, not a care failure. Alocasia typically maintains only a few active leaves at a time.
- Check the soil first — too dry or too wet are the most common causes.
- Cold drafts cause overnight drooping even when watering is correct.
- One old leaf drooping while new ones emerge is normal leaf cycling.
Alocasia delivers dramatic foliage that nothing else matches — but it asks more of you than most indoor plants.
Humidity: the one care factor alocasia won't compromise on
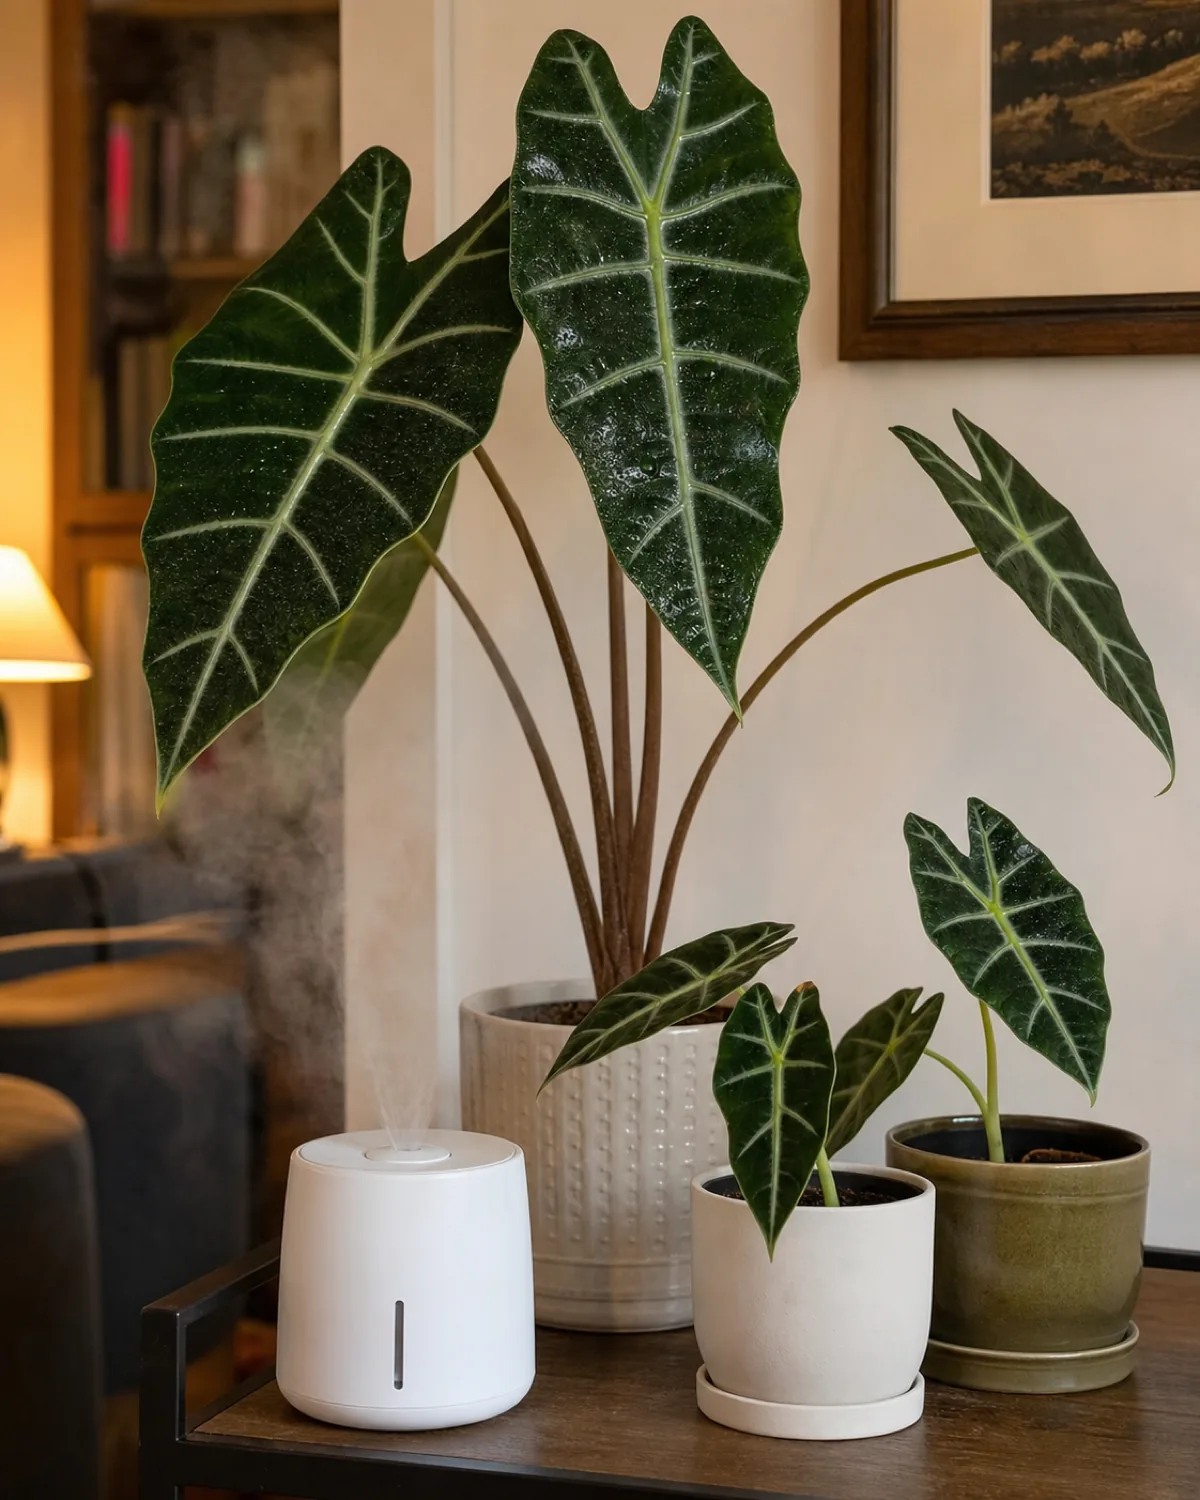
Most houseplants on this site tolerate 40 to 50 percent household humidity without complaint. Alocasia genuinely suffers below 50 percent — crispy leaf edges, browning tips, and spider mite invasions are all low-humidity signals.
A humidifier nearby is the most effective solution. A pebble tray helps marginally. Grouping tropical plants together creates a shared microclimate. Misting does almost nothing — the moisture evaporates in minutes without raising the ambient humidity around the leaves.
- Below 50% humidity causes crispy edges, browning tips, and invites spider mites.
- A humidifier nearby is the most effective fix — pebble trays help marginally.
- Misting doesn't work — the moisture evaporates too fast to matter.
Temperature and dormancy: what happens when leaves die back in winter
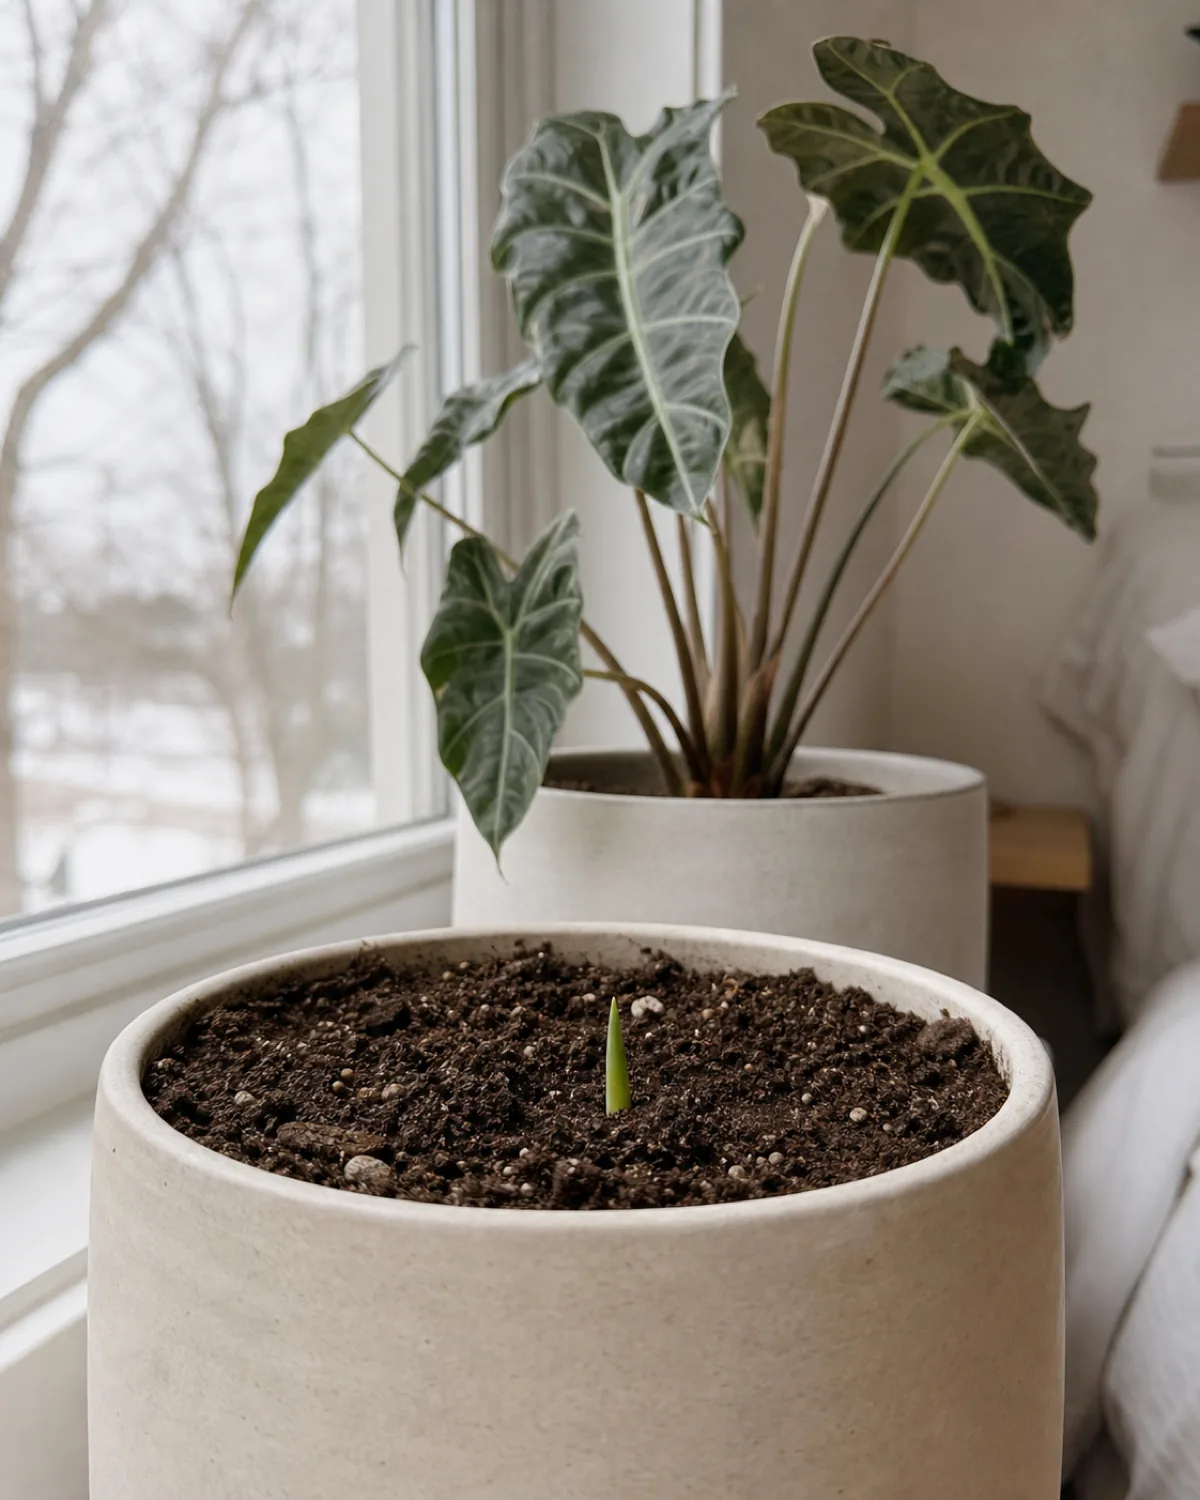
Alocasia is tropical and dislikes temperatures below 60°F (15°C). In cool or low-light winter conditions, some alocasia species drop every single leaf and go fully dormant — a bare pot of soil where a dramatic plant used to be.
This looks like death but it isn't. The underground corm is alive and storing energy. Stop fertilizing, water just enough to keep the corm from drying out completely — once every few weeks — and new leaves will push up in spring when light and warmth return.
No other species on this site does this. It's the single most common reason beginners throw away a perfectly healthy alocasia.
- Some species drop all leaves in winter and go fully dormant underground.
- The corm is alive — stop fertilizing, water sparingly, and wait for spring.
- No other houseplant on this site goes dormant like this — it looks dead but isn't.
Soil mix: chunky and fast-draining
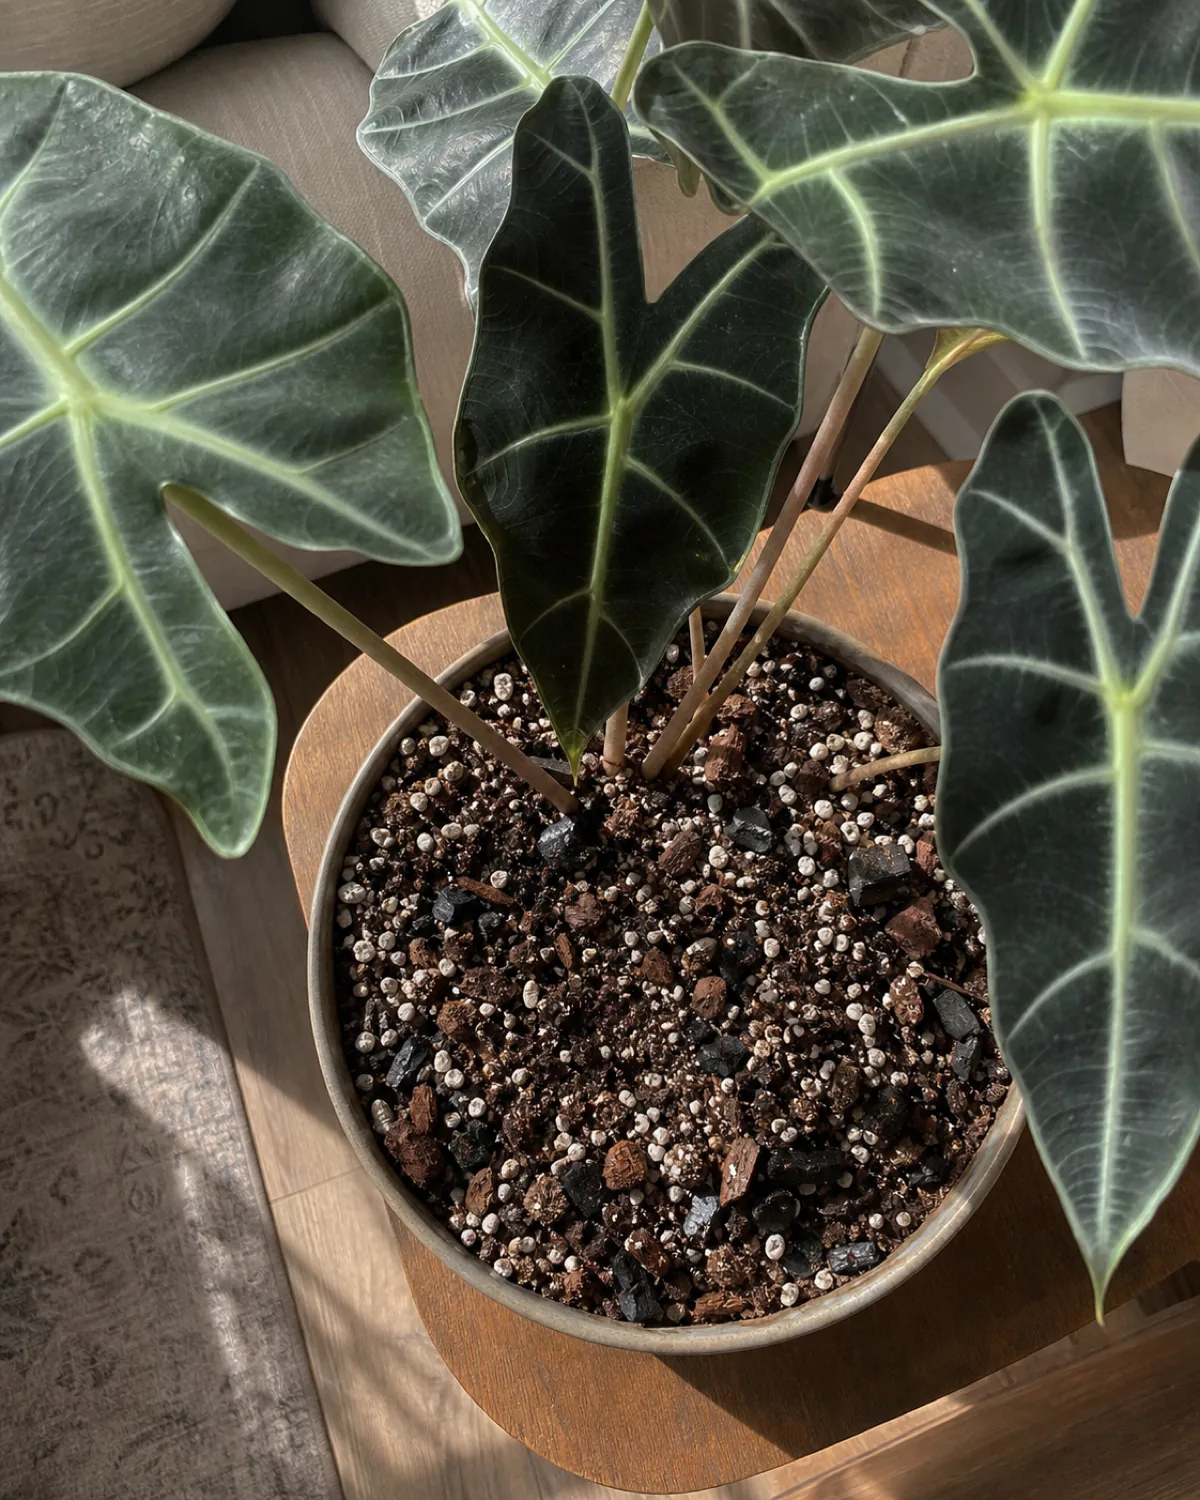
A standard potting mix holds too much moisture for alocasia corms. Mix in extra perlite, orchid bark, and a handful of horticultural charcoal for a chunky, airy blend that drains fast but holds some moisture in the bark pieces.
The goal is moist but never wet. The large air pockets created by bark and perlite let the corm breathe and prevent the waterlogged conditions that trigger rot. Think of it as the soil equivalent of bright indirect light — enough moisture to thrive, not so much that it drowns.
- Standard potting mix holds too much moisture — amend with perlite, orchid bark, and charcoal.
- Chunky, airy texture lets the corm breathe and drains fast.
- The goal: moist but never wet — large air pockets prevent waterlogging.
Most alocasia problems trace back to one of four missed conditions. Hold these four and it rewards you with the most dramatic foliage in your collection.
Fertilizing during the growing season only
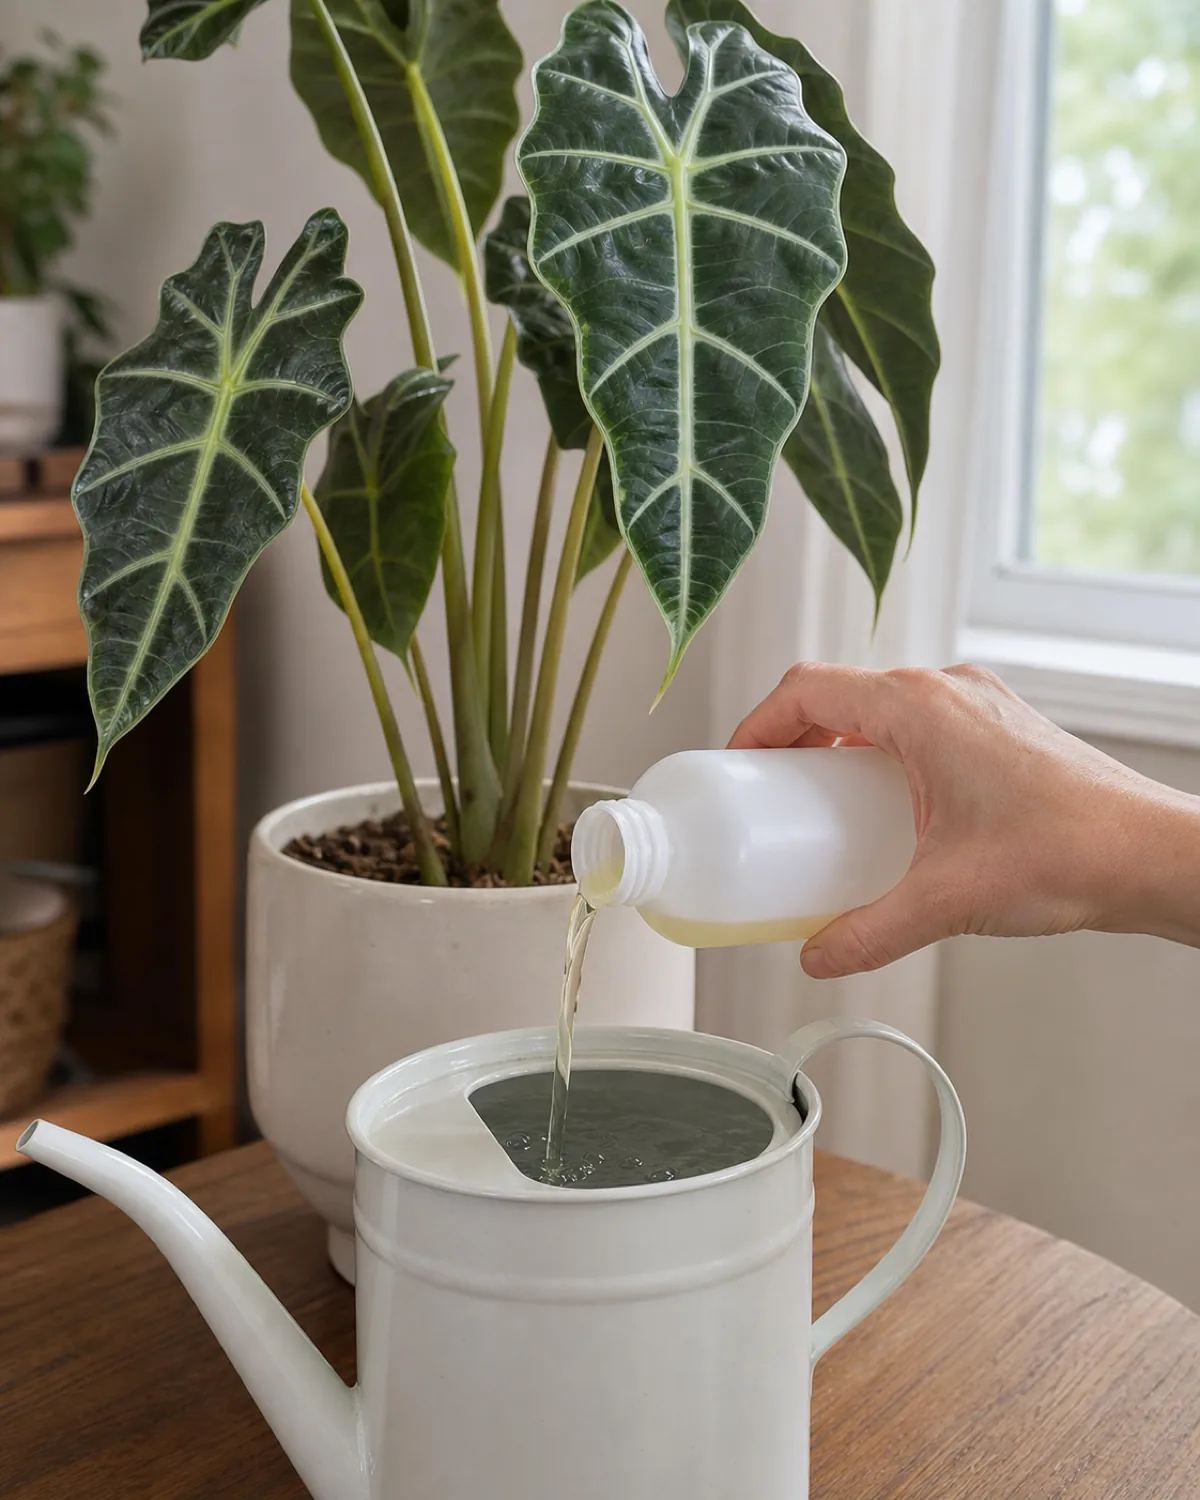
Feed every two weeks in spring and summer with a balanced liquid fertilizer at half strength. Alocasia is a fast grower in the right conditions and responds visibly to regular feeding — larger leaves, more vibrant color, and faster new leaf emergence.
Stop fertilizing entirely in fall and winter when growth slows or the plant goes dormant. Fertilizing a dormant corm does nothing useful and risks salt buildup around inactive roots that can't flush the excess.
- Every two weeks, spring and summer, at half strength.
- A fast grower that responds visibly to consistent feeding in the growing season.
- Stop entirely in fall and winter — dormant roots can't use or flush the fertilizer.
Propagation: dividing offsets from the mother corm
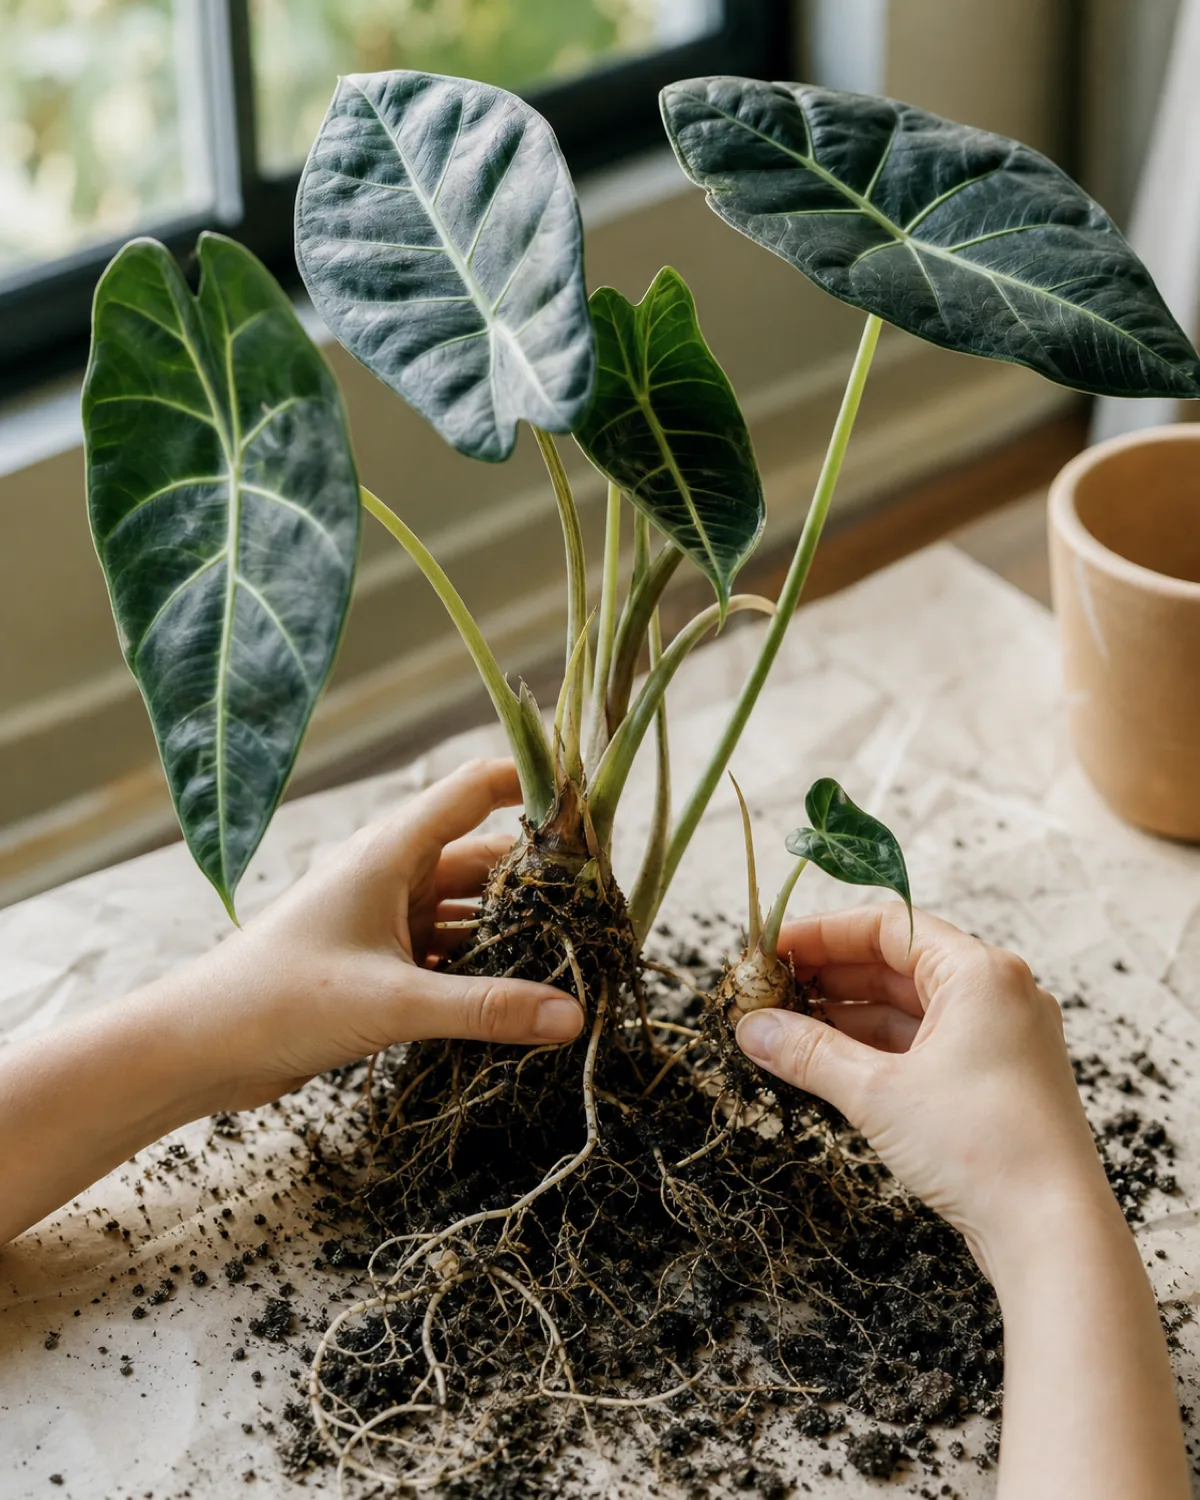
Alocasia produces small offset corms — baby bulbs — around the base of the mother plant. During repotting, separate offsets that have at least one leaf or a visible growth point and pot them in their own small container.
Keep humidity high around new offsets until they establish roots. A clear plastic bag loosely draped over the pot creates a mini greenhouse effect that helps significantly in the first few weeks.
Unlike philodendrons or pothos that root easily from stem cuttings in water, alocasia propagation is strictly a corm-division operation. There's no node-based shortcut.
- Separate offset corms during repotting — each needs at least one leaf or visible growth point.
- Keep humidity high around new offsets until they root in.
- No stem-cutting shortcut — unlike philodendrons, alocasia only propagates by corm division.
Repotting: annual check, up one size
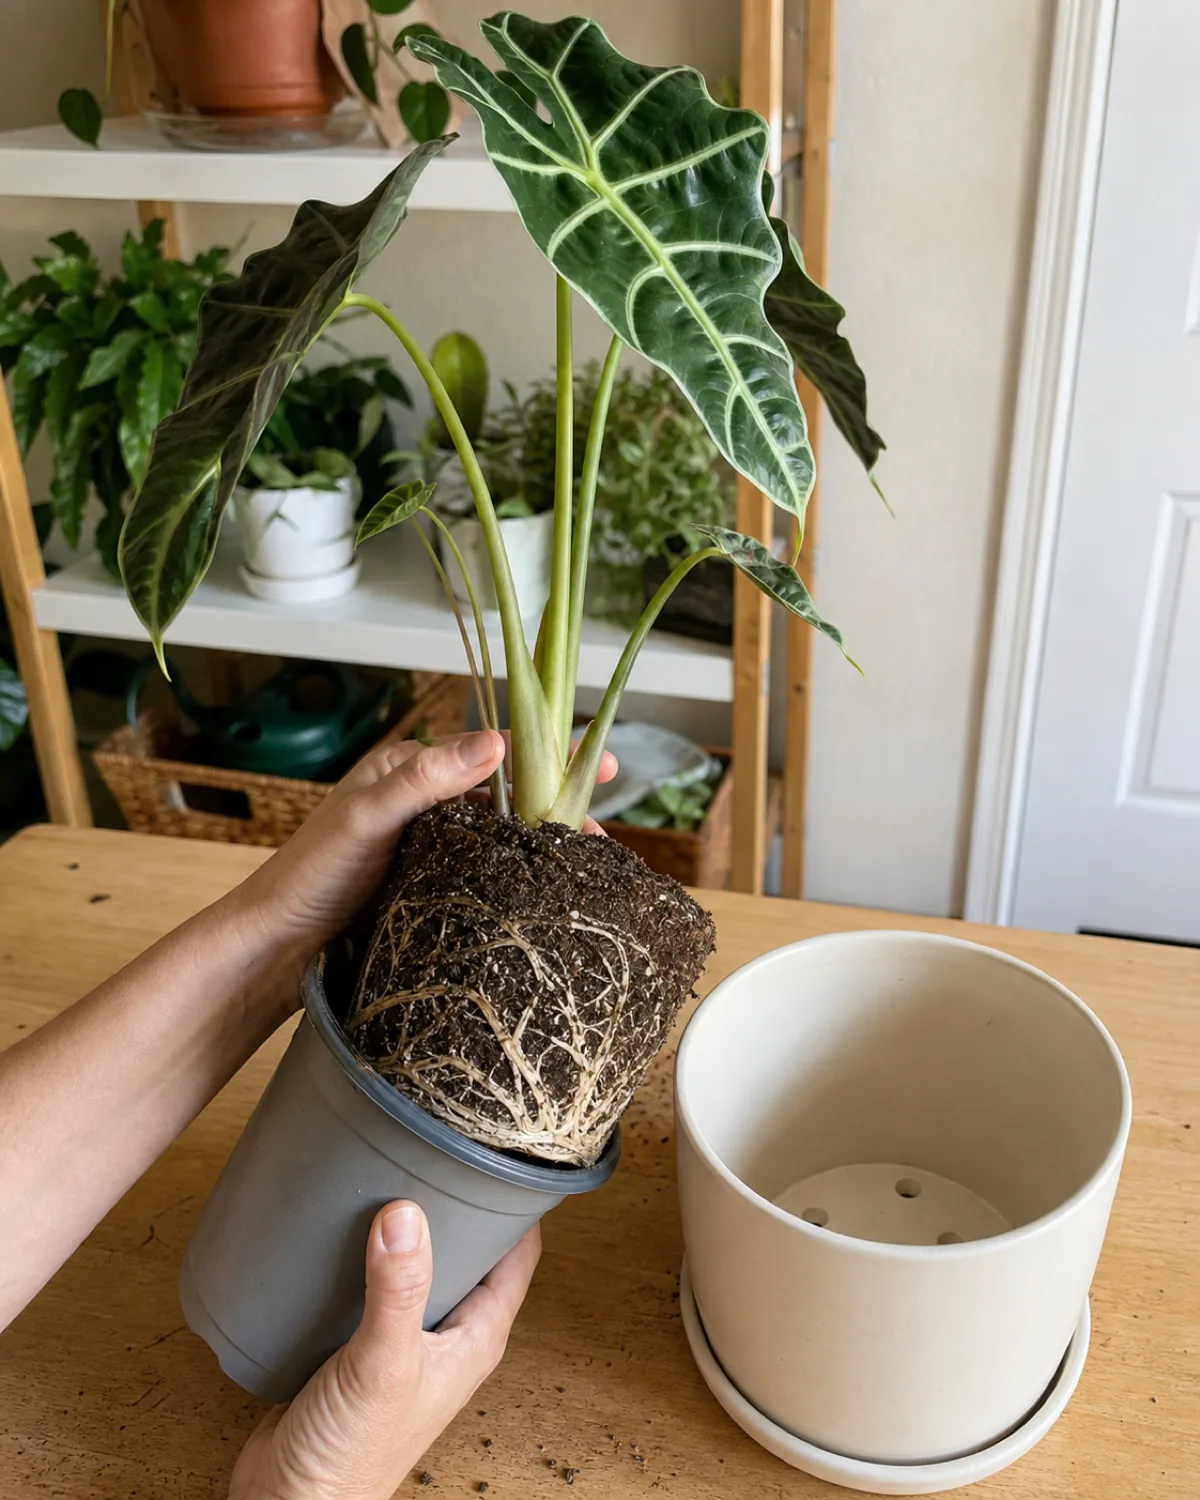
Alocasia grows fast in the right conditions and may need annual repotting — check in spring when new growth starts. Choose a pot only one size larger with drainage holes, and repot at the start of the growing season so the disturbed roots get the whole warm period to recover.
Unlike a ZZ plant or Chinese evergreen that prefers being slightly rootbound, alocasia benefits from the refresh. Fresh chunky mix, a little more room for the corm, and removal of any offset corms that have started crowding the pot.
- Check annually in spring — fast growers may need yearly repotting.
- One pot size larger, with drainage holes.
- Repot in spring so roots recover during the active growing season.
Alocasia Care: The Quick Reference
- 1Large arrow-shaped leaves on rigid petiolesUpright, sculptural, prominent veins — nothing else looks like it.
- 2Bright indirect light, nothing lessEast-facing window or filtered south/west — drops leaves fast in low light.
- 3Moist soil, never soggyLet the top inch dry, then water thoroughly — corms rot in standing water.
- 4Drooping = check the soilToo dry or too wet — both cause dramatic overnight drooping.
- 5Humidity above 50% is non-negotiableCrispy edges and spider mites are the low-humidity signals.
- 6Winter dormancy looks like death but isn'tThe corm is alive underground — water sparingly, wait for spring.
- 7Chunky, fast-draining soilPerlite, orchid bark, charcoal — standard mix holds too much water.
- 8Feed every two weeks in growing seasonHalf-strength liquid fertilizer — stop entirely in fall and winter.
- 9Propagate by dividing offset cormsNo stem-cutting shortcut — separate baby bulbs during repotting.
- 10Repot annually in springOne size up, fresh chunky mix, at the start of the growing season.
- 11Spider mites are the top threatCheck leaf undersides for webbing — humidity above 50% is the best prevention.
- 12Toxic to cats and dogsCalcium oxalate crystals cause immediate mouth pain — keep it elevated.
- 13Start with Polly, Frydek, or ZebrinaCompact, forgiving varieties that teach you alocasia habits before the big ones.
kultivy.com
Spider mites: alocasia's worst enemy
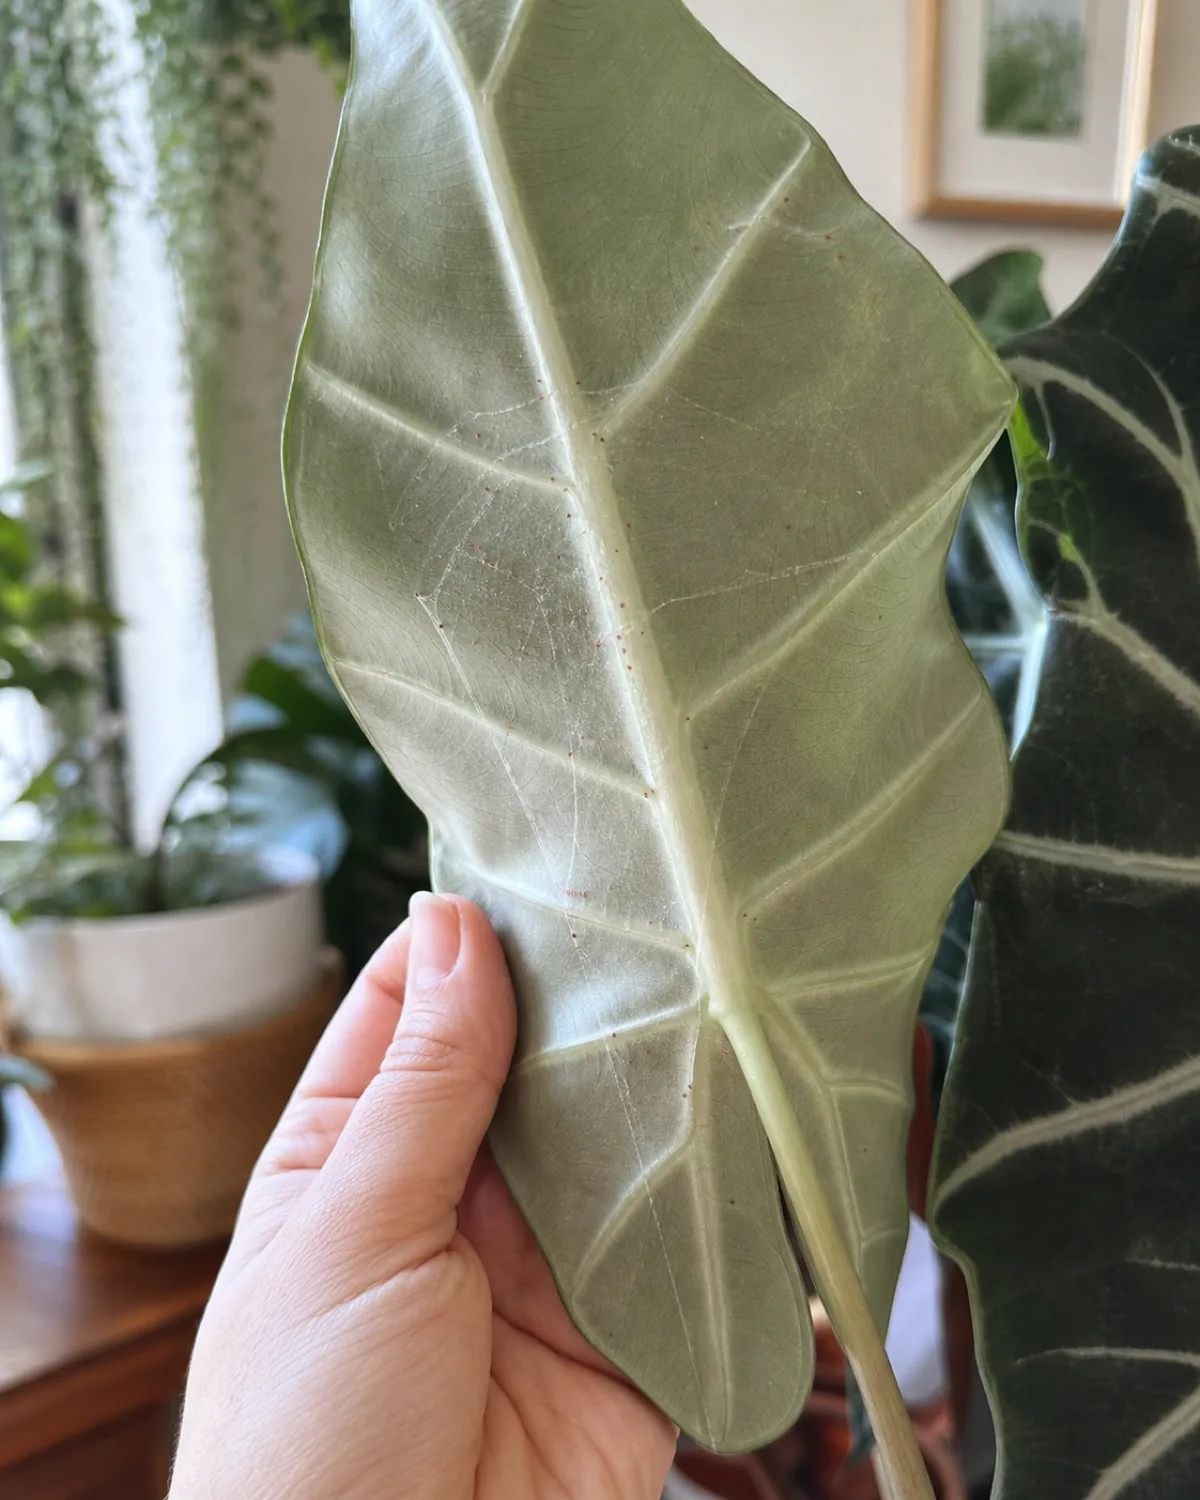
The combination of large leaf surfaces and a preference for warm, dry air makes alocasia a spider mite magnet. If any plant in your collection gets spider mites first, it will almost certainly be the alocasia.
Check the undersides of leaves regularly for fine webbing stretched between the veins and tiny reddish dots moving slowly across the surface. By the time you see webbing with the naked eye, the infestation is already established.
A neem oil spray applied to the undersides of every leaf once a week for three weeks breaks the lifecycle. Maintaining humidity above 50% is the single best prevention — spider mites thrive in dry air and struggle in humid conditions.
- Alocasia is usually the first plant in a collection to get spider mites.
- Check leaf undersides for fine webbing and tiny reddish dots.
- Neem oil weekly for three weeks clears active infestations; humidity above 50% prevents them.
Is alocasia toxic to pets?
Yes. All alocasia species contain calcium oxalate crystals throughout the plant — stems, leaves, and corm. Chewing causes immediate mouth pain, drooling, and tongue swelling in cats and dogs. The reaction is usually self-limiting but intensely uncomfortable.
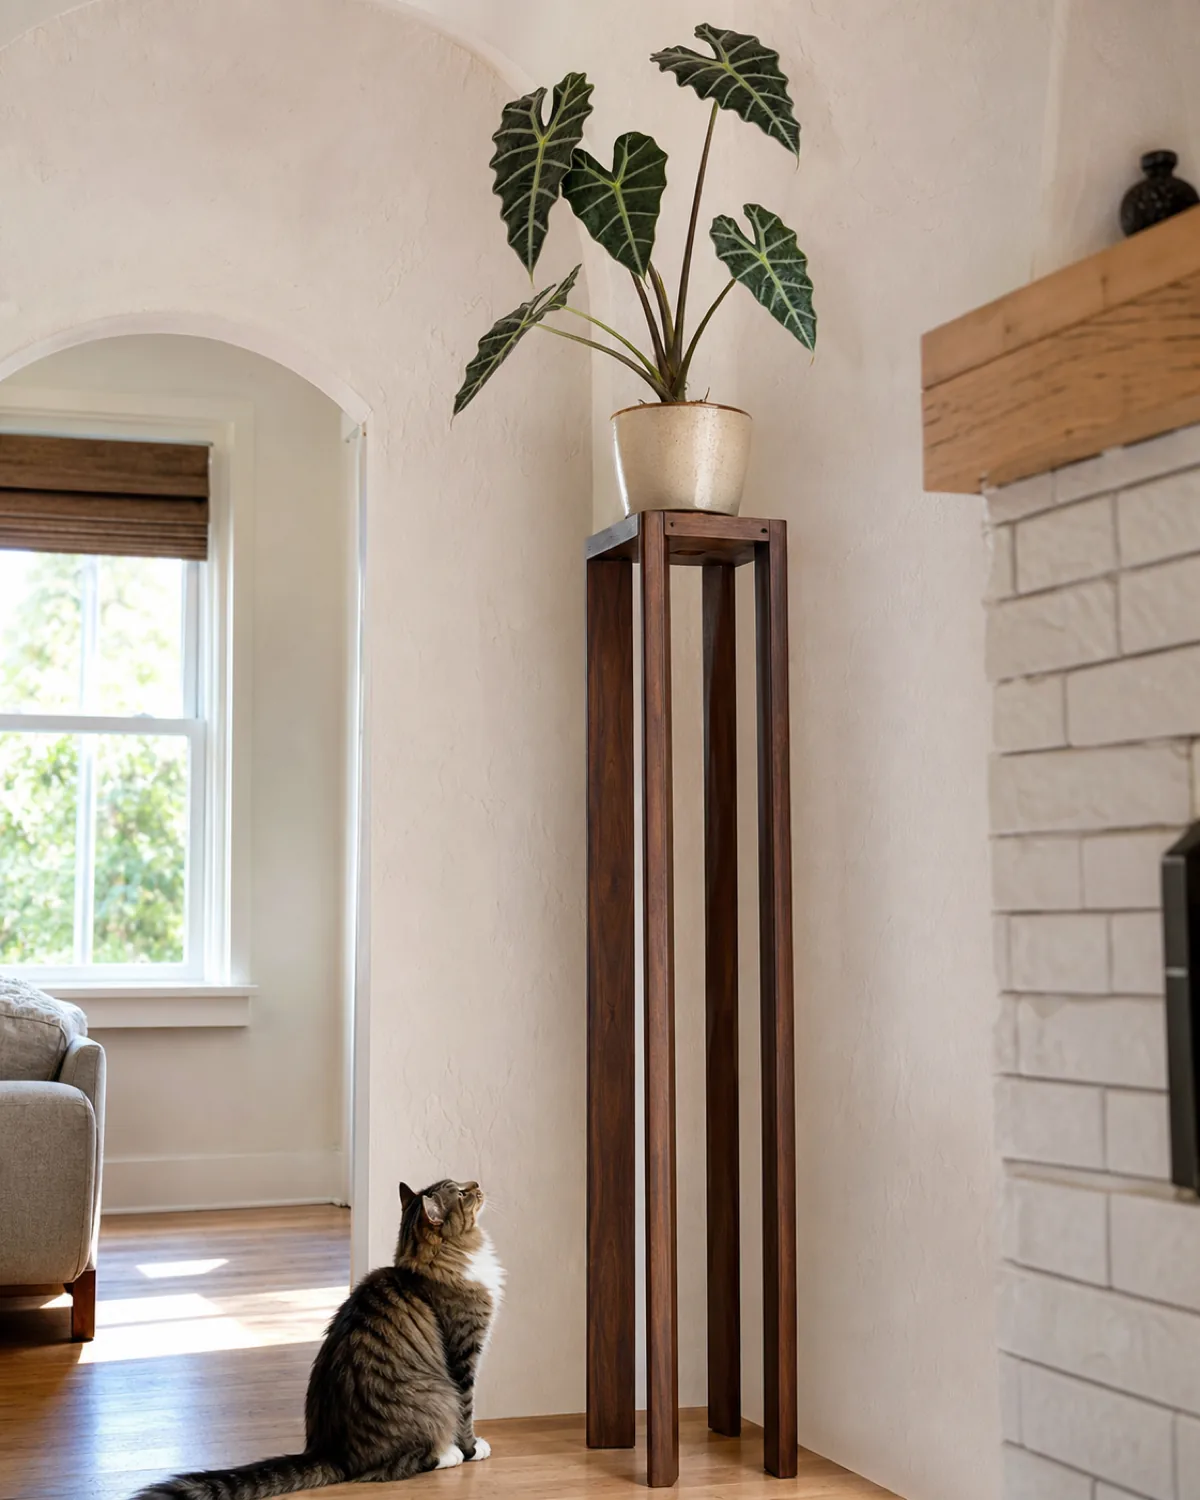
Keep an alocasia on a tall plant stand, a high shelf, or in a room pets don't access. If you want dramatic foliage without the toxicity concern, a calathea or a large fern delivers visual impact without the risk — though neither matches the alocasia's sculptural quality.
- All alocasia species are toxic — calcium oxalate crystals cause immediate oral irritation.
- Keep it elevated or in a pet-free room.
- Calathea or large ferns for pet-safe dramatic foliage, though neither matches the silhouette.
Popular alocasia varieties for indoors
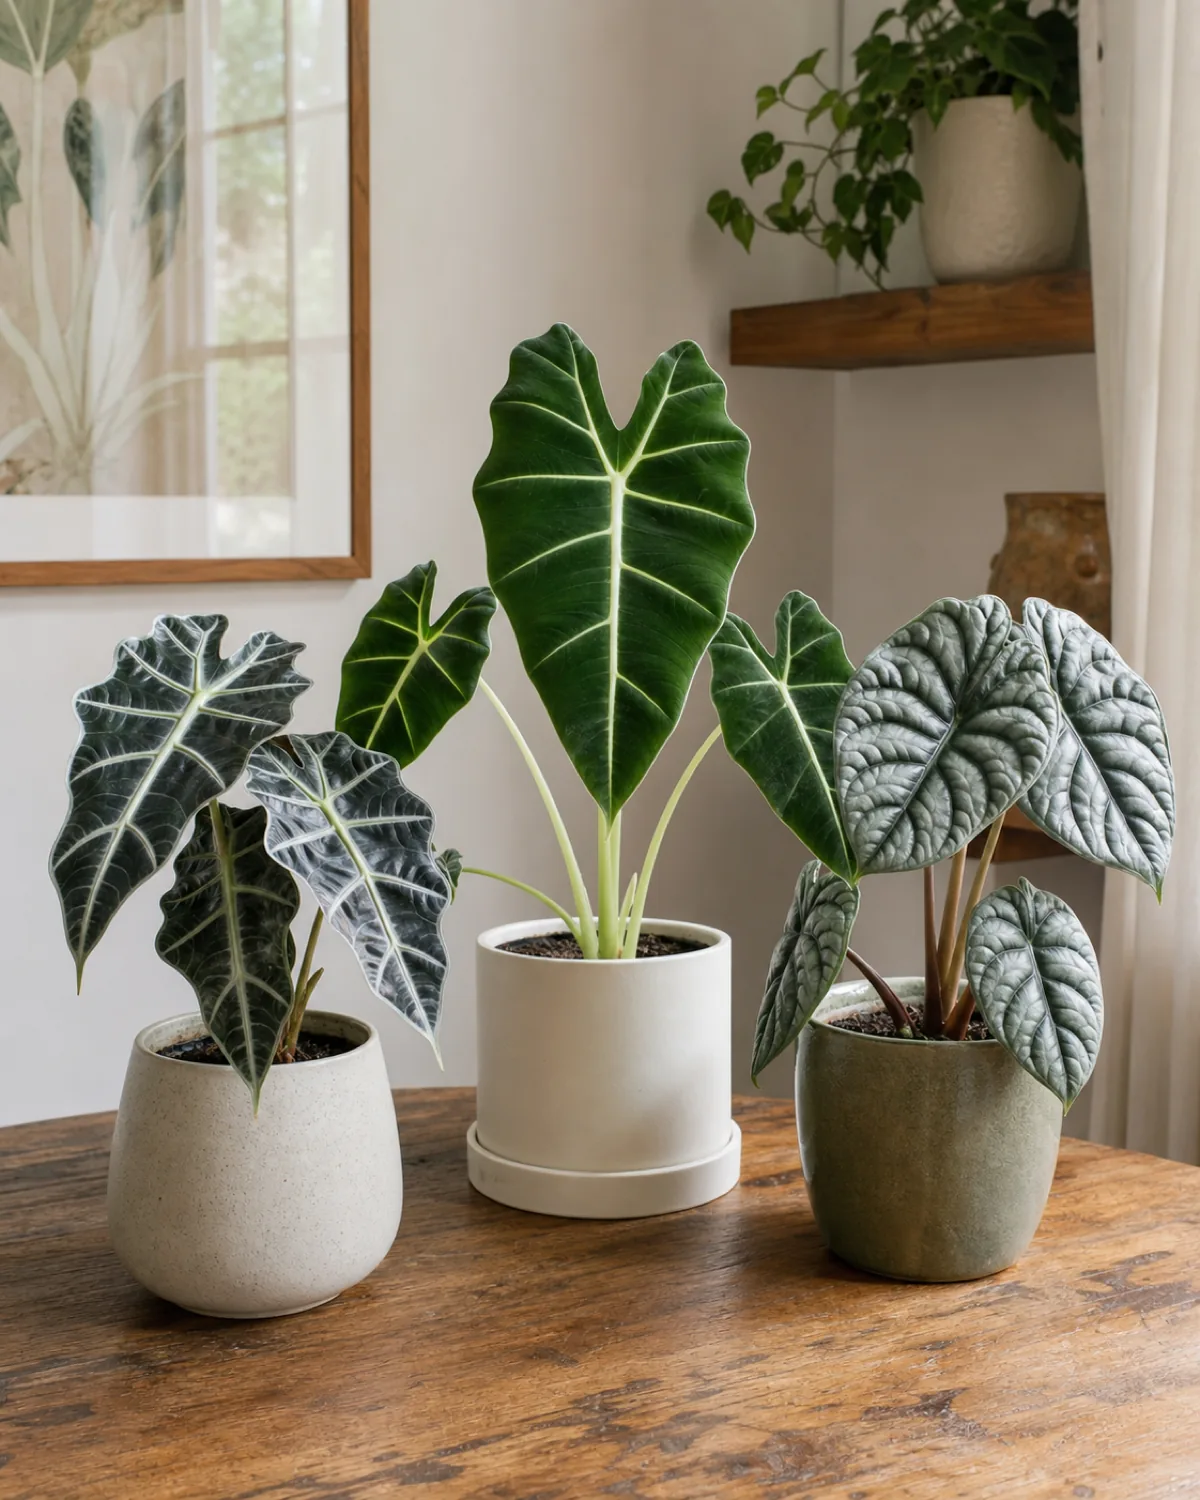
Alocasia 'Polly' (Amazonica) is the most common starter — compact, with narrow dark arrow-shaped leaves and bold white veins. It stays small enough for a tabletop and is more forgiving of imperfect conditions than larger species.
Alocasia 'Frydek' (Green Velvet) has velvety dark green leaves with a single bright white midrib vein. The velvet texture is unique even among alocasias and catches light in a way that photographs beautifully.
Alocasia zebrina stands out for its striking zebra-striped petioles rather than its leaves — the stems are the visual event.
Alocasia 'Dragon Scale' has thick, heavily textured leaves that look and feel like reptile skin, with deep vein channels creating a quilted surface. Alocasia 'Silver Dragon' is the pale cousin — silvery leaves with dark veins, compact, and slightly easier to keep than the green-leaved species.
Size ranges from tabletop (Polly, Dragon Scale) to statement floor plant (macrorrhizos, with leaves over three feet long).
- Polly for a compact, forgiving starter with bold white veins.
- Frydek for velvety texture that catches light and cameras.
- Dragon Scale and Silver Dragon for thick, textured leaves unlike anything else.

Mara Quinn edits Kultivy, where she shares houseplant care, propagation, beginner-friendly plant picks, and plant-styling ideas for anyone who wants their indoor plants to actually thrive. Every guide is image-led and reviewed for clarity, usefulness, image accuracy, and Pinterest-to-page alignment before it goes live. Visit the About page.