My first ZZ plant lived in a windowless office corner for nearly a year before I noticed it had grown two new fronds. The previous tenant said it was almost dead. It was not. It was doing what ZZ plants do.
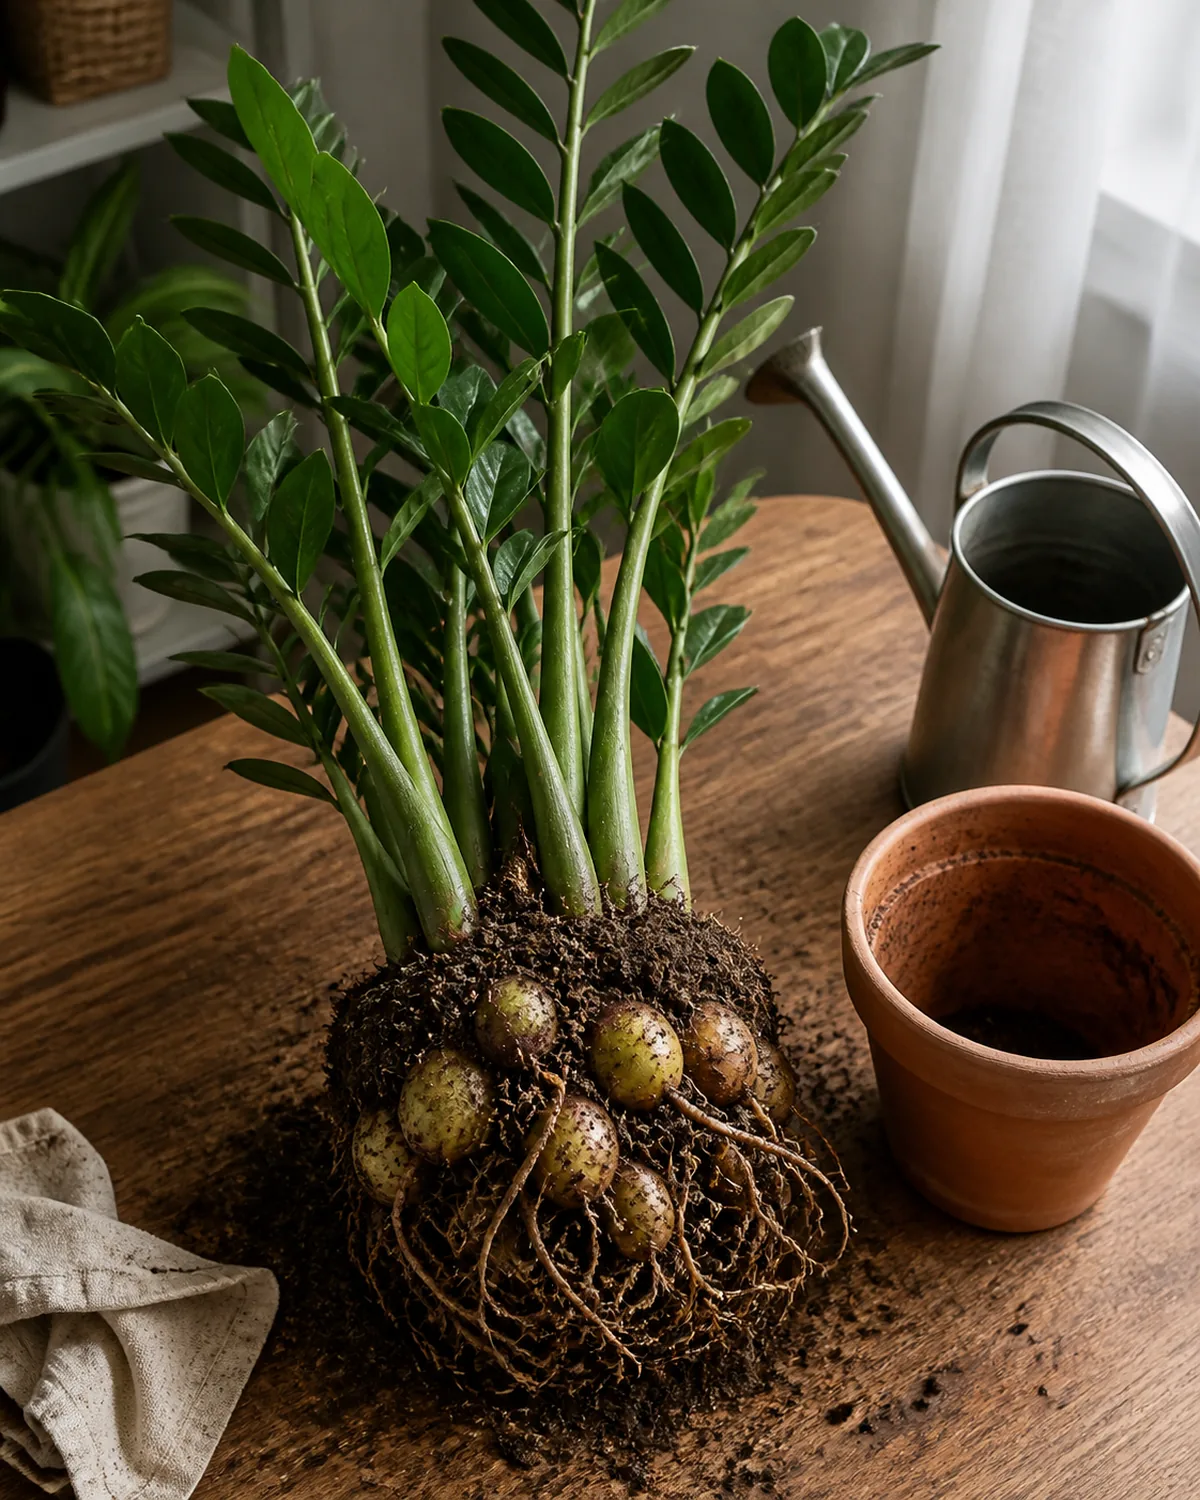
Which is almost nothing for months at a time, and then a fresh waxy frond when nobody is watching. The reason it survives those quiet rooms is hidden in the pot. Under the soil, a ZZ stores water in round potato-like rhizomes.
A ZZ plant is one of the most beginner-friendly drought-proof houseplants you can buy, but it has a few quirks worth knowing before you bring one home. Here is what it really needs to thrive.
ZZ plant care really comes down to three things: enough indirect light to keep new fronds coming, watering only when the soil is dry past the second knuckle, and understanding that the underground rhizome is doing most of the work. Jump to whatever you are dealing with right now.
- 1How much light it needs
- 2How often to water (rhizome rule)
- 3Gritty mix and a snug pot
- 4Where it actually thrives
- 5Why the stems are yellow
- 6Why the leaflets are curling
- 7How to clean the waxy leaflets
- 8Propagate from a single leaflet
- 9When and how to repot
- 10Pests to watch for
- 11Toxicity and pet placement
- 12‘Raven’ and other varieties
- 13Quick tips for the long term
How much light a ZZ plant really needs

Light is the part of ZZ care where the reputation and the reality drift apart. ZZ plants survive in genuinely dim rooms, which is rare among houseplants, but they grow much faster when the light is good. The real question is finding the spot that suits the pace you want.
- Bright indirect light grows the fastest fronds. A few feet back from a north or east window gives steady growth all year.
- Low light keeps it alive but slow. A windowless corner or an office under fluorescents works, but expect one or two new fronds a year at most.
- Skip a sunny south sill. Direct afternoon sun scorches the waxy leaflets to a pale yellow.
How often to water a ZZ plant (the rhizome rule)
ZZ watering rhythm feels wrong the first few times you try it. Three or four weeks between drinks is normal, sometimes longer in winter, and the plant looks fine the whole time because the underground tuber cluster is already topped up. The biggest mistake new owners make is reaching for the watering can on a schedule and slowly drowning the rhizome out of habit.
Unlike a snake plant, which buffers its drought in CAM photosynthesis and water-loaded sword leaves, a ZZ stores almost everything below the soil line in those potato-like tubers. That makes the soil dry-down, not the leaves, the only honest signal.
- Wait until the top 2 inches are bone dry. Push a finger in past the second knuckle; if it comes out clean and dry, the rhizome wants a drink.
- Soak once, drain hard, walk away. Pour until water runs out the bottom, tip the saucer empty, and do not water again until the soil is dry again.
- Stretch the gap in winter. New frond growth pauses and the tuber cluster holds onto water longer; an extra one to two weeks between drinks is usually right.
Gritty mix and a snug pot for the rhizome
ZZ soil has one job that most houseplant soil does not: it has to dry out fast enough that a fully hydrated rhizome cluster never sits wet. The tuber already carries weeks of moisture, so any mix that holds water for days will slowly rot the rhizome from the bottom up while the fronds still look glossy on top.
- Mix gritty cactus mix with a handful of perlite. A 70/30 cactus-to-perlite blend drains in seconds and stays airy for years.
- Stay snug; oversized pots rot rhizomes. Step up only 1 to 2 inches wider than the existing tuber cluster so the soil dries before the next watering.
- Pick terracotta with a drainage hole. The unglazed clay wicks moisture out of the mix between waterings and gives the rhizome the margin it needs.
Almost every ZZ plant problem comes down to too much water, too little light, or a hidden rhizome issue. Pick what is happening with yours and start there.
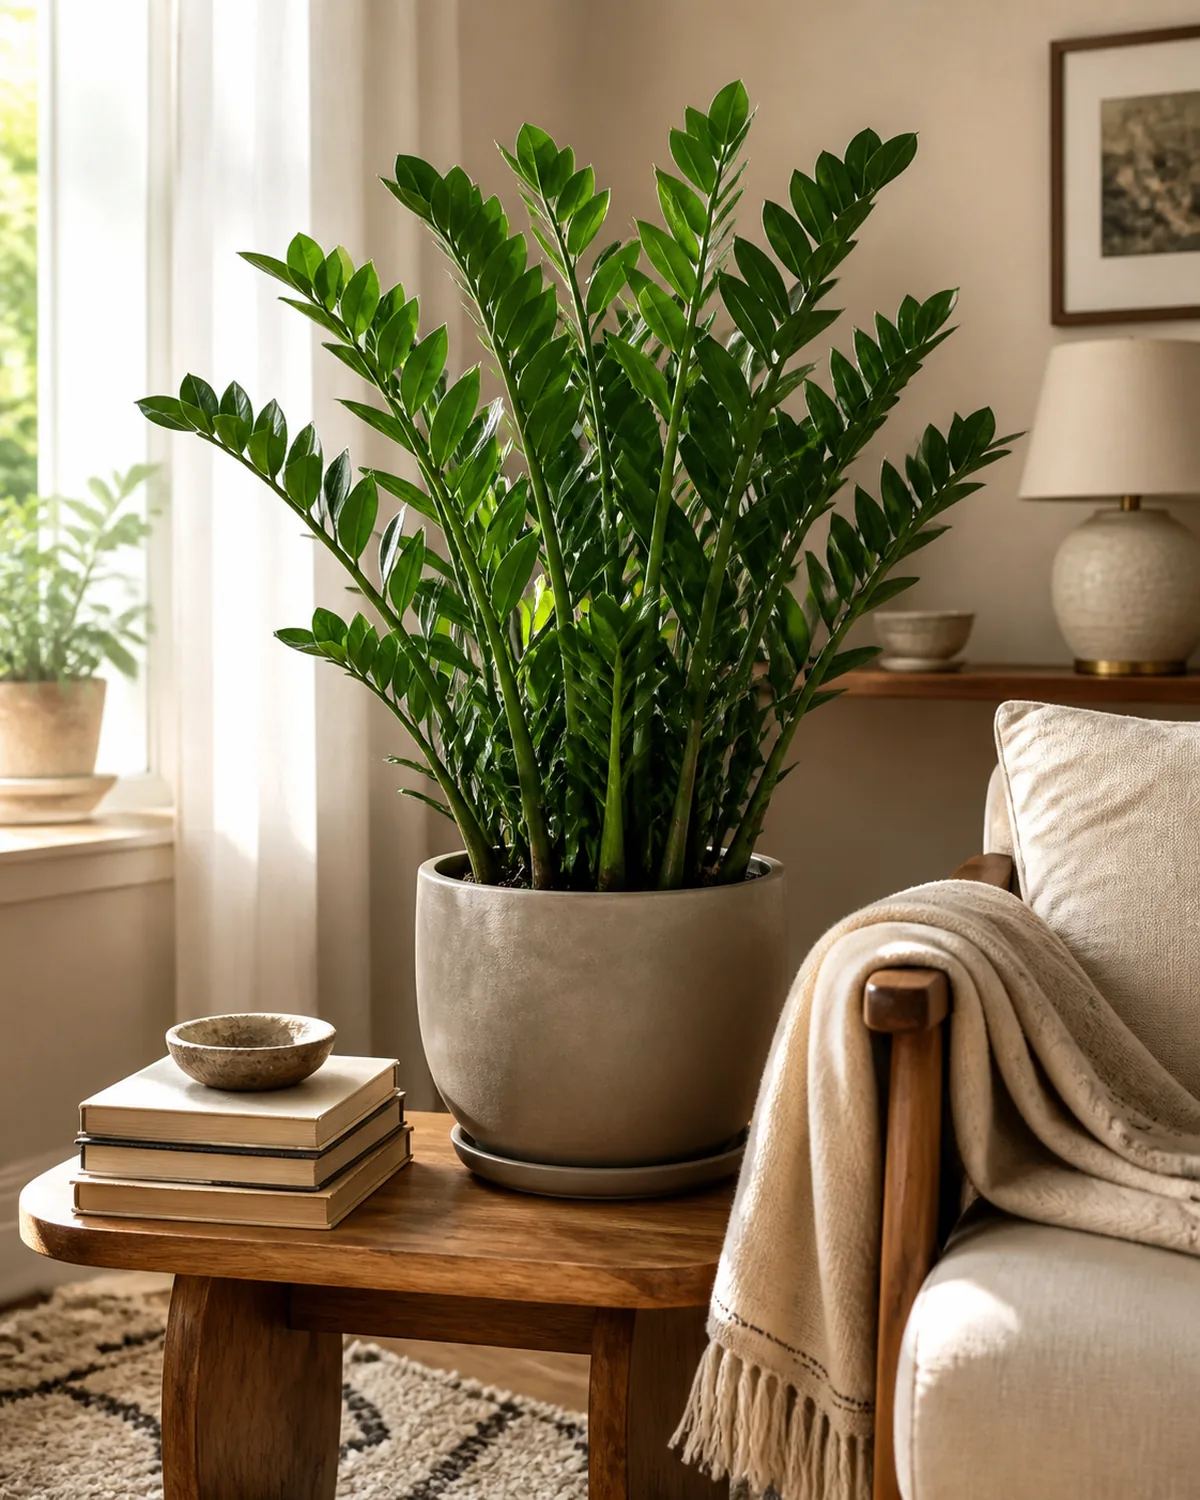
Where a ZZ plant actually thrives at home
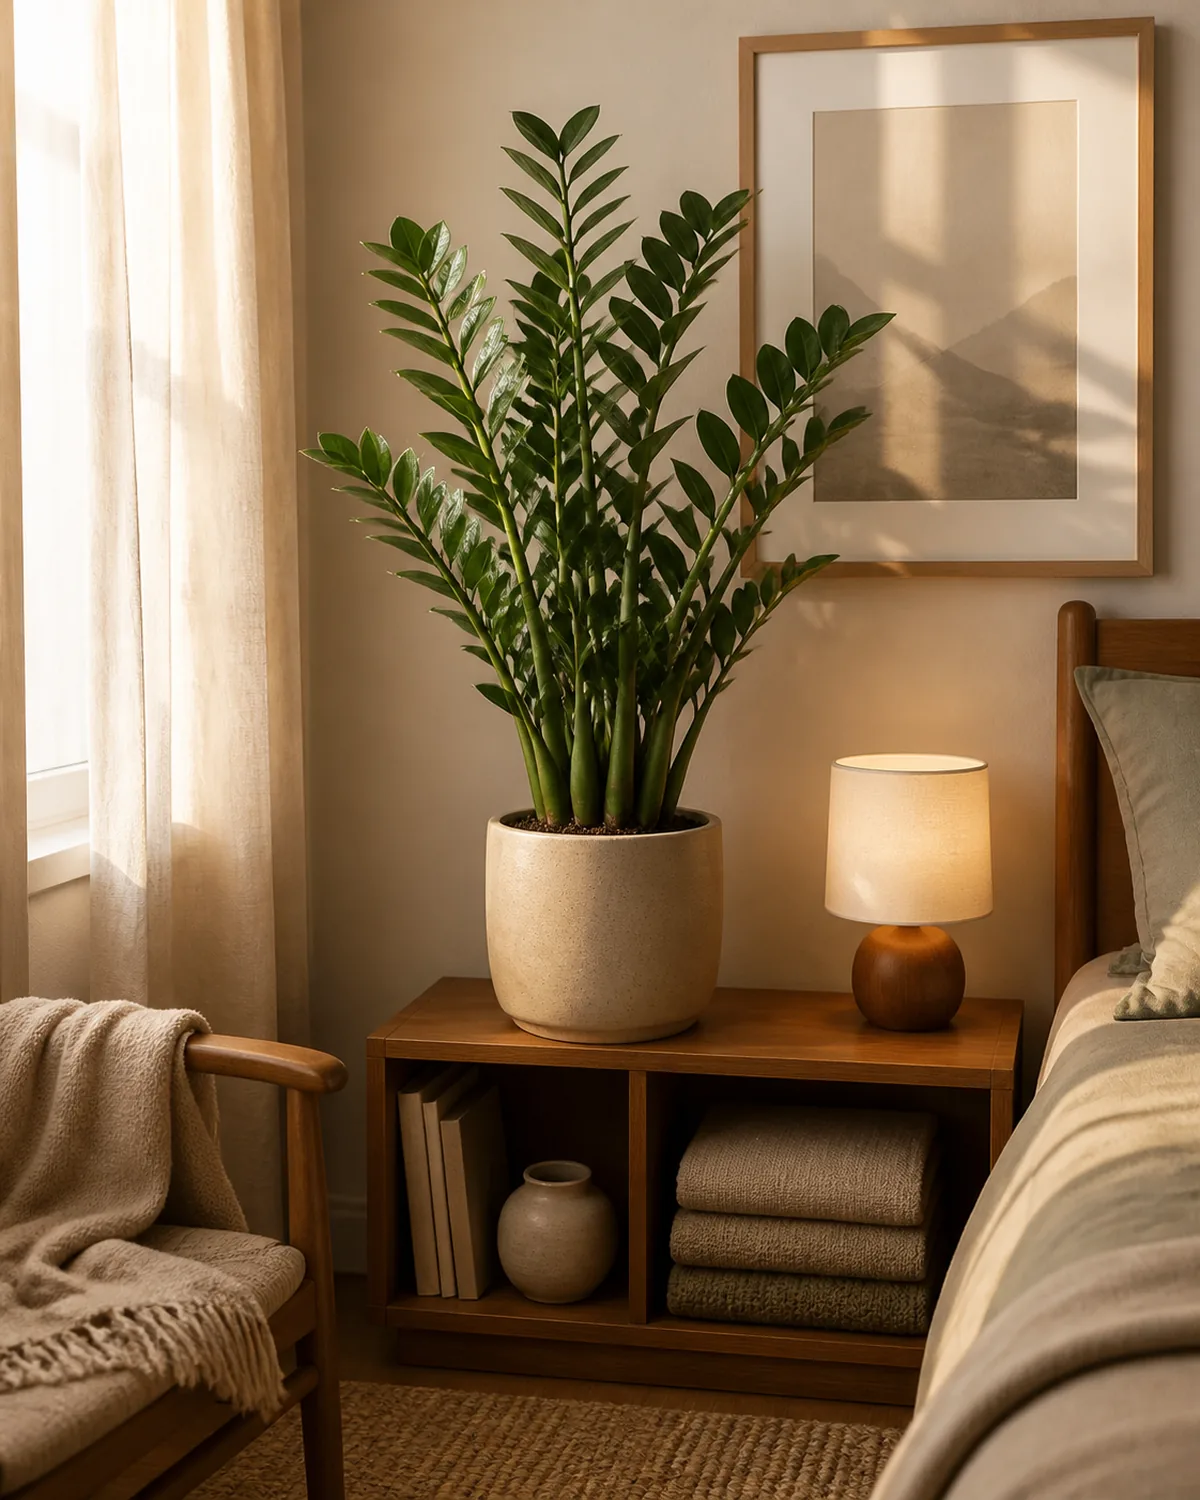
The rooms where a ZZ plant earns its reputation are the ones nothing else wants. A windowless home office under fluorescents, an interior hallway lit only by a sconce, a corner desk lit by a single lamp, a styled low cabinet at the dim end of a living room. ZZ fronds hold their sheen in genuinely low light because the waxy leaflets bounce what little light is there back into the leaf.
A low shelf in a calm bedroom corner is a nice fit, and there are more placement ideas in our plant shelf and corner styling guide.
- Windowless rooms are where ZZ wins. Hallways, interior offices, dim bathrooms; the waxy fronds keep their gloss where ferns and aroids fail.
- A north or east window grows it the fastest. Steady indirect light without harsh afternoon sun pushes the most new fronds per year.
- Add a lamp for true dark corners. A warm reading lamp on three or four hours a day is enough supplemental light to keep growth moving.
Why the stems are turning yellow
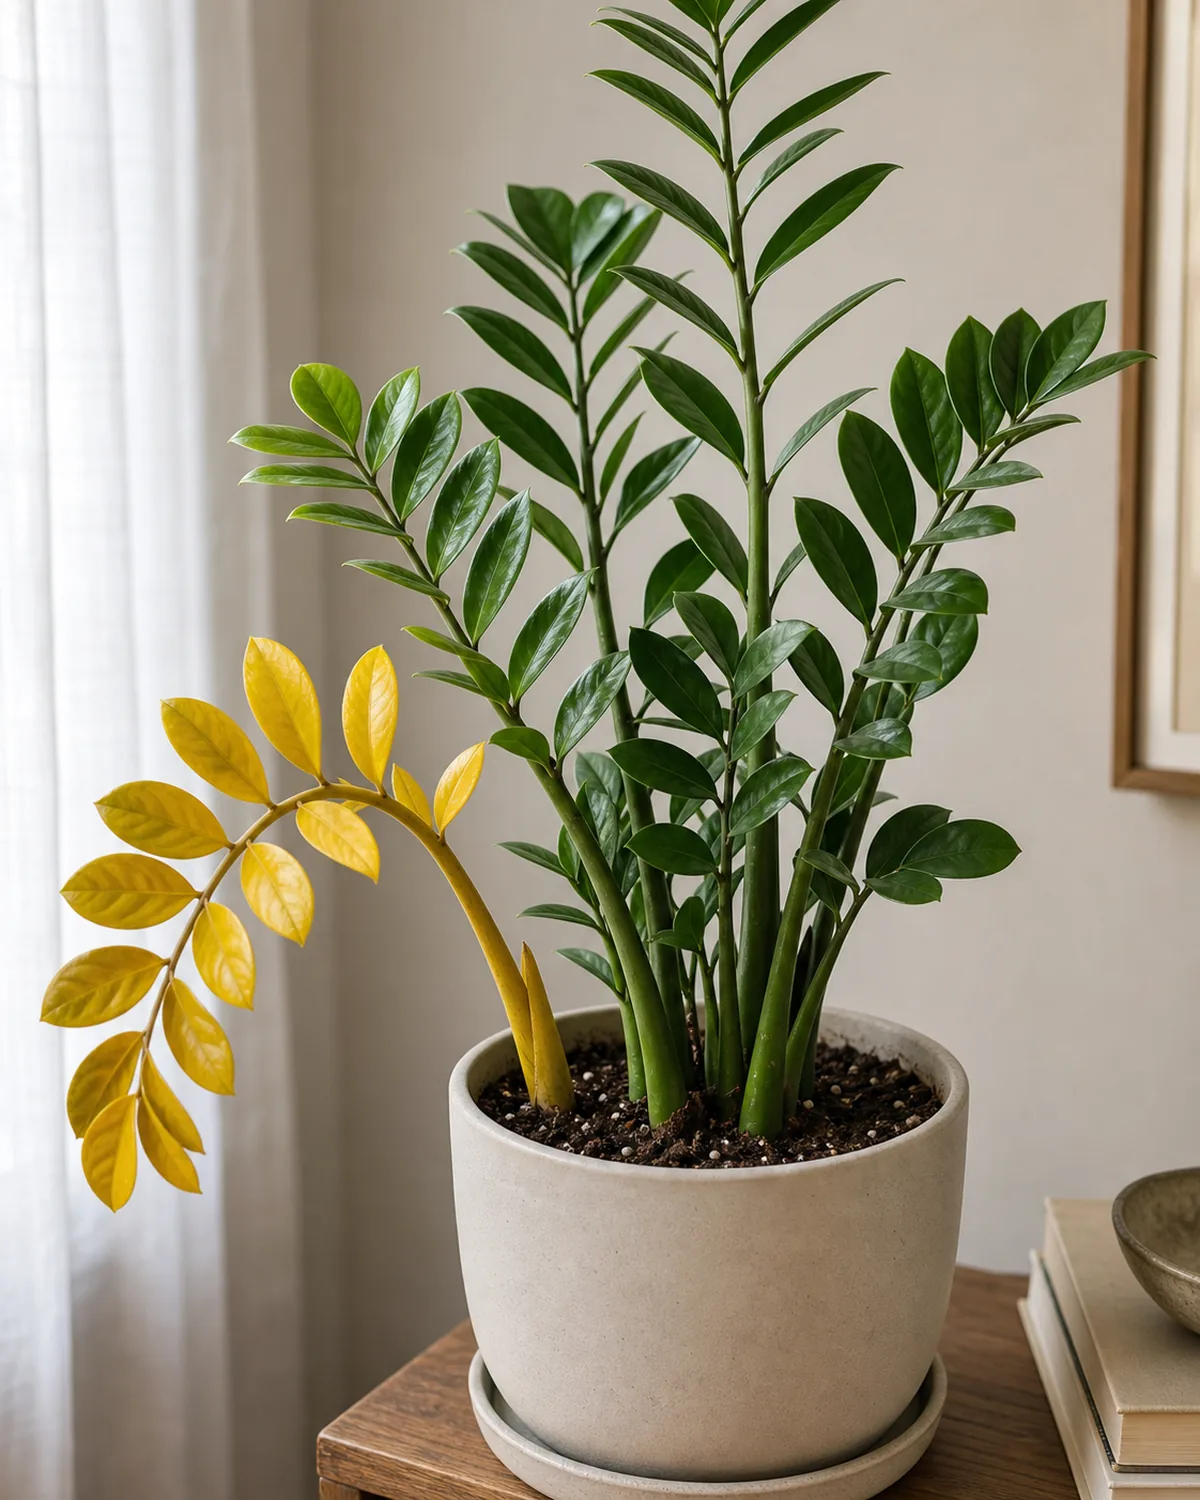
Yellow stems on a ZZ plant tell a very different story than yellow leaves on most houseplants. When an entire frond yellows from the base up, the rhizome under that stem has rotted. The plant is dropping the frond before it can pull the rest of the rhizome cluster down with it. What it needs is not more water or more light; it is to be lifted out so you can look at the rhizome.
- Unpot at the first yellow stem. Tip the plant out and check each rhizome for soft, mushy, or black sections.
- Cut the rot off with clean scissors. Trim back to firm, pale green flesh, then let the cut surface dry for a day before you repot.
- Repot into dry, gritty mix. Use fresh cactus or aroid mix and hold off on watering for a full week to let the rhizome heal.
Why the leaflets are curling

Leaflets folding inward along the stem and a slight droop at the tip of the frond are signs of severe drought, not over-watering. Getting a ZZ plant to this stage takes months of neglect, because the rhizome can carry the plant through long dry spells. By the time the leaflets curl, the tubers have finally run dry, and a single deep watering brings most plants back over a few days.
- Water deeply once and wait. Soak the pot until water drains, then leave it alone for several days to recover.
- Do not bury it in water. A second drink before the soil dries again risks tipping the recovering rhizome into rot.
- Trim only the worst fronds. Many curled leaflets perk back up; cut only the fronds that stay limp after a week.
A ZZ plant is one of the most forgiving houseplants you can own once you get four things right. These four rules are what make the steps below work instead of leaving you with a slowly rotting rhizome hidden under healthy-looking fronds.
How to clean the waxy leaflets
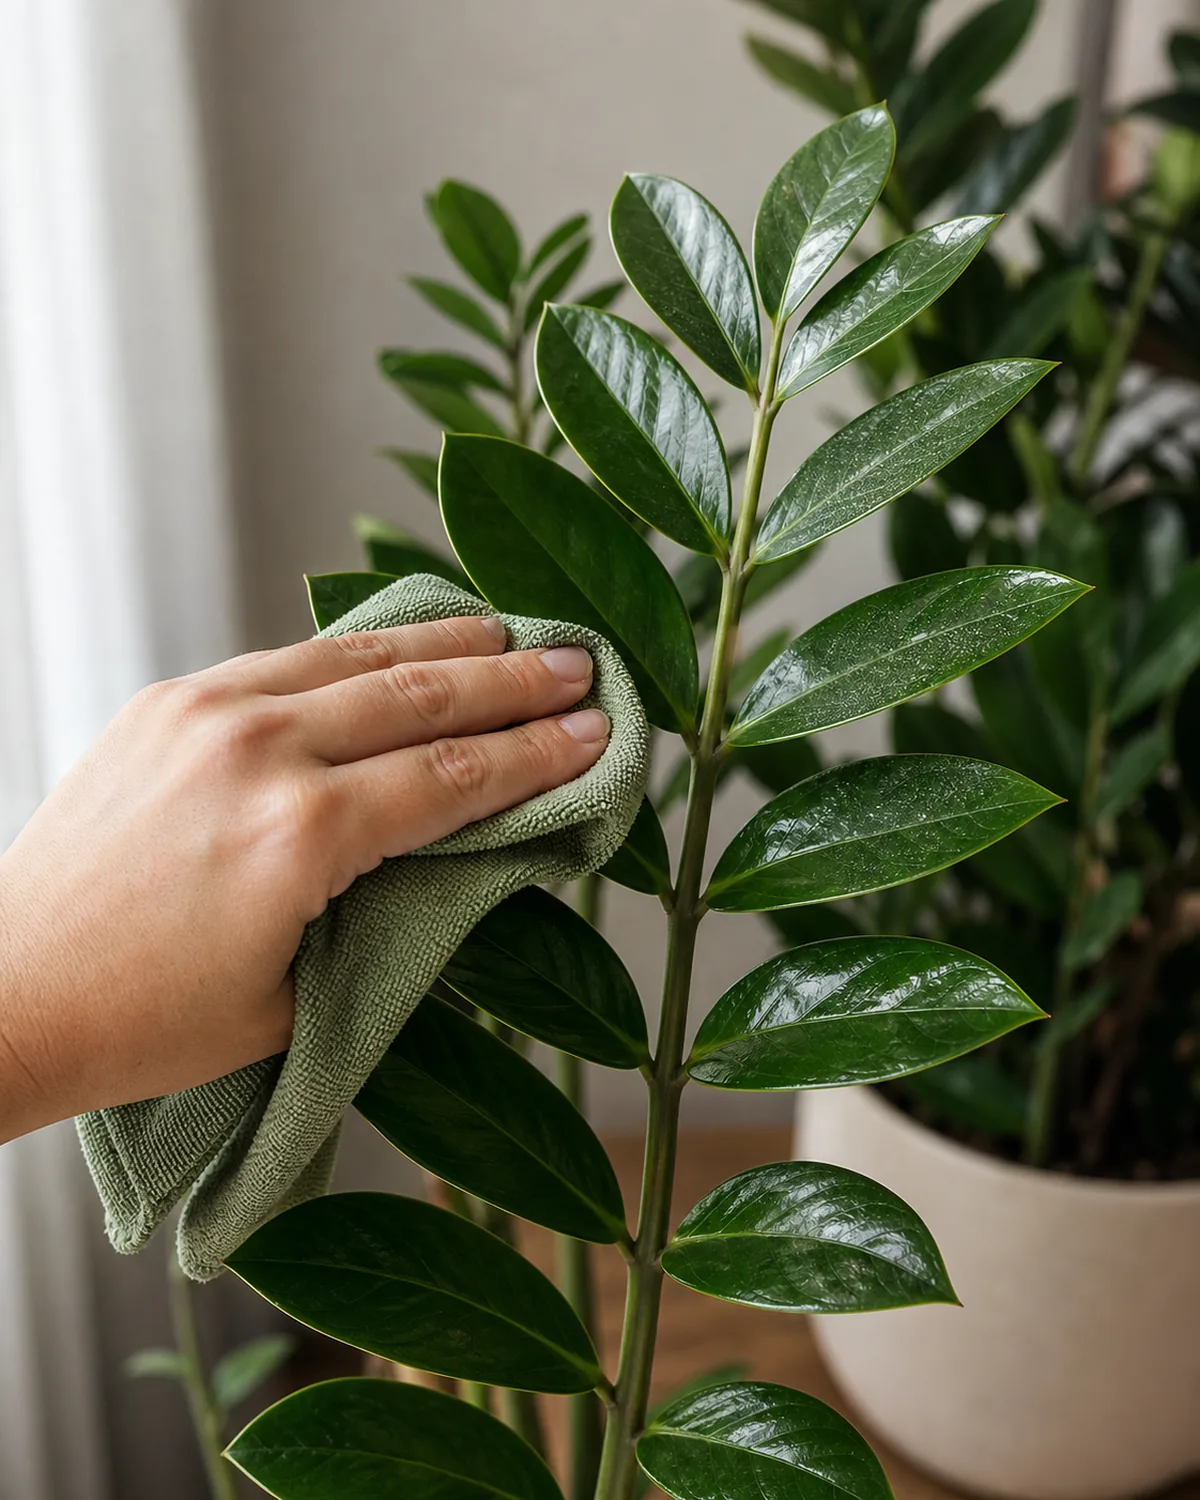
The glossy wax on each leaflet is part of how a ZZ plant gets so much out of low light. The waxy surface bounces light back into the leaf and slows water loss in dry rooms. Household dust dulls that wax fast, and a dusty ZZ photosynthesizes noticeably less than a clean one. A quick wipe once a month brings the sheen back and speeds up new growth.
- Wipe each frond with a damp cloth. Support the leaflet from below so the stem does not bend as you wipe.
- Skip leaf shine sprays. They coat the wax in a film that traps dust rather than cleaning it.
- Aim for once every four to six weeks. Dust builds up faster on top-of-shelf plants than on low side tables.
How to propagate from a single leaflet
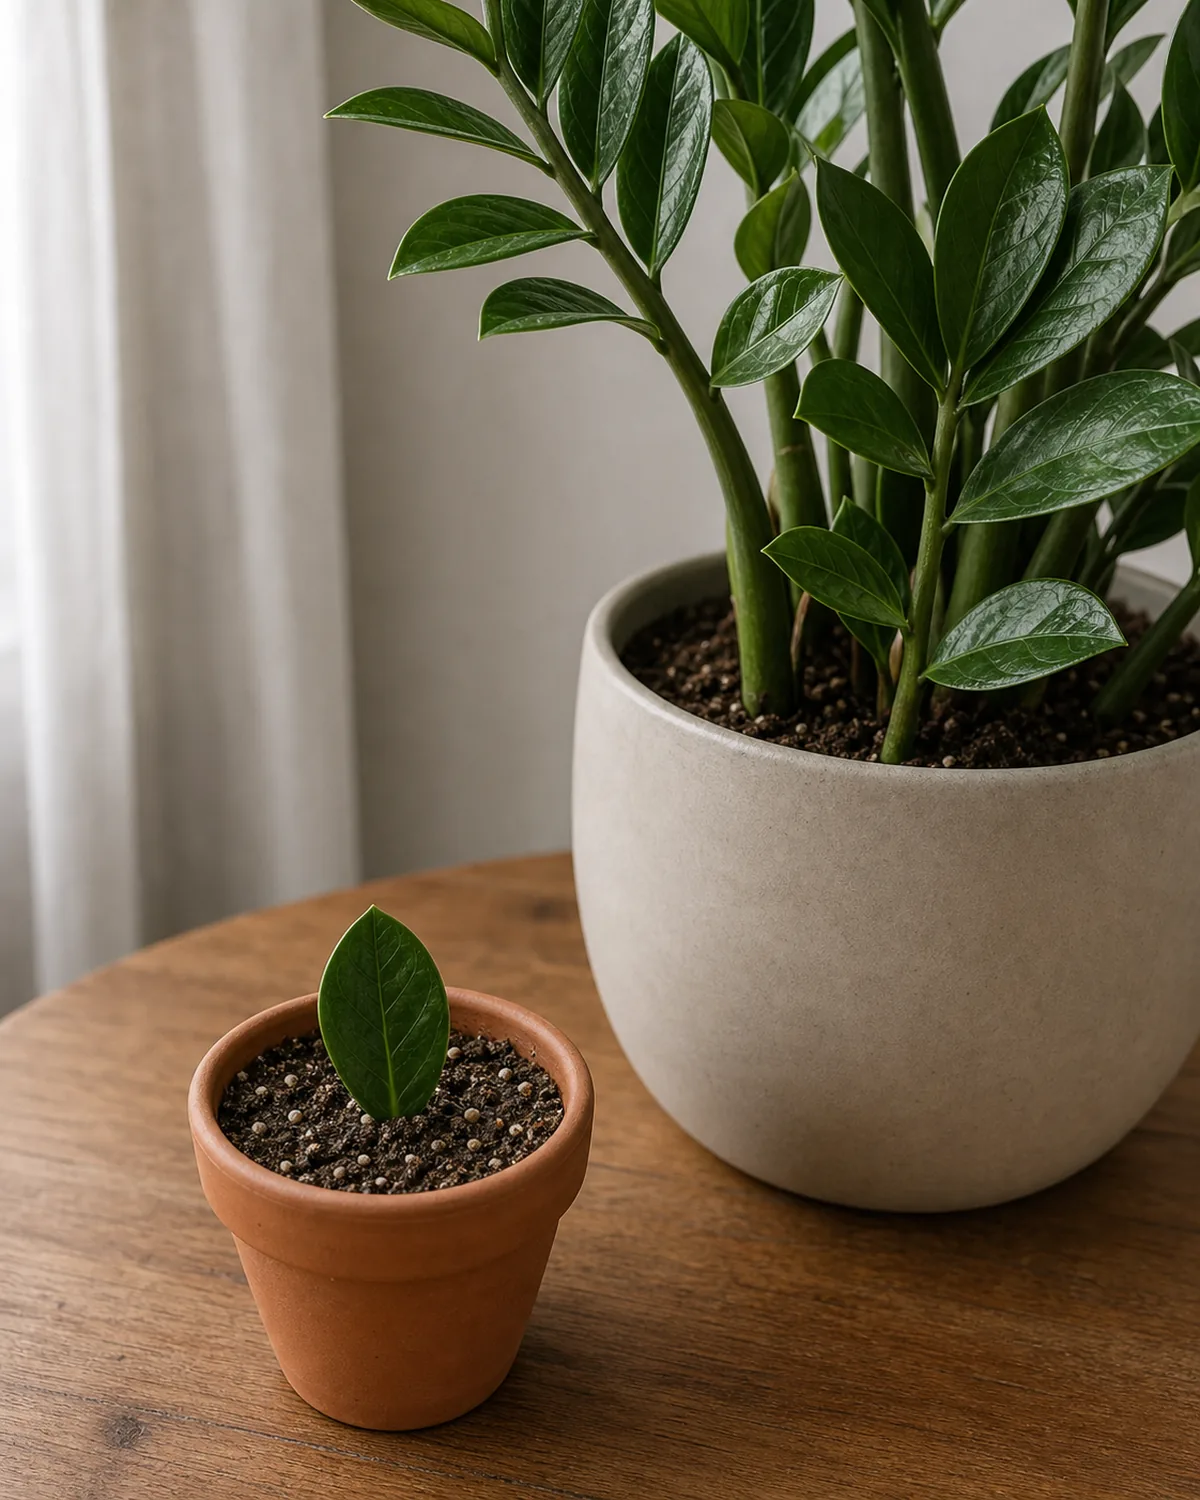
A ZZ plant has one of the strangest propagation tricks in houseplants. You can pluck off a single healthy leaflet, stick the cut end into soil, and wait. Months later, a tiny round rhizome forms below the surface, and after that a new shoot pushes up. Most propagations finish in a few weeks. This one takes four to six months on average, and that is part of the charm.
- Pluck a firm green leaflet. Snip or pull it off cleanly where it meets the stem so the cut surface is clean.
- Stick the cut end half an inch into dry soil. Use the same chunky mix as the parent plant in a small pot.
- Water once, then ignore it. Check moisture once a month and resist the urge to peek; the rhizome forms below the soil.
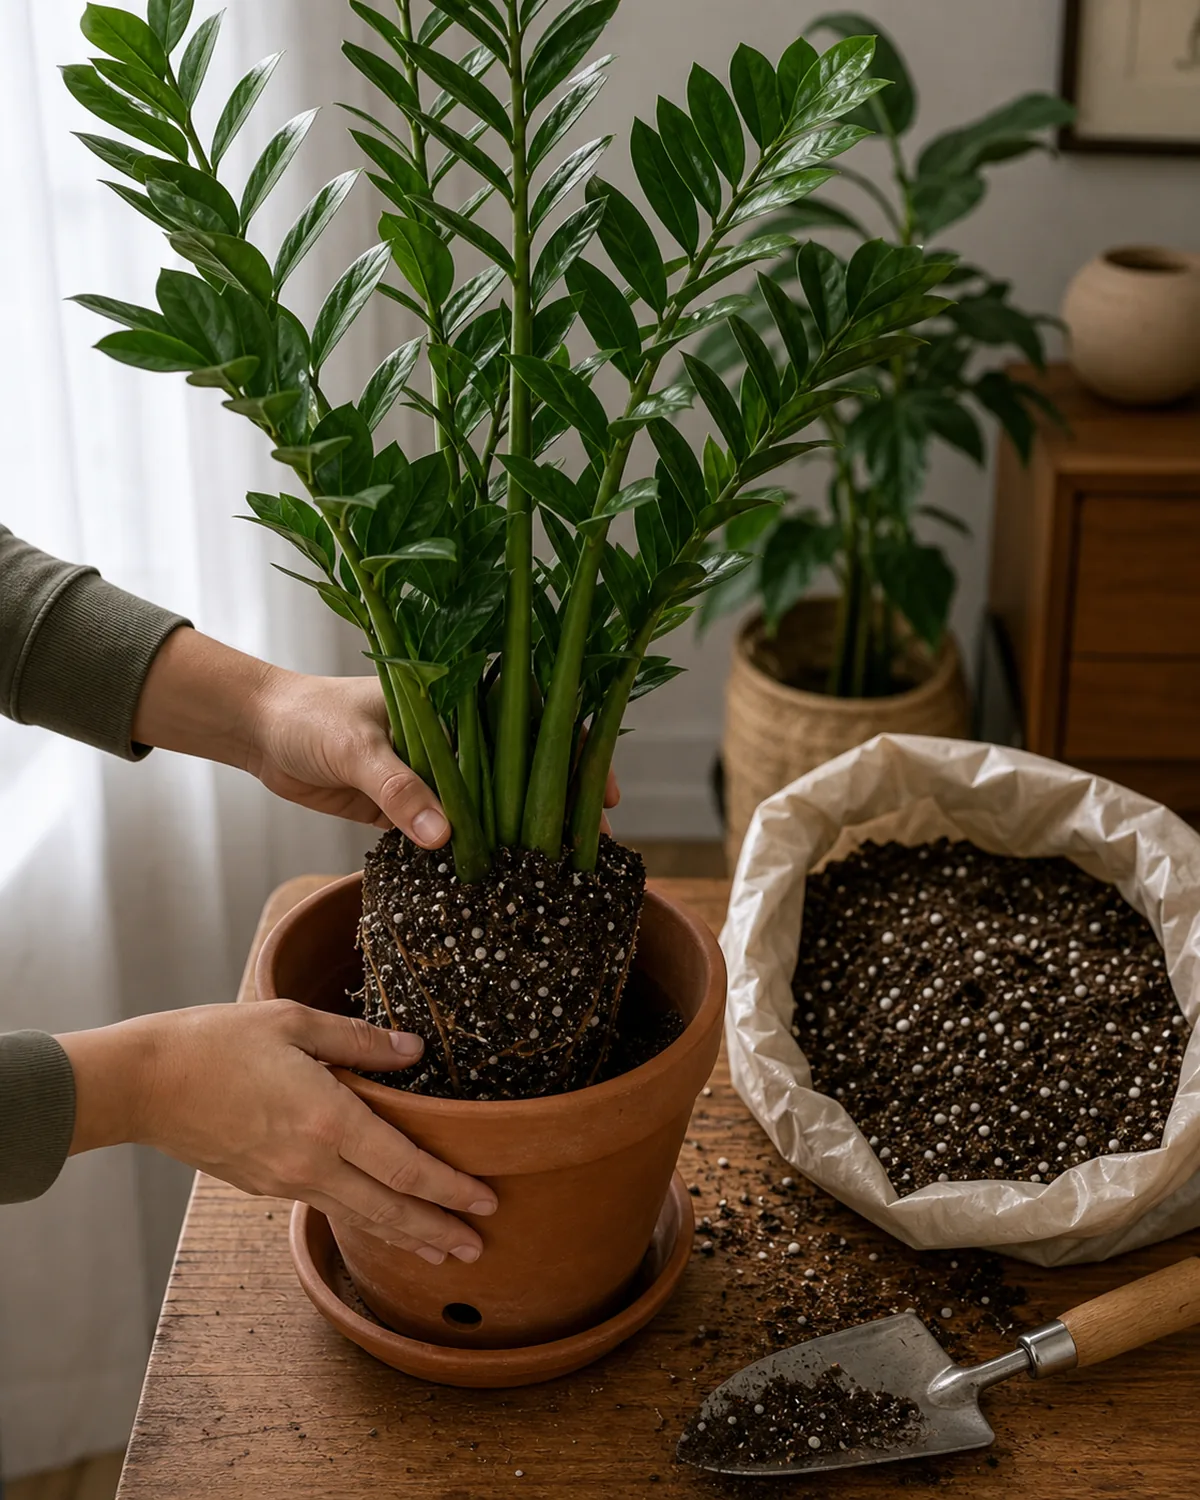
When and how to repot
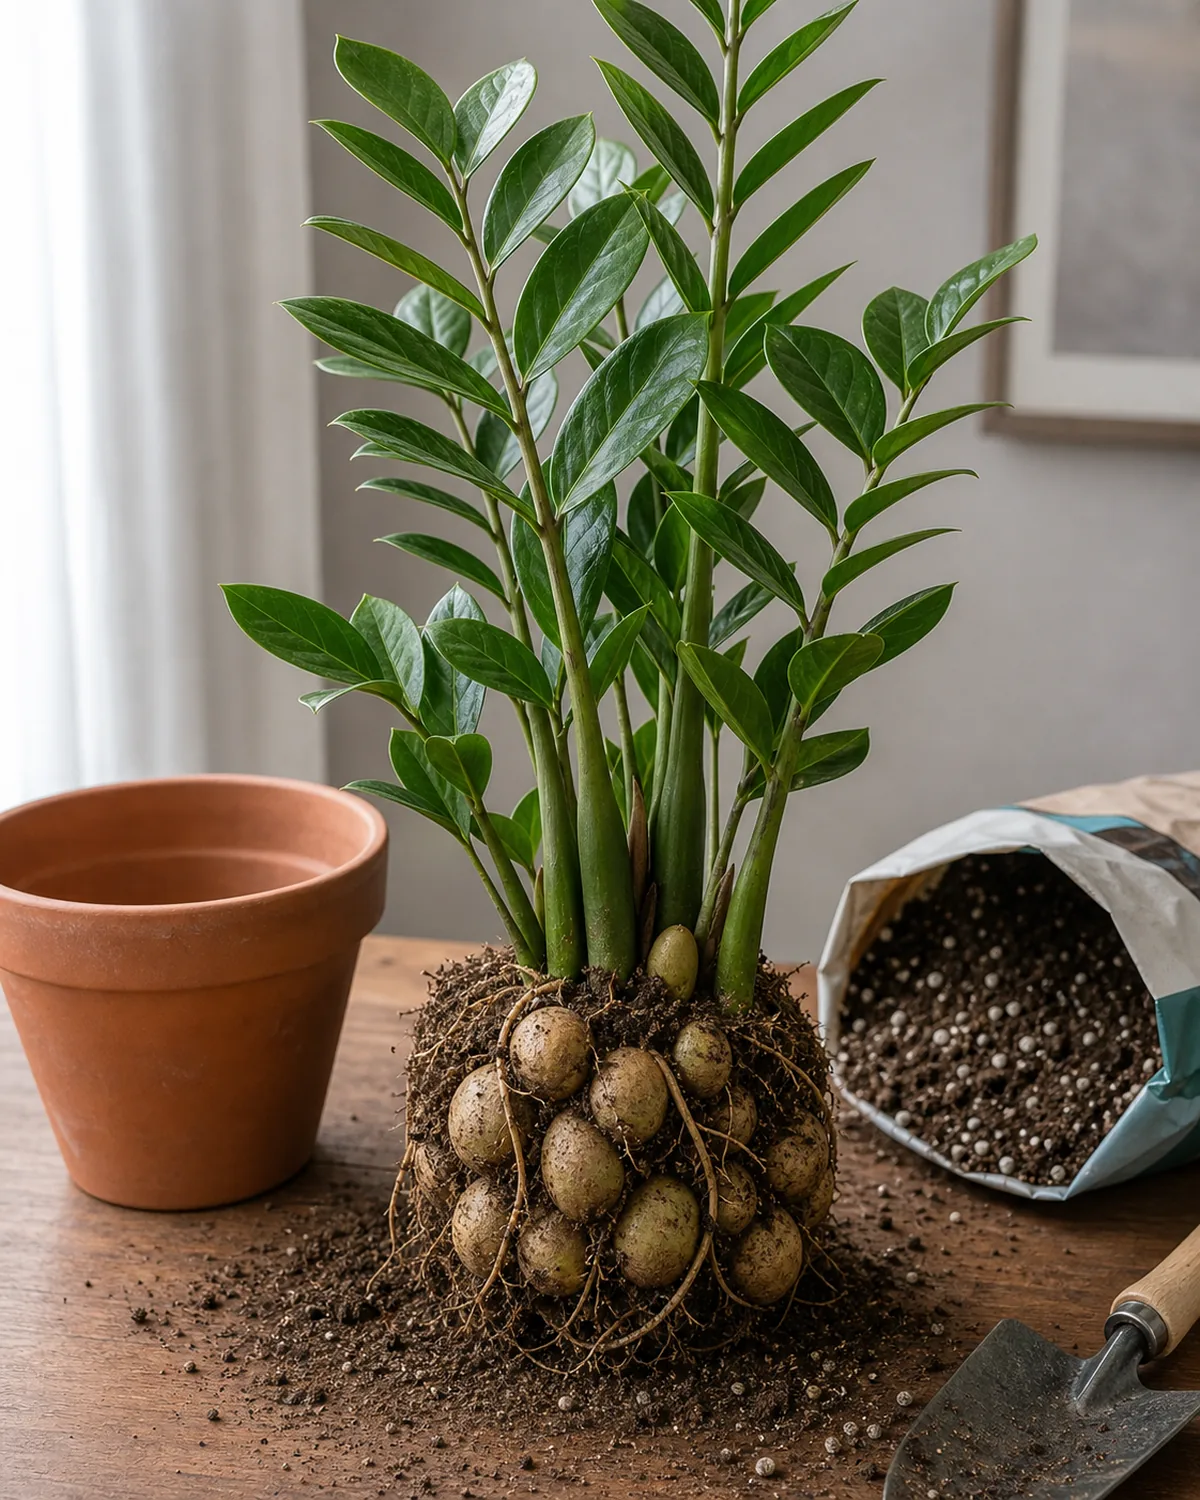
ZZ plants rarely need repotting. The rhizome cluster expands slowly, and the plant is happy to sit in the same pot for years. The signals are a rhizome bulging against the side of the pot, water running straight through without soaking in, or the plant tipping over from a top-heavy cluster.
Repotting is also the easiest moment to divide a mature plant and end up with two healthy ZZs for the price of one.
- Repot every two to three years at most. Spring is the easiest moment, just before active growth picks up.
- Step up by one to two inches. A pot only slightly larger than the rhizome cluster stays drier between waterings.
- Divide a crowded cluster by hand. Gently pull the rhizomes apart so each piece has a few fronds and roots, then pot each up.
ZZ Plant Care: The Quick Checklist
- 1Bright indirect light grows the fastest frondsA few feet from a north or east window keeps new fronds coming; low light keeps it alive but slow.
- 2Water only when the top 2 inches are bone dryThree to four weeks between drinks is normal; the rhizome stores water below the soil so it looks fine longer than it feels.
- 3Chunky cactus or aroid mix in a draining potAdd perlite to standard mix and use a terracotta pot with a drainage hole for fast drying.
- 4It thrives where almost nothing else willNorth windows, hallways, windowless bathrooms, and office corners all suit it; pair it with a lamp in dark rooms.
- 5A yellow stem means rhizome rotUnpot, trim soft tubers back to firm green, let cuts dry overnight, then repot in dry mix and wait a week before watering.
- 6Curling leaflets are severe droughtWater deeply once and most fronds recover over several days; resist a second watering before the soil dries.
- 7Wipe the waxy fronds once a monthA damp cloth removes the dust that dulls the leaflets and slows photosynthesis; skip leaf shine sprays.
- 8Propagate from one leaflet, slowlyStick a single leaflet half an inch into dry soil and ignore it for 4 to 6 months while a rhizome forms.
- 9Repot every 2 to 3 years at mostStep up by 1 to 2 inches in spring and divide a crowded rhizome cluster by hand for a free second plant.
- 10Mostly pest-free; mealybugs are the rare guestDab visible mealies with rubbing alcohol on a cotton swab; treat heavier infestations with insecticidal soap.
- 11Mildly toxic to pets and kidsCalcium oxalate causes mouth irritation if chewed; keep it on a high stand or shelf out of pet reach.
- 12‘Raven’ is the dramatic dark varietyClassic green for a first ZZ; ‘Raven’ for near-black mature fronds; ‘Zenzi’ for a small shelf.
- 13Less is more, long termWater on soil dryness, rotate the pot every few weeks, and feed lightly only in the growing season.
kultivy.com
Common pests and a fix
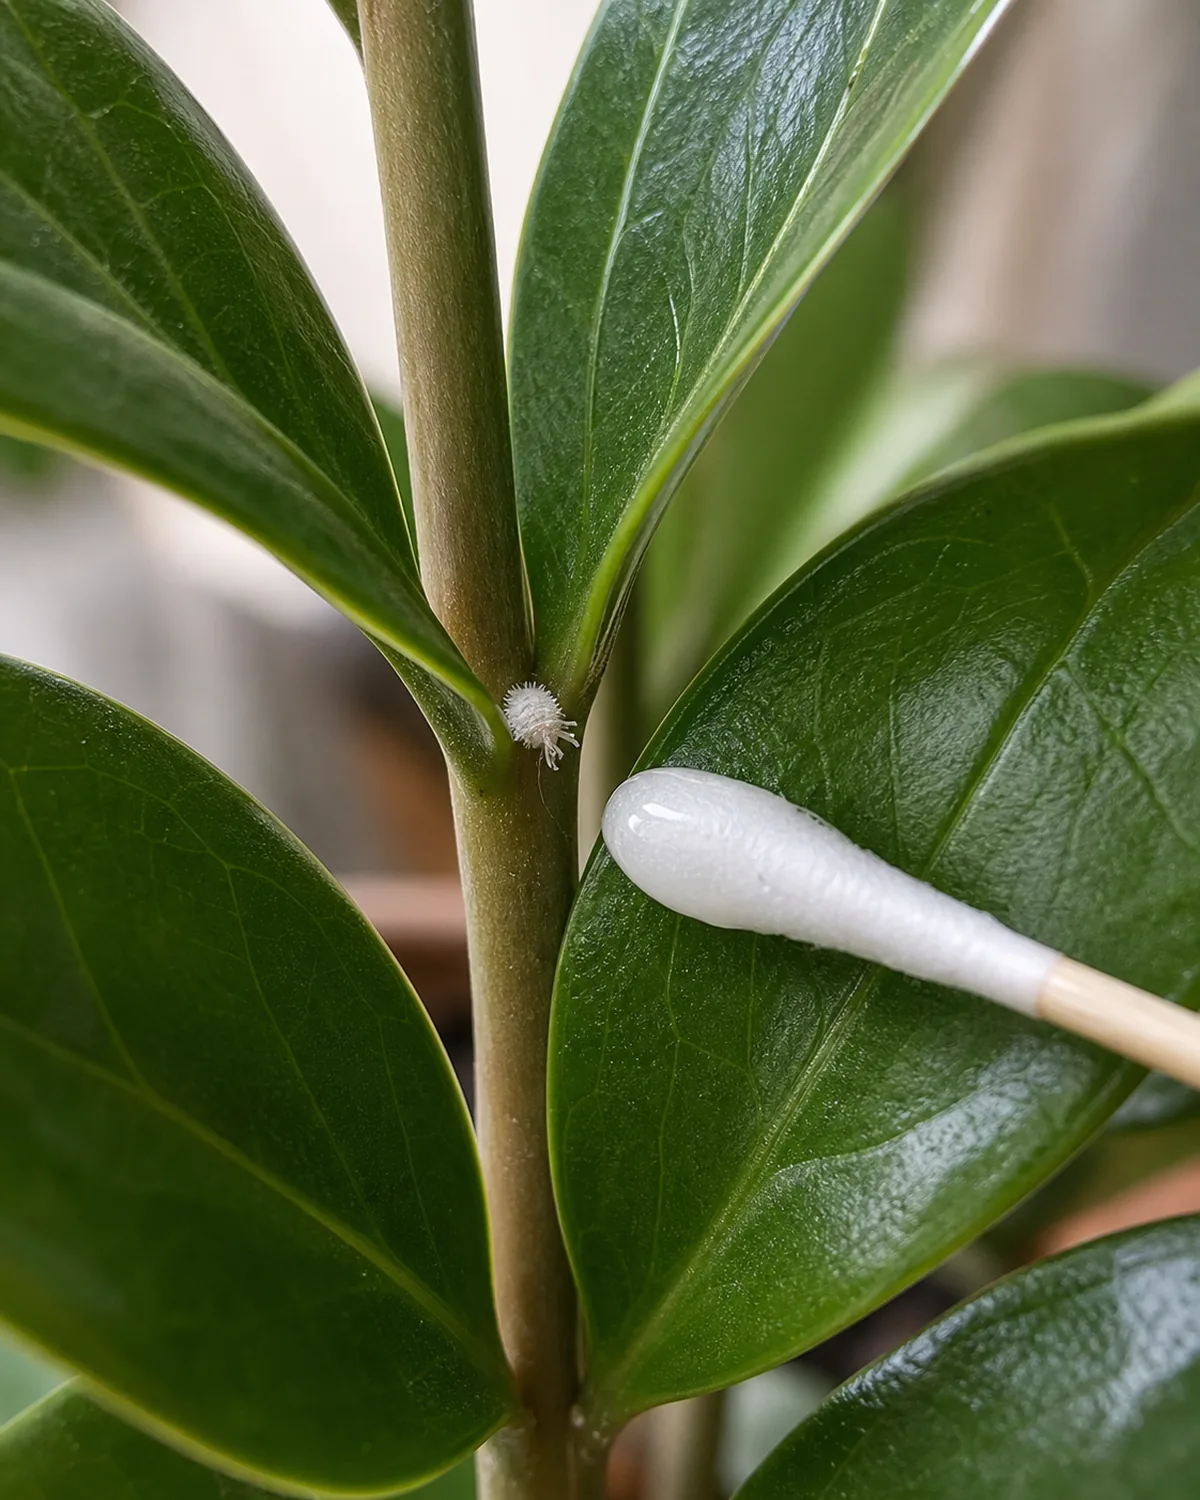
ZZ plants are one of the most pest-resistant houseplants you can own. The waxy surface and the slow growth give pests very little to latch onto. The two you might still see are mealybugs and, in very dry rooms, spider mites. Both are easy to catch and easy to clear if you spot them early.
- Dab mealybugs with rubbing alcohol. A cotton swab dipped in 70 percent alcohol kills them on contact.
- Wipe leaves for mites. A damp cloth catches dust and mite webbing in one pass; repeat weekly until the webbing is gone.
- Treat a heavy infestation with insecticidal soap. Spray every leaflet, top and bottom, and repeat after a week.
ZZ plant toxicity and pet-safe placement
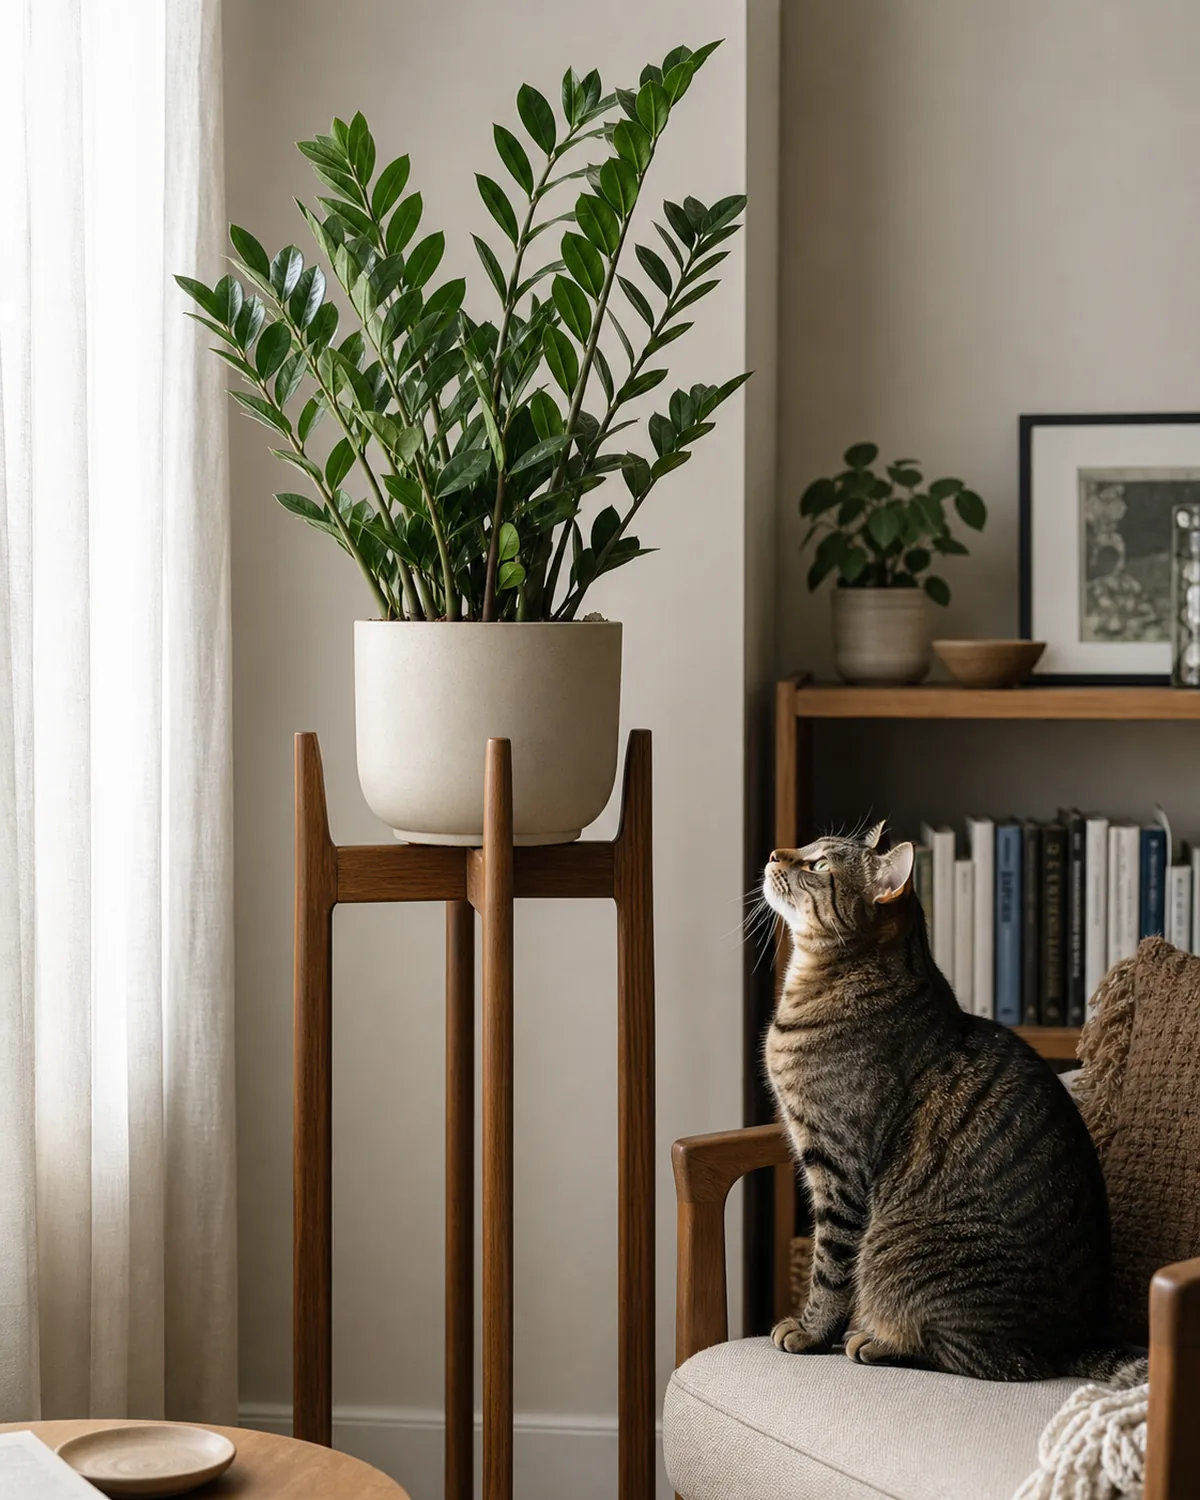
ZZ has a stronger toxic reputation online than it actually deserves. The fronds and rhizomes do contain calcium-oxalate crystals, which irritate a pet’s mouth and throat if chewed, and the sap can sting human skin if you handle a cut rhizome at repotting time without gloves. Both are real, both are mild, and both can be planned around with placement.
- Put it above floor level. A tall plant stand, a top-of-cabinet spot, or a high shelf keeps fronds and rhizomes out of pet reach.
- Wear gloves when you cut a rhizome. Repotting or trimming rot is the one moment when the sap can leave a sting on bare hands.
- Call your vet if a pet chews some. Severe reactions are rare with ZZ, but a quick call beats guessing for a small pet.
The ‘Raven’ ZZ and other varieties
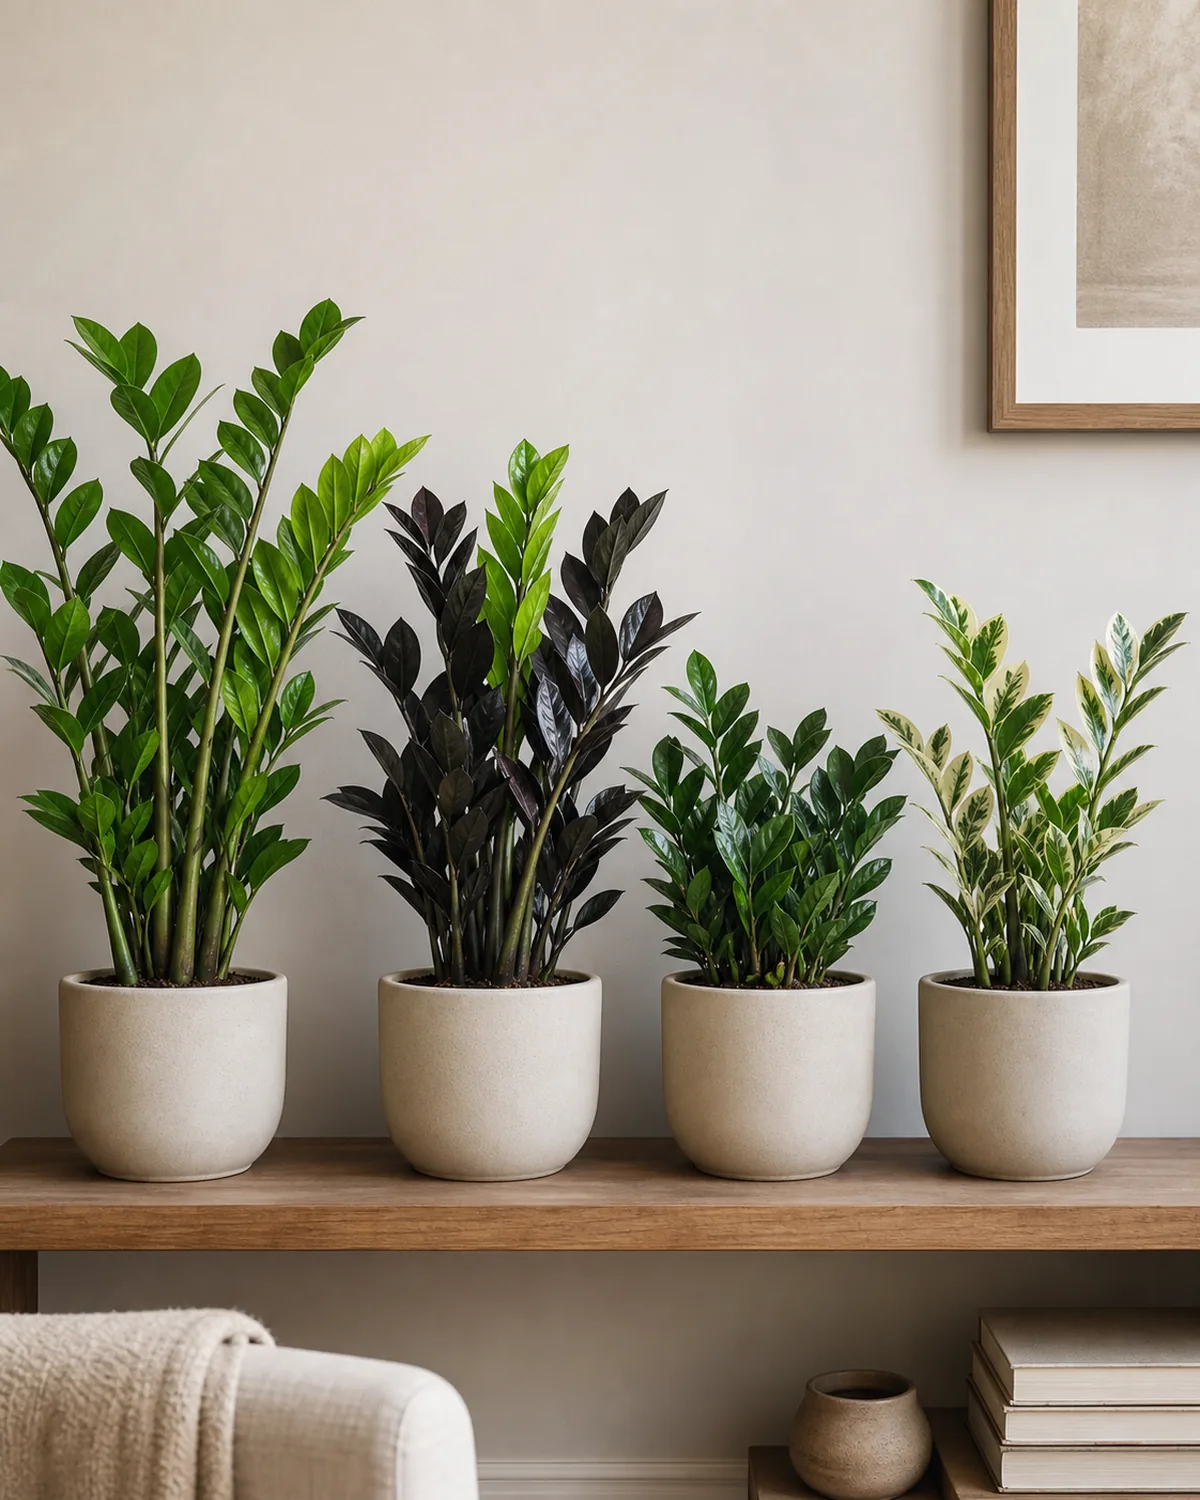
Once you have one ZZ thriving, it is worth knowing that the plain green ZZ is not the only option. A handful of newer varieties have shown up in plant shops in the past few years, and one of them is dramatic enough that it sells out the moment it lands. The care is the same across all of them, so picking is mostly about which one suits your room.
- Classic green is the safest first ZZ. Glossy bright-green pinnate fronds, fast to recover from neglect, easy to find.
Ravenis the show-stopper. New growth comes in bright green and matures to near-black; worth the higher price for a dark room.Zenzisuits a small shelf. A compact dwarf form with shorter, denser fronds; perfect for a vanity or a desk.- Variegated ZZ is rare and slow. Cream-and-green streaked leaflets; lovely but pricey and slow to grow, so not a first ZZ pick.
A few quick tips for keeping a ZZ thriving long term
After a year or two with a ZZ plant, the rhythm becomes second nature. The plant asks for very little, and most of the small habits that keep it thriving come down to leaving it alone in the right way. A few quiet patterns matter more than any single rule.
- Water on the soil, not the calendar. Push a finger past the second knuckle every couple of weeks and water only when the soil is dry.
- Rotate the pot every few weeks. Turning the plant a quarter at a time keeps growth even toward whatever light it gets.
- Feed lightly, if at all. A balanced houseplant fertilizer at half strength once or twice a growing season is more than enough.
- Let new shoots come up slowly. ZZ is a slow plant; a sudden burst of soft growth usually points to too much water, not a growth spurt.
A ZZ plant rewards patience with a slow, almost stubborn kind of resilience. Give it the right pot, leave it alone between drinks, and it will keep its sheen in rooms that would dull almost anything else. Once it is settled, browsing our plant shelf and corner ideas is a nice next step for finding it the best home.