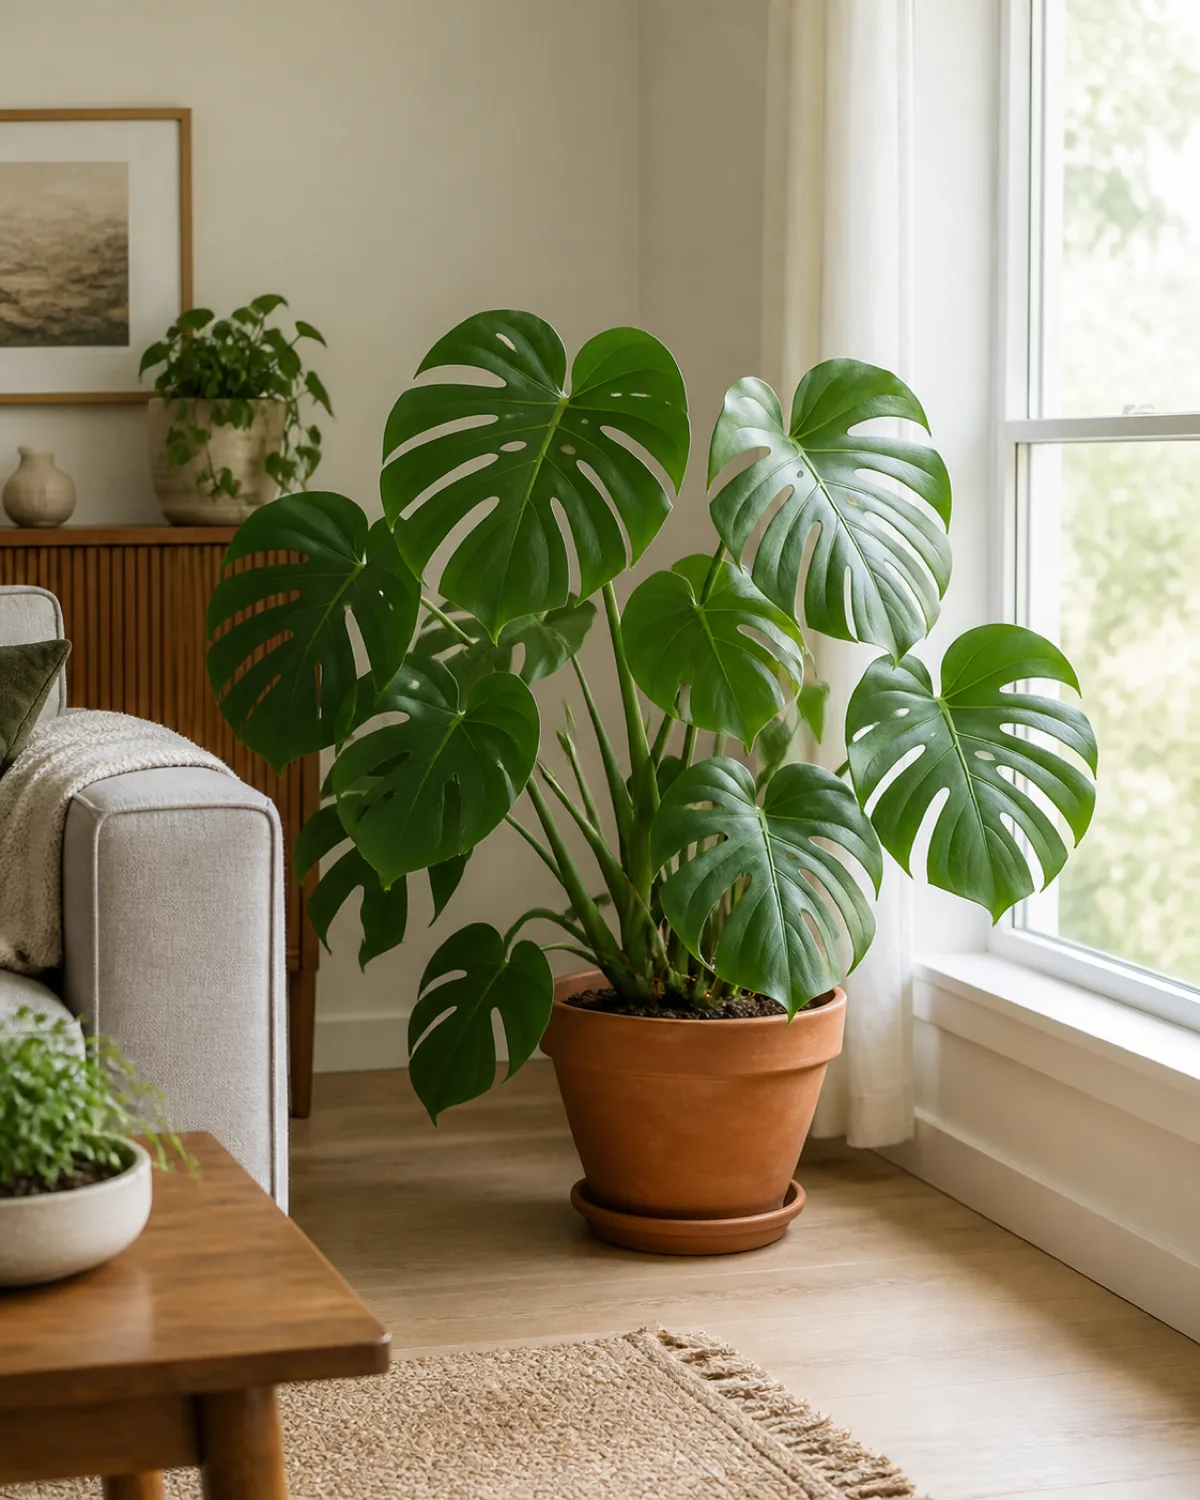
My first monstera sat in a dark corner for a year, made three small solid leaves, and sulked. The plant was fine. The spot was wrong. Once it moved near a window, the leaves got bigger and finally started to split.
That is most of monstera care in one story: get the light and water right, then be a little patient. The famous holes come with time, not with fancy products.
Here is everything a monstera needs, step by step, from watering to why the leaves split to how to make a whole new plant for free.
Monstera care comes down to light, water, and a little patience while the leaves learn to split. Jump to whatever you are dealing with right now.
- 1How much light a monstera needs
- 2How often to water (and how to tell)
- 3The best soil and pot
- 4The humidity it quietly wants
- 5Why the leaves aren’t splitting
- 6Fixing yellow leaves
- 7Fixing brown crispy edges
- 8Give it a moss pole to climb
- 9When and how to repot
- 10How to propagate it
- 11Common pests and what to do
- 12Is it safe around pets?
- 13How fast it grows + styling it
How much light a monstera needs
Light is the single biggest thing that decides whether your monstera thrives and splits or just survives. It wants bright, indirect light: plenty of brightness, but not harsh sun beating directly on the leaves.
- Aim for a few feet from a bright window. East or north light is gentle; strong south or west sun needs a sheer curtain.
- Direct sun scorches. Bleached or brown sunburn patches mean move it back from the glass.
- A dark corner keeps it small. Low light means small, solid leaves no matter how well you water.
How often to water (and how to tell)
Forget a fixed schedule. How fast your monstera dries out depends on your light, pot, and home, so you water based on the soil, not the calendar. Overwatering is the most common way people kill one.
- Check the top two inches. Dry to your second knuckle means water; still damp means wait.
- Water thoroughly, then drain. Soak until it runs out the bottom, and never let the pot sit in a full saucer.
- When in doubt, wait. A monstera bounces back from thirsty far easier than from soggy roots.
The best soil and pot
Monstera roots want air as much as water, so the soil has to drain fast. A dense, water-holding mix is what turns the leaves yellow, even when you water correctly.
- Use a chunky mix. Regular potting soil plus bark and perlite gives roots the air pockets they want.
- A drainage hole is non-negotiable. No hole means water pools at the bottom and rots the roots.
- Match the pot to the plant. Too big a pot holds too much wet soil; size up gradually instead.
Most monstera problems trace back to light or water. Pick what is happening with yours and start with those steps.
The humidity it quietly wants
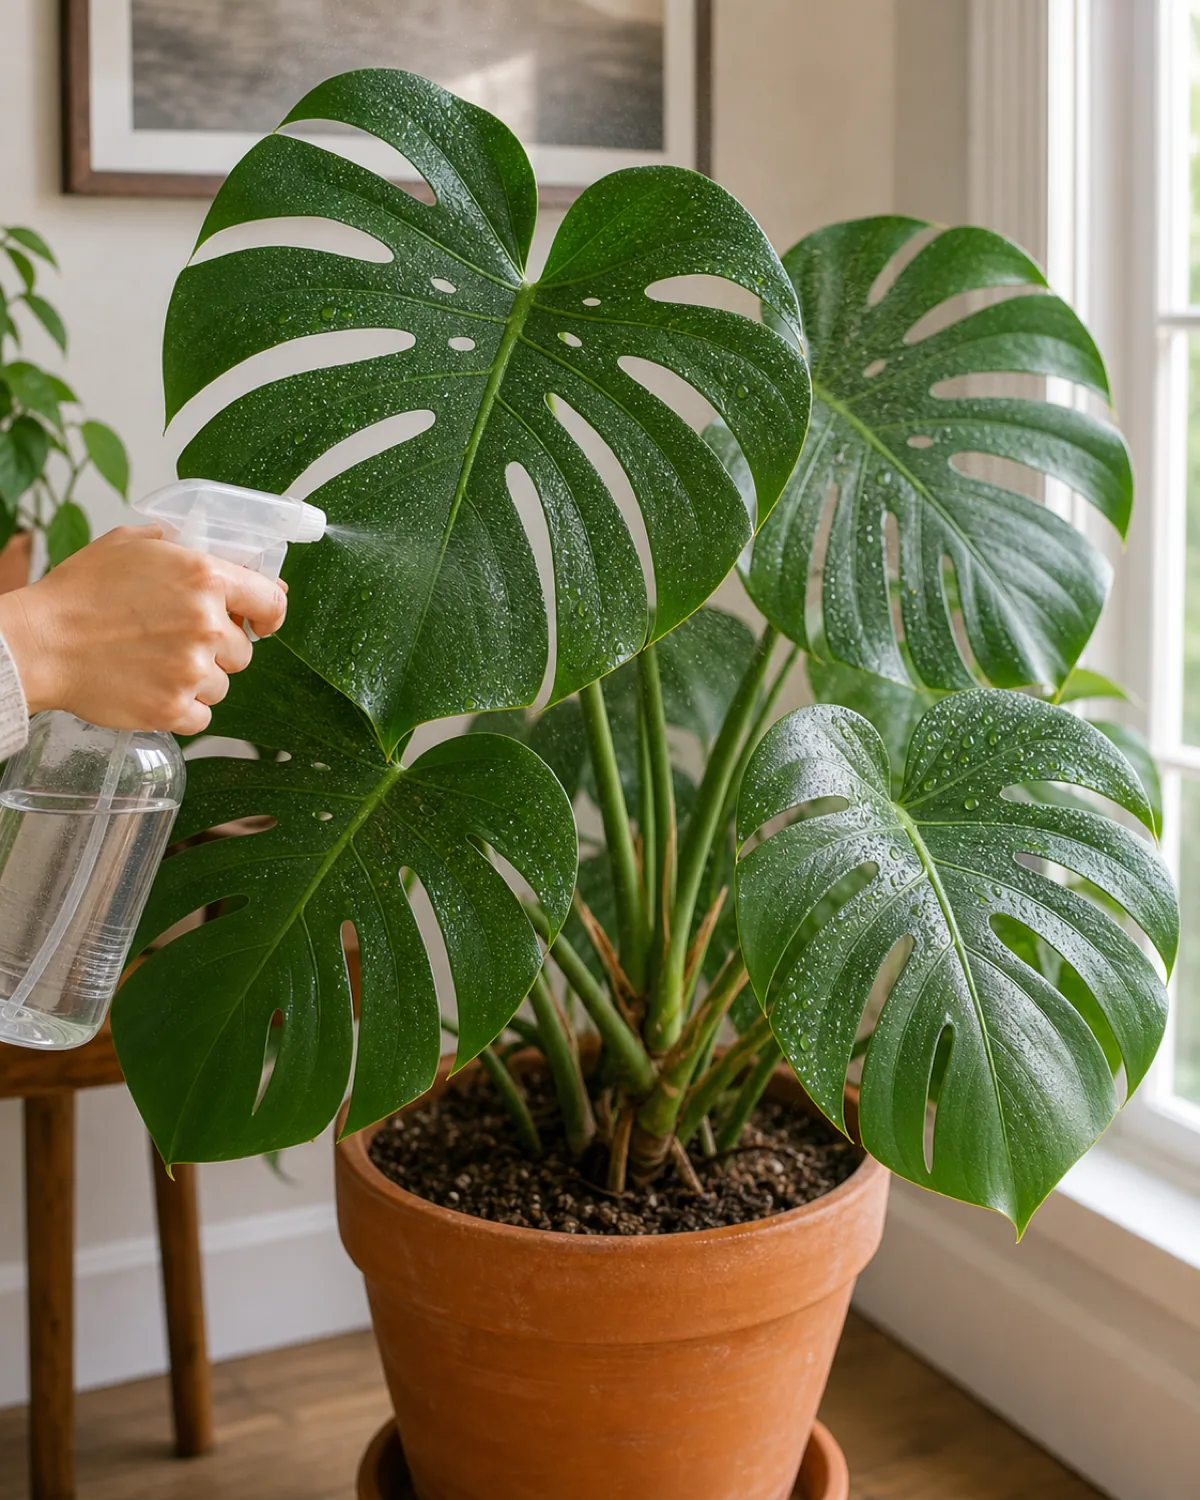
A monstera is a jungle plant, so it likes humidity higher than most living rooms. It will survive dry air, but it looks its best when the air has some moisture in it.
- Aim for around 50 percent. Grouping plants together raises the humidity around them naturally.
- A pebble tray helps. Set the pot on a tray of water and pebbles so it sits above the waterline.
- Keep it away from vents. Hot, dry air from heating or AC is what crisps the edges.
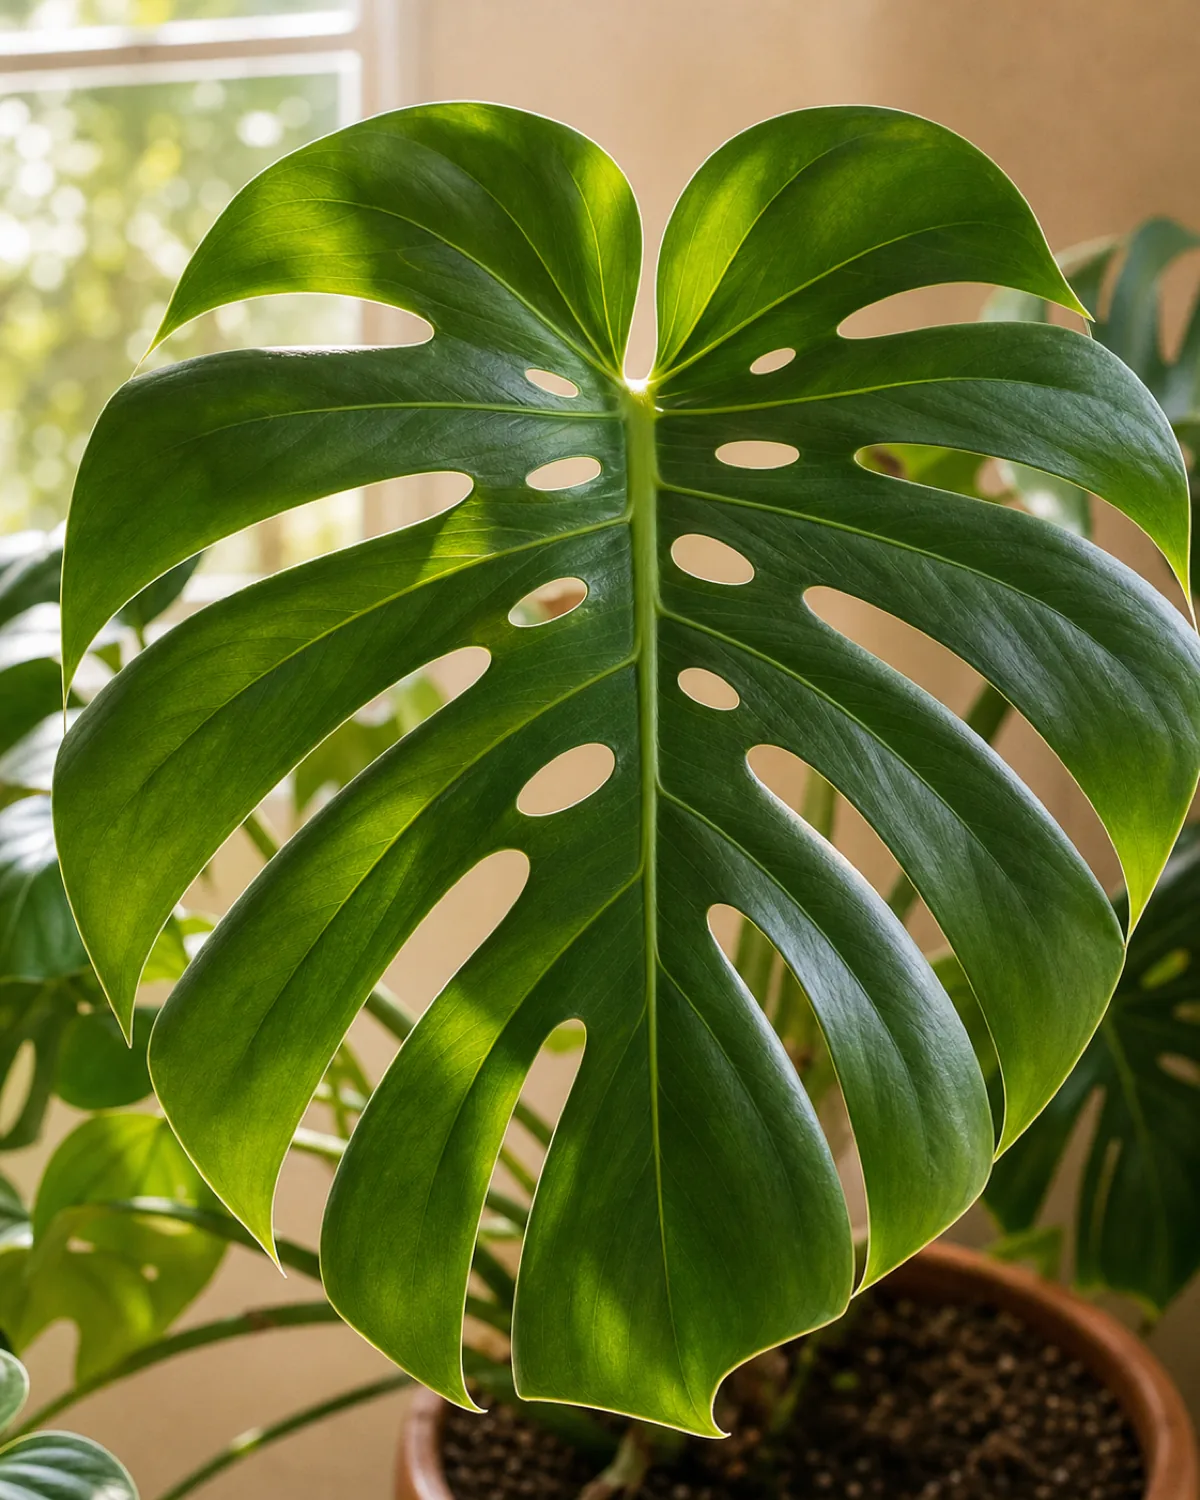
Why your leaves aren’t splitting yet
A monstera with solid, heart-shaped leaves and no holes is not broken. Young plants make solid leaves first, and the splits and holes arrive as the plant matures in good light.
- Give it time. New, immature plants need a few leaf cycles before fenestrations start.
- Brighten its spot. More light is the fastest way to encourage bigger, splitting leaves.
- Let it climb. Plants that climb mature faster than ones left to sprawl flat.
Fixing yellow leaves
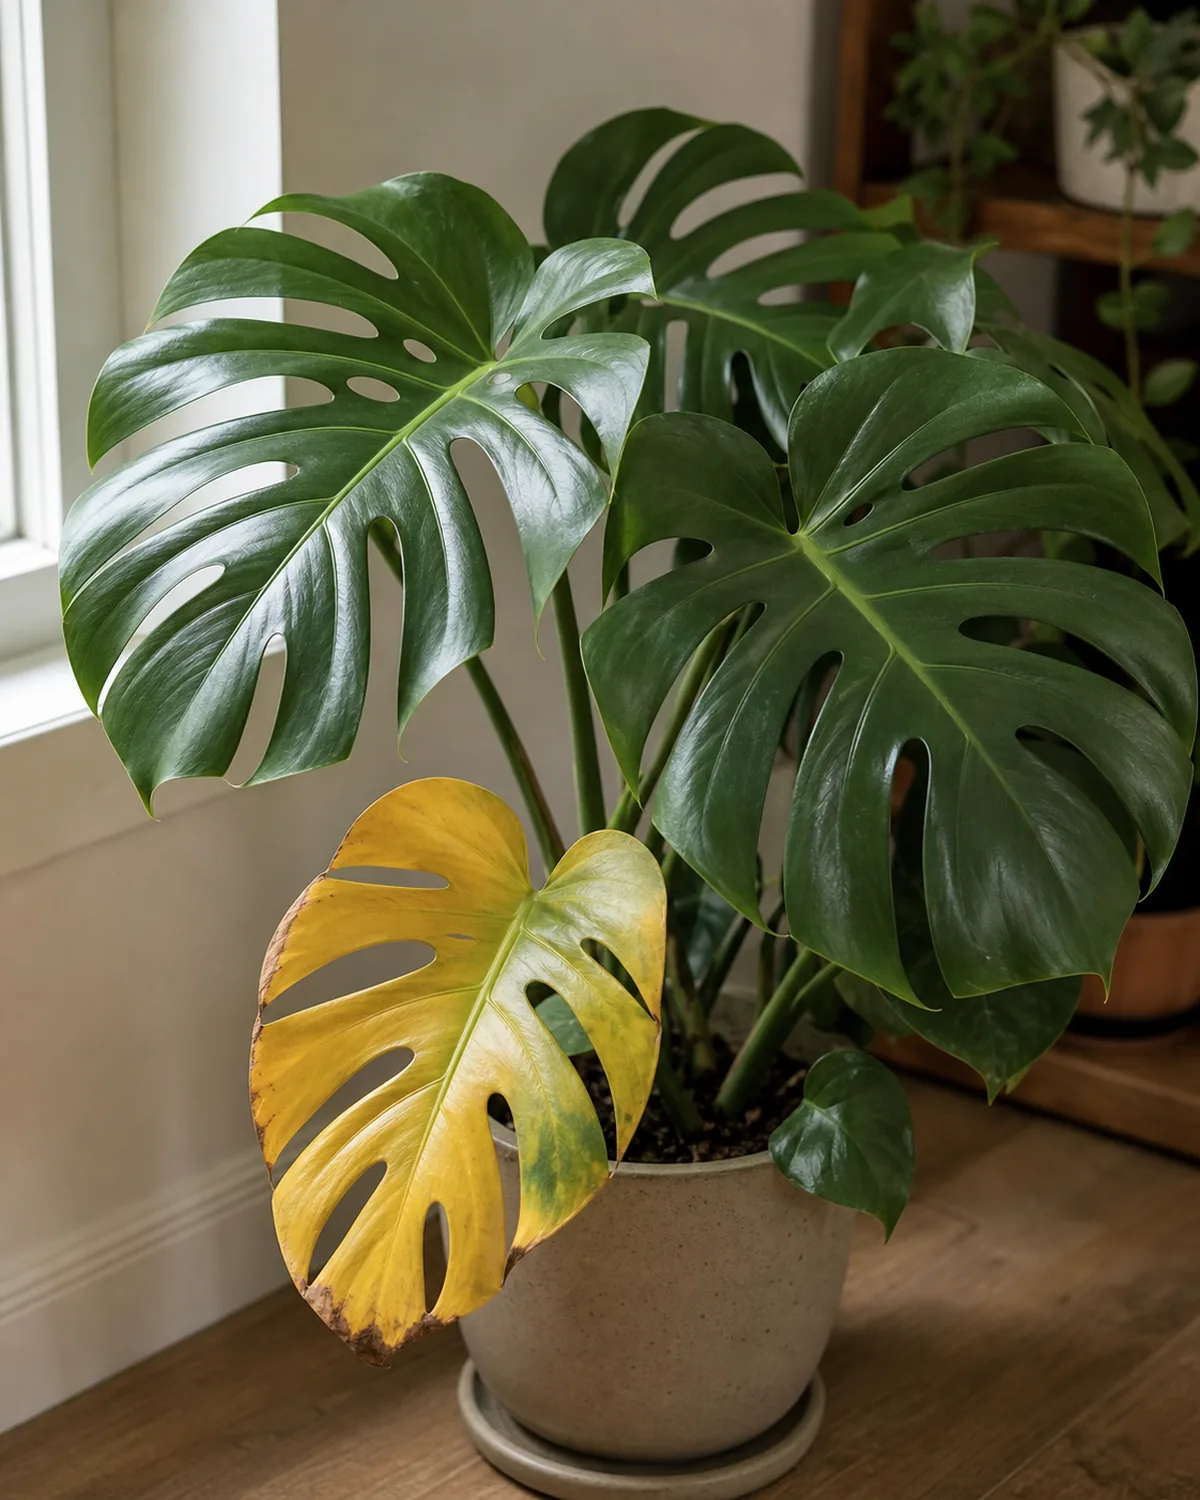
A yellow leaf is your monstera telling you something, and the something is almost always too much water. Before you do anything else, check the soil.
- Feel the soil first. Soggy soil plus yellow leaves equals overwatering; ease off and let it dry.
- Check the roots if it spreads. Mushy brown roots mean rot; trim them and repot in fresh dry mix.
- One old yellow leaf is normal. The occasional lower leaf yellowing with age is nothing to worry about.
A monstera is forgiving once you get four things right. These four rules are what make the steps below actually work instead of leaving you guessing.
Fixing brown crispy edges
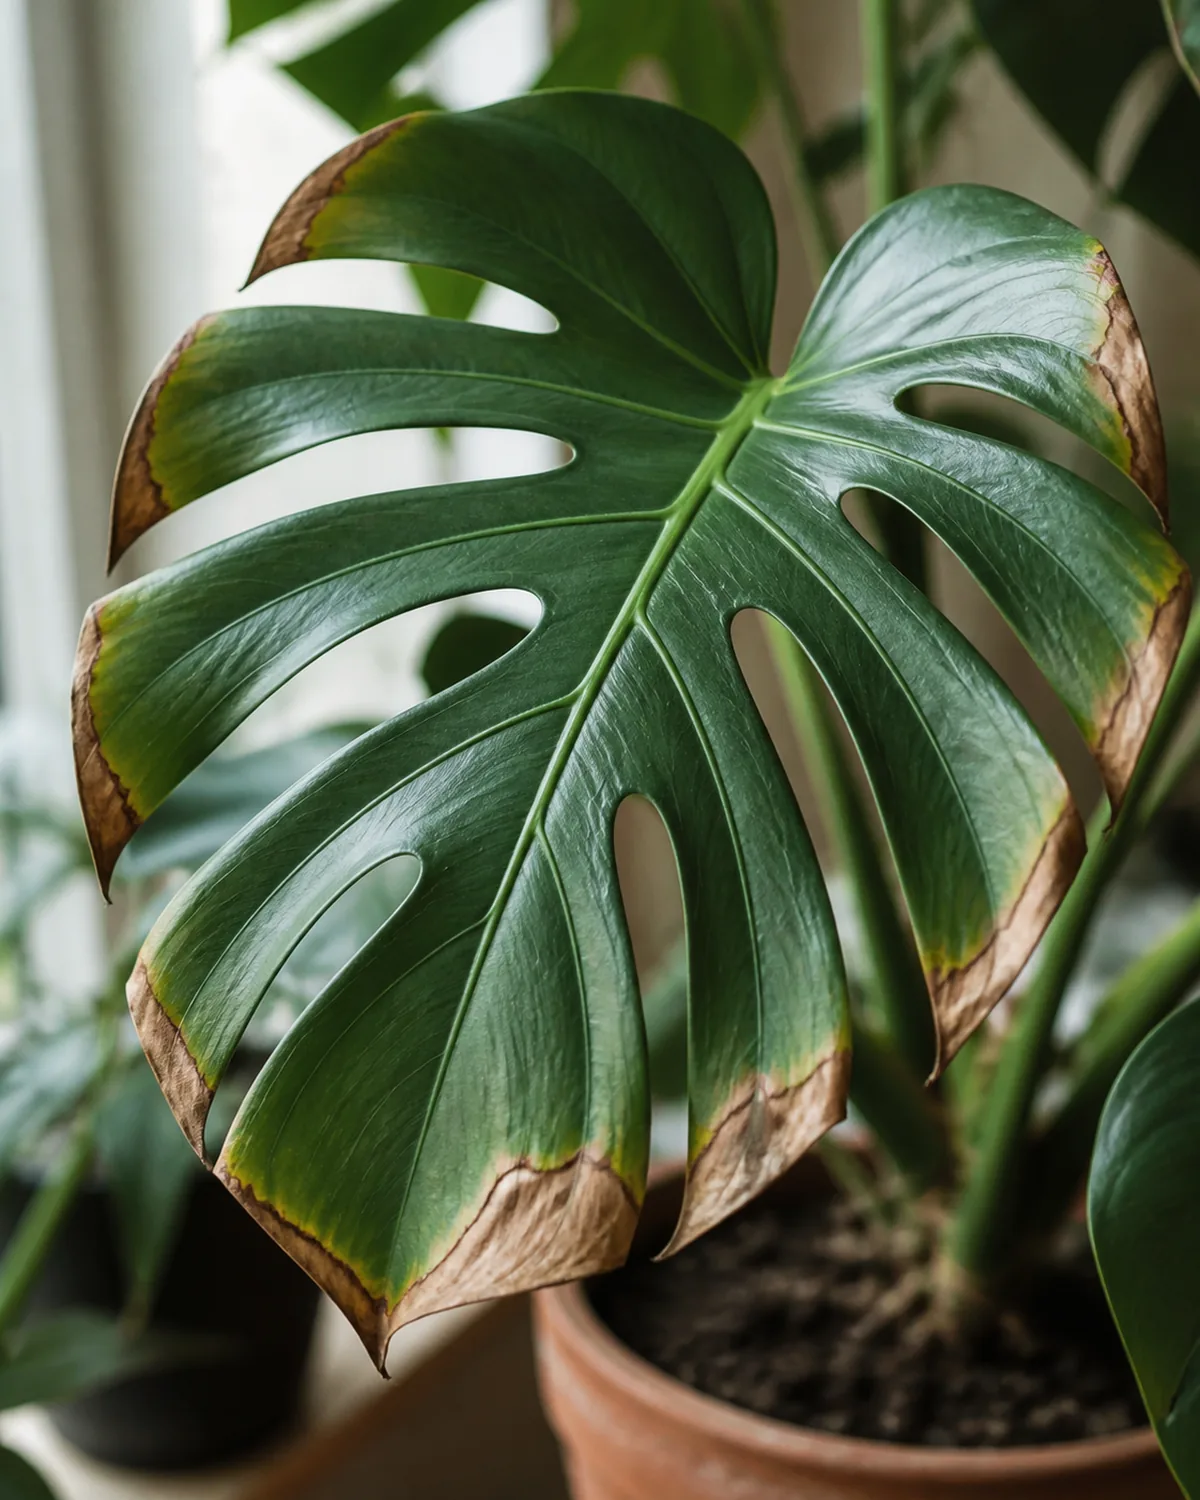
Brown, crispy edges are the opposite signal from yellowing: usually not enough water in the leaf, whether from dry air, missed waterings, or mineral buildup.
- Raise the humidity. Dry indoor air is the most common cause of crispy tips.
- Water a little more consistently. Letting it bone-dry between waterings browns the edges.
- Try filtered water. Some monsteras brown from the minerals and fluoride in hard tap water.
Give it a moss pole to climb
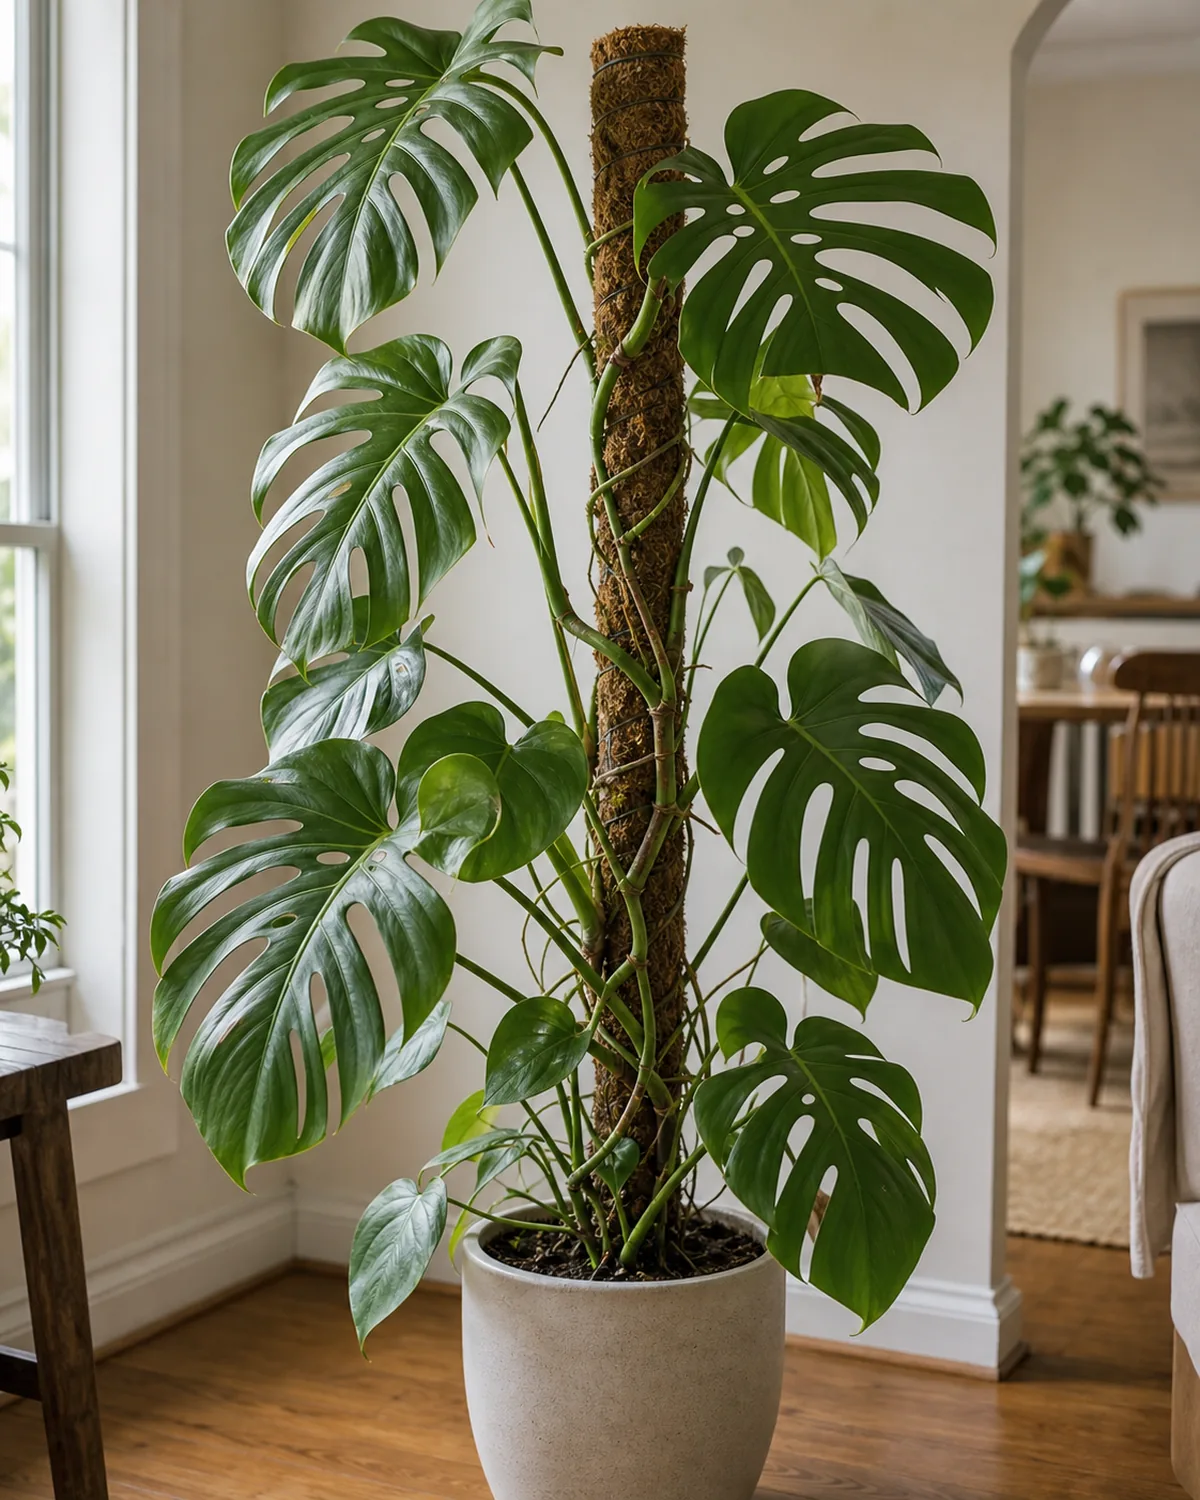
In the wild a monstera climbs tree trunks, and a climbing plant makes far bigger, more split leaves than one flopping over the pot edge. A moss pole is the easiest way to give it something to grab.
- Add the pole early. It is much easier to train a young plant than to wrangle a big sprawling one.
- Guide the aerial roots to it. Tuck those thick roots against the pole so the plant grips and climbs.
- Keep the pole damp. A lightly moist moss pole encourages the aerial roots to attach.
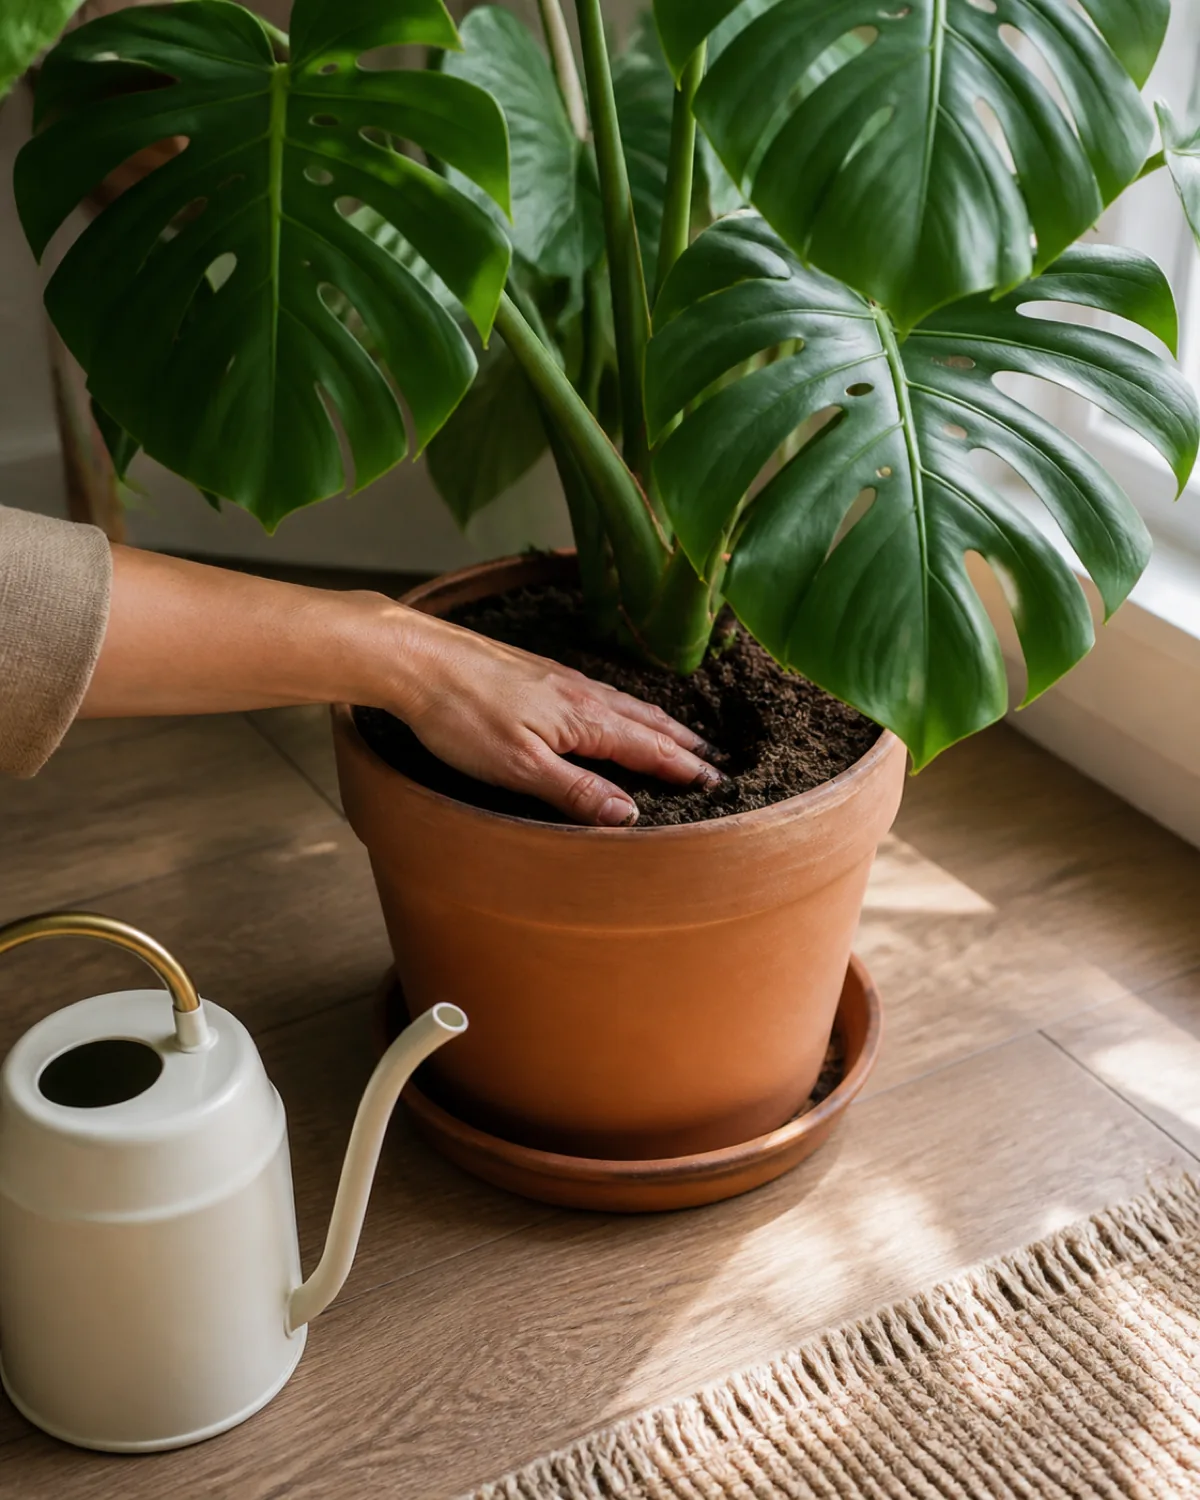
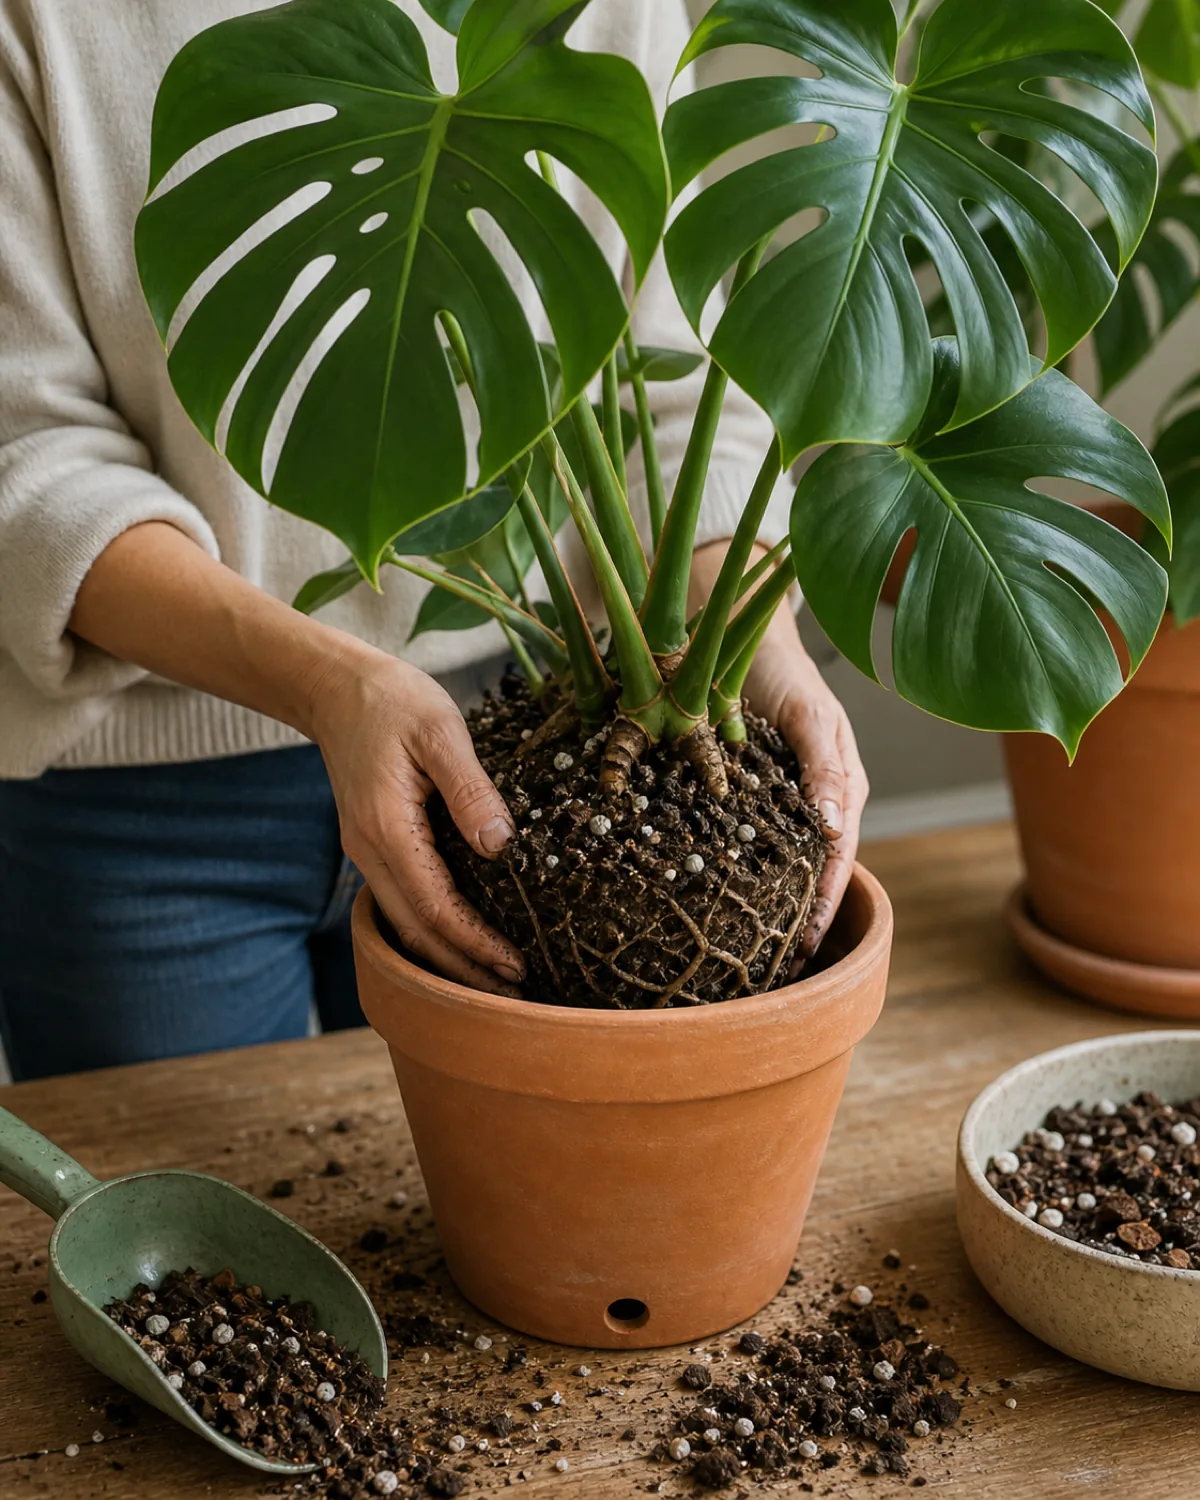
When and how to repot
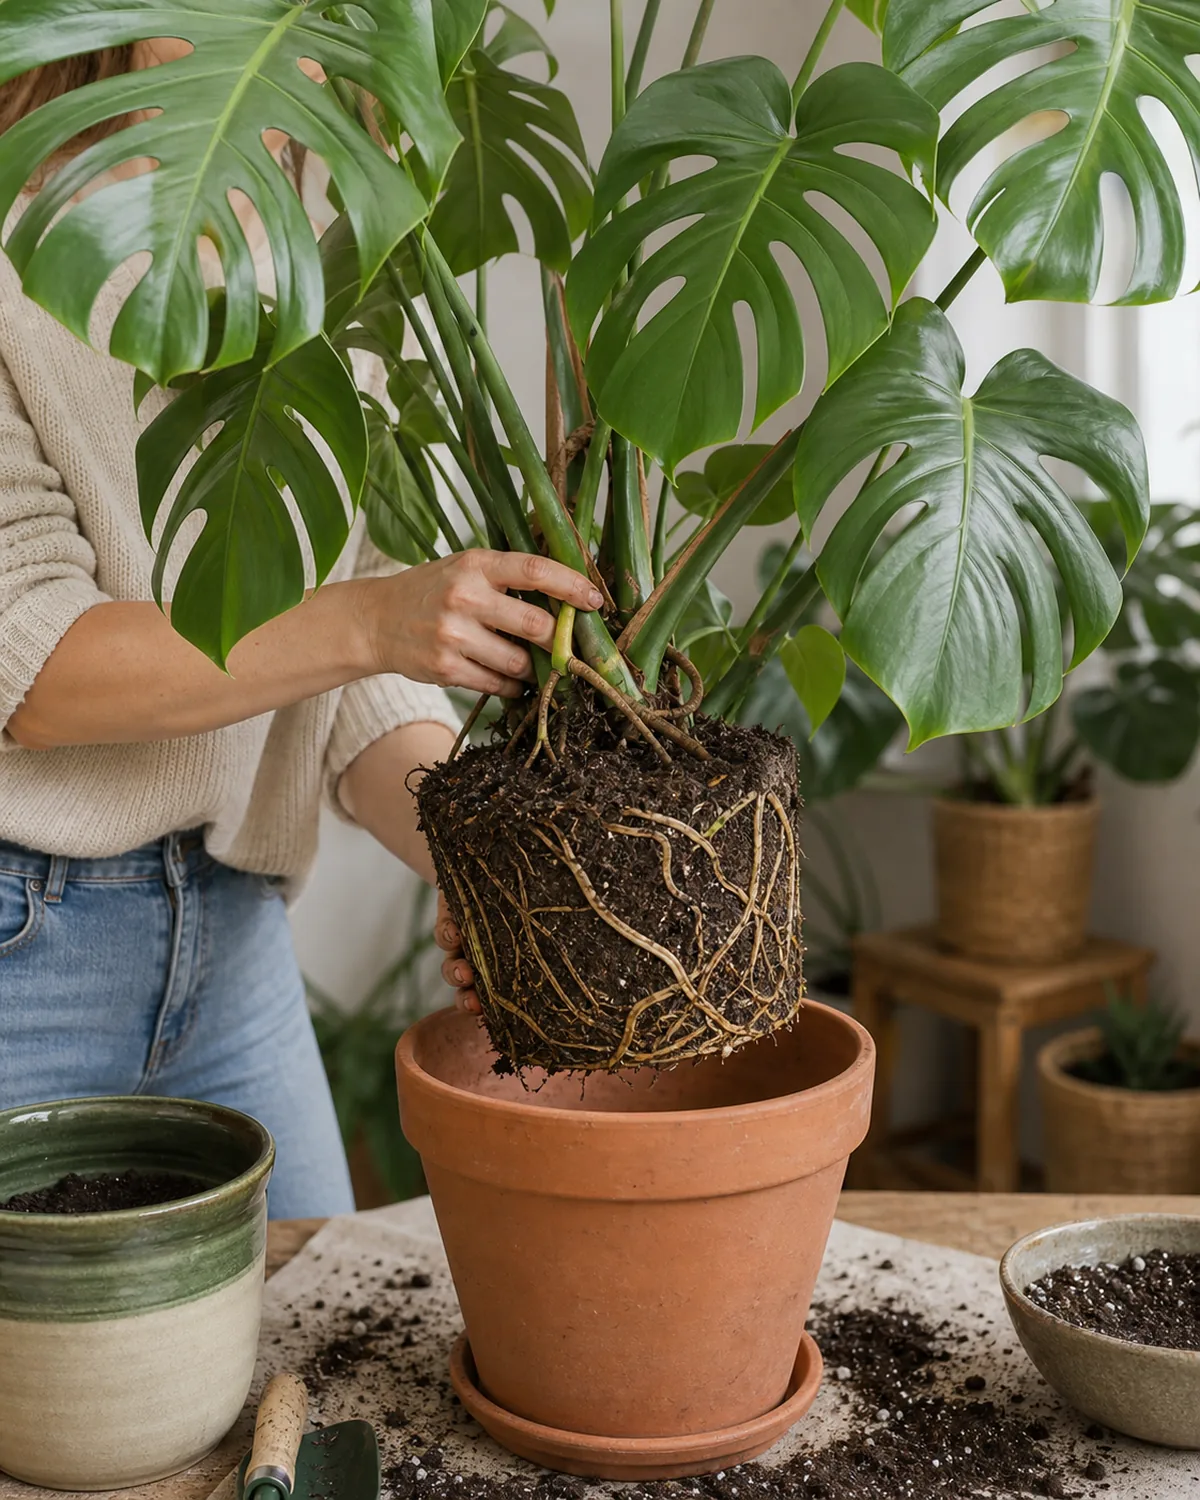
A monstera is happy a little snug, but every year or two it outgrows its pot. The tell is roots circling the bottom or poking out the drainage hole.
- Size up just one pot. Two inches wider is plenty; a giant pot holds too much wet soil.
- Repot in spring if you can. It recovers fastest during the growing season.
- Refresh the mix. Use fresh chunky soil and gently loosen the old root ball before settling it in.
Monstera Care: The Quick Checklist
- 1Bright, indirect lightA few feet from a bright window; direct sun scorches, deep shade keeps leaves small and solid.
- 2Water when the top 2 inches are dryCheck the soil, not the calendar; overwatering is the number one monstera killer.
- 3Chunky, well-draining soil + a drainage holeBark and perlite keep air around the roots; a dense soggy mix turns leaves yellow.
- 4A little humidityAim for 50%+; group plants or use a pebble tray and keep it away from heating vents.
- 5Splits come with light and ageYoung leaves are solid; fenestrations appear as the plant matures in bright light.
- 6Yellow leaves usually mean overwateringCheck the soil and roots before you reach for the watering can again.
- 7Brown crispy edges mean dry air or thirstRaise humidity, water a touch more often, or switch to filtered water.
- 8Add a moss poleA climbing monstera makes bigger, more split leaves; tuck the aerial roots against the pole.
- 9Repot every 1 to 2 yearsSize up one pot when roots poke out the drainage hole; fresh chunky mix each time.
- 10Propagate from a nodeA cutting must include a node; root it in water, then pot it once roots are a couple inches long.
- 11Wipe leaves and watch for pestsSpider mites and mealybugs hide underneath; wipe leaves and isolate a buggy plant fast.
- 12Keep it away from petsMonstera is mildly toxic if chewed, so set it where curious cats and dogs can’t reach.
- 13Then style itOnce it’s thriving, a monstera anchors a corner beautifully; see our plant styling guide for ideas.
kultivy.com
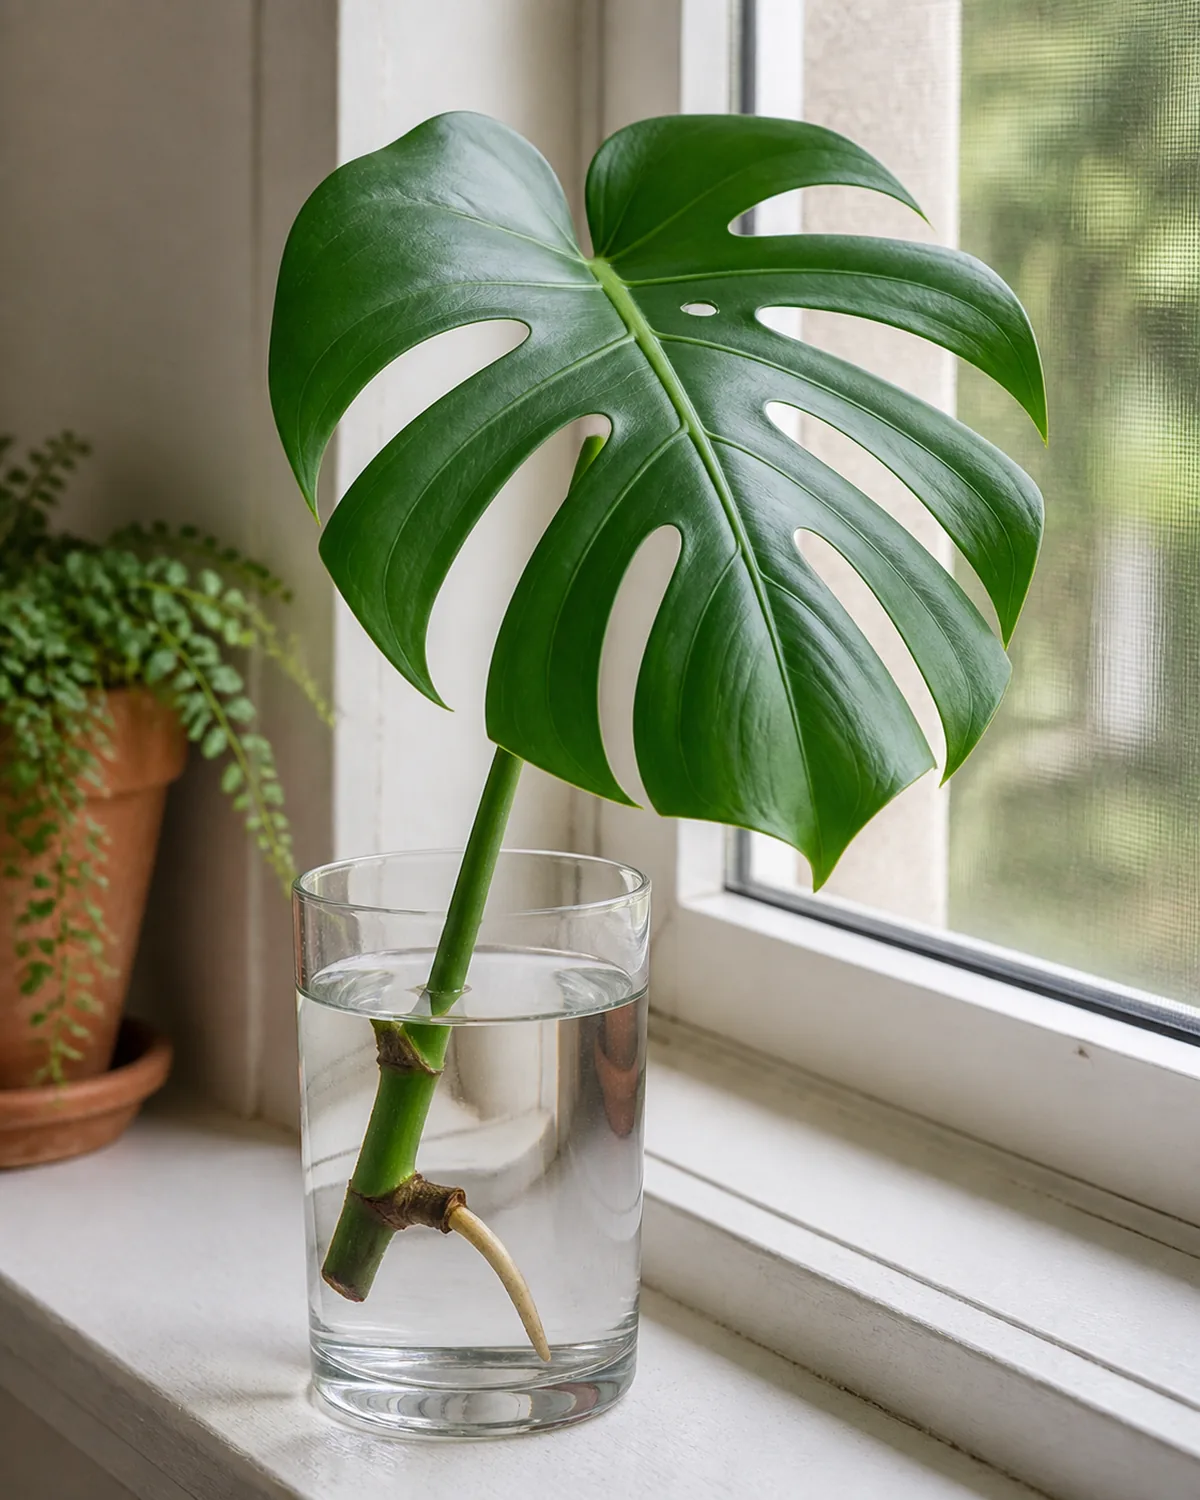
How to propagate from a node
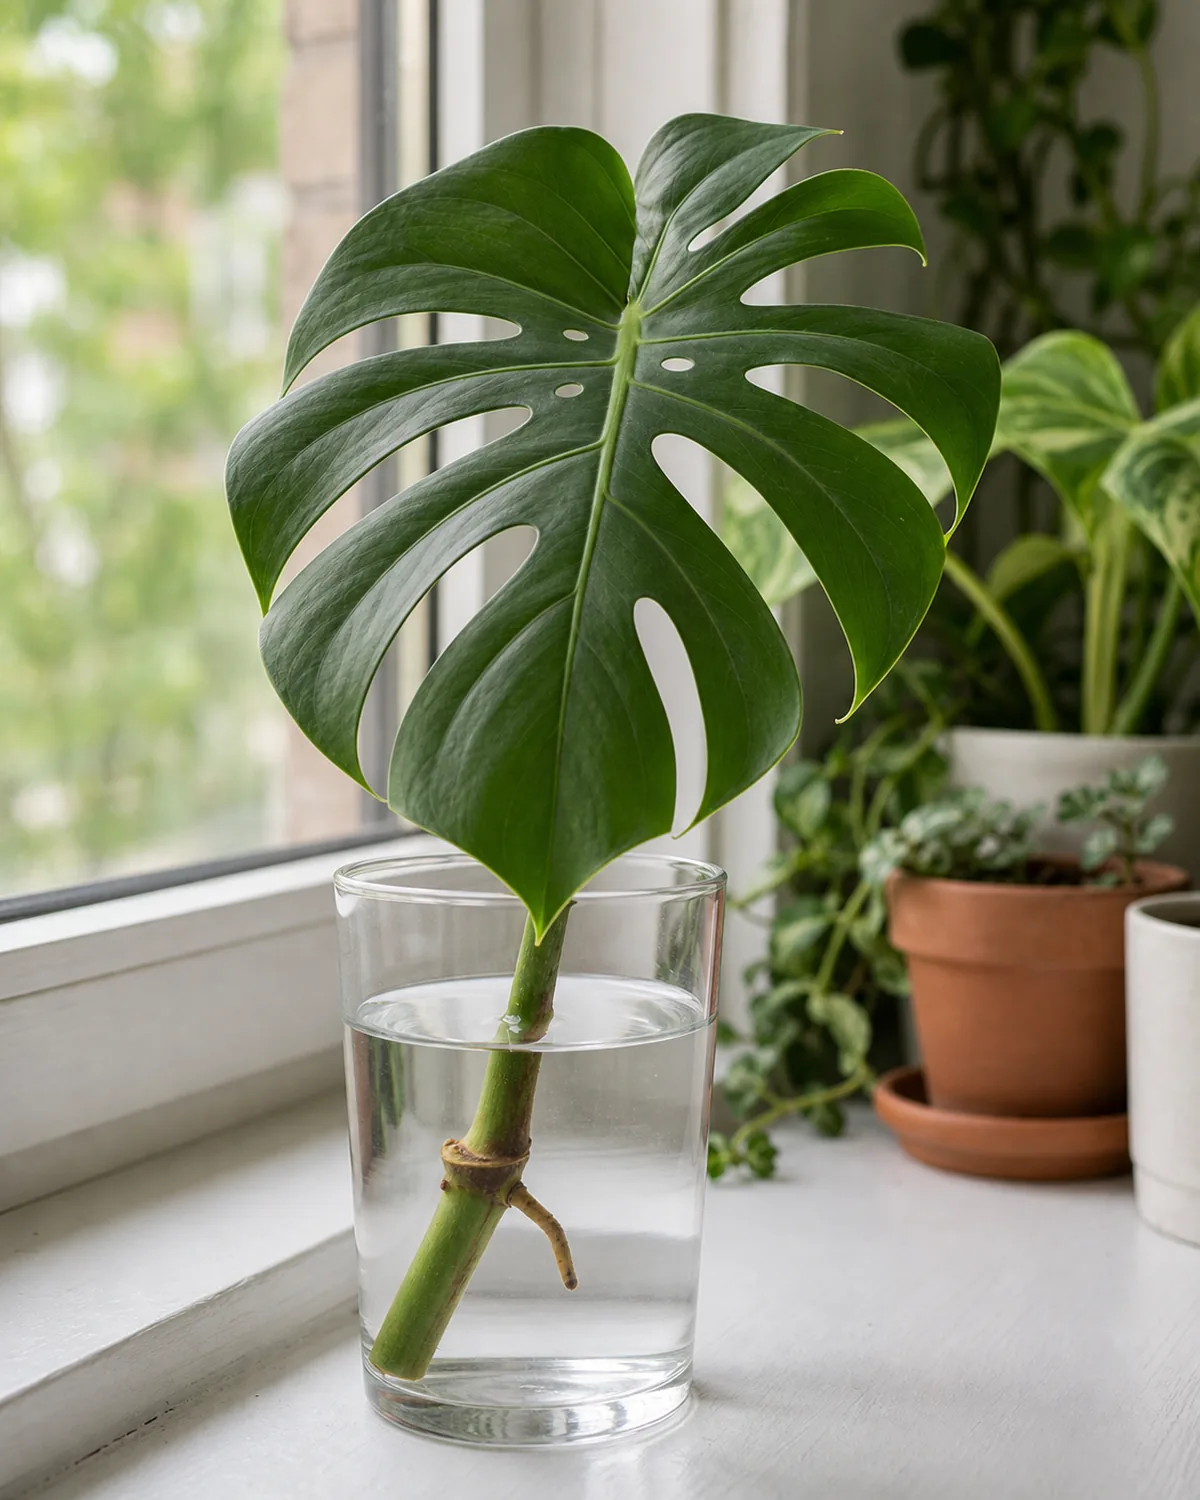
A monstera is one of the most satisfying plants to propagate, and it costs nothing. The one rule: your cutting has to include a node, the little bump where a leaf and aerial root meet.
- Cut just below a node. A leaf with no node will never root, so check for that bump first.
- Root it in water. Set the node underwater in a glass on a bright sill and change the water weekly.
- Pot it up at a couple inches. Once the new roots are an inch or two long, move it into soil.
Common pests and what to do
Monsteras are pretty tough, but spider mites and mealybugs sometimes move in, usually in dry air. Catching them early makes them easy to deal with.
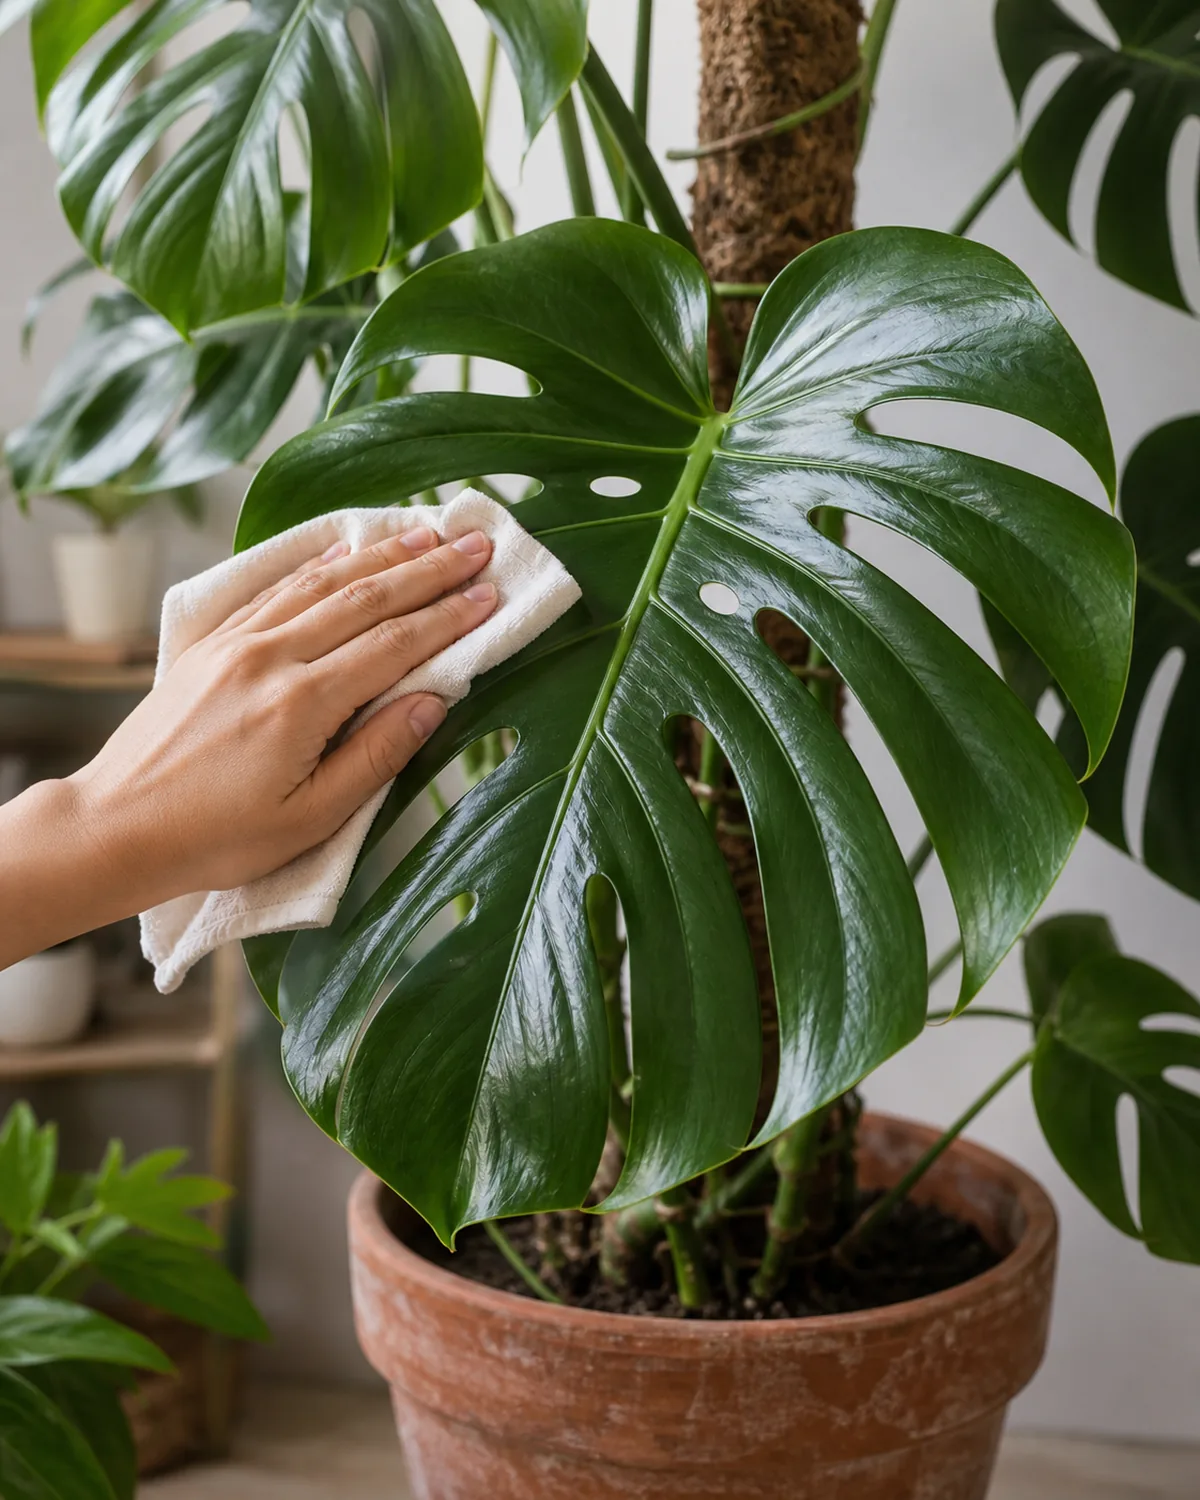
- Wipe the leaves now and then. Cleaning dust off also lets you spot pests and helps the leaf breathe.
- Check the undersides. Fine webbing means spider mites; little white cottony spots mean mealybugs.
- Isolate and treat fast. Move a buggy plant away from the others and wipe it down with diluted soap.
Is a monstera safe around pets?
Those big, dramatic leaves come with one honest caveat: a monstera is mildly toxic to cats and dogs if they chew it. It is not usually an emergency, but it can cause drooling and an upset stomach.
- Set it out of reach. A high shelf or a plant stand keeps curious pets away from the leaves.
- Watch new puppies and kittens. The youngest, chewiest pets are the ones to worry about.
- Call your vet if a pet eats some. Better to ask than to guess, even for a mild toxin.
How fast it grows and how to style it
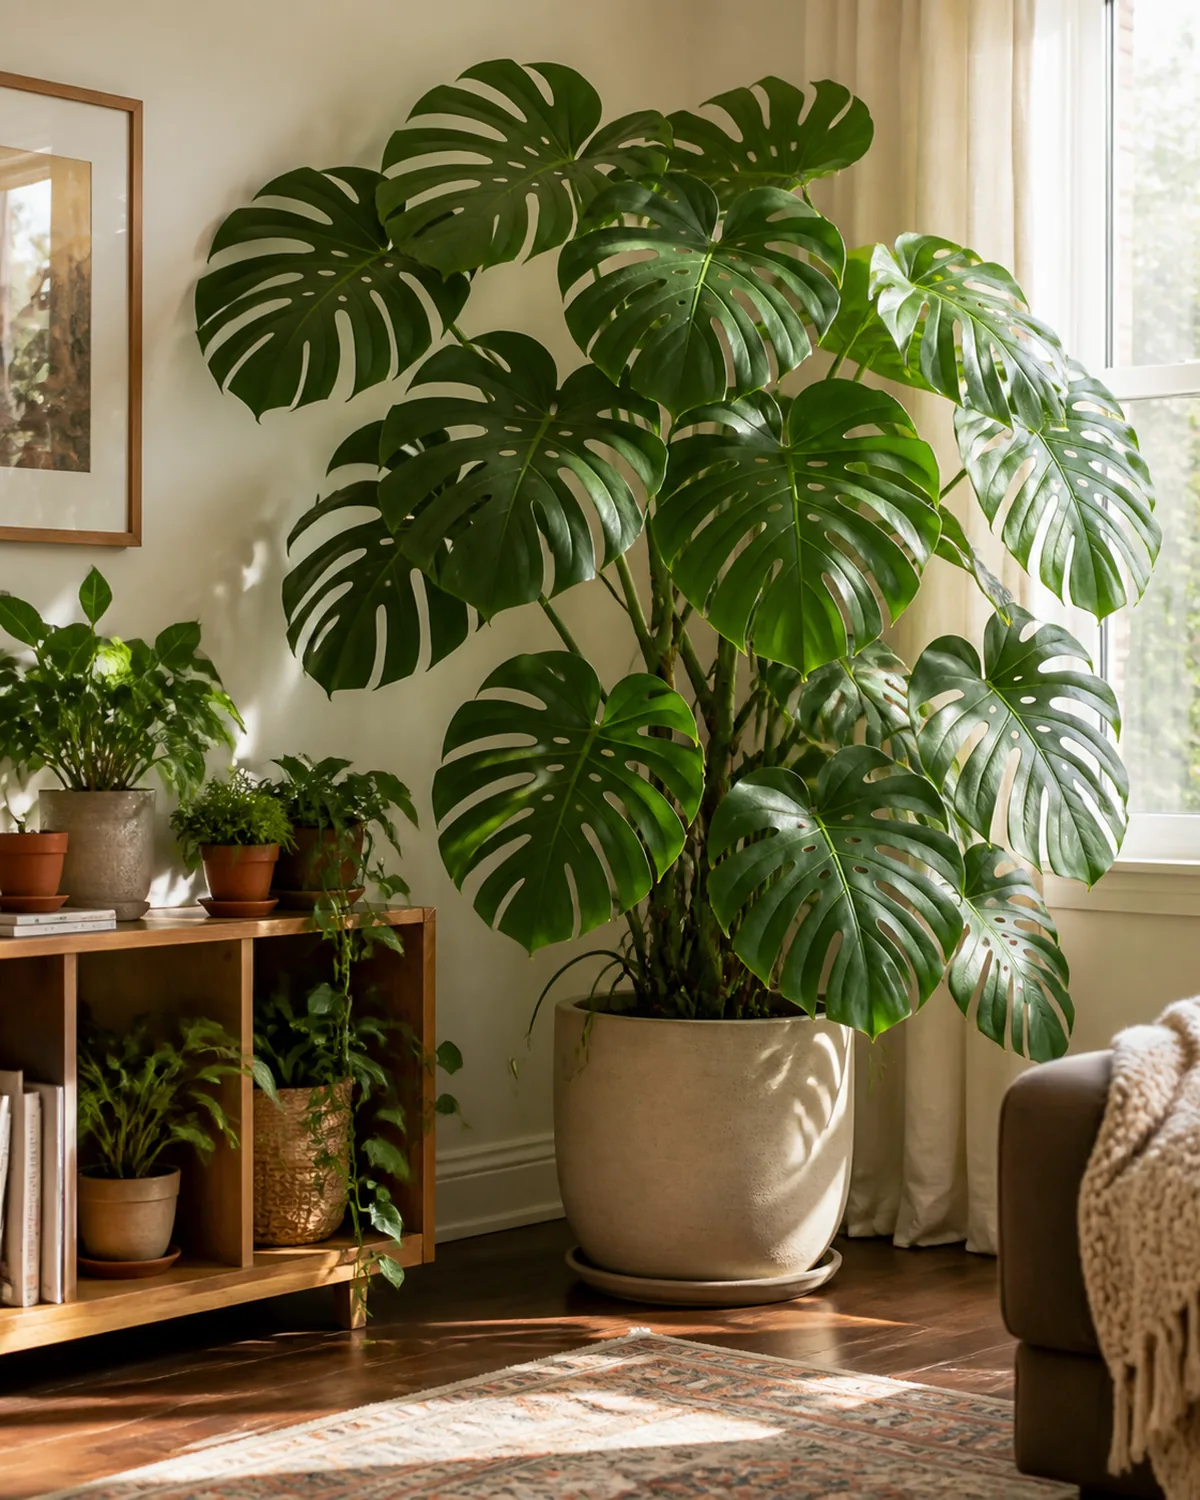
Once a monstera is happy, it grows fast in spring and summer, pushing out a new leaf every few weeks, each one usually bigger and more split than the last. That is when it earns its spot as a statement plant.
- Expect a flush in the warm months. Growth slows in winter, which is normal, not a problem.
- Anchor an empty corner with it. A big monstera fills a bare corner the way furniture cannot.
- Style it once it’s thriving. See our plant shelf and corner ideas for ways to show it off.
Get the light and water right first, give it something to climb, and the splits will come. A monstera is far more forgiving than its reputation, and once it settles in, it turns into the easiest showpiece in the room.